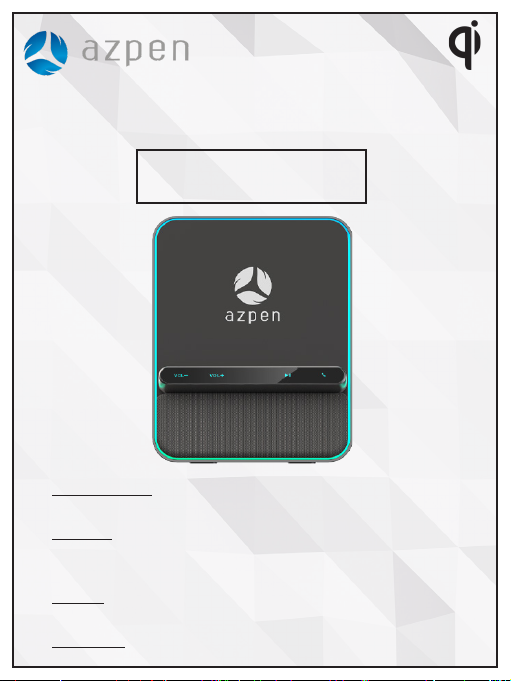
Azpen DockAll D5 User manual
USER MANUAL
DockAll D5
Contact Us:
Phone: 001-972-378-5559 (International)
1-855-297-3672 (Toll Free Us and Canada)
Email: [email protected]
Website: www.azpenpc.com


Contents
English
Español
Français
Deutch
日本語
1-11
12-19
20-27
28-35
36-43

1
10
1
2
3
4
5
1
2
3
4
5
7
68
6
7
8
9
10
9
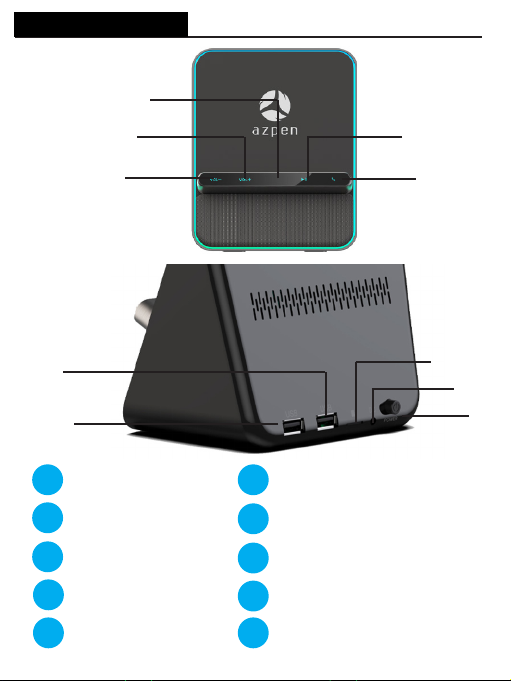
Volume up
Volume Down
Microphone
Play/Pause
Answer Call
2 AMP USB 2.0
1 AMP USB 2.0
Micro SD Slot
DC Power Port
Power Button
YOUR DEVICE

2
Power the DockAll Docking Station:
First, plug in the included power adapter into the DC
Power Port located on the back of the docking station.
Then, plug the power adapter into a wall socket. Next,
turn the DockAll on by pressing the Power Button
located on the back. To power o, simply press the
power Button or unplug the power adapter. It is
recommended to power o the DockAll when not in
use.
GETTING STARTED
Push the power button
to turn on.
3
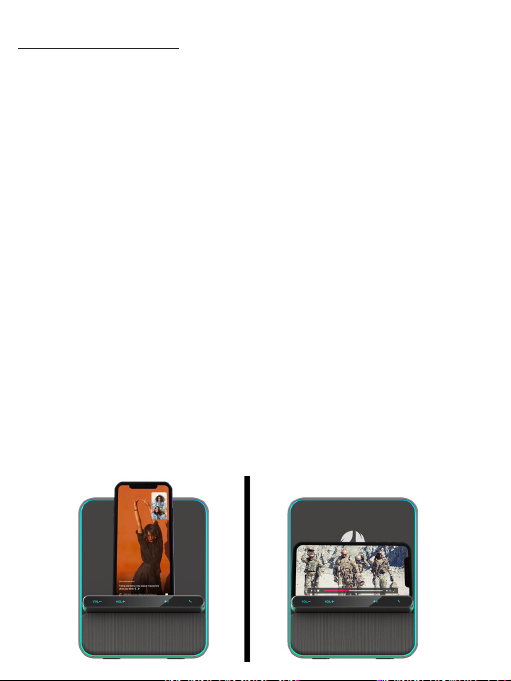
Vertical Horizontal
Wireless Charging:
Wireless charging is available for smartphones or
devices equipped with built-in Qi Wireless Charging
Receivers or devices enabled through the addition
of a third party Qi Wireless Charging Adapter/
Receiver. Insure your device is compatible by
reviewing the manufacturer user manual or website.
Devices without a Qi Wireless Charging Receiver or
receivers other than Qi wireless are not compatible.
To charge place your device vertically or horizon-
tally on the center of the stand. When positioned
correctly, your device will begin to charge within
1-2 seconds. Using your device as it charges is not
a problem; however it could increase the time in
which it completes the charge considering the
process is at a reduced rate compared to typical
wire charging.

4
Wired Charging:
The DockAll has two USB ports which dier in
charging power. USB1A(1 AMP) is recommended
for charging smaller devices like smartphones or
MP3 players. USB2 A (2 AMPS) is best suited for
charging larger items like tablets or laptops.
However, either port is capable of charging a
device regardless of its size. The dierence would
be the time in which to complete the charge could
vary depending on the device and/or USB port
used. To wire charge, simply connect your USB ca-
ble to your device then insert the other end to the
appropriate USB port located on the back of the
DockAll. The DockAll is capable of charging three
devices simultaneously.
GETTING STARTED
5
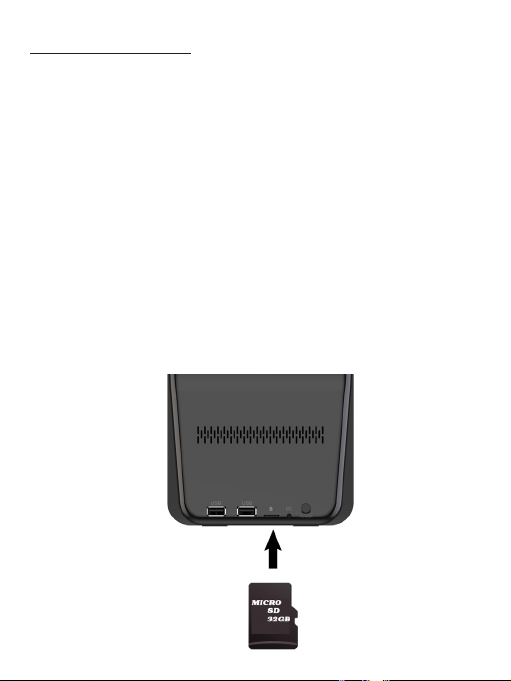
Micro SD card slot:
The DockAll’s equipped with a Micro SD card slot
located on the back to allow you to listen to music
or audio files from a Micro SD card (up to 64GB).
To use, simply insert the card into the slot until you
feel it “click” into place. The music or files will begin
to play once the card is inserted and locked. You
can control the Volume, Music, Media selections,
Play or Pause by pressing the appropriate buttons
on the front panel. To remove the Micro SD card,
push the card in to unlock and release. Micro SD
cards are not included with the DockAll but can be
purchased separately at most retailers.

6
GETTING STARTED
Bluetooth:
To use the Bluetooth feature, step number one is
to pair your device to the DockAll. The Micro SD
card takes priority over Bluetooth so make sure the
card is disengaged or unlocked prior to pairing. By
default, the DockAll is in Bluetooth mode when first
powered on. Start by turning on the Bluetooth
function on your smartphone, tablet or laptop
device. Your device should automatically start
searching for Bluetooth devices (if not press
“SEARCH” on your device).
Connect
Table of contents
Languages:
Other Azpen Batteries Charger manuals


