CHAPTER 1 SETTING UP YOUR GRAPHICS CARD
○○○○○○○○○○○○○○○○○○○○○○○○○○○○○○○○○○○○○○○○○
5
1.2 Safety Precaution
Do not remove your graphics card from its protective bag until you are
ready to install it.
Always try to hold your graphics card by its edges. Avoid touching any
electronic components on your graphics card.
Static electricity can cause permanent damage to your graphics card. To
prevent such damage, you must ground yourself while installing the
card. You can do this in either of two ways :
» Use a grounding strap, which is a coiled wire with a clip at one
end and an elastic strap at the other. Wear the strap around your
wrist and attach the clip to any non-painted metal surface of the
computers chassis.
» If you do not have a grounding strap, touch any non-painted
surface of the computer's chassis before you begin installation, and
again every minute or so until the installation is completed.
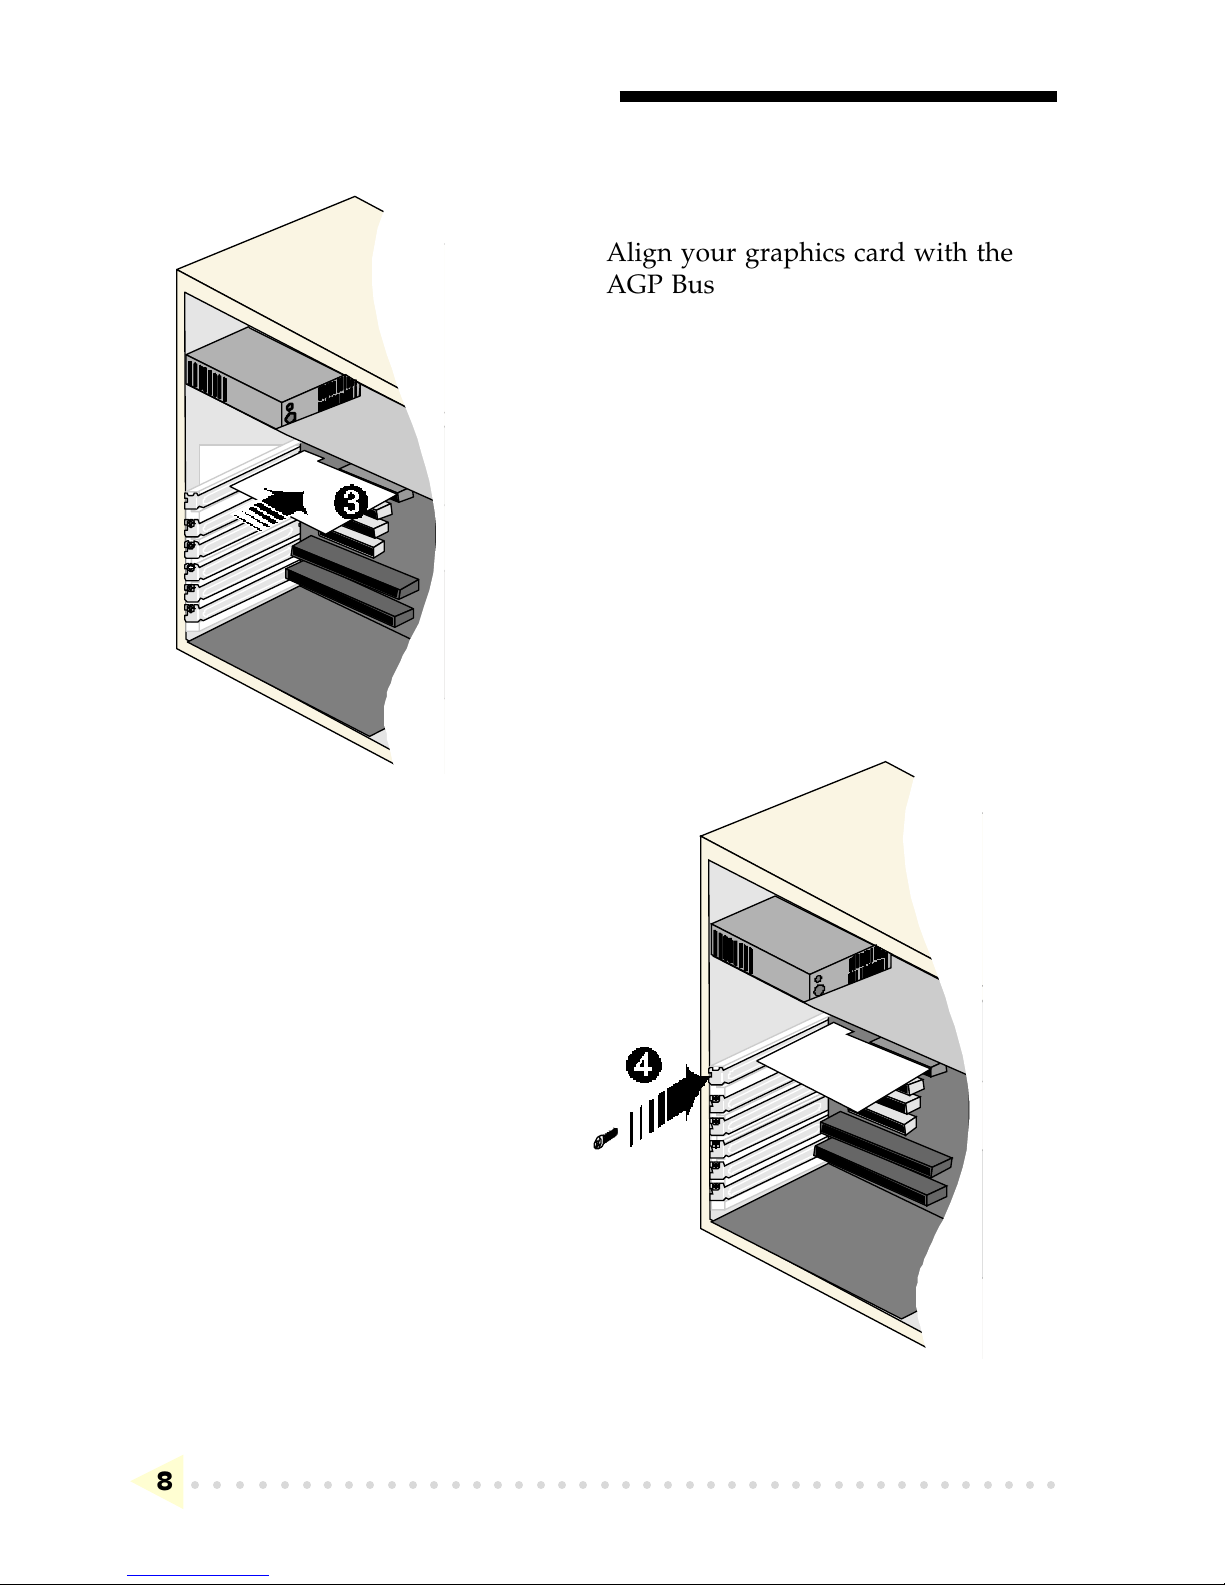
1.3 Installation Notes
Computers vary in appearance and layout. Therefore, the installation
procedures in this chapter apply generally and you should compare the
illustrations here with your computer before you start the graphics card
installation.
A Philips-type screwdriver is required for the graphics card installation.
Your computers documentation should come in handy during the
graphics card installation. Have it ready by your side when you start
the graphics card installation.
If you have an existing graphics card (that is non-Plug-and-Play-based)
installed in your computer, you must first un-install its drivers before
you remove the graphics card. Refer to your existing graphics card
documentation for more details on this.