B/R/K ZIRCON User manual

ZIRCON
Instruction book
pressure cooker

PRIOR INFORMATION page 2
SAFETY INSTRUCTIONS page 3
PRODUCT DESCRIPTION page 4-5
PRIOR TO FIRST USE page 6
USING THE PRESSURE COOKER page 7-9
UPKEEP AND MAINTENANCE page 10
COOKING TIMES page 11-12
CONTENTS
• Do not use the pressure cooker on heat sources of over 3000 W.
• When you use an electrical or vitroceramic griddle, use a disk
with a diameter which is equal to or lower than the diameter of the
bottom (Bd) of the pressure cooker.
• When you use a vitroceramic griddle, make sure that the bottom
of the pressure cooker is clean and dry.
• Do not place an empty pressure cooker on a connected source of
heat.
• When you use a gas stove, adjust the ame so it doesn’t go above
the diameter of the bottom.
• Never remove the lid without rst checking that the pressure
cooker is depressurised. See the instructions on depressurisation in
point 3.3 of the present manual.
•The progressive locking system, with the ring ensure an easy
sealing of the pressure cooker guaranteeing all required conditions
to improve the pressure and the temperature.
Read the present instructions carefully to the end so as to become
familiar with the characteristics and potential of the pressure
cooker.
PRIOR INFORMATION
2

SAFETY INSTRUCTIONS
1. The pressure cooker works under pressure. An inappropriate use
can cause serious burns and damages. Make sure the pressure coo-
ker is properly closed before putting it under the heat source. Read
the chapter: “Using the pressure cooker”.
2. Do not use the pressure cooker near children.
3. Do not use the pressure cooker for other purposes than the
intended.
4. Do not put the pressure cooker in a heated oven.
5. Do not use the pressure cooker to fry food.
6. When the pressure cooker is pressurised, move it very carefully.
Do not touch the warm surfaces. Use the handles and, if necessary,
kitchen gloves or another mean of protection.
7. Keep your hands off the steam escape zones.
8. Do not use the pressure cooker without any water inside as this
practice may cause serious damage. Read chapter “Prior to rst
use”.
9. The supercial skin of some meats swells under the effect of pres-
sure (e.g. tongue). After cooking, do not prick the meat if it looks
swollen; you may scald yourself. Prick the meat before cooking.
10. When making greasy foods, you should shake the pressure
cooker slightly before opening the lid, preventing the food from
spitting out.
11. Do not operate the safety systems more than that which is
recommended in the cleaning and maintenance instructions. Read
the chapter “Upkeep and maintenance”.
12. Do not use the pressure cooker when it, or any of its compo-
nents, is damaged or does not correspond to the functions descri-
bed in the usage instructions. Only use original replacement parts of
the model in question. Contact the Post Sales Assistance Service.
(See last page)
FOLLOW THESE INSTRUCTIONS AND KEEP THEM.
3

TRADITIONAL STAINLESS STEEL
PRESSURE COOKER
Besides the enormous advantages described
previously, this pressure cooker also has a ther-
mic bottom - Impact Disc Plus gives rapid and
uniform heat transference, improving the ther-
mic efciency and compatibility with induction.
THE PRODUCT DESCRIPTION
Material Capacity Internal Base Type Functioning Security Boiling
(Litres) ø (cm) ø (cm) Pressure Pressure Temperature(Cº)
(bar) (bar)
Stainless
Steel 8 24,5 19,4 Progressive 0,5 0,8 111 a 113
Locking

5
Material Capacity Internal Base Type Functioning Security Boiling
(Litres) ø (cm) ø (cm) Pressure Pressure Temperature(Cº)
(bar) (bar)
Stainless
Steel 8 24,5 19,4 Progressive 0,5 0,8 111 a 113
Locking
ASSEMBLY OF ACCESSORIES
Inside the package of your pressure cooker you will nd the
following accessories:
• 2 bakelite handles
• 2 screws, for the 24,5 cm diameter pressure cookers.
1.) Position the handle against the pressure cooker and check if the
handle hole is in line with the hole on the pressure cooker.
2.) Put the screw(s) into the handle hole(s) and screw them in.
3.) Check if the handle is attached properly. Please note that if the
handle is not xed properly it could release.
4.) Repeat the same procedure to assemble the other handle.
EC-declaration of conformity
B / R / K Vertriebs-GmbH, Westring 340,
42329 Wuppertal/Germany, certies that the pressure cookers
conform to the following harmonized EC guidelines:
97/23/EG (Modul B)
DIN EN 12778

min
max
6
PRIOR TO FIRST USE
Pressure cooker
Prior to rst use, remove all the labels from the pressure cooker.
Wash it in hot water and washing-up liquid. After washing, dry it with
a cloth.
Lubricate the sealing ring with a bit of cooking oil to facilitate the
opening and closing of the pressure cooker. Make sure the steam
release devices are clear.
Give the pressure cooker a test run using half a litre of water. Let it
cook for 10 minutes until the control valve starts giving off steam.
Minimum quantity:
Do not use the pressure cooker with a liquid quantity inferior to 250
ml, that practice may cause damage to the pressure cooker and / or
to the heat source.
Maximum Quantity:
Do not ll the pressure cooker below 2/3 of its capacity.
In the case of the food that expands or creates foam during the coo-
king process (such as peas, chick-peas, spinaches, dough, rice, etc.)
do not ll the pressure cooker over the half of its capacity, in order
to prevent the water or food from blocking the safety or pressure
control systems.
Cooking with the pressure cooker:
Fill the pan with sufcient liquid to generate the necessary steam
(water, sauce or stock).
WARNING: always add adequate liquid. NEVER let the pres-
sure cooker “cook dry”.
Now add the food to be cooked.
Maximum 1/2 full for foods that swell or tend to foam up.
Maximum 2/3 full for all other cooking.
Please check that there is adequate space between the food to be
cooked and the lid with safety valves.
Please note if you exceed the limit of the capacity, the
steam could be released through the control valve or
through the edge of the lid. This could also occur if the
heat source is too strong.

7
Prior to use
1.) Place the ring on the inner edge of the lid, checking that it is
adjusted and correctly placed in accordance with FIG.01.
2.) Check whether the control valve is clear. During the use, the
control valve allows the steam to come out continuously, regulating
the pressure inside the pressure cooker. (Fig. 2)
3.) Check whether the safety valve is clear and working properly, by
pressuring lightly the valve piston via the interior of the lid. It should
move with no efforts. (Fig. 3)
4.) Place the control valve in the lid and check if it is well-positioned.
(Fig.4)
5.) Place the lid horizontally and check if the lid is well-positioned
related to the body of the cooker. (Fig. 5)
6.) After placing the lid, screw the locking lever tighter following the
direction of the arrow, until the yoke of the locking system touches
the handles of the cooker. In order to obtain a complete close, screw
the locking lever at least half a turn more to close it fully. (Fig. 6)
Only after the conclusion of all these operations, the pressure coo-
ker will be ready to cook.
USING THE PRESSURE COOKER

During use
1.) Put the cooker on the heat source. Please note that the heating
in induction hobs can reach extremely high temperatures in just few
seconds which requires a greater care and attention. As soon as the
steam will start to come out and make the control valve turn round,
the needed pressure will be reached. (Fig. 7)
2.) Start counting cooking time after checking that the steam is
coming out in constant fashion via the control valve.
3.) If during the use of the pressure cooker, the control valve does
not release steam, check whether the power of the heat source
is strong enough. Should this persist, depressurise the pressure
cooker and check:
•Whether the quantity of liquid inside the pressure
cooker is sufcient;
• Whether the pressure cooker is closed;
• Whether the control valve is clear;
• Whether the silicone sealing ring and the edge of the lid are in
good conditions.
4.) Do not place objects on the control valve whilst the pressure
cooker is working.
5.) Use the heat stored in the thermal bottom and save energy by
disconnecting the heat source before the food cooking time has
terminated. (Fig. 8)
6.,) If steam is released via the lid edges and/or via the safety valve,
remove the pressure cooker from the heat source, depressurise it
and check:
• Whether the control valve is clear;
• Whether the sealing ring is clean, properly positioned and shows
any sign of deterioration;
• Whether the edge of the pressure cooker unit shows any signs of
deterioration which prevent the effective adjustment of the
sealing ring.
When the pressure cooker is under pressure, never use
force to open the lid.
8
USING THE PRESSURE COOKER

9
USING THE PRESSURE COOKER
Upon completion of use
1.) Once the cooking time has elapsed, remove the pressure cooker
from the heat source and depressurise it, by removing the control
valve from the lid. (g 9) You can also put the pressure cooker under
cold water to provoke its cooling and then remove the control valve.
Please note that you should be extremely careful to avoid any burns
which may be caused by the handling and the steam released.
(g. 10)
2.) After depressurisation, turn the locking lever in the opposite sense
of the one indicated by the arrow, and remove the lid. (g. 11)
3.) To handle the pressure cooker only use Bakelite accessories and,
when necessary, wear gloves or some other means of protection.
(g.12)
4.) Wash it with water and soap so that the salty or acid food will not
damage the stainless steel. Never put the pressure lid or any parts of
it into the dishwasher! (g.13)
5.) If during the cooking process you let the food burn: put the pres-
sure cooker under the water with a little bit of soap, during some
minutes, before washing it.
6.) For a careful cleaning:
• Clean the lid paying particular attention to the inside of the gasket.
To wash it you do not need to take it off the lid, just clean it using
warm water in order to avoid damages caused by grease. At the end,
dry off the pressure cooker and its gasket with a tissue. (g 14)
• Clean the groove of the control valve with a forceful water jet or
with a wire. Be sure it is completely clean. (g 15)
• Clean the base of the safety valve and ensure it is working properly
by pressing lightly, from the inside of the lid, on the valve piston which
must move with no difculty. (Fig 16)
• After having cleaned the pressure cooker, put the lid up side
down on the top of the cooker to avoid any distortion of the gasket.
(Fig.17)

Removal of labels Wetten the label in very hot water and remove it. If traces of glue
remain, soak a bit of cotton wool in alcohol and wipe.
Use of abrasive pads This type of wire mesh scratches the surface of the pressure coo
ker. Rub horizontally and not vertically.
Use of detergents Do not use disinfectants containing bleach or other detergents
containing chlorine (Cl).
Burned food Add some water and ammoniac detergent and leave to rest for a
few minutes. Wash the piece normally.
Limescale stains (whitish stains) Add a bit of vinegar and water and heat the pressure cooker for a
few minutes. Leave to cool and wash normally.
Rust stains (brownish stains) Do not use steel wire pads when cleaning stainless steel parts. This
type of pad may leave rust stains, permanently damaging the sur
face of the piece. Use stainless steel pads.
Food stains Add some bicarbonate of soda and water and heat the piece for a
few minutes. Leave to cool and wash.
Excess heat stains (coloured stains) Clean the piece with a 10% nitric acid diluted solution, or use brigh
teners for chrome items
10
UNKEEP AND MAITENANCE
To keep your pressure cooker always in good shape for a long
period of time:
1.) Never heat an empty pressure cooker. This can cause damage of
your pressure cooker.
2.) Salted water from boiling, and water full of cleaning products,
should not be in contact with the pressure cooker for long periods.
3.) When cooking roasting meat in the pressure cooker, heat the fat
progressively before roasting the meat.
4.) Lubricate the centre axis with cooking oil if you nd that the lid
is hard to lock.
5.) Replace the sealing ring every year or at least every two years. It
will need to be replaced early whenever the following occur:
• Cracks or dents
• Deformations
• Dark appearance
• Lack of exibility
Any of the aforementioned irregularities may prevent the correct
sealing or closure of the pressure cooker.
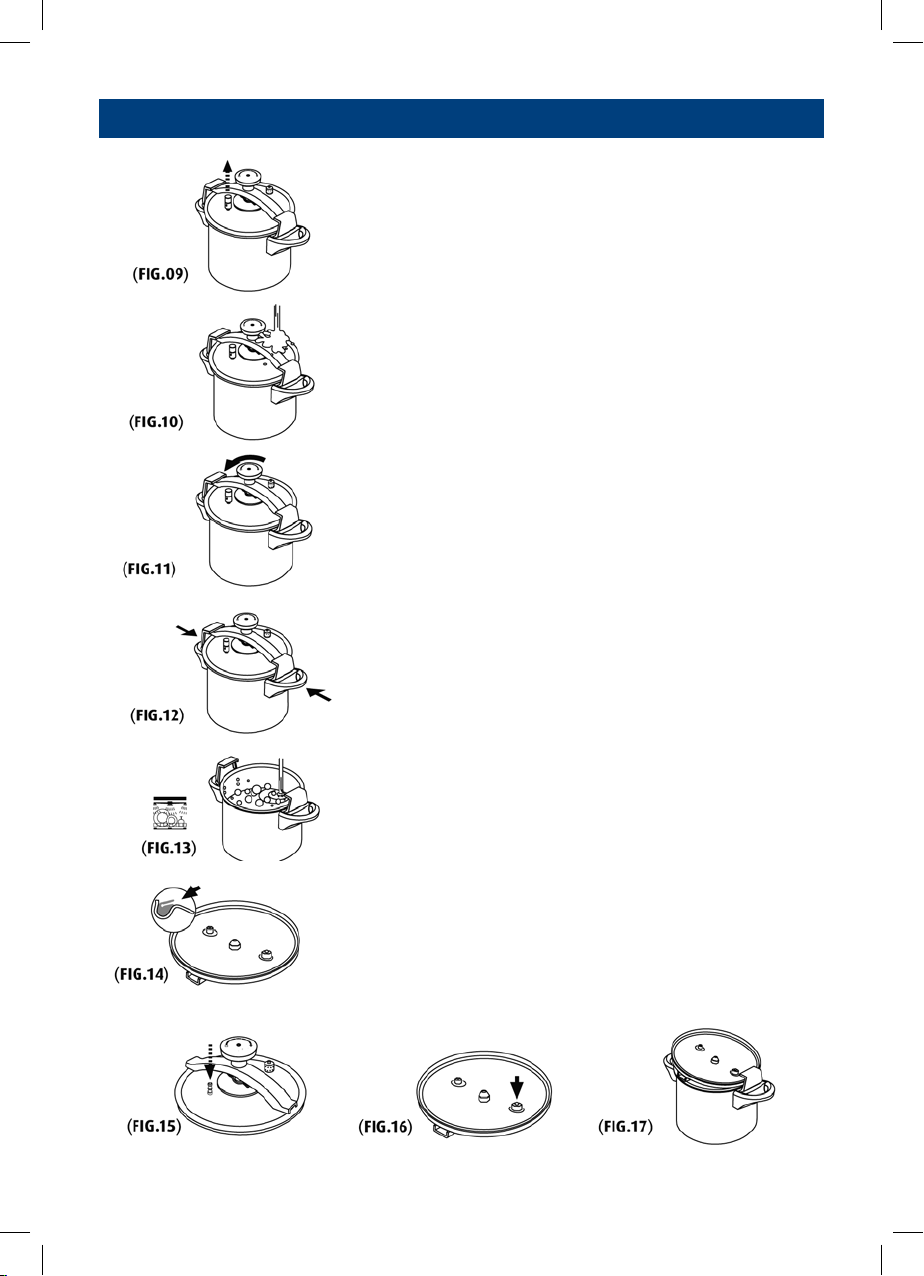
To place a new gasket: (include image)
• Select a B/R/K sealing ring identied in the table (page 05)
• Place the ring on the inner edge of the lid, checking that it is
adjusted and properly placed.
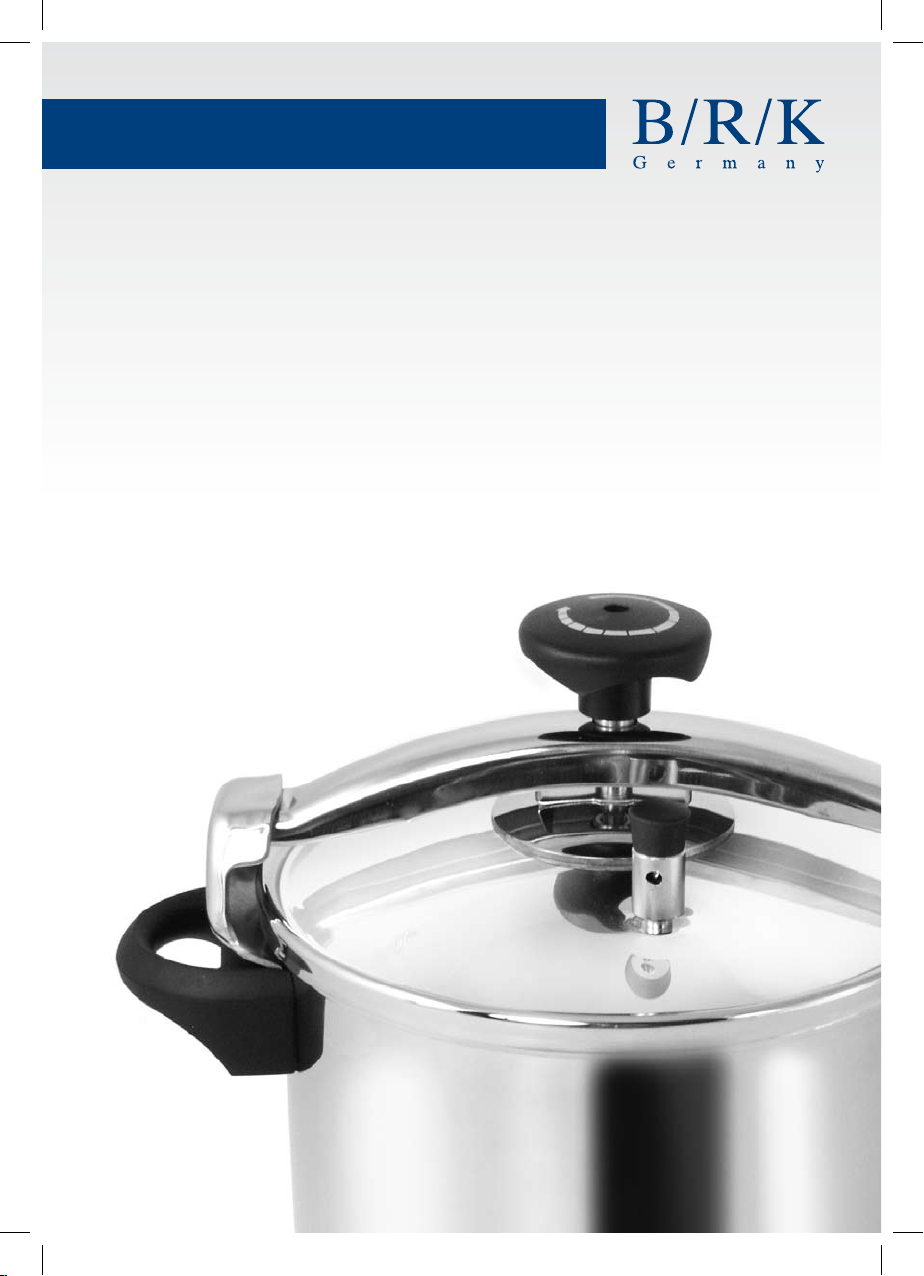
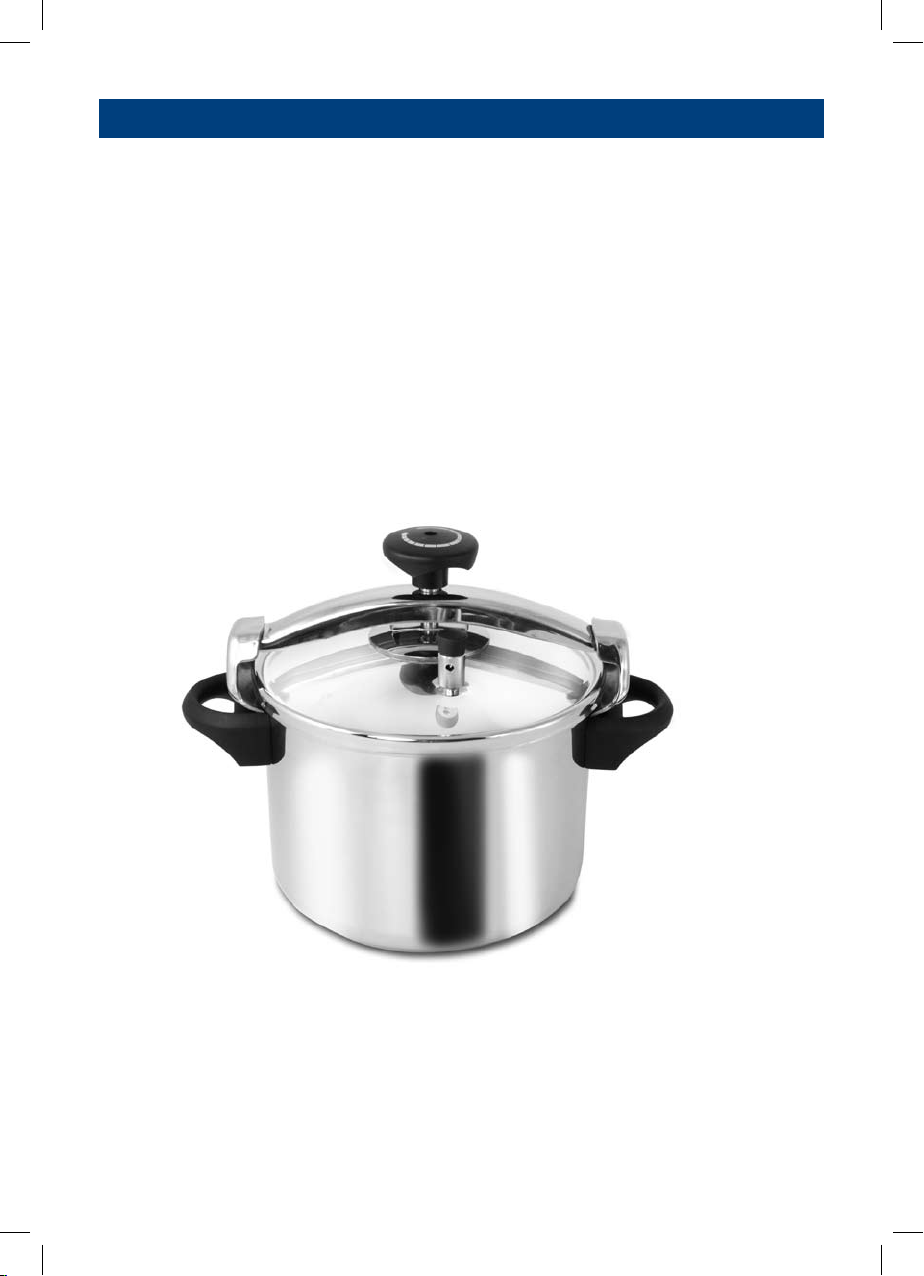
Stainless steel pressure cooker
OCCURRENCE: RECOMMENDATION:

11
SOUPS COOKING TIME RAPID COOK
Bean soup 20 min. 2
Pea soup (not soaked) 20-25 min. 2
Vegetable soup 4-8 min. 2
Semolina soup 3-5 min. 2
Goulash soup 10-15 min. 2
Potato soup 5-6 min. 2
Bone marrow soup 20-25 min. 2
Minestrone 8-10 min. 2
Rice soup 6-8 min. 2
Beef tea 35-40 min. 2
Boiling chicken 25-35 min. 2
Tomato soup with rice 6-8 min. 2
STEWS COOKING TIME RAPID COOK
Cabbage stews 15 min. 2
Lentil (soaked) 13-5 min. 2
Bavarian Pichelsteiner 120 min. 2
Serbian beef stew 8-10 min. 2
VEGETABLES COOKING TIME GRADUAL COOK
Cauliower 3-7 min. 1
Peas, green 3-5 min. 1
Carrots 3-7 min. 1
Stuffed capsicum 6-8 min. 1
Mushrooms 6-8 min. 1
Beetroot 15-25 min. 1
Cabbage types 5-15 min. 1
Spinach 3-4 min. 1
RAPID COOK
Beans 6-10 min. 2
Potatoes 6-8 min. 2
Potatoes (unpeeled) 6-12 min. 2
Celeriac 12-15 min. 2
Vegetables:
The ner vegetables are cut up, the shorter is their cooking time. On the
other hand, if you prefer them “crunchy”, their cooking time is shorter.
The more you cook, the longer the cooking time.
Suggestion:
It is better to undercook – extra cooking is always possible.
COOKING INSTRUCTIONS

12
MEAT COOKING TIME RAPID COOK
Knuckle of pork 30-40 min. 2
Goulash 15-20 min. 2
Minced meat 5-10 min. 2
Chicken 20-25 min. 2
Veal, sliced 6 min. 2
Veal, roast 15-20 min. 2
Veal fricassee 5 min. 2
Turkey leg 25-35 min. 2
Beef roast 40-50 min. 2
Rib of pork 10-12 min. 2
Meat roulade 15-20 min. 2
Braised marinated beef 30-35 min. 2
Roast pork 25-30 min. 2
Knuckle of pork 25-35 min. 2
Braised venison 25-30 min. 2
Meat:
Meat is brought to the boil in the uncovered pressure cooker. It is then
topped up as necessary. Pieces which are too large should be cut
up and browned individually, then laid over one another to complete
cooking.
FISH COOKING TIME GRADUAL COOK
Steamed sh with potatoes 6-8 min. 1
Fish in white wine sauce
with potatoes 6-8 min. 1
Cod 4-6 min. 1
Fish (fresh):
Cook with adequate liquid, according to amount. Since sh stock is
extremely sticky, the lid should be removed as soon as the pressure
indicator has completely disappeared.
Frozen food:
The otherwise long times needed for defrosting shrink to minutes, but
still depend on type and amount of the food to be defrosted. Defrosting
in the pressure cooker preserves the vitamins, minerals and avours of
your food.
COOKING INSTRUCTIONS
Service
B / R / K Vertriebs-GmbH
Westring 340
42329 Wuppertal / Germany
Tel.: +49 (0)202 283 77-0
Fax: +49 (0)202 283 77-91
E-Mail: info@brk-germany.com
Service France
Sarl FRAJEMA
60, Rue de la Poste
60280 - CLAIROIX
Tél. 03-44.83.37.98
Fax 03.44.83.24.53
Table of contents
Other B/R/K Electric Pressure Cooker manuals
Popular Electric Pressure Cooker manuals by other brands

InstantPot
InstantPot Duo Crisp + Air Fryer AF 8 user manual

INOXRIV
INOXRIV 03200 Usage and maintenance instructions

NASA electric
NASA electric NS-3082 instructions

Ninja
Ninja FOODI TENDERCRISP OP300ANZ Series instructions

Carlo Cracco
Carlo Cracco Masterpro BGMP-9092 instruction manual

Philips
Philips HD2136 user manual