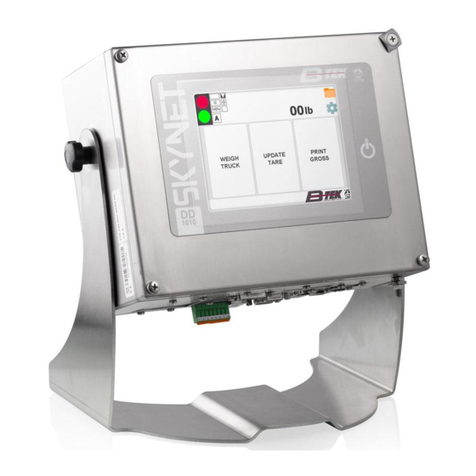
B-TEK Scales Skynet Installation and maintenance instructions

Cod.81320556
1
Skynet Start Manual
Technical Department 81320556 REL.1.1 Mar. 2020

Cod.81320556
2

Cod.81320556
3
Summary
1. What Is the Start Application?............................................................................................................ 5
2. Software activation............................................................................................................................ 6
2.1 QR Code activation .................................................................................................................... 7
2.2 Public Code activation.............................................................................................................. 10
3. The Menu ........................................................................................................................................ 11
3.1 The Password to Open the Menu.............................................................................................. 11
3.2 The Customer Password to Open the Light Menu...................................................................... 14
3.2.1
The Light Menu ............................................................................................................................................. 15
3.3 The Menu Items (Quick Reference)........................................................................................... 16
3.3.1
System........................................................................................................................................................... 16
3.3.2
Update........................................................................................................................................................... 22
3.3.3
Backup........................................................................................................................................................... 31
3.3.4
Restore.......................................................................................................................................................... 38
3.3.5
Utility............................................................................................................................................................. 50
4VNC Server Activation ...................................................................................................................... 57
5Appendix ......................................................................................................................................... 58
5.1 Appendix A: The Available Memory Devices ............................................................................. 58
5.1.1
Using the Internal Memory........................................................................................................................... 59
5.1.2
Using the USB Flash Drive ............................................................................................................................. 59
5.2 Appendix B: The Configuration Backup / Restore ...................................................................... 59
5.2.1
The Configuration Items................................................................................................................................ 60
5.2.2
The Customized Folder.................................................................................................................................. 60
5.2.3
Notes about Procedures ............................................................................................................................... 61
5.3 Appendix C: Patch installation.................................................................................................. 63
5.3.1
When to Install the BSP Patch....................................................................................................................... 63
5.3.2
The Update Procedure .................................................................................................................................. 65
5.4 Appendix D: The Software Locking Mechanism ......................................................................... 65
5.4.1
The LOCKED Status........................................................................................................................................ 65
5.4.2
The UNLOCKED Status................................................................................................................................... 65


Cod.81320556
4
5.4.3
The UNLOCK KEY ........................................................................................................................................... 66
5.5 Appendix E: Changes between Versions.................................................................................... 66
Changes from 1.X to 2.0 ....................................................................................................................... 66
Changes from 2.0 to 2.1........................................................................................................................ 66
Changes from 2.2 to 2.3........................................................................................................................ 67
Changes from 2.3 to 2.4........................................................................................................................ 67
Changes from 2.4 to 2.5........................................................................................................................ 67
5.6 Appendix F: Main board Test.................................................................................................... 67
5.6.1
Scales............................................................................................................................................................. 67
5.6.2
Mother board and Optional Cards................................................................................................................ 74

Cod.81320556
5
1. What Is the Start Application?
Start is the software that manages the device Start Up. It is automatically run by the Operating
System and, at the beginning, it shows the following window.
As the message says, the user can open an internal menu to configure the device simply touching the
display. In particular:
Tap the screen during the 5 seconds
interval
The default loading of the software
system is stopped and a password
request is shown to open the internal
menu
Don't tap the screen during the 5
seconds interval
Start runs the installed software
system and closes up
Due to the system structure built to reach the legal approval of the device, this internal menu is the
only way to:
•configure the basic system (not the installed software, that defines a different setup)

Cod.81320556
6
•execute all the operations required for the maintenance of the device (like update and
backup/restore the software system)
Therefore to apply the right control on what the user can do (to be aligned with the metrological
requirements), all the procedures required to support these features are managed in this application.
And with the same logic, the internal menu will possibly be enhanced in the future with new
functionalities (especially to improve the support to the maintenance).
2. Software activation
When the Skynet is first started, the software must be activated. There are two activation modes:
1. with QR Code: a QRcode reading app and an internet connection is required
2. with Public Code: an internet connection and a phone call to the B-TEK Technical Support
Department is required

Cod.81320556
7
2.1
QR Code activation
1
Select the “QR Code” icon
2
Wait a few moments for the
generation of the QR Code
3
If you need to change the Serial
number, click on the box to open the
keyboard page, otherwise go directly
to step 5
4
Using the displayed keyboard, enter
the device serial number. Then click
the Save button to set
NOTE: “x” button deletes the current
value, Back button aborts the
procedure

Cod.81320556
8
5
If you need to change the Seal type,
select the type from the list,
otherwise go to the next step
6
If you need to change the Law, select
the law from the list, otherwise go
directly to step 8
7
In case of Law change a warning
message pops out to inform that
system has detected a Law change.
Press Yes only if sure to set the new
law, press No to cancel operation
8
Read the QR Code auto-generated
with the QR reader app
NOTE: click once on the QR Code to
force the refresh of the code
NOTE: if you are having trouble
reading the QR Code in small
displays, long press the QR Code to
view it in full screen, otherwise go
directly to step 10

Cod.81320556
9
9
Read the QR Code auto-generated
with the QR reader app, then press
Close button to return to the
previous page.
10
Enter the key obtained from the app
using the numeric keyboard, then
press the Unlock button
NOTE: “x” button deletes the current
value, Back button aborts the
procedure
11
If the code is OK, a “Key valid!”
message is shown.
Click on the OK button to complete
the procedure.
NOTE: if the code is wrong, an error
message is shown. Press the OK
button to edit the code again

Cod.81320556
10
2.2
Public Code activation
1
Select the “Public Code” icon
2
Read the Public Code and
communicate it to B-TEK
3
Enter the key obtained from B-TEK
using the numeric keyboard, then
press the Unlock button
NOTE: “x” button deletes the current
value, Back button aborts the
procedure
4
If the code is OK, a “Key valid!”
message is shown.
Click on the OK button to complete
the procedure.
NOTE: if the code is wrong, an error
message is shown. Press the OK
button to edit the code again

Cod.81320556
11
FIXED PASSWORD
607524
3. The Menu
3.1
The Password to Open the Menu
Tapping the terminal display within 5 seconds after start-up, the next window is shown.
Using the numeric keyboard, enter the password and press “Login”. This allows to open the internal
menu (the “X” button deletes the current value and the ”Back” button aborts the menu opening).
This password has a fixed value because its aim is simply to make a mild control on who can open the
menu. This just to avoid that everyone can open the menu, without however to manage a real policy
that is not required (as above mentioned, all the functions available from the menu are already safe
and under control).

Cod.81320556
12
The next picture shows the internal menu visible after the entering of the right password. In the next
chapters, all the sub-menu items and the procedures linked to these are accurately described.
As above shown, the two buttons defined outside the menu are:
•the “Info” button opens the page with info about the version of the BSP and its patch, the
software application and the Start application (below an example).
•the “Start” button runs the software application and closes Start
System info
Start application

Cod.81320556
13

Cod.81320556
14
CUSTOMER PASSWORD
432867
3.2
The Customer Password to Open the Light Menu
Tapping the terminal display within 5 seconds after start-up, the next window is shown.
Using the numeric keyboard, enter the password and press “Login”. This allows to open the internal
menu (the “X” button deletes the current value and the ”Back” button aborts the menu opening).
This password opens a light menu with reduced functionality, aimed primarily at the end customer,
with the aim of simplifying the use of the application.

Cod.81320556
15
3.2.1 The Light Menu
The next picture shows the light version of the internal menu visible after the entering of the
customer password.
As above shown, there is only one section with the useful procedures for the end customer.
Network settings
Opens the window to manage the network settings
Language settings
Opens the window to set language and culture
Software update
Updates the software system using the proper
installation pack
Display calibration
Opens the WinCE panel to manage the resistive
display calibration
Capacitive display calibration
Not implemented

Cod.81320556
16
Upload custom logo
Uploads a custom logo image
3.3
The Menu Items (Quick Reference)
Below a summary of the items available in the menu pages, just to have a global view (see the linked
chapters for more info).
3.3.1 System
In the next paragraphs, the procedures grouped under the System menu are described in details.
System
Network settings
Opens the window to manage the network settings
Language settings
Opens the window to set language and culture
Framework settings
Define the application operating mode
Display calibration
Opens the WinCE panel to manage the resistive
display calibration
Display rotation
Opens the window to manage the display rotation
Date/Time settings
Opens the WinCE panel to manage the date/time
setting
Software activation
Open the section to activate the software
3.3.1.1 Network setting
This procedure sets the Ethernet configuration.
1
Select the “Network settings” icon

Cod.81320556
17
2
The current network setting is shown
and can be modified as required.
NOTE: ask the Network Administrator
for more info.
NOTE: DNS servers are optional
3
Click on “Save” to apply the new
connection configuration.
4
If everything is fine, a message pops
out to inform the configuration was
applied with success. Click Ok button
for escape.
3.3.1.2 Language settings
This procedure sets language and culture used by the device as a default.
1
Select the “Language settings” icon
2
Select the required language among
the available ones

Cod.81320556
18
3
Click on “Save” to set the new
language
NOTE: If necessary click on the
"Languages Panel" button to access
the "Regional and Language Settings"
system window
4
If everything is fine, a message pops
out to inform the new language was
applied with success. Click Ok button
for escape.
NOTE: the system will be
automatically rebooted at the end of
the procedure
3.3.1.3 Framework settings
Skynet has two main different operating modes: the online mode and the standard mode.
1. The Standard mode is the default operating mode: the weighing application installed onto
the device.
2. The Online mode is used with Flexpoint applications: Skynet only controls scale and other
configured physical devices using framework.exe, while the user interface is drawn by
Flexpoint using IESimple. In this operating mode also managedframework.exe can be
configured, if required, to transmit over serial or network cable.

Cod.81320556
19
Clicking on the timeout box is also possible to set the timeout, expressed in minutes, in case the NIC
is not detected at device startup. After this timeout is elapsed, the device is automatically rebooted.
3.3.1.4 Display calibration
This procedure calibrates the touch screen display of the Skynet.
1
Select the “Display calibration” icon
2
In the shown window, select the
“Calibration” panel (the second tab)
3
Tap the “Recalibrate” button to start
the calibration procedure

Cod.81320556
20
4
Point a pen or a finger on the target
and keep the pressure until the
target moves.
Repeat this operation on every new
position of the target (the target is
shown in 5 different positions across
the display)
5
When the target disappears, the
procedure is completed and a
message is shown.
Tap on display to close the window
6
Click on the OK button to close the
Stylus Properties window and return
to the start menu.
3.3.1.5 Display rotation
This procedure is to screen rotation of Skynet devices mounted on the wall.
1
Select the “Display rotation”
2
In the shown window select the
rotation degree
3
Select the value and press “Save”
3.3.1.6 Date/Time settings
4. This procedure is to set date/time of Skynet.
Table of contents
Other B-TEK Scales Scale manuals

B-TEK Scales
B-TEK Scales Super Sack User manual

B-TEK Scales
B-TEK Scales AquaShield Series User manual

B-TEK Scales
B-TEK Scales 4 Square User manual

B-TEK Scales
B-TEK Scales DD1010 User manual

B-TEK Scales
B-TEK Scales WorldWEIGH C200 Series User manual

B-TEK Scales
B-TEK Scales AX200 User manual

B-TEK Scales
B-TEK Scales Centurion-DT User manual

B-TEK Scales
B-TEK Scales BT-BC User manual

B-TEK Scales
B-TEK Scales WorldWEIGH C100 Series User manual

B-TEK Scales
B-TEK Scales WorldWEIGH PGE-W Series User manual