Installation, Operation & Maintenance Manual
INSTALLATION
4
Rev 09/17
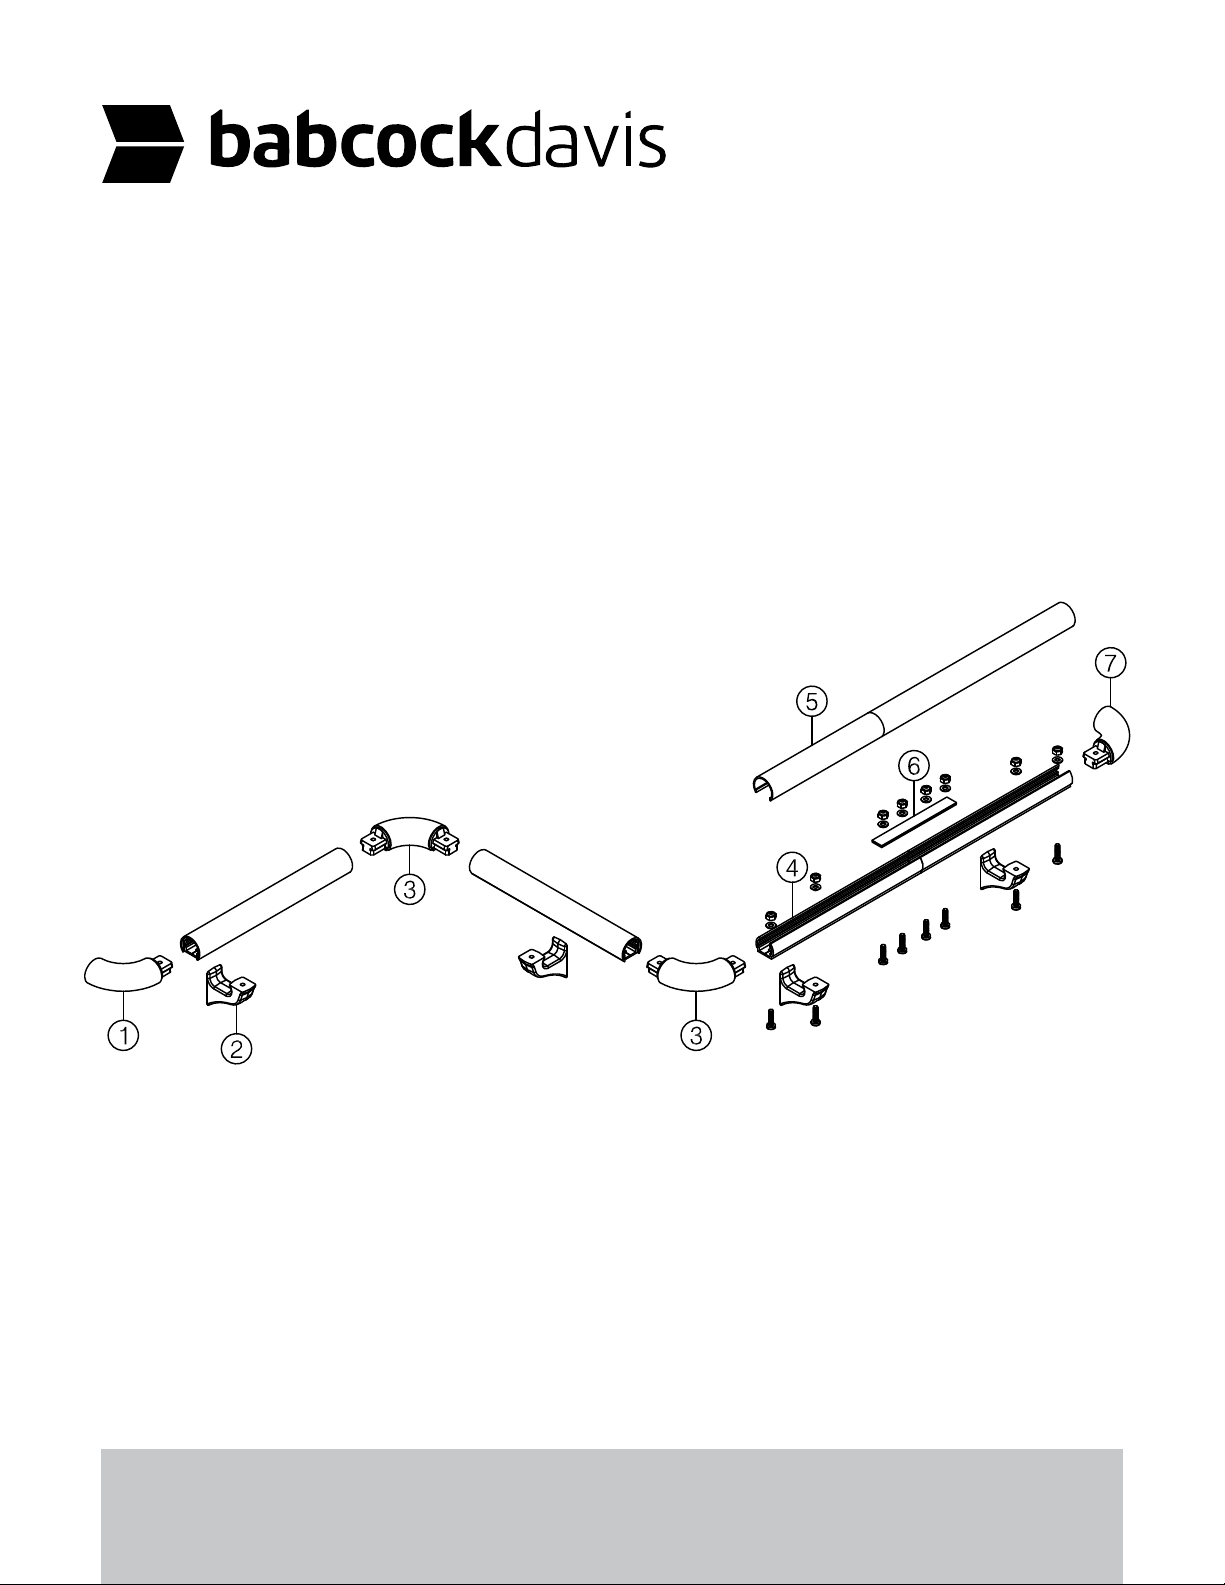
1-1/2 inch Vinyl Handrail
Model(s): BHRVE15C-P
installation
Preparation: Verify that all products listed on the packaging slip are included in the package.
Check the products for damage. If product is damaged, contact customer support immediately
to report a freight claim.
Store material in a clean dry place where the temperature is maintained above 50°F (10°C).
Walls and rooms should be maintained at a minimum of 65°F (18°C) for at least 48 hours prior
to installation. Acclimate materials to normal building conditions for at least 24 hours before
cutting and installing.
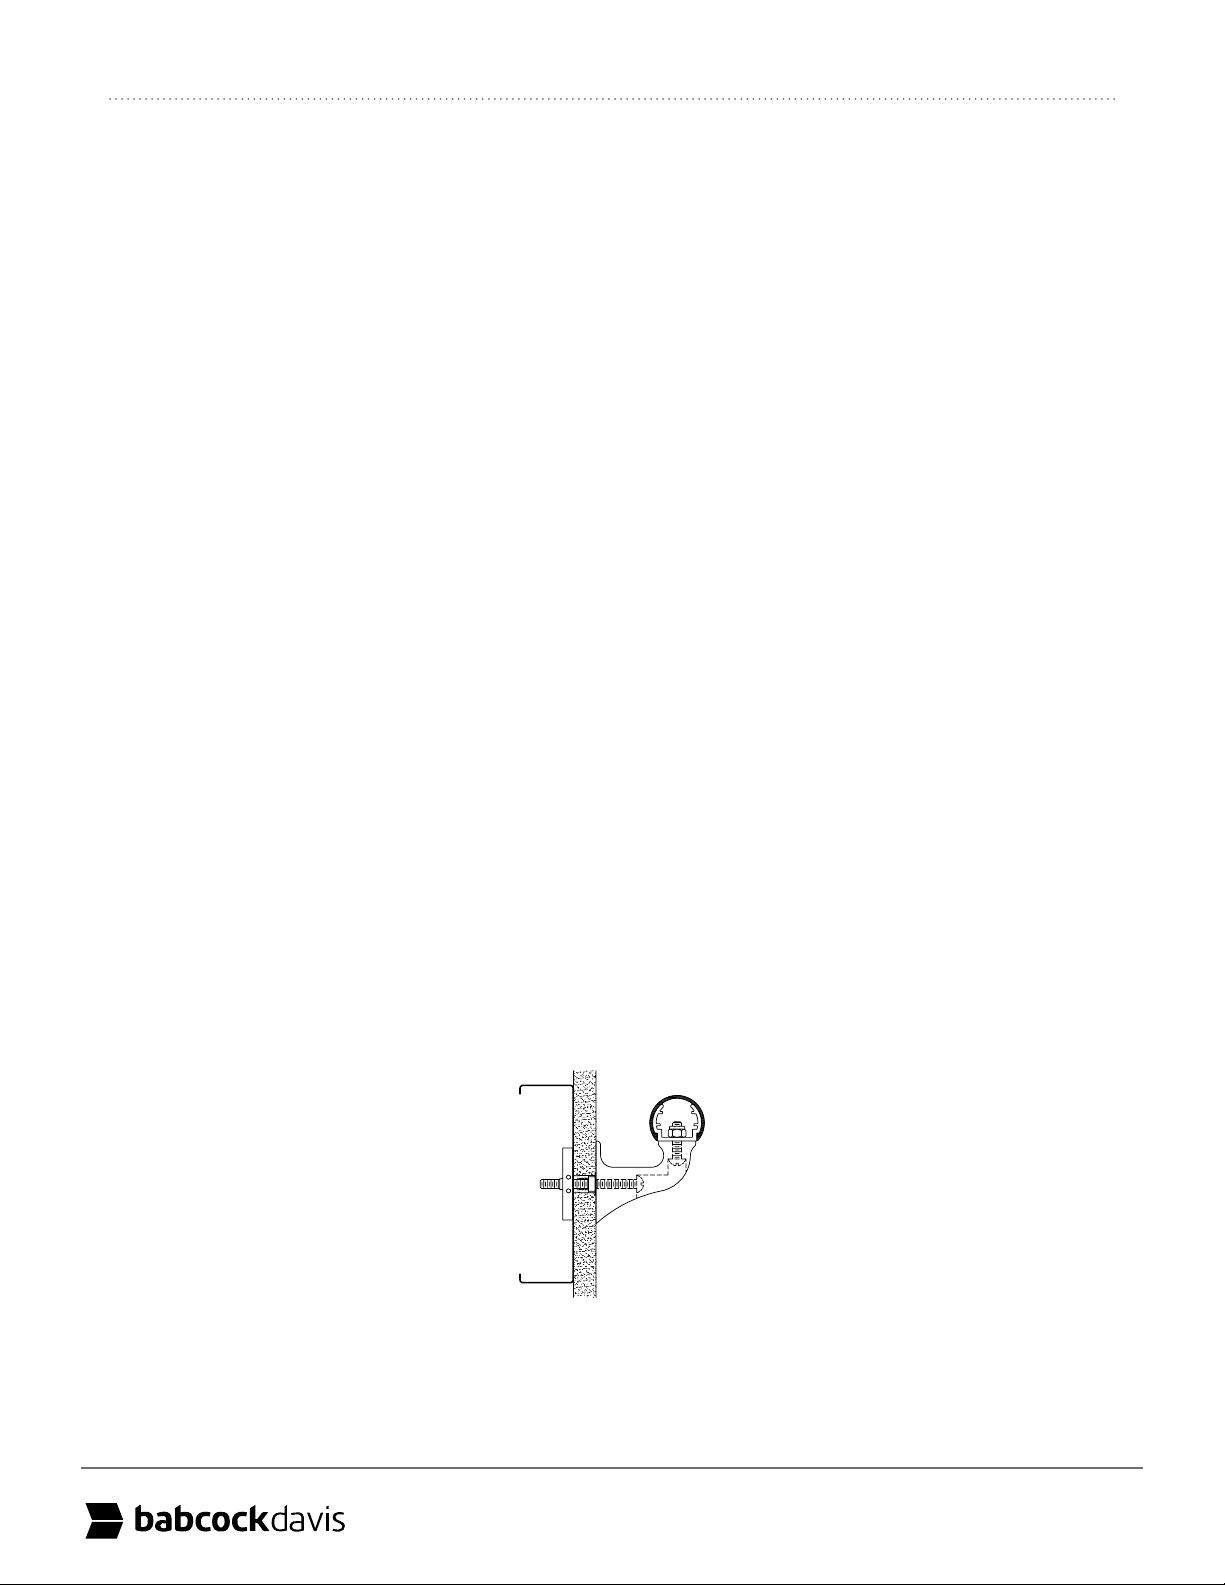
Step 1 Determine top of handrail height and snap a chalk line 2-1/2 inches below for centerline
of mounting hardware, see g. 1.
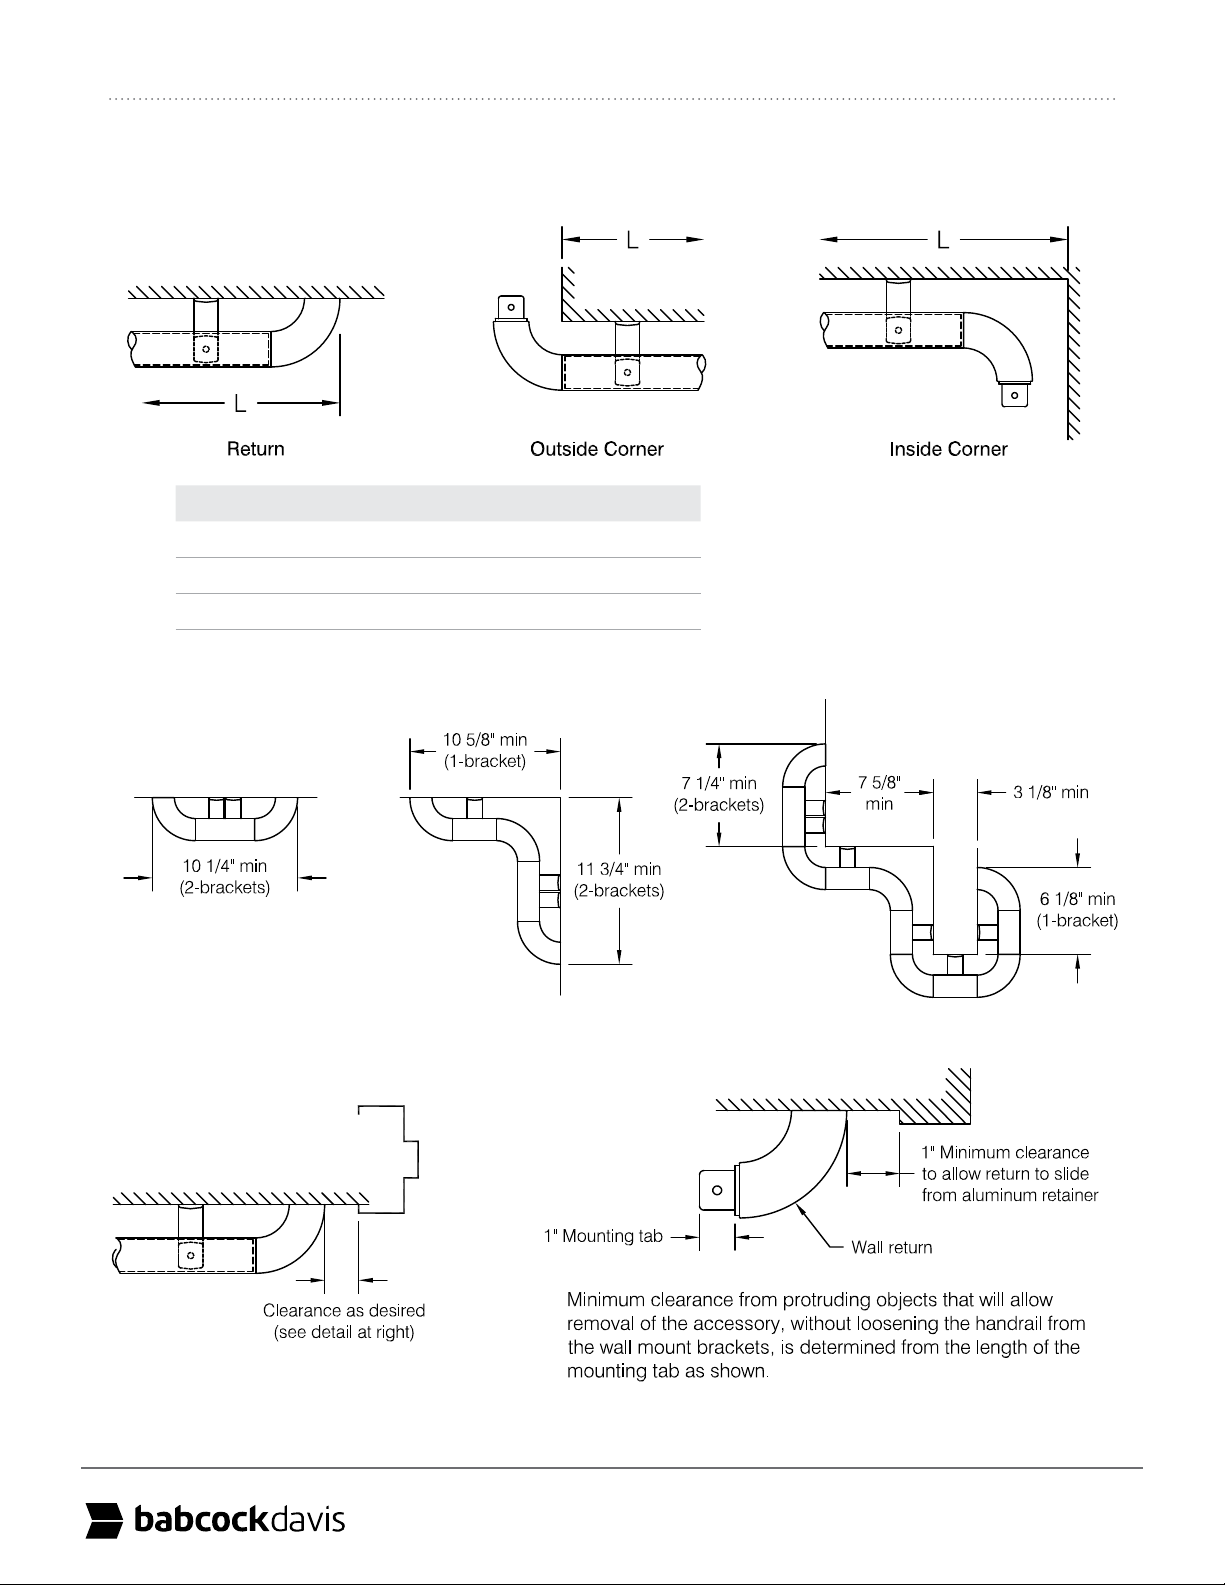
Step 2 Cut retainer. See Cutting Adjustment Diagrams and Schedule for adjustments to
retainer length at wall returns, inside corners and outside corners. Refer to Minimum
Layout Congurations and Clearance with Adjoining Construction for additional
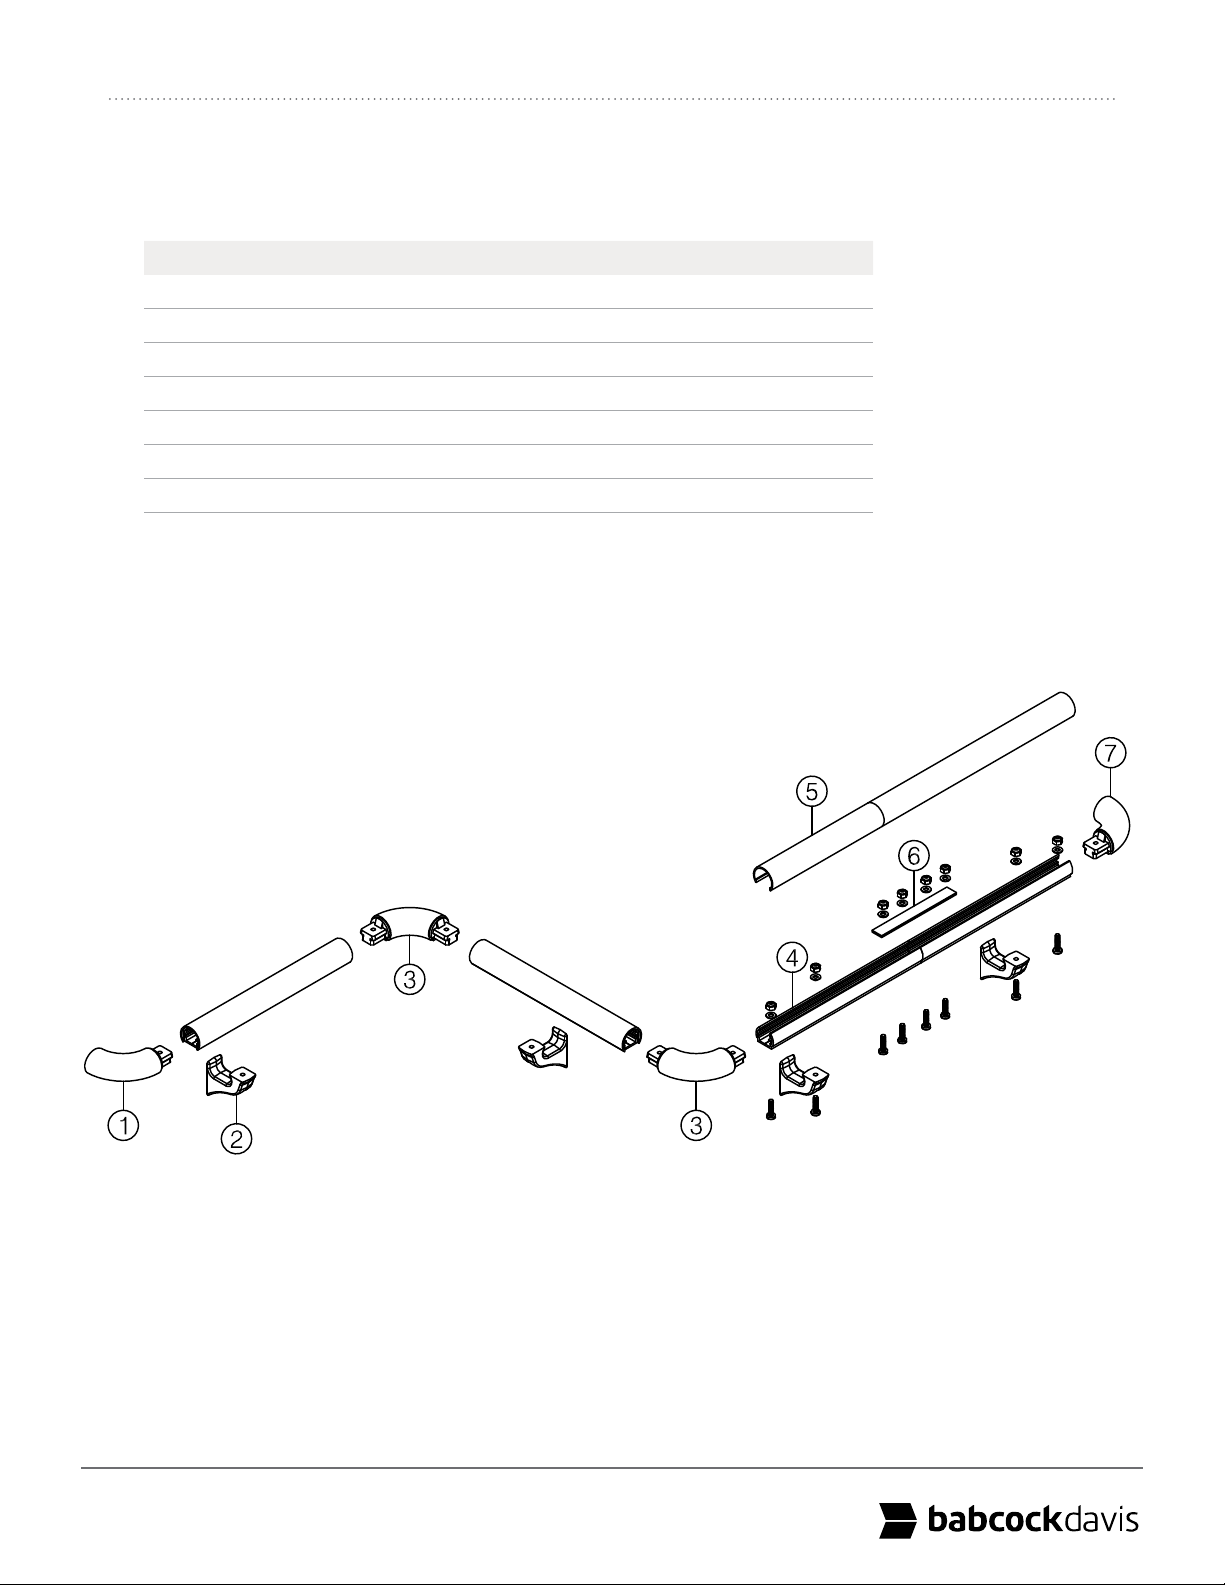
Step 3 Layout retainer “face up”, mark and drill bracket mounting hole locations. Use groove in
retainer to locate centerline for drilling, see g. 2. Bracket mounting holes must be spaced:
• Not to exceed 32 inches on center
• 1-1/2 inches to 6 inches from end of retainer at returns and corner accessories
• A minimum of 4 inches from end of retainer at splices to avoid interference with splice
hardware (shown in g. 5)
• To align with metal studs (on metal stud construction) or preferably with horizontal
backer plate (by others)
Step 4 Locate and drill bracket mounting holes in wall construction using the retainer as a
template or by careful measurement. Choice of hardware will dictate hole diameter.
Step 5
accessory as a template, see g. 3.
Step 6 Attach molded returns, outside corners and inside corners to retainer with accessory
washers and nylon lock jam-nut provided.
Caution:
g. 4.