Assembling Instruction
Battery Handling
1. Battery must be handled by adults only, and use AA size batteries.
2. Do not mix old and new batteries.
3. Always remove batteries when the unit is not going to be used for an
extended period of time.
4. When replacing new batteries, always replace all batteries.
5. Different types of batteries are not to be mixed.
6. Do not dispose of batteries in fire, batteries may explode or leak.
7. Non-rechargeable batteries are not to be recharged.
8. Rechargeable batteries are to be removed from the toy before being
charged.
9. Rechargeable batteries are only to be charged under adult
supervision.
10. Batteries are to be inserted with the correct polarity. The supply
terminals are not to be short-circuited.
4. Assemble the
safety bar into the
backrest.
5. Insert the push
bar into the hole
at the back of the
backrest.
6. Turn the ride-on
upside down and
fix the foot rest as
shown in the
picture.
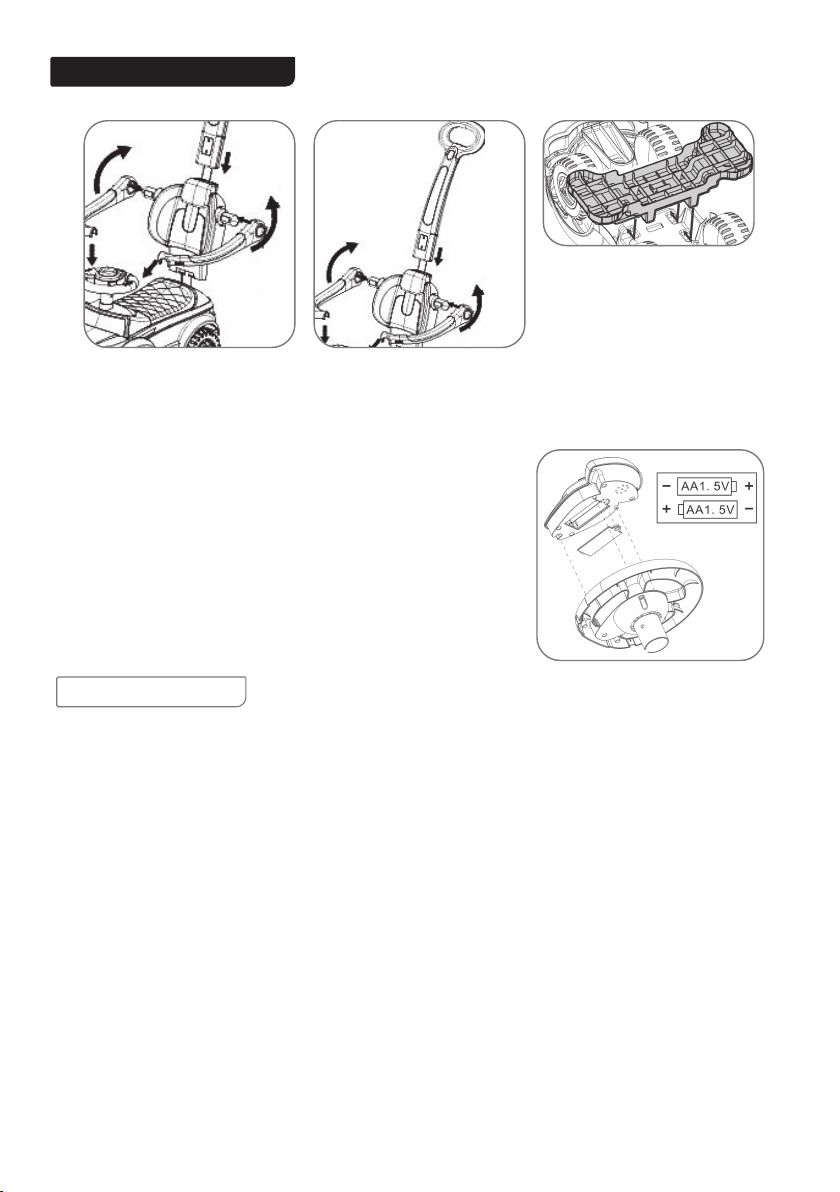
Battery Fixing
Loosen the three screws with a screwdriver, and take
the music box out.
Loosen the screw of the battery cover, please keep all
the screws in a safe place away from children's reach.
Insert 2 AA batteries in the battery house as per the
polarities mentioned.
Then tight all the screws with a screwdriver.