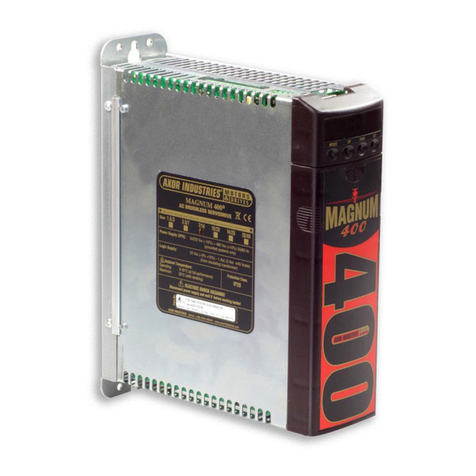
Baldor MintDrive II User manual

-~
ARTISAN
®
~I
TECHNOLOGY
GROUP
Your definitive source
for
quality
pre-owned
equipment.
Artisan Technology
Group
Full-service,
independent
repair
center
with
experienced
engineers
and
technicians
on staff.
We
buy
your
excess,
underutilized,
and
idle
equipment
along
with
credit
for
buybacks
and
trade-ins
.
Custom
engineering
so
your
equipment
works
exactly as
you
specify.
•
Critical
and
expedited
services
•
Leasing
/
Rentals/
Demos
• In
stock/
Ready-to-ship
•
!TAR-certified
secure
asset
solutions
Expert
team
ITrust
guarantee
I
100%
satisfaction
All
tr
ademarks,
br
a
nd
names, a
nd
br
a
nd
s a
pp
earing here
in
are
th
e property of
th
e
ir
r
es
pecti
ve
ow
ner
s.
Find the ABB / Baldor MDH2A07TR-RB23 at our website: Click HERE

MintDriveII
Servo & Position Control
SERVO DRIVE
Installation Manual
03/10 MN1901
Artisan Technology Group - Quality Instrumentation ... Guaranteed | (888) 88-SOURCE | www.artisantg.com

Artisan Technology Group - Quality Instrumentation ... Guaranteed | (888) 88-SOURCE | www.artisantg.com

Contents i
MN1901
Contents
1 General Information 1-1.................................
2 Introduction 2-1........................................
2.1 MintDriveII features 2-1.....................................
2.2 Receiving and inspection 2-2................................
2.2.1 Identifying the catalog number 2-2....................................
2.3 Units and abbreviations 2-3..................................
3 Basic Installation 3-1....................................
3.1 Introduction 3-1............................................
3.1.1 Power sources 3-1................................................
3.1.2 Hardware requirements 3-1.........................................
3.1.3 RS485 / RS422 systems 3-2........................................
3.1.4 Tools and miscellaneous hardware 3-2................................
3.1.5 Other information needed for installation 3-3...........................
3.2 Mechanical installation and location requirements 3-4...........
3.2.1 Mounting the MintDriveII 3-5.........................................
3.2.2 Dimensions 3-6...................................................
3.3 Connector locations 3-7.....................................
3.4 Power connections 3-8......................................
3.4.1 Single-phase connection to package sizes A, B, C, D 3-9................
3.4.2 Three-phase connection to package sizes E, G, H 3-10...................
3.4.3 Input power conditioning 3-11.........................................
3.4.4 Power disconnect and protection devices 3-11..........................
3.4.5 Power supply filters 3-12.............................................
3.4.6 Wire sizes and protection device ratings 3-13...........................
3.4.7 External customer supplied 24V control supply 3-14......................
3.5 Motor connections 3-15......................................
3.5.1 Motor circuit contactors 3-16.........................................
3.5.2 Motor power cable pin configuration - Baldor BSM rotary motors 3-16.......
3.5.3 Motor cable pin configuration - Baldor linear motors 3-17..................
3.5.4 Sinusoidal filter 3-17................................................
3.5.5 Thermal switch connection 3-18.......................................
3.5.6 Motor brake connection 3-19.........................................
3.6 Regeneration resistor (Dynamic Brake resistor) 3-20.............
3.6.1 Controlling regeneration 3-20.........................................
3.7 Feedback connections 3-21...................................
3.7.1 Resolver option - X8 3-22............................................
3.7.2 Encoder option - X8 3-24............................................
3.7.3 EnDat (absolute encoder) option - X8 3-27..............................
3.7.4 Hiperface (absolute encoder) option - X8 3-29...........................
Artisan Technology Group - Quality Instrumentation ... Guaranteed | (888) 88-SOURCE | www.artisantg.com

ii Contents MN1901
3.8 Drive enable 3-31...........................................
3.8.1 Drive enable - X3 3-31..............................................
3.8.2 Drive enable - SW1 DIP switch 3-32...................................
3.8.3 Drive enable command 3-32..........................................
3.9 DIP switches - SW1 3-33.....................................
3.9.1 Switches 1-4 3-33..................................................
3.9.2 Switch 5 - Hold 3-34................................................
3.9.3 Switch 6 - RS485 terminator 3-34.....................................
3.9.4 Switch 7 - Offset tuning 3-34.........................................
3.9.5 Switch 8 - Enable 3-34..............................................
3.9.6 Switch 9 - MODBUS select 3-35......................................
3.9.7 Switch 10 - RS232/RS485 select 3-35.................................
3.9.8 Factory settings 3-35................................................
3.9.9 Preventing a program running at startup / restoring communciation 3-36.....
4 Input / Output 4-1......................................
4.1 Introduction 4-1............................................
4.2 Analog I/O 4-1.............................................
4.2.1 Analog input - X3 (demand) 4-2......................................
4.2.2 Analog input - X4 4-4...............................................
4.2.3 Analog outputs, bipolar - X4 4-6......................................
4.3 Digital I/O 4-7..............................................
4.3.1 Digital inputs - X3 4-8..............................................
4.3.2 CREF and digital inputs 4-9.........................................
4.3.3 Special functions on inputs DIN4 and DIN5 4-9.........................
4.3.4 Digital outputs - X3 4-12.............................................
4.3.5 Relay output / digital output - X3 4-13..................................
4.4 Other I/O 4-14..............................................
4.4.1 Encoder output - X7 4-14............................................
4.4.2 Master (auxiliary) encoder input - X9 4-16..............................
4.4.3 Serial port - X6 4-18.................................................
4.4.4 Using RS232 cable 4-19.............................................
4.4.5 Multidrop using RS485 / RS422 cable 4-20.............................
4.4.6 Connecting Baldor HMI Operator Panels 4-21...........................
4.5 Connection summary - minimum system wiring 4-22.............
4.6 Option connectors 4-23......................................
5 Operation 5-1..........................................
5.1 Introduction 5-1............................................
5.1.1 Connecting the MintDriveII to the PC 5-1..............................
5.1.2 Installing the software 5-1...........................................
5.1.3 Starting the MintDriveII 5-2..........................................
5.1.4 Preliminary checks 5-2.............................................
5.1.5 Power on checks 5-2...............................................
5.1.6 Offset tuning (optional) 5-3..........................................
Artisan Technology Group - Quality Instrumentation ... Guaranteed | (888) 88-SOURCE | www.artisantg.com
Contents iii
MN1901
5.2 Mint WorkBench 5-4........................................
5.2.1 Help file 5-4......................................................
5.2.2 Starting Mint WorkBench 5-5........................................
5.2.3 Commissioning Wizard 5-7..........................................
5.2.4 Using the Commissioning Wizard 5-7.................................
5.2.5 Completing the Commissioning Wizard 5-7............................
5.2.6 Performing a test move 5-8.........................................
5.3 Further configuration 5-9....................................
5.3.1 Fine-tuning tool 5-9................................................
5.3.2 Parameters tool 5-11................................................
5.3.3 Digital I/O tool 5-12.................................................
5.3.4 Other tools and windows 5-12........................................
6 Preset Moves & PLC Task 6-1...........................
6.1 Introduction 6-1............................................
6.2 Preset moves 6-2..........................................
6.2.1 Defining a preset move 6-2..........................................
6.2.2 Testing a preset move 6-3...........................................
6.2.3 Using digital inputs to trigger a preset move 6-3........................
6.2.4 Controlling preset moves 6-6........................................
6.2.5 Using presets with the CAN & Auxiliary I/O option 6-6...................
6.3 PLC Task 6-7..............................................
6.3.1 Defining conditions 6-7.............................................
6.3.2 Enabling and downloading the actions 6-8.............................
6.3.3 Testing the PLC Task 6-9...........................................
6.4 Saving presets or PLC conditions 6-9.........................
7 Troubleshooting 7-1....................................
7.1 Introduction 7-1............................................
7.1.1 Problem diagnosis 7-1..............................................
7.1.2 SupportMe feature 7-1.............................................
7.1.3 Power-cycling the MintDriveII 7-1....................................
7.2 MintDriveII indicators 7-2....................................
7.2.1 Status display 7-2.................................................
7.2.2 DB On (Regeneration) LED 7-5......................................
7.2.3 Communication 7-5................................................
7.2.4 Power on 7-6.....................................................
7.2.5 Tuning 7-6........................................................
7.2.6 Status display shows a digit or ‘E.’ 7-6................................
8 Specifications 8-1......................................
8.1 Introduction 8-1............................................
8.1.1 AC input power and motor output - single-phase models 8-2..............
8.1.2 AC input power and motor output - 230V three-phase models 8-3..........
8.1.3 AC input power and motor output - 230-460V three-phase models 8-4......
Artisan Technology Group - Quality Instrumentation ... Guaranteed | (888) 88-SOURCE | www.artisantg.com
iv Contents MN1901
8.1.4 Customer supplied 24VDC supply input 8-5............................
8.1.5 Regeneration 8-5..................................................
8.1.6 Analog input (X3) 8-6...............................................
8.1.7 Analog input (X4) 8-7...............................................
8.1.8 Analog outputs (X4) 8-7............................................
8.1.9 Digital inputs (X3) 8-8..............................................
8.1.10 Digital outputs (X3) 8-8.............................................
8.1.11 Relay / general purpose output (X3) 8-9...............................
8.1.12 Serial RS232 interface (X6) 8-9......................................
8.1.13 Serial RS485 interface (X6) 8-9......................................
8.1.14 Encoder output (simulated) (X7) 8-10..................................
8.1.15 Resolver feedback option (X8) 8-10...................................
8.1.16 Encoder feedback option (X8) 8-10....................................
8.1.17 EnDat (absolute encoder) feedback option (X8) 8-11.....................
8.1.18 Hiperface (absolute encoder) feedback option (X8) 8-11..................
8.1.19 Master (auxiliary) encoder input (X9) 8-11..............................
8.1.20 Pulse and direction input (X9) 8-12....................................
8.1.21 Environmental 8-12.................................................
Appendices
A Accessories A-1........................................
A.1 Introduction A-1............................................
A.1.1 Factory fitted options A-1...........................................
A.1.2 Motor power cables A-2.............................................
A.1.3 Motor power cable part numbers A-2..................................
A.1.4 Resolver feedback cables A-3.......................................
A.1.5 Encoder / Hall feedback cables A-4...................................
A.1.6 EnDat / Hiperface (absolute encoder) feedback cables A-4...............
A.1.7 Feedback cable part numbers A-5....................................
A.1.8 EMC filters A-6....................................................
A.1.9 Regeneration resistors A-9..........................................
B Control System B-1.....................................
B.1 Introduction B-1............................................
B.1.1 Positioning system with speed controller B-1...........................
B.1.2 Positioning system without speed controller B-2........................
B.1.3 Speed amplifier B-3................................................
B.1.4 Torque amplifier B-4................................................
B.2 Control system operation B-5................................
B.2.1 Position controller B-5..............................................
B.2.2 Speed controller B-6...............................................
B.2.3 Torque controller and feedback B-7...................................
C Mint Keyword Summary C-1.............................
C.1 Introduction C-1............................................
C.1.1 Keyword listing C-1................................................
Artisan Technology Group - Quality Instrumentation ... Guaranteed | (888) 88-SOURCE | www.artisantg.com

Contents v
MN1901
D CE&UL D-1...........................................
D.1 Introduction D-1............................................
D.1.1 EMC Conformity and CE marking D-1.................................
D.1.2 Declaration of conformity D-2........................................
D.1.3 Use of CE compliant components D-3.................................
D.1.4 EMC wiring technique D-3...........................................
D.1.5 EMC installation suggestions D-4.....................................
D.1.6 Wiring of shielded (screened) cables D-5..............................
D.2 UL file numbers D-6.........................................
Artisan Technology Group - Quality Instrumentation ... Guaranteed | (888) 88-SOURCE | www.artisantg.com
vi Contents MN1901
Artisan Technology Group - Quality Instrumentation ... Guaranteed | (888) 88-SOURCE | www.artisantg.com
www.baldormotion.com
General Information 1-1MN1901
LT0159A05 Copyright Baldor (c) 2010. All rights reserved.
This manual is copyrighted and all rights are reserved. This document or attached software may not,
in whole or in part, be copied or reproduced in any form without the prior written consent of Baldor.
Baldor makes no representations or warranties with respect to the contents hereof and specifically
disclaims any implied warranties of fitness for any particular purpose. The information in this
document is subject to change without notice. Baldor assumes no responsibility for any errors that
may appear in this document.
Minttis a registered trademark of Baldor.
Windows 2000, Windows XP and Windows Vista are registered trademarks of the Microsoft
Corporation.
UL and cUL are registered trademarks of Underwriters Laboratories.
EnDat is a registered trademark of Heidenhain Corporation.
Hiperface is a registered trademark of Max Stegmann GmbH.
Limited Warranty
For a period of two (2) years from the date of original purchase, Baldor will repair or replace without
charge controls and accessories that our examination proves to be defective in material or
workmanship. This warranty is valid if the unit has not been tampered with by unauthorized persons,
misused, abused, or improperly installed and has been used in accordance with the instructions and/or
ratings supplied. This warranty is in lieu of any other warranty or guarantee expressed or implied.
Baldor shall not be held responsible for any expense (including installation and removal),
inconvenience, or consequential damage, including injury to any person or property caused by items of
our manufacture or sale. (Some countries and U.S. states do not allow exclusion or limitation of
incidental or consequential damages, so the above exclusion may not apply.) In any event, Baldor’s
total liability, under all circumstances, shall not exceed the full purchase price of the control. Claims for
purchase price refunds, repairs, or replacements must be referred to Baldor with all pertinent data as
to the defect, the date purchased, the task performed by the control, and the problem encountered. No
liability is assumed for expendable items such as fuses. Goods may be returned only with written
notification including a Baldor Return Authorization Number and any return shipments must be prepaid.
Baldor UK Ltd
Mint Motion Centre
6 Bristol Distribution Park
Hawkley Drive
Bristol, BS32 0BF
Telephone: +44 (0) 1454 850000
Fax: +44 (0) 1454 850001
E-mail: motionsupport.uk@baldor.com
Web site: www.baldormotion.com
See rear cover for other international offices.
1General Information 1
Artisan Technology Group - Quality Instrumentation ... Guaranteed | (888) 88-SOURCE | www.artisantg.com
www.baldormotion.com
1-2 General Information MN1901
Product Notice
Only qualified personnel should attempt the start-up procedure or troubleshoot this equipment.
This equipment may be connected to other machines that have rotating parts or parts that are
controlled by this equipment. Improper use can cause serious or fatal injury. Only qualified personnel
should attempt to start-up, program or troubleshoot this equipment.
Safety Notice
Intended use: These drives are intended for use in stationary ground based applications in industrial
power installations according to the standards EN60204 and VDE0160. They are designed for
machine applications that require variable speed controlled three-phase brushless AC motors. These
drives are not intended for use in applications such as:
HHome appliances
HMedical instrumentation
HMobile vehicles
HShips
HAirplanes.
Unless otherwise specified, this drive is intended for installation in a suitable enclosure. The enclosure
must protect the drive from exposure to excessive or corrosive moisture, dust and dirt or abnormal
ambient temperatures. The exact operating specifications are found in section 8 of this manual. The
installation, connection and control of drives is a skilled operation, disassembly or repair must not be
attempted. In the event that a drive fails to operate correctly, contact the place of purchase for return
instructions.
Precautions
WARNING: Do not touch any circuit board, power device or electrical connection before you
first ensure that no high voltage is present at this equipment or other equipment to
which it is connected. Electrical shock can cause serious or fatal injury. Only
qualified personnel should attempt to start-up, program or troubleshoot this
equipment.
WARNING: Be sure the system is properly earthed/grounded before applying power. Do not
apply AC power before you ensure that earths/grounds are connected. Electrical
shock can cause serious or fatal injury.
WARNING: Be sure that you are completely familiar with the safe operation and programming
of this equipment. This equipment may be connected to other machines that have
rotating parts or parts that are controlled by this equipment. Improper use can
cause serious or fatal injury. Only qualified personnel should attempt to program,
start-up or troubleshoot this equipment.
Artisan Technology Group - Quality Instrumentation ... Guaranteed | (888) 88-SOURCE | www.artisantg.com
www.baldormotion.com
General Information 1-3MN1901
WARNING: MEDICAL DEVICE / PACEMAKER DANGER: Magnetic and electromagnetic
fields in the vicinity of current carrying conductors and industrial motors can result
in a serious health hazard to persons with cardiac pacemakers, internal cardiac
defibrillators, neurostimulators, metal implants, cochlear implants, hearing aids,
and other medical devices. To avoid risk, stay away from the area surrounding a
motor and its current carrying conductors.
WARNING: Be sure all wiring complies with the National Electrical Code and all regional and
local codes. Improper wiring may result in unsafe conditions.
WARNING: The stop input to this equipment should not be used as the single means of
achieving a safety critical stop. Drive disable, motor disconnect, motor brake and
other means should be used as appropriate. Only qualified personnel should
attempt to program, start-up or troubleshoot this equipment.
WARNING: Improper operation or programming of the drive may cause violent motion of the
motor and driven equipment. Be certain that unexpected motor movement will not
cause injury to personnel or damage to equipment. Peak torque of several times
the rated motor torque can occur during control failure.
WARNING: The motor circuit might have high voltages present whenever AC power is
applied, even when the motor is not moving. Electrical shock can cause serious or
fatal injury.
WARNING: If a motor is driven mechanically, it might generate hazardous voltages that are
conducted to its power terminals. The enclosure must be earthed/grounded to
prevent possible shock hazard.
WARNING: When operating a rotary motor with no load coupled to its shaft, remove the shaft
key to prevent it flying out when the shaft rotates.
WARNING: A regeneration resistor may generate enough heat to ignite combustible materials.
To avoid fire hazard, keep all combustible materials and flammable vapors away
from the brake resistors.
CAUTION: To prevent equipment damage, be certain that the input power has correctly sized
protective devices installed.
CAUTION: To prevent equipment damage, be certain that input and output signals are
powered and referenced correctly.
CAUTION: To ensure reliable performance of this equipment be certain that all signals to/from
the drive are shielded correctly.
CAUTION: Suitable for use on a circuit capable of delivering not more than the RMS
symmetrical short circuit amperes listed here at rated voltage.
Horsepower RMS Symmetrical Amperes
1-50 5,000
Artisan Technology Group - Quality Instrumentation ... Guaranteed | (888) 88-SOURCE | www.artisantg.com
www.baldormotion.com
1-4 General Information MN1901
CAUTION: Avoid locating the drive immediately above or beside heat generating equipment,
or directly below water or steam pipes.
CAUTION: Avoid locating the drive in the vicinity of corrosive substances or vapors, metal
particles and dust.
CAUTION: Do not connect AC power to the drive terminals U, V and W. Connecting AC
power to these terminals may result in damage to the drive.
CAUTION: Baldor does not recommend using “Grounded Leg Delta” transformer power leads
that may create earth/ground loops and degrade system performance. Instead,
we recommend using a four wire Wye.
CAUTION: Drives are intended to be connected to a permanent main power source, not a
portable power source. Suitable fusing and circuit protection devices are required.
CAUTION: The safe integration of the drive into a machine system is the responsibility of the
machine designer. Be sure to comply with the local safety requirements at the
place where the machine is to be used. In Europe these are the Machinery
Directive, the ElectroMagnetic Compatibility Directive and the Low Voltage
Directive. In the United States this is the National Electrical code and local codes.
CAUTION: Drives must be installed inside an electrical cabinet that provides environmental
control and protection. Installation information for the drive is provided in this
manual. Motors and controlling devices that connect to the drive should have
specifications compatible to the drive.
CAUTION: If the drive is subjected to high potential (‘hipot’) testing, only DC voltages may be
applied. AC voltage hipot tests could damage the drive. For further information
please contact your local Baldor representative.
CAUTION: Violent jamming (stopping) of the motor during operation may damage the motor
and drive.
CAUTION: Do not tin (solder) exposed wires. Solder contracts over time and may cause
loose connections. Use crimp connections where possible.
CAUTION: Electrical components can be damaged by static electricity. Use ESD
(electro-static discharge) procedures when handling this drive.
CAUTION: Ensure that resolver or encoder wires are properly connected. Incorrect
installation may result in improper movement.
CAUTION: The threaded holes in the top and bottom of the enclosure are for cable clamps.
Be sure to use a M4 bolt no longer than 12mm in length. Longer bolts might
short-circuit the electrical components inside the drive.
CAUTION: Removing the cover will invalidate UL certification.
Artisan Technology Group - Quality Instrumentation ... Guaranteed | (888) 88-SOURCE | www.artisantg.com
www.baldormotion.com
Introduction 2-1MN1901
2.1 MintDriveII features
The MintDriveII combines a powerful fully featured motion controller and brushless servo
control into a compact package. This provides a flexible and powerful motion control solution
for single axis rotary and linear positioning systems. Programmable in Mint, applications can
be quickly written and tested. Standard features include:
HSingle axis AC brushless drive with integrated Mint controller
HWide range of models with continuous current ratings from 2.5A to 27.5A
HDirect connection to 115VAC or 230VAC single-phase or 230-460VAC three-phase
supplies (model dependent)
HResolver, encoder, EnDat or Hiperface feedback
HProgrammable in Mint, with multi-tasking capability
HPosition, velocity and current control, preset and point to point moves, software cams and
gearing
HAuto-tuning wizard (including position loop) and software oscilloscope facilities
H8 optically isolated digital inputs
H3 optically isolated digital outputs
H2 general-purpose analog inputs (can be used as a speed or torque demand reference)
H2 general-purpose analog outputs
H1 control relay
HSelectable RS232 or RS485 communications
HFlash memory for program storage (128k)
HNon-volatile RAM.
Factory-fitted options expand the I/O capabilities of the MintDriveII and provide CAN bus,
DeviceNet or Profibus connectivity. See Appendix A for details about options. MintDriveII will
operate with a large number of brushless servo motors - for information on selecting Baldor
servo motors, please see the sales brochure BR1202 (BR1800 for linear motors) available
from your local Baldor representative.
This manual is intended to guide you through the installation of MintDriveII. The sections
should be read in sequence.
The Basic Installation section describes the mechanical installation of the MintDriveII,the
power supply connections and motor connections. The other sections require knowledge of
the low level input/output requirements of the installation and an understanding of computer
software installation. If you are not qualified in these areas you should seek assistance before
proceeding.
2Introduction 2
Artisan Technology Group - Quality Instrumentation ... Guaranteed | (888) 88-SOURCE | www.artisantg.com
www.baldormotion.com
2-2 Introduction MN1901
2.2 Receiving and inspection
When you receive your MintDriveII, there are several things you should do immediately:
1. Check the condition of the shipping container and report any damage immediately to the
carrier that delivered your MintDriveII.
2. Remove the MintDriveII from the shipping container and remove all packing material. The
container and packing materials may be retained for future shipment.
3. Verify that the catalog number of the MintDriveII you received is the same as the catalog
number listed on your purchase order. The catalog number is described in the next section.
4. Inspect the MintDriveII for external damage during shipment and report any damage to the
carrier that delivered your MintDriveII.
5. If MintDriveII is to be stored for several weeks before use, be sure that it is stored in a location
that conforms to the storage humidity and temperature specifications shown in section 8.1.21.
2.2.1 Identifying the catalog number
The MintDriveII is available with different current ratings and package sizes. The catalog
number is marked on the front of the unit, just below the Baldor logo. It is a good idea to look
for the catalog number (sometimes shown as ID/No: ) and write it in the space provided here:
Catalog number: MDH______________-________
Installed at: ________________________ Date: ______
A description of a catalog number is shown here, using the example MDH1A05TB-RC23:
Meaning Alternatives
MDH MintDriveII family -
1Requires an AC supply voltage of 115 Volts, 1Φ2=230V (1Φor 3Φ);
4=230V-460V (3Φ)
A05 Continuous current rating of 5.0A A02=2.5A; A07=7.5A; A15=15A;
A20=20A; A27=27.5A
TBuilt in AC power supply -
BDynamic Brake with a built in transistor and
resistor (available on 2.5A and 5A models only)
R= Requires external braking
resistor
RFeedback option is a resolver
E=Encoder (incremental);
D=EnDat (absolute encoder);
H=Hiperface (absolute encoder)
COptions: 1 CAN channel
B=CAN & Auxiliary I/O;
D=DeviceNet; P=Profibus DP;
N=No options specified
2Serial port type is combined RS232 / RS485 -
3Customer’s own 24VDC supply is required to
power the internal MintDriveII logic
0= Internally generated 24VDC
supply*
Additional suffix letters may be used to indicate customer-specific builds.
*An external 24VDC supply will always be required to operate the enable input, digital inputs
and digital outputs on connectors X3 and X4. See sections 4.3.1 to 4.3.4.
Artisan Technology Group - Quality Instrumentation ... Guaranteed | (888) 88-SOURCE | www.artisantg.com
www.baldormotion.com
Introduction 2-3MN1901
2.3 Units and abbreviations
The following units and abbreviations are used in this manual:
V Volt (also VAC and VDC)...............
WWatt..............
A Ampere...............
ΩOhm...............
μF microfarad..............
pF picofarad..............
mH millihenry.............
Φphase...............
ms millisecond..............
μs microsecond..............
ns nanosecond..............
Kbaud kilobaud (the same as Kbit/s in most applications)...........
MB megabytes.............
CDROM Compact Disc Read Only Memory.........
CTRL+E on the PC keyboard, press Ctrl then Eat the same time..........
mm millimeter.............
m meter...............
in inch...............
ft feet...............
lb-in pound-inch (torque).............
Nm Newton-meter (torque).............
ADC Analog to Digital Converter............
DAC Digital to Analog Converter............
AWG American Wire Gauge............
(NC) Not Connected............
Artisan Technology Group - Quality Instrumentation ... Guaranteed | (888) 88-SOURCE | www.artisantg.com
www.baldormotion.com
2-4 Introduction MN1901
Artisan Technology Group - Quality Instrumentation ... Guaranteed | (888) 88-SOURCE | www.artisantg.com

www.baldormotion.com
Basic Installation 3-1MN1901
3.1 Introduction
You should read all the sections in Basic Installation to ensure safe installation.
This section describes the mechanical and electrical installation of the MintDriveII in the
following stages:
HLocation considerations
HMounting the MintDriveII
HConnecting the AC power supply
HConnecting the optional customer supplied 24VDC control supply
HConnecting the motor
HInstalling a regeneration resistor (Dynamic Brake resistor)
HConnecting the feedback device
HConnecting the drive enable input.
These stages should be read and followed in sequence.
3.1.1 Power sources
An AC power source (IEC1010 over-voltage category III or less) in the installation area is
required. This will need to be single or three-phase depending upon the type of MintDriveII.
An AC power filter is required to comply with the CE directive for which the MintDriveII was
tested (see section 3.4.5).
If the MintDriveII requires an external (customer supplied) 24VDC logic supply then this must
be a regulated power supply with a continuous current supply capability of 1.75A (4A power on
surge). A 24V filter may be required to comply with the CE directive for which the MintDriveII
was tested (see section 3.4.5).
3.1.2 Hardware requirements
The components you will need to complete the basic installation are:
HThe motor that will be connected to the MintDriveII
HA motor power cable
HA resolver or encoder feedback cable (and Hall cable for linear motors)
HWith some applications there may be a requirement for a regeneration resistor (Dynamic
Brake).
Note: Without the regeneration resistor, the drive may produce an overvoltage fault.
All MintDriveII models have overvoltage sensing circuitry, but only 2.5A and 5A
models (catalog numbers MDHxxxxxB-xxxx) have an internal regeneration
resistor. For 7.5A, 15A, 20A and 27.5A models a regeneration resistor must be
purchased separately if required. See Appendix A.
3Basic Installation 3
Artisan Technology Group - Quality Instrumentation ... Guaranteed | (888) 88-SOURCE | www.artisantg.com
www.baldormotion.com
3-2 Basic Installation MN1901
HA serial cable.
Note: The serial connector on the MintDriveII (connector X6) can be configured as either
RS232 or RS485 / RS422. Pin 9 is used to carry +8V for powering some Baldor
keypad peripherals. Ensure that pin 9 is not connected to earth/ground or to
equipment that could be damaged by the +8V supply. See sections 4.4.3 to 4.4.4.
A suitable cable is available from Baldor, catalog number CBL001-501.
HA PC (with one free COM port) with the following specification:
Minimum specification Recommended specification
Processor Intel PentiumIII
500 MHz or faster
Intel PentiumIII / 4 or equivalent
1 GHz or faster
RAM 128 MB 1GB
Hard disk space 50 MB 50 MB
CD-ROM ACD-ROMdrive
Screen 1024 x 768, 16-bit color 1152 x 864, 16-bit color
Mouse A mouse or similar pointing device
Operating
system
Windows 2000, Windows XP or Windows Vista
3.1.3 RS485 / RS422 systems
If you will be using RS485 / RS422 and your PC does not have an RS485 / RS422 connector,
an RS232 to 4-wire RS485 / RS422 converter will be required. These commercially available
devices convert the signals from the RS232/RS485 port (connector X6) to the signals
necessary for RS485 / RS422 communications. Special care must be taken with the pin
assignment on all RS485 / RS422 devices, as this can differ between products. Connectors
might need to be rewired to provide the correct pin assignment. The MintDriveII pin
assignment is shown in section 4.4.3.
Note: If this is the first time you are installing a MintDriveII then it is strongly
recommended that you use RS232 to get started and try RS485 later. This will
avoid any potential problems involving the RS232-RS485 converter. Selection of
RS232 or RS485 is controlled using DIP switch 10 - see section 3.9.6.
3.1.4 Tools and miscellaneous hardware
HYour PC operating system user manual might be useful if you are not familiar with
Windows
HA small screwdriver (supplied) with a blade width less than 3mm (1/10 in).
HM5 screws or bolts for mounting the MintDriveII
HCrimping tool.
A connector kit is supplied with your MintDriveII. This contains a number of useful connectors
and a screwdriver for tightening the connections.
Artisan Technology Group - Quality Instrumentation ... Guaranteed | (888) 88-SOURCE | www.artisantg.com
www.baldormotion.com
Basic Installation 3-3MN1901
3.1.5 Other information needed for installation
This information is useful (but not essential) to complete the installation:
HThe data sheet or manual provided with your motor, describing the wiring information of
the motor cables/connectors
HKnowledge of which digital inputs/outputs will be ‘Active Low’, ‘Active High’ or edge
triggered.
Artisan Technology Group - Quality Instrumentation ... Guaranteed | (888) 88-SOURCE | www.artisantg.com
This manual suits for next models
1
Table of contents
Other Baldor Servo Drive manuals

Baldor
Baldor MicroFlex User manual

Baldor
Baldor NextMove BX User manual

Baldor
Baldor 23H Series Installation instructions

Baldor
Baldor UM Series Installation instructions

Baldor
Baldor MotiFlex e100 User manual

Baldor
Baldor MicroFlex e100 User manual

Baldor
Baldor FDH1A05TB-EN20 User manual

Baldor
Baldor Flex+DriveII User manual

Baldor
Baldor VS1SD Owner's manual

Baldor
Baldor FPX A05T Installation instructions