Baldwin Boxall BVRDTSM User manual

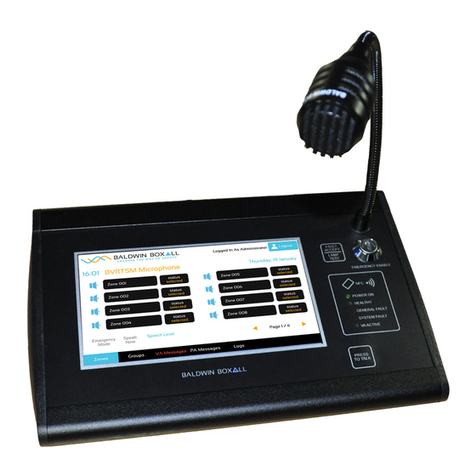
BVRDTSM Touchscreen
Microphone
Installation Instructions
Manual name: BVRDTSM Touchscreen Microphone
Issue: 1
ECR: N/A
Date of issue: an 2017

BVRDTSM Touchscreen Microphone
Installation Instructions
ii
BVRDTSM Touchscreen Microphone issue 1
© an 2017 Baldwin Boxall Communications Limited
Wealden Industrial Estate
Farningham Road, arvis Brook
Crowborough
East Sussex
TN6 2 R
UK
Telephone: +44 (0)1892 664422
Facsimile: +44 (0)1892 663146
Email: [email protected].uk
Website: http://www.baldwinboxall.co.uk
This equipment has been designed and manufactured to conform to the following
EC Standards:
EMC: EN55103-1 Environment Classification: E1,
EMC: EN55103-2 Environment Classification: E5,
Safety: EN60065
Failure to use the equipment in the manner described in the product literature
will invalidate the conformity.
A “Declaration of Conformity” statement to the above standards and a list of
auxiliary equipment used for compliance verification is available on request.

BVRDTSM Touchscreen Microphone
Installation Instructions
BVRDTSM Touchscreen Microphone issue 1
iii
Amendment Record ___________________________________ v
Proprietary Notice ____________________________________ v
Safety Information ___________________________________ vi
Comments_________________________________________ vi
Introduction
Microphone Options & Features __________________________2
Technical Specification _________________________________3
Installation
Hardware Configuration Options _________________________5
Audio Outputs _______________________________________6
Configuration Option - Live Page & AUX____________________7
Description - - - - - - - - - - - - - - - - - - - - - - - - - - - - - - 7
Hardware Required - - - - - - - - - - - - - - - - - - - - - - - - - - 7
Hardware Configuration - - - - - - - - - - - - - - - - - - - - - - - - 8
Cabling and Connection details - - - - - - - - - - - - - - - - - - - - - 9
Configuration Option - Dual Outputs _____________________ 10
Description - - - - - - - - - - - - - - - - - - - - - - - - - - - - - 10
Hardware Required - - - - - - - - - - - - - - - - - - - - - - - - - 10
Hardware Configuration - - - - - - - - - - - - - - - - - - - - - - - 10
Cabling and Connection details - - - - - - - - - - - - - - - - - - - - 11
Configuration Option - Live Page & Hardwired Bypass _________ 12
Description - - - - - - - - - - - - - - - - - - - - - - - - - - - - - 12
Hardware Required - - - - - - - - - - - - - - - - - - - - - - - - - 12
Hardware Configuration - - - - - - - - - - - - - - - - - - - - - - - 13
Cabling and Connection details - - - - - - - - - - - - - - - - - - - - 13
Configuration Option - Live Paging, AUX and Hardwired Bypass__ 14
Description - - - - - - - - - - - - - - - - - - - - - - - - - - - - - 14
Hardware Required - - - - - - - - - - - - - - - - - - - - - - - - - 14
Hardware Configuration - - - - - - - - - - - - - - - - - - - - - - - 15
Cabling and Connection details - - - - - - - - - - - - - - - - - - - - 15
Configuration Option - Dual Outputs & Hardwired Bypass ______ 16
Description - - - - - - - - - - - - - - - - - - - - - - - - - - - - - 16
Hardware Required - - - - - - - - - - - - - - - - - - - - - - - - - 16
Hardware Configuration - - - - - - - - - - - - - - - - - - - - - - - 17

BVRDTSM Touchscreen Microphone
Installation Instructions
iv
BVRDTSM Touchscreen Microphone issue 1
Cabling and Connection details - - - - - - - - - - - - - - - - - - - - 17
BMS8/16 Termination Box _____________________________ 18
Recommended Cable Types____________________________ 18
Operating Instructions
Controls & Indicators ________________________________ 19
Operation_________________________________________ 20
User Accounts- - - - - - - - - - - - - - - - - - - - - - - - - - - - 20
Zone Selection - - - - - - - - - - - - - - - - - - - - - - - - - - - 21
Groups - - - - - - - - - - - - - - - - - - - - - - - - - - - - - - - 22
Recording of User Messages - - - - - - - - - - - - - - - - - - - - - 22
Firmware Configuration
Introduction _______________________________________ 23
Entering Configuration Mode ___________________________ 23
Import / Export Configuration Settings ____________________ 24

BVRDTSM Touchscreen Microphone
Installation Instructions
BVRDTSM Touchscreen Microphone issue 1
v
A
MENDMENT
R
ECORD
P
ROPRIETARY
N
OTICE
All data and information contained within this manual is of a
proprietary nature with the exclusive title to the same held by
Baldwin Boxall Communications Limited. The possession of this
manual and the use of the information is, therefore, restricted
only to those persons duly authorised by Baldwin Boxall
Communications Limited.
Do not reproduce, transcribe, store in a retrieval system or
translate into any language, any part of this manual without the
prior permission of Baldwin Boxall Communications Limited.
n the interest of continual product development, Baldwin Boxall
Communications Limited reserves the right to make changes to
product specification without notice or liability. Use of Baldwin
Boxall Communications Limited products as critical components
in life support systems is not authorised except with express
written approval from Baldwin Boxall Communications Limited.
Change Note
Number
Nature of Amendment Date of
Amendment
N/A Issue 1: First Release an 2017

BVRDTSM Touchscreen Microphone
Installation Instructions
vi
BVRDTSM Touchscreen Microphone issue 1
S
AFETY
I
NFORMATION
Personnel who install, maintain or repair this equipment must
read the safety information below before starting work.
Voltages in excess of 30 Volts RMS or 50 Volts DC are considered
Hazardous and in certain circumstances can be lethal.
f Functional Testing, Maintenance, or Repair is to be completed
with the Mains Power (and/or battery backup) connected then
this should only be undertaken by personnel who are fully aware
of the danger involved and who have taken adequate precautions
and training.
This Manual contains Warnings, Cautions and Notes.
Warnings describe potential threats to health or life, e.g.
Cautions describe potential threats to the equipment, e.g.
Notes are statements that are useful to the user in the context of
a particular section of the manual, e.g.
C
OMMENTS
Comments regarding the content of this manual are welcome and
should be addressed to m[email protected].uk.
!
WARNI NG
Before attempting to remove this component, ensure the Mains
Power Supply and Battery Backup have been disconnected.
CAUT I O N
Notice must be taken of all cautions.
If a Caution is ignored the equipment may be damaged.
CAUT I O N: ELEC TR O -T AT IC EN IT IVE DEVICE
Observe the relevant precautions for the protection of Electro-
static Sensitive Devices when handling this equipment.
NOTE: Do not speak into the microphone until the "Speak Now" LED is
illuminated.

BVRDTSM Touchscreen Microphone
Installation Instructions
BVRDTSM Touchscreen Microphone issue 1
1
1 Introduction
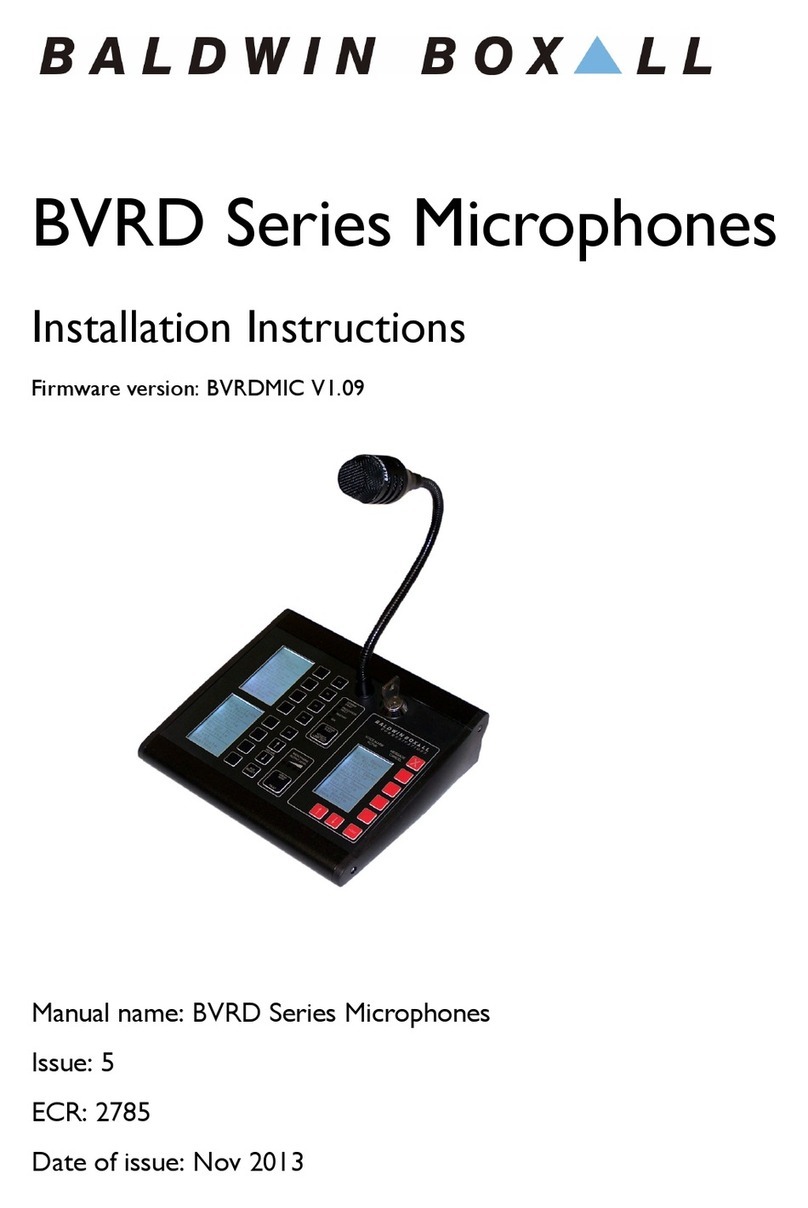
The BVRDTSM Touchscreen Microphone has been designed to
provide a wide variety of features suitable for any installation.
Figure 1.1 — BVRDTSM Microphone
The Microphone is configured during commissioning using the in
built touchscreen. Standard RJ45 Network cable connections
(carrying both Audio and Serial Data) are employed, in order to
make installation simple and flexible.

BVRDTSM Touchscreen Microphone
Installation Instructions
2
BVRDTSM Touchscreen Microphone issue 1
1.1 M
ICROPHONE
O
PTIONS
& F
EATURES
The BVRDTSM microphone includes the following features as
standard:
• Fully monitored microphone, speech and data paths
• Ergonomic design with all buttons and displays mounted
behind a stylish overlay
• Performs as a Paging microphone (with emergency options
disabled) and as a Fire microphone only when the key switch
is turned
• 7" high brightness, capacitive touchscreen
• NFC Smart card access control with configurable
permissions per user
• Record, Preview and Broadcast non-emergency messages
• Scheduler to enable timed broadcast of non-emergency
messages
• Route background music sources to all zones
• Zone programmable volume adjustment
• Connect a background music source directly to the
microphone
• USB import and export of non-emergency messages,
configuration files and logs (fault and activity)
• All configuration performed via touchscreen, no other tools
required
• “Speak Now” indicator to show the user when a pre-
announcement chime has finished
• Simple bar graph display shows the user the current speaking
volume to ensure a clear announcement is made
• Ability to select router stored emergency messages
• Voice alarm system Active indicator
• Option to add emergency “All Call” bypass facility
• Option for dual output facility (audio, data and power) for
connection to dual systems

BVRDTSM Touchscreen Microphone
Installation Instructions
BVRDTSM Touchscreen Microphone issue 1
3
1.2 T
ECHNICAL
S
PECIFICATION
Audio
Nominal Output Level 0dBM
Max Output (limiter operating) +6dBM
Output Impedance 180R
Frequency Response (-3dB) 200Hz - 12KHz
Power Requirement (24V DC)
Standby 0.175A
In Use 0.36A
erial Data Link (See note below)
RS485 Type 2 Protocol, 9600 Baud, 8 bit,
Even Parity, 1 Stop Bit
Dimensions (W x H x D)
BVRDTSM 275mm x 48mm x 177mm
NOTE: The RS48 Protocol is configured during the commissioning
process, the default values are shown above.

BVRDTSM Touchscreen Microphone
Installation Instructions
4
BVRDTSM Touchscreen Microphone issue 1

BVRDTSM Touchscreen Microphone
Installation Instructions
BVRDTSM Touchscreen Microphone issue 1
5
2 Installation
2.1 H
ARDWARE
C
ONFIGURATION
O
PTIONS
There are 4 hardware configuration options accessible by
removing the left and right side panels of the BVRDTSM. These
and their functions are shown in the images and tables below;
Figure 2.1 — BVRDTSM RH Hardware Options
Tab e 2.1 — BVRDTSM RH Hardware Options
Figure Marked as Function
A A-DC Mon / Park Default: A-DC Mon
A-DC Mon: Applies a DC Voltage for monitoring
purposes to the audio transmission path
Park*: No DC present, set to Park if Audio input is not
transformer isolated

BVRDTSM Touchscreen Microphone
Installation Instructions
6
BVRDTSM Touchscreen Microphone issue 1
Figure 2.2 — BVRDTSM LH Hardware Options
Tab e 2.2 — BVRDTSM LH Hardware Options
2.2 A
UDIO
O
UTPUTS
The BVRDTSM is equipped with 2 Audio Outputs OP1 and OP2.
OP1 is used for Live paging broadcasts. OP2 can be configured
for either;
Figure Marked as Function
B All Call / Park Factory Fit Option
All Call: Set on microphones with All Call Bypass button
Park: Set on microphones without All Call Bypass button
C Dual OP / BGM Default: BGM
Dual OP: Microphone audio routed out of OP1 and OP2
BGM: AUX Audio routed out of OP2
See section 2.2 for more details
NOTE: * If park is selected "Protocol Faults (BVRD2M MB
F/W 2.00 and above)" must be also be disabled in the
configuration. This enables compatability with legacy
systems
Figure Marked as Function
A Test / Park Default: Park
Factory use only
B 3V3 / Park* Default: Park
Park: Hardware Bypass Access Level = 10V
3V3: Hardwired Bypass Access Level = 3V3
NOTE: * Option label on underside of PCB. Hardwired
Bypass Access Level must match connected BVRD2M or
BVRD2M4 configured level. See manuals for these products
for more details.

BVRDTSM Touchscreen Microphone
Installation Instructions
BVRDTSM Touchscreen Microphone issue 1
7
• AUX Output (broadcast of microphone stored none
emergency messages or routing of local background music
connection)
• Dual Output (OP1 and OP2 carry live paging broadcasts for
dual redundant systems)
See Hardware Configuration section for more details on how to
change the Audio Output Configuration.
n order to simplify cabling requirements by default the
BVRDTSM also carries the AUX Output on OP1. This means
that the microphone can be installed using a single CAT6A cable.
f a Hard Wired Bypass is fitted to the microphone (factory fit
option) then the AUX Output is not available on OP1 so therefore
OP2 must also be connected.
Please see the following sections for details of site connections
and hardware configuration for all Audio Output options.
2.3 C
ONFIGURATION
O
PTION
- L
IVE
P
AGE
& AUX
2.3.1 Description
This is the default configuration of a BVRDTSM and enables;
• Live Paging and Emergency Paging Broadcasts
• Broadcasting of microphone stored none emergency
messages
• Routing of a locally connected background music source
(microphone messages take priority and if triggered will stop
local background music routing)
2.3.2 Hardware Required
n order to support this BVRDTSM configuration the following
additional equipment is required;

BVRDTSM Touchscreen Microphone
Installation Instructions
8
BVRDTSM Touchscreen Microphone issue 1
• BMS8 - required to terminate the BVRDTSM microphone
CAT6A lead to site wiring
• BVRD F7 - required to terminate the site wiring to a Voice
Alarm rack
• 1 x CAT6A cable
Optional Equipment;
• Background Music Source (if required) connected to AUX
N jack socket on rear of the BVRDTSM
• Headphones connected to H/SET OUT jack socket on the
rear of the BVRDTSM (allows previewing of recorded
messages before broadcast)
2.3.3 Hardware Configuration
The following hardware options must be set to support this
configuration;
Option Jumper Position
A-DC Mon / Park Don’t Care*
All Call / Park Park
Dual OP / BGM BGM
+3V3 / Park Don’t Care*
NOTE: * see section section 2.1above for more information

BVRDTSM Touchscreen Microphone
Installation Instructions
BVRDTSM Touchscreen Microphone issue 1
9
2.3.4 Cabling and Connection details
Please see Table below for details of Site Wiring connections;
Mic OP
(CAT6A)
BM 8
(CAT6A)
BM 8 ( ite
Wiring)
Cable BVRDIF7 ( ite
Wiring
1 1
+V
4 Core 1
+V
0V 0V
RS485-A RS485-A
RS485-B RS485-B
Audio CH1 (Paging)
4 Core 2
Audio CH1 (Paging)
Audio CH1 (Paging) Audio CH1 (Paging)
Audio CH2 (AUX) Audio CH2 (AUX)
EMC Shield of cable 1&2 EMC
2 Not Used

BVRDTSM Touchscreen Microphone
Installation Instructions
10
BVRDTSM Touchscreen Microphone issue 1
2.4 C
ONFIGURATION
O
PTION
- D
UAL
O
UTPUTS
2.4.1 Description
This is an optional configurational that can be configured by the
end user it allows;
• Live Paging and Emergency Paging Broadcasts to 2
independent Voice Alarm systems (dual redundant)
2.4.2 Hardware Required
n order to support this BVRDTSM configuration the following
additional equipment is required;
• BMS16 - required to terminate the BVRDTSM microphone
OP1 and OP2 to site wiring
• 2 x BVRD F3 - one required per voice alarm system
• 2 x CAT6A cable
Optional Equipment;
• None
2.4.3 Hardware Configuration
The following hardware options must be set to support this
configuration;
NOTE: Broadcasting of microphone stored messages or local
background music source is not possible in this configuration
Option Jumper Position
A-DC Mon / Park Don’t Care*
All Call / Park Park
Dual OP / BGM Dual OP
+3V3 / Park Don’t Care*

BVRDTSM Touchscreen Microphone
Installation Instructions
BVRDTSM Touchscreen Microphone issue 1
11
2.4.4 Cabling and Connection details
Please see Table below for details of Site Wiring connections;
NOTE: * see section section 2.1above for more information
Mic OP
(CAT6A)
BM 16
(CAT6A)
BM 16 Channel 1
( ite Wiring)
Cable BVRDIF3 Rack 1
( ite Wiring)
1 Channel 1
+V
4 Core 1
+V
0V 0V
RS485-A RS485-A
RS485-B RS485-B
Audio CH1 (Paging)
4 Core 2(or 2 Core)
Audio CH1 (Paging)
Audio CH1 (Paging) Audio CH1 (Paging)
Not Used Not Used
Not Used Not Used
EMC Shield of cable 1&2 EMC
BM 16 Channel 2
( ite Wiring)
BVRDIF3 Rack 2
( ite Wiring)
2 Channel 2
+V
4 Core 3
+V
0V 0V
RS485-A RS485-A
RS485-B RS485-B
Audio CH2 (Paging)
4 Core 4 (or 2 Core)
Line (Paging)
Audio CH2 (Paging) Line (Paging)
Not Used Not Used
Not Used Not Used
EMC Shield of cable 3&4 EMC

BVRDTSM Touchscreen Microphone
Installation Instructions
12
BVRDTSM Touchscreen Microphone issue 1
2.5 C
ONFIGURATION
O
PTION
- L
IVE
P
AGE
& H
ARDWIRED
B
YPASS
2.5.1 Description
The addition of Hardwired Bypass is a factory fit option. f this
option is fitted then it is possible to configure the microphone for
Live paging and Hardwired bypass enabling;
• Live Paging and Emergency Paging
• Performing an All Call utilising the Hardwired Bypass inputs
of a Baldwin Boxall router.
2.5.2 Hardware Required
n order to support this BVRDTSM configuration the following
additional equipment is required;
• BMS8 - required to terminate the BVRDTSM microphone
CAT6A lead to site wiring
• BVRD F3 - required to terminate the site wiring to a Voice
Alarm rack
• 1 x CAT6A cable
Optional Equipment;
• None
NOTE: Broadcasting of microphone stored messages or local
background music source is not possible in this configuration

BVRDTSM Touchscreen Microphone
Installation Instructions
BVRDTSM Touchscreen Microphone issue 1
13
2.5.3 Hardware Configuration
The following hardware options must be set to support this
configuration;
2.5.4 Cabling and Connection details
Please see Table below for details of Site Wiring connections;
Option Jumper Position
A-DC Mon / Park Don’t Care*
All Call / Park All Call
Dual OP / BGM Don’t Care*
+3V3 / Park Must match the hardwired bypass access level of the
connected Baldwin Boxall router (3V3 = 3V3, Park =
10V)
NOTE: * see section section 2.1above for more information
Mic OP
(CAT6A)
BM 8
(CAT6A)
BM 8 ( ite
Wiring)
Cable BVRDIF7 ( ite
Wiring
1 1
+V
4 Core 1
+V
0V 0V
RS485-A RS485-A
RS485-B RS485-B
Audio CH1 (Paging)
4 Core 2
Audio CH1 (Paging)
Audio CH1 (Paging) Audio CH1 (Paging)
Access Access
0V 0V
EMC Shield of cable 1&2 EMC
2 Not Used

BVRDTSM Touchscreen Microphone
Installation Instructions
14
BVRDTSM Touchscreen Microphone issue 1
2.6 C
ONFIGURATION
O
PTION
- L
IVE
P
AGING
, AUX
AND
H
ARDWIRED
B
YPASS
2.6.1 Description
The addition of Hardwired Bypass is a factory fit option. f this
option is fitted then it is possible to configure the microphone for
Live paging, AUX output and hardwired bypass enabling;
• Live Paging and Emergency Paging Broadcasts
• Broadcasting of microphone stored none emergency
messages
• Routing of a locally connected background music source
(microphone messages take priority and if triggered will stop
local background music routing)
• Performing an All Call utilising the Hardwired Bypass inputs
of a Baldwin Boxall router.
2.6.2 Hardware Required
n order to support this BVRDTSM configuration the following
additional equipment is required;
• BMS16 - required to terminate the BVRDTSM microphone
OP1 and OP2 to site wiring
• 2 x BVRD F3 - 2 required in order to interface all the
required signals to a voice alarm rack.
• 2 x CAT6A cable
Optional Equipment;
• Background Music Source (if required) connected to AUX
N jack socket on rear of the BVRDTSM
• Headphones connected to H/SET OUT jack socket on the
rear of the BVRDTSM (allows previewing of recorded
messages before broadcast)
Other manuals for BVRDTSM
2
Table of contents
Other Baldwin Boxall Microphone manuals

Baldwin Boxall
Baldwin Boxall BDM 208 User manual

Baldwin Boxall
Baldwin Boxall BDM300 User manual

Baldwin Boxall
Baldwin Boxall BFM 400 User manual

Baldwin Boxall
Baldwin Boxall BDM201 User manual

Baldwin Boxall
Baldwin Boxall BVR16M User manual

Baldwin Boxall
Baldwin Boxall BVRDTSM User manual

Baldwin Boxall
Baldwin Boxall BVRAMB User manual

Baldwin Boxall
Baldwin Boxall BDM 204 User manual

Baldwin Boxall
Baldwin Boxall BDM 400 User manual

Baldwin Boxall
Baldwin Boxall BVRDTSM Operating and maintenance manual