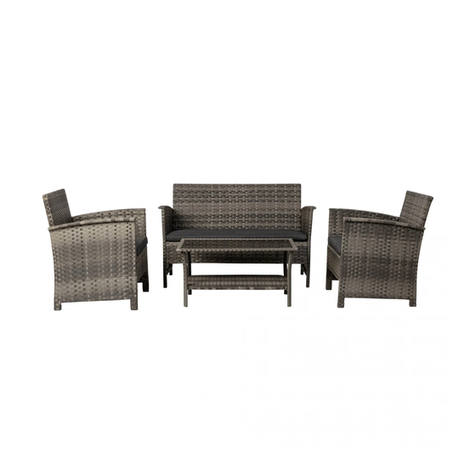
Balkene Home Vega 62772 User manual

9HJD2XWGRRU$UPFKDLU
Item#: Ǽ¼Ç¿¿µtÁÑ_¾>U¿7gLLy¿
½Ç¼¼Ã¿¿ >Áɵ>¿-Á>¾>¿µ_
½Ã½Ãw¿¿ >Áɵ>¿-Á>¾ >ÐÓ¿µ_
½Ã½Ãu¿¿ >Áɵ>¿-Á>¾µ>Ó¿µ_
SAVE THESE
INSTRUCTIONS FOR
FUTURE REFERENCE.
ATTACH YOUR
RECEIPT HERE
Keep a copy of your proof of purchase
µ¿µ_gµ¿UÚµ>Á¿ÑU¿Ñ¿Lg¿
needed if you need to contact us
>LÉÁ¿Ñ>µµ>ÁÓ¿UÐgµ>yg¦
Purchase Date:
+Åg¶¿¶\½³Lg¶\½¶¶y½>³¿¶©½
Before returning to your retailer, our exceptional customer service is available.
0805
Call toll-free (866) 985-7877 9 a.m. – 9 p.m., EST
Live chat www.balkenehome.com 9 a.m. – 6 p.m., EST, Mon-Fri

Á>UÁ¿É¸¿tµ¿>¸¸¸Á>Ug[¿¿£l½½¤¿lu¼l¼¼¿¿N¿¿ÑÑѦL>ggg¦U¿ ¿¿¿¿¿¿Ç
INFORMATION
%
%()25(<28%(*Ζ1
%HIRUHEHJLQQLQJDVVHPEO\PDNHVXUHDOOSDUWVDUHSUHVHQW&RPSDUHSDUWVUHFHLYHGZLWKWKHȊ3DUWV/LVWȋΖI
DQ\SDUWLVPLVVLQJRUGDPDJHGGR127DWWHPSWWRDVVHPEOHWKHSURGXFW3OHDVHUHDGDQGXQGHUVWDQGWKLV
HQWLUHPDQXDOEHIRUHDWWHPSWLQJWRDVVHPEOHRSHUDWHRULQVWDOOWKLVSURGXFWΖI\RXKDYHDQ\TXHVWLRQV
UHJDUGLQJWKHSURGXFWSOHDVHFRQWDFW&XVWRPHU6HUYLFH
*(1(5$/Ζ1)250$7Ζ21
<RXUQHZFKDLULVPDGHIURPWKHILQHVWPDWHULDOVDYDLODEOHΖWVKRXOGSURYLGHPDQ\\HDUVRIHQMR\PHQWZLWK
PLQLPDOFDUH7KLVFKDLULVLQWHQGHGIRURXWGRRUXVHEXWDVZLWKDOOZRRGSURGXFWVLWZLOODJHIDVWHUZLWK
H[SRVXUHWRWKHZHDWKHUDQGVXQ
)RUEHVWUHVXOWVNHHS\RXUFKDLUFOHDQDQGGU\&OHDQZLWKDVRIWGDPSFORWKΖI\RXXVHIXUQLWXUHFRYHUV
DOZD\VPDNHVXUHWKHFKDLULVFOHDQDQGFRPSOHWHO\GU\EHIRUHFRYHULQJDVPROGPD\IRUPLQGDUNZHW
SODFHV%HWZHHQXVHVDQGZKHQVHDVRQDOO\RXWRIXVHVWRUHWKLVFKDLULQDGU\WHPSHUDWXUHFRQWUROOHGSODFH
WRSURORQJLWVXVHIXOOLIHVSDQ&KHFNWKHKLQJHVRQ\RXUFKDLUUHJXODUO\WRPDNHVXUHWKH\DUHVHFXUH
7RDYRLGGDPDJLQJWKHFKDLUGRQRWGUDJZKHQPRYLQJ
7KHZHLJKWOLPLWIRUWKLVFKDLULV/%.*
6$)(7<Ζ1)250$7Ζ21
:$51Ζ1*
'2127VWDQGRUDOORZFKLOGUHQWRVWDQGRQWKLVFKDLU0DNHVXUHFRQQHFWRUVDUHVHFXUHO\LQSODFH3HUIRUP
SHULRGLFFKHFNVWRPDNHVXUHWKHFRQQHFWRUVDUHVHFXUHDQGDGMXVWLIQHHGHG
&$87Ζ21
5($'DOOLQVWUXFWLRQVEHIRUHEHJLQQLQJDVVHPEO\)DLOXUHWRGRVRPD\UHVXOWLQIDXOW\DVVHPEO\DQGSRWHQWLDO
LQMXU\$VVHPEOHWKHLWHPRQDVRIWQRQDEUDVLYHVXUIDFHVXFKDVFDUSHWRUFDUGERDUGWRDYRLGGDPDJLQJ
WKHLWHP

Á>UÁ¿É¸¿tµ¿>¸¸¸Á>Ug[¿¿£l½½¤¿lu¼l¼¼¿¿N¿¿ÑÑѦL>ggg¦U¿ ¿¿¿¿¿¿Ã
PARTS LIST
*,/ -,*/" +1 //9
Seat¿>U
-g>Á
gtÁ¿µ¾gy
µ>Ug
,7,½" / /-
-U³gͽºÎÕ
+¿Ï[½w
¿½»Îwu
+¿Ï[½w
gν7³gU
,yÁ¿µ¾gy
+¿Ï[½
7>¶g³½ÄÕ
+¿Ï[½»
NOTE: Assembly of this item involves Mortise and Tenon Joints. A Mortise is a notch or hole in a piece of
wood designed to receive a Tenon of corresponding dimensions.
WARNING: Assemble in a clear area on a spacious, nonabrasive surface such as a carpet or blanket. Do
NOT over-tighten hardware, or you risk stressing or cracking the wood.
TIP: As you proceed through assembly, be sure to insert each Screw/Bolt STRAIGHT into the receiving
hardware or threaded hole. Insertion at an angle can strip the threads and prevent secure connections.
Do NOT fully tighten any hardware connection until the entire chair is assembled. Then, go back and
fully tighten each bolt.

Á>UÁ¿É¸¿tµ¿>¸¸¸Á>Ug[¿¿£l½½¤¿lu¼l¼¼¿¿N¿¿ÑÑѦL>ggg¦U ¿¿¿¿¿¿w
PREPARATION
%HIRUHEHJLQQLQJDVVHPEO\EHVXUHWRHPSW\FRQWHQWVRIFDUWRQDQGPDNHVXUHDOOSDUWVDUHSUHVHQWΖIDQ\SDUWV
DUHPLVVLQJSOHDVHFRQWDFW&XVWRPHU6HUYLFH
3ODFHDOOSDUWVRQDVRIWOHYHOVXUIDFHIRUDVVHPEO\(VWLPDWHG$VVHPEO\7LPH0LQXWHV
'2127RYHUWLJKWHQKDUGZDUH2YHUWLJKWHQLQJKDUGZDUHFDQFDXVHZRRGWRFUDFN
ASSEMBLY
Ä
Assemble the seat: insert the tenon at the bottom of
each side of Seat Back A into the corresponding mortise
drilled opposite the curve of the Seat B as shown. Insert
a Screw 1 through the hole drilled in the inside of the
curve and finger-tighten into the Seat Back. Repeat to join
the other side.
Hardware Used: 1 Screw (7x90) x2
Connect the Arms C/D and Brace E: insert the tenon
at one end of the Brace E into the corresponding mortise
in the side of Right Arm/Leg D. Loosely fasten the two
pieces together using a Screw 1 with Washer 3.
Repeat to attach the Brace to the Left Arm/Leg C.
Attach the Arms to the assembled Seat B: locate the
hole drilled on the front right side of the seat (a few inches
back from the front edge) and align it with the hole drilled
above the notch in the front right leg, resting the side of
the seat on the notch in the inner edge of the right leg.
Connect the two pieces using a Bolt 2 with Washer 3.
Finger-tighten, then repeat to attach the left side.
Attach the Arms to the Seat Back: align the hole drilled
through the back end of the right arm with the hole about
halfway down the right side of the Seat Back A. Insert a
Bolt 2 with Washer 3 and finger-tighten to join. Repeat
to attach the left side.
Check that the chair sits level on the ground, then fully
tighten all hardware, being careful not to over-tighten.
Your Vega chair is ready for use!
Hardware Used: 1 Screw (7x90) x2
2 Bolt (6x45) x4
3 Washer x6

/
7
,,
/
9
Ŷ¿g³¶½½¿
g½¿
y
ÅŶ½1
-
7¿½
³t½t½
ųU>¶g½t³½>½>Å¿³Óg_½³g¿>g
³
\¿
Á
¸¿
¡
µ_ÉU
Á
¿
¸
¿Ñ>µµ>Ág_¿
tµ¿>¿¡gµ_¿t¿¿Óg>µ¿tµ¿µy>¿¡ÉµU>¸g¿_>Ág¿>y>¸Á¿_gtgUÁ¸¿¿>Ágµ>¸
>_¿Ñµ>¸
¡
¿É_gµ¿µ>¿É¸g¦¿/¸¿Ñ>µµ>ÁÓ¿_g¸¿ "/¿UÐgµ¿µ>
Ñg>µ¾Ñg>Ágµ
y
\
g
Ò¡¸Éµg¿Á¿Ñ>Ágµ\¿tµgg×y¿Ág¡gµ>Áɵg¸\¿¸\¿tÉ_¸\¿µ
UgU>
¸
¿",¿É¸g¿¿>¿UgµU>¿UÁgÒÁ¿t¿Ág¿ÉÁ¿¸¿Á¿_g¸
y
>Ág_¿>¸¿>
UgµU>
¿
_
g
¦
¿
Á¿7g
¿/µ>Ðg
g
_
¿Ð
y
²
¸¿¸
g¿
_
¸UµgÁ\¿¡µ
_
ÉUÁ¸¿É
_
gµ¿
Ñ>µµ>ÁÓ¿Ñ¿Lg¿µg
¡
>µg_¿>_¾µ¿µg
¡
>Ug_¿>Á¿¿U>µyg¿Á¿Ág¿UɸÁgµ¦
,gÁɵ¸¿¸gÁ¿L>U¿Á¿7g¿/µ>Ðgg_¿Ðy¿É¸Á¿Lg¿¸gÁ¿Ð>¿¡µg¡>_¿tµgyÁ¿
Ág¿µy>¿µgÁ>¿¡>U>yy¦
µ¿Ñ>µµ>ÁÓ¿¸gµÐU
g
\
¿UÁ>UÁ¿>gg¿
g
¾7g¿/µ>Ðgg_¿Ð
y
¿>Á¿Ág¿
>__µg¸¸\¿¡g¿ÉLgµ¸¿µ¿ÑgL¸Ág¿>_¿g>¿¸Ág_¿¿Á¸¿Ñgµ²¸¿>É>¦
g¿¸Éµg¿Á¿>Ðg¿Óɵ¿¸>g¸¿µgUg¡Á\¿_>Ág¿t¿¡ÉµU>¸g¿>_¿U>Á>yÉg¾_g
ÉLgµ¸¿>Ð>>Lg¿Ñg¿U>y¦¿¿Ñ>µµ>ÁÓ¿¸gµÐUg¿Ñ¿Lg¿Uµ_>Ág_¿LÓ
7g¿/µ>Ðgg_¿Ð
y
´
¸
¿g>¿¸>_\¿µ_>¿¸gµÐUg¿UgÁgµ¦¿/¸¿Ñ>µµ>ÁÓ¿¸
gÒÁg_g_¿Ó¿Á¿Ág¿µy>¿Ñgµ¦¿*µt¿t¿¡ÉµU>¸g¿Ñ¿Lg¿µgªÉµg_¿Lgtµg
Ñ>µµ>ÁÓ¿¸gµÐUg¿¸¿µg_gµg_¦¿/g¿¸>g¸¿µgUg¡Á¿¸¿Ág¿Ó¿Ð>_¿¡µt¿
t
¿
¡ÉµU>¸g¦¿/¸¿Ñ>µµ>ÁÓ¿Ó¿UÐgµ¸¿t>ɵg¸¿_Ég¿Á¿_gtgUÁ¸¿¿>Ágµ>¸¿µ
ѵ>¸¡¿ÑU¿UUɵ¿_ɵy¿µ>¿É¸g¦¿>ɵg¸¿>_¾µ¿_>>yg¿ÑU
µg¸ÉÁ¿tµ¿>UU_gÁ\¿gyygUg\¿¸É¸g\¿>Lɸg\¿gygUÁ\¿¸>_y\
>Ágµ>Á¿µ¿_tU>Á\¿t>ɵg¿Á¿>Á>\¿¡µ¡gµ¿>¸¸gLÓ¿µ
>Ág>Ug\¿¸gµÐUg¿LÓ¿É>ÉÁµ×g_¿>ygUÓ¿µ¿É¸g¿t¿É>ÉÁµ×g_
U¡gÁ¸¿µ¿_>>yg¿Á>Á¿¸¿>ÁÁµLÉÁ>Lg¿Á¿>UÁ¸¿t¿_¿>µg¿ "/¿UÐgµg_
¦
/¸¿Ág_ Ñ>µµ>Á
Ó
¿
y
Ðg¸¿ÓÉ¿¸¡gUtU¿gy>¿µyÁ¸¿>_¿ÓÉ¿>Ó¿>¸¿>Ðg
Ágµ µ
y
Á¸ ÑU¿Ð>µÓ¿tµ¿Éµ¸_UÁ¿Á¿Éµ¸_UÁ¦¿/g¿¡µÐ¸¸¿t¿Ág¿
1Ág_¿ >Á¸¿ÐgÁ¿¿Áµ>UÁ¸¿tµ¿Ág¿->g¸¿t¿_¸¿¸>¿Á¿>¡¡Ó¿
Á¿Á¸¿Ág_ Ñ>µµ>ÁÓ¿µ¿Ág¿¸>g¿t¿
¡
µ_ÉUÁ¸¿UÐgµg_¿LÓ¿Á¸¿Ág_
Ñ>µµ>ÁÓ
¦
T /
,
,½ "½8*,--½7,, /-½8*/½-
-
/
¤
T ½*1,
-
,½
--
1
-
½ ,
-
-
½ ½/½
--
9½ ½
"
*,/
"
½
"
½/
-
½1
/
¤
T ½1,½/
"
½
"
"
7 7,
-
½
½
"
*,/
"
-
/,1
/
"
-
½
"
/ ½
/
-
½ 1
½,
-
1/ ½
-
6,½*,
"
*,/9½
¼
",½*,
-"
1
,
9
¤
T ½ ½ "½6 / 7½7½/,6½6 \½",½
/-½,/",-\½",-½",½ /-½
½
/"½/½*1,-,½",½ 9½/,½*,/9\½
7/,½ ½" /,/\½ ½/",/\½"
,
½"
9
½
"/
,
½
--\½",½ 9½ ,/\½-*
\½
*
1 /6\½8
*
,9\½" -+1 /
\½"
,
½
/ "--\ "-/\½",½ ,- ½
"1/½"½",½ ½" /"
7
/½/½-\½
/ \½1-\½",½
/
9½ /"½1-½/½
*,"1/\½6 ½½7
½
/
,
6
6 ½",½
/-½,/",-\½",-½",½ /-½6½
½
6-½"½/½*"--
/9½ "½-1½"---\½
"-/-½",½-\½",½ -1½"---\½"-/-\½
"
,
½-½,½",-
¤½ ½ "½6 /½
7
½7½/
,
6
½6 \½",½/-½",-\½
,/",-\½",½ /-½
½
½",½ 9½
,/
"
---\
"-/-½",½-½//½
8½/½*1,-½*,½"½/½*,"1/¤
T ½-"½1,-/" -½"½ "/ "7 /
81-" ½",½
//" "½ / ",½
" -+1 /
-\½-"½/½
"6½
//" ½",½ 8
1-"
9
½ "/½
**
9
½/"
/½*1,-,¤
³¿>¿½ ¿Ug
½ "/½³g¿Å³½¿½>Ug½t½Å³U>¶g#tµ¿UɸÁgµ¿¸gµÐUg¿>_¿Ñ>µµ>ÁÓ¿¸¸Ég¸[
>¿Átµgg¿
>¿
Ðg¿U>Á¿
¢l»»£ luºlºº ¿>¦¦¿o¿¿¡¦¦\¿-/
U¶g³ÌUgJÍg¿³>Ìgg_¤g¿
L>ggg¤U¿¿>¦¦¿¿½¿¡¦¦\¿-/\¿_>Ó¿¿µ_>Ó
¶¿³LÅ¿g_½LÏ[
7g¿/µ>Ðgg_¿Ðy
@4ABB"C)BC<!!CB/!.+B>.0 BBDELD'¿
L>ggg¦U
>!<G+!H!..C<G!.! 80!C
6"AA7B1"&*@"@@
+<!B!0>!=
B *>Á¿ -g¸g\¶¿ Ð>¿g\¶¿3,G!BF0=
B F.0=
¿¿>gg¿g¶¿0 B!..B<G!.! B+G+0(=B<!B<!(+>C!<! BC< !/<->B3%B
!..B<G!.! B/53<C>B0=
8B ..B>>!/.JB+0>C<FC+30B5<!>!0CC+30>B<!BC)!B5<35!<CJB3%B!..B<G!.! B/53<C>B08
=B0 B<!B5<3C!C! BJB
88B35J<+()C>B0 BC< !/<->8B..B<+()C>B<!>!<G! 8
8/ ½9"1,½7,, /9
7g¿ÓÉ¿¡ÉµU>¸g¿>¿µg¿-g¸g¿µ¿>gg¿g¿¡µ_ÉUÁ¿tµ¿>Ó¿>ÉÁµ×g_¿µgÁ>gµ\¿ÓÉ´¿>Ðg¿¡g>Ug¿
t¿_¿¿Ñy¿Á>Á¿Á¿Ug¸¿ÑÁ¿>¿gÓg>µ¿Ñ>µµ>ÁÓ¦¿ÒÁg_¿Óɵ¿Ñ>µµ>ÁÓ¿tµ¿an additional year¿
Ñg¿ÓÉ¿µgÐgÑ¿Óɵ¿Ág¿>Á¿L>ggg¤U½ÑÁ¿Ã½u¿_>Ó¸¿t¿¡ÉµU>¸g¦
This manual suits for next models
3
Table of contents
Other Balkene Home Outdoor Furnishing manuals
Popular Outdoor Furnishing manuals by other brands

CASARIA
CASARIA 994884 Assembly instructions

Sunjoy
Sunjoy G-GZ006PWI Assembly instructions

PURPLE LEAF
PURPLE LEAF 10x12 BRONZE HARDTOP GAZEBO WITH DOUBLE ROOF Assembly manual

Sunjoy
Sunjoy MALIBU 10'X12' GAZEBO Assembly instructions

Costway
Costway HW63199 user manual

for Living
for Living Crawford L-GZ385PST Assembly instructions

Hesperide
Hesperide Rubby 165584 manual

Solid
Solid KIOSK S7774 manual

pure cube
pure cube PG990C Assembly instructions

Yardistry
Yardistry YM12944 Installation and operating instructiontructions

Kettler
Kettler WIRE 0106419 Assembly & operating instructions

Garden Oasis
Garden Oasis SS-K-138-2NGZ13 Use and care guide