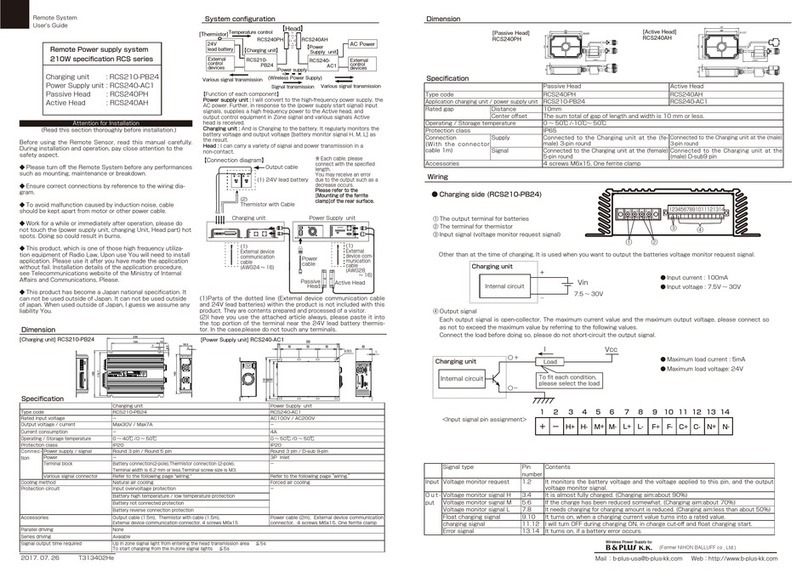
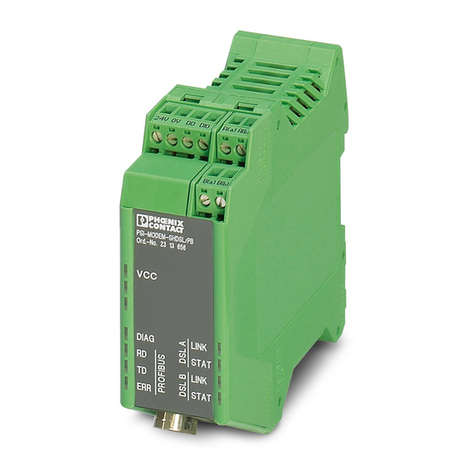
B&PLUS RCD22T-211-CLC User manual

Remote System
User’s Guide
https://www.b-plus-kk.jp/ E-mail [email protected]
Demensions
Construction of the system
【Function of each Component】
Remote Mounted on a moving side. It transmits CC-Link data to the Base and supplies power to connected CC-Link interface device.
Base Mountes on the fixed side. It transmits CC-Link data to the Remote and supplies power to the Remote inductively through air-gap.
Remote Coupler System
CC-Link version
Remote part :RCD22T-211-CLC
Base part part:RCD22E-211-CLC
*Compatible with CC-Link Ver.1.10/Ver.2.0.
No settings for station type, number of occupied stations, etc.
are required.
*The built-in DIP switches can be used only to set the
communication speed and internal terminating resistor.
*No communication problem even if multiple remote coupler
system CC-Link specifications are used.
0
1
2
3
4
5
6
7
8
-2-4
-6-8-10 2 4 6 8 10
Y
X
mm
Output current ≦ 2A
Type number A(mm) B(mm) C(mm)
RCD22T-211-CLC 50 45 300
RCD22E-211-CLC
T312101Oe
2022.11.15
終端
抵抗
CC-Link
ユ ニ ット
機器
CC-Link
ユ ニ ット
CC-Link
ユ ニ ット
CC-Link
ユ ニ ット
CC-Link
ユ ニ ット
電源
24V DC
終端
抵抗
終端
抵抗
終端
抵抗
CC-Link
ユ ニ ット
機器
Remote part
Base part
The built-in terminating
resistor SW4 in this
conguration example
is set to Base part part
OFF and Remote part
ON.
X:Center off set (mm)
Y:Transmitting distance (mm)
LED indication
Installation
A
B
C
(^_^) (^_^)
Specications
Master
unit
CC-Link
unit
CC-Link
unit
CC-Link
unit
CC-Link data
Terminator
Power supply
24V DC
Terminator
Power supply
-Design the product so that it can be used under the wiring
and ambient conditions specified in the specifications. Also,
design the product to meet the requirements for "transmission
distance," "axis misalignment," "output voltage," and "output
current.
Designing out of the specifications may cause unexpected
malfunctions, troubles, or failures due to deterioration of internal
components.
-In remote coupler systems, the control signal may become
unstable outside of specication. If it aects the operation of
the equipment, start data communication after it is within the
specication range.
-Be sure to attach the included ferrite clamp (gray) to the communication
cable and power cable in two turns, and attach the ferrite clamp (white) to the
communication cable and power cable together in one turn within 20 cm from
the Base part part and Remote part main unit. Figure 2. (Figure 2)
Remote:RCD22T-211-CLC
RCD22T-211-CLC
75
90
90
75
97
63
4-φ5.5
4-φ10 depth 6
FG(faston 0.25")
45
30
10
④②
①
③
①
② ④
Status LED(Green/Yellow) Power LED(Green)
③
Dip-switch
Power
Signal
A66e
RCD22E-211-CLC
75
90
90
75
97
63
4-φ5.5
4-φ10 depth 6
45
30
10
④②
③
①
①
② ④③
A65e
FG(faston 0.25")
Status LED(Green/Yellow) Power LED(Green)
Dip-switch
Power
Signal
Base:RCD22E-211-CLC
pin
signal(4pin) Power(4pin)
1
SLD
+24V
2 DB Not use
3 DG 24G
4
DA
Not use
pin
signal(4pin) Power(4pin)
1
SLD
+24V
2 DB Not use
3 DG 24G
4
DA
Not use
Type number RCD22E-211-CLC
Supply voltage 24 V DC ± 5 % (include ripple)
Current consumption
≦ 3 A
Communication CC-Link data
Communication speed
156kbps....10M bps (Changes by Dip switch)
Data delay
max.30bit
Start-up time
≦ 2 sec*
Operating temperature
0...+50 ℃
Connector Signal/ PowerSignal
M12/4 pin Male Acoding / M12/4 pin Male Acoding
Available connector cable Signal/Power
VA-4DSX5CCG4[5m] / TM-4DSX5HG2-1/3[5m]
Degree of protection
IP 67
Material
Housing Aluminum anodized nish
Active surface
ABS + PBT
Bundled items Ferrite core clamp ( Gray x2 / White x1 )
Type number RCD22T-211-CLC
Output voltage 24V ± 1.5V DC
Output current ≦ 2A
Transmitting distance
3...5mm
Center o-set ± 4mm
Operating temperature
0...+50 ℃
Degree of protection
IP 67
Connector Signal/ Power
M12/4 pin Male Acoding /
M12/4 pin Female Acoding
Available connector cable Signal/Power
VA-4DSX5CCG4[5m] / TM-4DBX5HG2-1/3[5m])
Material
Housing Aluminum anodized nish
Active surface
ABS + PBT
Bundled items Ferrite core clamp ( Gray x2 / White x1 )
* This means the time since the timing when a Remote
part and a Base part are energized within
the transmission area until the timing when the
wireless signal transmission starts. It doesn't mean
the time until the system as CC-Link established.
Transmitting Area Diagram(Non-flush mounted) [Example : Supply voltage at 24V DC]
* When excessive heat is generated.It stops
the power supply and once heat cool-down.
RCD22E would be restarted.
LED Color LED State
Power LED
Green
ON The power supply* is supplied.
Base &
Remote part
OFF The power supply* is not supplied.
Blink Anomalous temperature(turn on : 9s / turn o : 2s)
Base part Green Blink Supply voltage is low. (turn on : 0.5s / turn o : 0.5s)
Blink Supply voltage is high. (turn on : 0.1s / turn o : 0.1s)
Remote part Green Blink Output voltage is low. (turn on : 0.5s / turn o : 0.5s)
Status LED Yellow ON Inzone.
Base &
Remote part Green ON Unusual data is received continuously.
Blink Interval of blinking varies by the baud rate. (Refer to upper table. )
*Indicates External power supply at Base and indicates Base part at Remote.
When temperature and voltage are abnormalities - - -
LED turned on for 6 sec changes to blink of the interval of 0.5
sec or 0.1 sec.
Anomalous TEMP
Anomalous TEMP&Voltage
(0.5 sec interval / Votage low)
6 sec 2 sec
ON
OFF
ON
OFF
-To avoid the inuence of surrounding metal and mutual interference between products,
be sure to open a space larger than the value shown in the table below.(Fig.1)
- When installing a ferrite clamp, be careful not to apply excessive stress
to the cable due to sudden bending at the connector end or both ends of
the ferrite clamp.
- Install so that water and cutting water do not get on the end (wiring
part) of the cable. Moisture is transmitted from the cable core to the main
body, causing short circuits and corrosion.
- When routing cables with bends, install them above the bend
radius of the cables to be used.
Metal facing
( 一 _ 一;)
(Fig.4) (Fig.5)
Foreign material invades inside the sensor
Base part
metal
metal
moisture
Foreign material
- Fix the peripheral cables and install them so that they will not be
shaken or shocked.
- Use the tab terminal (FG) in a place where the noise environment is bad. (Fig.3)
- To reduce the eect of self-heating, it is recommended to install it on
metal using case mounting screws.
- If foreign material get inside the device from the end of the
connector, it may cause re, smoke, re, electric shock, or malfunction
due to malfunction or short circuit.(Fig.5)
- Do not put metal objects between the operating heads.
- Since metal overheating and internal elements may be damaged, install
the base so that it does not face the metal before turning on the power. (Fig.4)
(Fig.2)Clamping
(Fig.3)Installation using the tab terminal
(Fig.1)
arrange with space
CC-Link unit CC-Link unit
Setting ferrite core clamp
CC-Link signal
Max.20cm
Ferrite
core(Gray)
Ferrite
core(Gray)
Ferrite
core(White)
Power

DA
DB
DG
SLD
+24V
24G
FG
DA ④
DB ②
DG ③
SLD①
+24V①
24G③
FG
④ DA
② DB
③ DG
①SLD
①+24V
③24G
FG
DA
DB
DG
SLD
FG
Terminators Terminators
Master unitRCD22ERCD22TRemote unit
External
device
Blue
White
Yellow
SLD
Brown
Blue
FG
Blue
White
Yellow
SLD
Brown
Blue
FG
Please read the CC-Link Installation Manual carefully when wiring.
The following is a wiring example of a T-branch without repeater function.
- The cable color in this wiring diagram shows the cable color when using the recommended connector cable. When
wiring, check the instruction manual of the cable you actually use before wiring.
- Connect "Terminators" between DA-DB of the last unit on the CC-Link network.
- When this unit mounted on the both end of CC-Link network, please set the Dip switch SW4 to ON.(Refer to the
followiing Setting for Switch and Status LED indication (Remote part/Base part part)
・When installing with T-branch wiring, set the communication speed to 625 kbps or less.
- For wiring of external power unit 24V DC to FG, please return to wiring.
Connect "+" of power unit +24V DC to a terminal indicated [+24V] , "-" to [24G].
- Always use a constant voltage power supply such as a switching power supply.
(Use of a power supply with a ripple greater than the rated value, such as a full-wave rectier power supply, may cause
malfunction.)
- Please set the cable length to consider the total length of the entire network according to CC-Link manual.
- When the Remote part and the Base part are not facing each other, no signal is sent from the Remote part, but there is
no problem in communication on the Base part.
Wiring sample
Wiring diagram between master unit and slave
Setting for Switch and Status LED indication (Remote part/Base part part)
Communitation speed is set with S W1~3, when SW4 is turned on, Terminator(110Ω)can be used.
インジケータLED(緑/黄) パワーLED(緑)
ON
OFF
SW4:終端抵抗(110Ω)ON/OFF
SW3~1:ボーレート設定
*Always make changes to the DIP switches
with the power turned off.
If changed while energized, communication
is disabled and the status LED blinks at 0.5
second intervals.
*If the dip switch lid is opened, close it tightly
to prevent water from entering.
Initial value
(default)
SW 1:OFF
SW 2:OFF
SW 3:ON
SW 4:ON
Status LED(Green/Yellow)
SW1 ~ 3:commnunication spped set up
SW4:Terminator(110 Ω )ON/OFF
ONOFF
Pwer LED(Green)
No. = Pin assignment (refer to the dimensional outline drawing)
通常
master
station
Terminator
Terminator
slave
station
slave
station
slave
station
slave
station
slave
station
master
station
支線分断
Terminator
Terminator
SW4 → OFF
SW4 → ON
Terminator
slave
station
slave
station
slave
station
slave
station
slave
station
幹線分断
Terminator
Terminator
SW4 → ON SW4 → ON
master
station
slave
station
slave
station
slave
station
slave
station
slave
station
複数設置
Terminator
Terminator
Terminator
SW4 → ON SW4 → ON
SW4 → OFF
SW4 → ON
SW4 → OFF
SW4 → ON
Terminator
master
station
slave
station
slave
station
slave
station
slave
station
slave
station
Remote part Base part
Terminator
(110 Ω)
Terminator
(110 Ω)
■ for RCD22T(Remote part)
bending radius = 24mm
bending radius = 46mm
bending radius = 24mm
White Gray
bending radius = 46mm
■ for RCD22E(Base part part)
Communication cable VA-4DSX5CCG4 (M12/4 pin female,5m)
Power cable :TM-4DBX5HG2-1/3 (M12/4 pin male,5m) Power cable:TM-4DSX5HG2-1/3 (M12/4 pin male, 5m)
Ferrite clamp(White):DK-Z/RFC-H13
45°
M12 × 1.0
φ 14.5
113
41.7
(5m)
30
45
45°
φ 14.5
M12 × 1.0
9
15.5
42 (5m) 30 45
45°
M12 × 1.0
φ 14.5
115.5
40 (5m) 30 45
1----------------------SLD
2---------------------- White
3----------------------Yellow
4---------------------- Blue
1----------------------Brown
2---------------------- ×
3----------------------Blue
4---------------------- ×
1----------------------Brown
2---------------------- ×
3----------------------Blue
4---------------------- ×
Ferrite clamp(Gray):DK-Z/E04SR401938
Communication cable VA-4DSX5CCG4 (M12/4 pin female、5m)
45°
M12 × 1.0
φ 14.5
113
41.7
(5m)
30
45
1----------------------SLD
2---------------------- White
3----------------------Yellow
4---------------------- Blue
Communication speed
SW3 SW2 SW1 LED status Interval when LED blinks
156kbps OFF OFF OFF
Lighting once every 2 seconds.
625kbps OFF OFF ON
Turning o once every 2 seconds.
2.5Mbps OFF ON OFF
Lighting twice every 2 seconds.
5Mbps OFF ON ON
Turning o twice every 2 seconds.
10Mbps ON OFF OFF
Lighting 3 times every 2 seconds.
--- ON OFF ON LED keeps on when set error
--- ON ON OFF LED keeps on when set error
--- ON ON ON LED keeps on when set error
■Setting for Switch
ON
OFF
ON
OFF
ON
OFF
ON
OFF
ON
OFF
ON
OFF
ON
OFF
ON
OFF
devide
the drop line
multiple
installations
Normal
wiring
devide the
trunk line
Optional parts
【communication cable / power cable】
Recommended connector cable is available as an option. Please use in combination with the remote coupler system.
[Ferrite clamp]
The included Ferrite clamp is available as an option in case it is damaged or lost.

Other note
-The remote coupler system is a system that supplies and transmits power and signals in a non-contact manner. Please
do not use it for any other purpose.
-Design with the combination described in the instruction manual or user's guide. Opposition in any other combination
may cause malfunction or damage.
-If power exceeds the rated voltage, there is a risk of heat generation and ignition. Before supplying power, be sure to
check that the power supply is specied in the specications.
-Design so that it can be used under the wiring and surrounding environment conditions specied in the specications.
Also, design to satisfy the "transmission distance", "center o-set", "output voltage", and "output current". Designs
outside the specications may cause unexpected malfunctions, troubles, and failures due to deterioration of internal parts.
-When wiring for installation, maintenance, failure, etc., be sure to check that the main breaker (power panel) is cut
before performing the work. If you work on a live line, you may get an electric shock or malfunction.
-As with other electronic devices, inrush current may occur when the system starts up, so set the power supply in
consideration of the inrush current.
-
Please be sure in the withstanding voltage test that a capacitor (50VDC 3.3nF) is built in between the each
pouwer supply pin (+24V/24G) and the FG.
-Design the system so that the entire system works safely even if the external power supply is abnormal or the product fails.
-Please be careful about the inuence on the material degradation due to the installation environment and the intrusion
of foreign material. Especially when using it outdoors, please install it with less inuence from ultraviolet rays.
https://www.b-plus-kk.jp/ E-mail [email protected]
Precautions for installation and design
■ Be sure to check it as there are various dangers such as failure if it is installed incorrectly
- Impact and external noise may cause malfunction or failure. Wire the cable away
from power lines and high-voltage equipment without giving a shock. (Fig. 6)
-This product has the CE mark on the exterior of the product. However, we do not
support surges, so if you use the cable with a cable length of more than 10 m,
take measures to prevent excessive surges from being applied.
-Use within the range where the total current consumption of the connected devices does not
exceed the output current value.
-To consider and reduce the self-heating of this product, take measures so that it can be used
below the specied ambient temperature.In order to reduce the eect of self-heating (heat
dissipation), it is recommended to mount it on metal using case mounting screws.
-Installed in a place where it is exposed to direct sunlight or hot air from a heater, it may cause
a re or malfunction. (Fig. 7)
-If you apply power to the remote unit or energize either one with the base units facing each
other, a malfunction may occur. (Fig. 8)
-Please use in an environment where organic solvents and liquids containing them do not come
in contact. (Fig. 9)
((+_+))
impact
Power line and high-voltage equipment
noise
(+_+)
(+_+)
24V DC
(+_+)
(+_+) (+_+)
Direct sunlight
and hot air apply
power
energize facig each other
Base part Base part
Liquies such as
organic solvents
(Fig.7) (Fig.8) (Fig.9)
(Fig.6)
Remote part
Product failures due to mishandling are increasing.
Please be sure to read this manual, and if you have any
concerns, please contact the following before energizing.
-Do not disassemble or modify our products. It may cause a malfunction, fire, electric shock, etc., or cause serious
damage. Also, if it is disassembled or modied, it will not be covered by the warranty.
- If you are in an abnormal condition such as smoke, strange noise, or strange odor, stop using the product immediately
because there is a risk of malfunction, re, electric shock, or accident.
- Be sure to use accessories and specied parts. If you do not use it, it may cause malfunction, accident, malfunction, re, etc.
- If any equipment is added or moved, please check the installation conditions again.
- If any equipment is added or moved, please check the installation conditions again.
■ About product handling
・The control communication device installed in the product corresponds to a "weak radio station
(weak radio wave device)",
so the Minister of Internal Aairs and Communications' radio station permit (diploma) is not required.
However, please be careful when operating it as it may aect electronic devices and medical devices
(pacemakers, etc.).
・ When using the product outside Japan, please check the standards and regulations that the system should comply
with and take appropriate measures.
■ Standards and regulations
・Please note that the contents and specications of this manual are subject to change without notice. If you have any
questions about the contents of this document, please contact us.
This manual suits for next models
1
Other B&PLUS Power Supply manuals
