Bang & Olufsen EarSet 2 User manual

Guide
EarSet 2


Contents
English, 4
Dansk, 14
Svenska, 24
Suomi, 34
Deutsch, 44
Français, 54
Italiano, 64
Español, 74
Português, 84
Nederlands, 94
Русский, 104
Οδηγός, 114
3

English
Introducing EarSet 2
EarSet 2 is a headset equipped
with Bluetooth wireless
technology for hands-free call
handling via a mobile phone,
such as Serene, or other
products with Bluetooth
wireless technology.
Make and receive calls, transfer
calls to and from the mobile
phone, and charge the headset
in the enclosed charger. Place the
lid on the charger and it
becomes a practical carrying
case.
Refer to the guide enclosed
with your mobile phone for
detailed information about
display messages, as these vary
from phone to phone.
(A) … Ear hook. Tilt up and down
until the speaker fits your ear.
(B) … Microphone arm. Rotate in
to switch the headset off, and
out to switch it on.
(C) … Switch. Push up and down
to adjust volume. Press or push
to answer an incoming call. Press
and hold to redial the last dialled
number.
(D) … Indicator light. Shows the
state of the headset.
(E) … Ear pad. Put the ear pad on
the speaker for greater listening
comfort.
A
C
D
CB
E
4

Indicator light on the headset
The indicator light on the headset
(D) informs you about the current
state of the headset. The signals –
which can only appear while the
headset is on – are explained below:
Light off … No power. Charge the
battery as described in ‘Charge
the headset battery’.
Flashing green, slow … Ready for
use.
Flashing green, rapid … Incoming
or active call.
Flashing red, slow … Ready for use,
but the battery requires charging.
Flashing red, rapid … Indication
during an incoming or active call
that the battery requires charging.
The indicator light flashes red when
there is less than five minutes of
talk time left.
Sound feedback
Beep sounds inform you about the
state of the phone. The sounds and
situations are described below.
One beep
– Limit for speaker volume reached
– Call rejected
– Redial call started
Two beeps
– Call audio on in the headset
(rising tone)
– Call audio off in the headset
(falling tone)
Repeating beep
– Battery low. Repeats three times
at thirty second intervals
– Microphone muted. Repeats
continuously at 1.5 second
intervals
5

>> English
Wear the headset
> Fold the microphone arm out as
shown. This switches on the
headset.
> Place the speaker in your ear,
adjusting the height and angle of
the ear hook as necessary. Make
sure that the microphone always
points towards your mouth. This
ensures the best sound quality.
EarSet 2 is intended for use in dry,
domestic environments only,
within a temperature range of
10–40ºC (50–104ºF).
Charge the headset battery
If the headset requires charging,
this occurs automatically when the
headset is placed in the charger.
About charging …
– The charger must be connected
to the power outlet.
– It takes approximately three
hours to fully charge the battery.
– The minimum talk-time per
charge is approximately four
hours.
– Standby time per charge is
approximately 100 hours.
Indicator light on the charger
The indicator light on the charger
(F) informs you about the current
state of the charger.
Light off … Headset not connected
to charger.
Steady red … Charging in progress.
Steady green … Charging
complete.
6

WARNING! For use only with
the power supply included with
the product!
Manufacturer: Salcomp
ID-nummer: 8040017, 8040018,
8040020, 8040022, 8040023 or
8040024.
You can always place the headset
in the charger after use, even if the
battery does not need recharging.
Leaving the headset in the charger
does not reduce the lifetime of the
battery.
TIP: If you do not wish to use the
charger as a carrying case, you can
use the lid as a table stand. Place
the lid on the table with the top
side down and place the charger in
the lid.
F
7

>> English
Register the headset to your
mobile phone
To be able to use the headset, you
must first register it to a mobile
phone with Bluetooth or to a
similar device with a hands-free
profile.
You can only register the headset
to one mobile phone or device at a
time.
To register the headset …
> Switch on the mobile phone.
> If you are registering the headset
for the first time, fold the
microphone arm out. This
switches on the headset. The
indicator light flashes red and
green.
> Activate the search function on
your mobile phone as described
in the guide enclosed with the
phone. When the mobile phone
finds the headset, the headset is
identified as EarSet 2 in the
mobile phone’s display.
> If you are prompted for a
pincode by your mobile phone,
enter 0000. The headset is now
registered to the phone.
> If registration fails, switch off the
headset and repeat the
procedure.
Register the headset to a new
mobile phone
> Switch on the mobile phone. Do
the next three steps in five
seconds or less.
> Press and hold the switch.
> Fold the microphone arm out.
> When the indicator light flashes
red and green, release the
switch.
> Activate the search function on
your mobile phone as described
in the guide enclosed with the
phone. When the mobile phone
finds the headset, the headset is
identified as EarSet 2 in the
mobile phone’s display.
> If you are prompted for a
pincode by your mobile phone,
enter 0000. The headset is now
registered to the phone.
> If registration fails, switch off the
headset and repeat the
procedure.
8

Make and answer calls
There are several ways to make calls.
This depends on which mobile
phone you use. Refer to the guide
enclosed with your mobile phone
for further instruction.
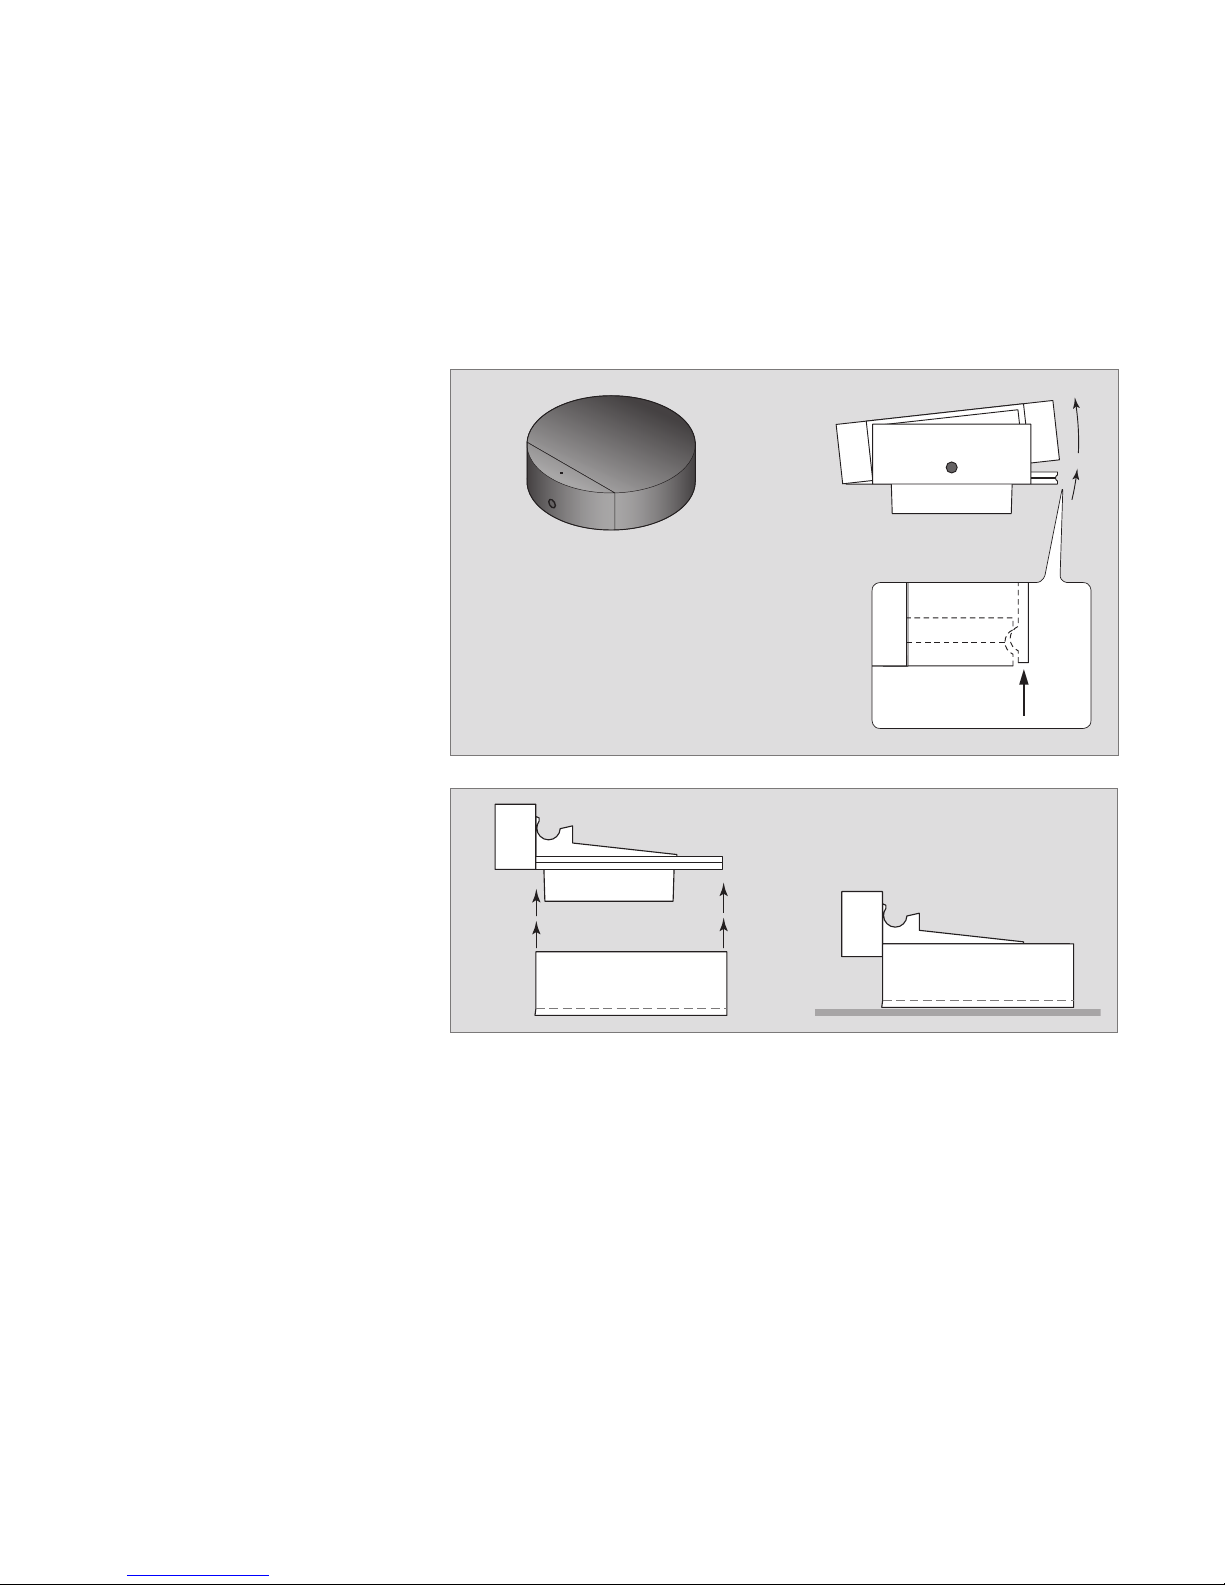
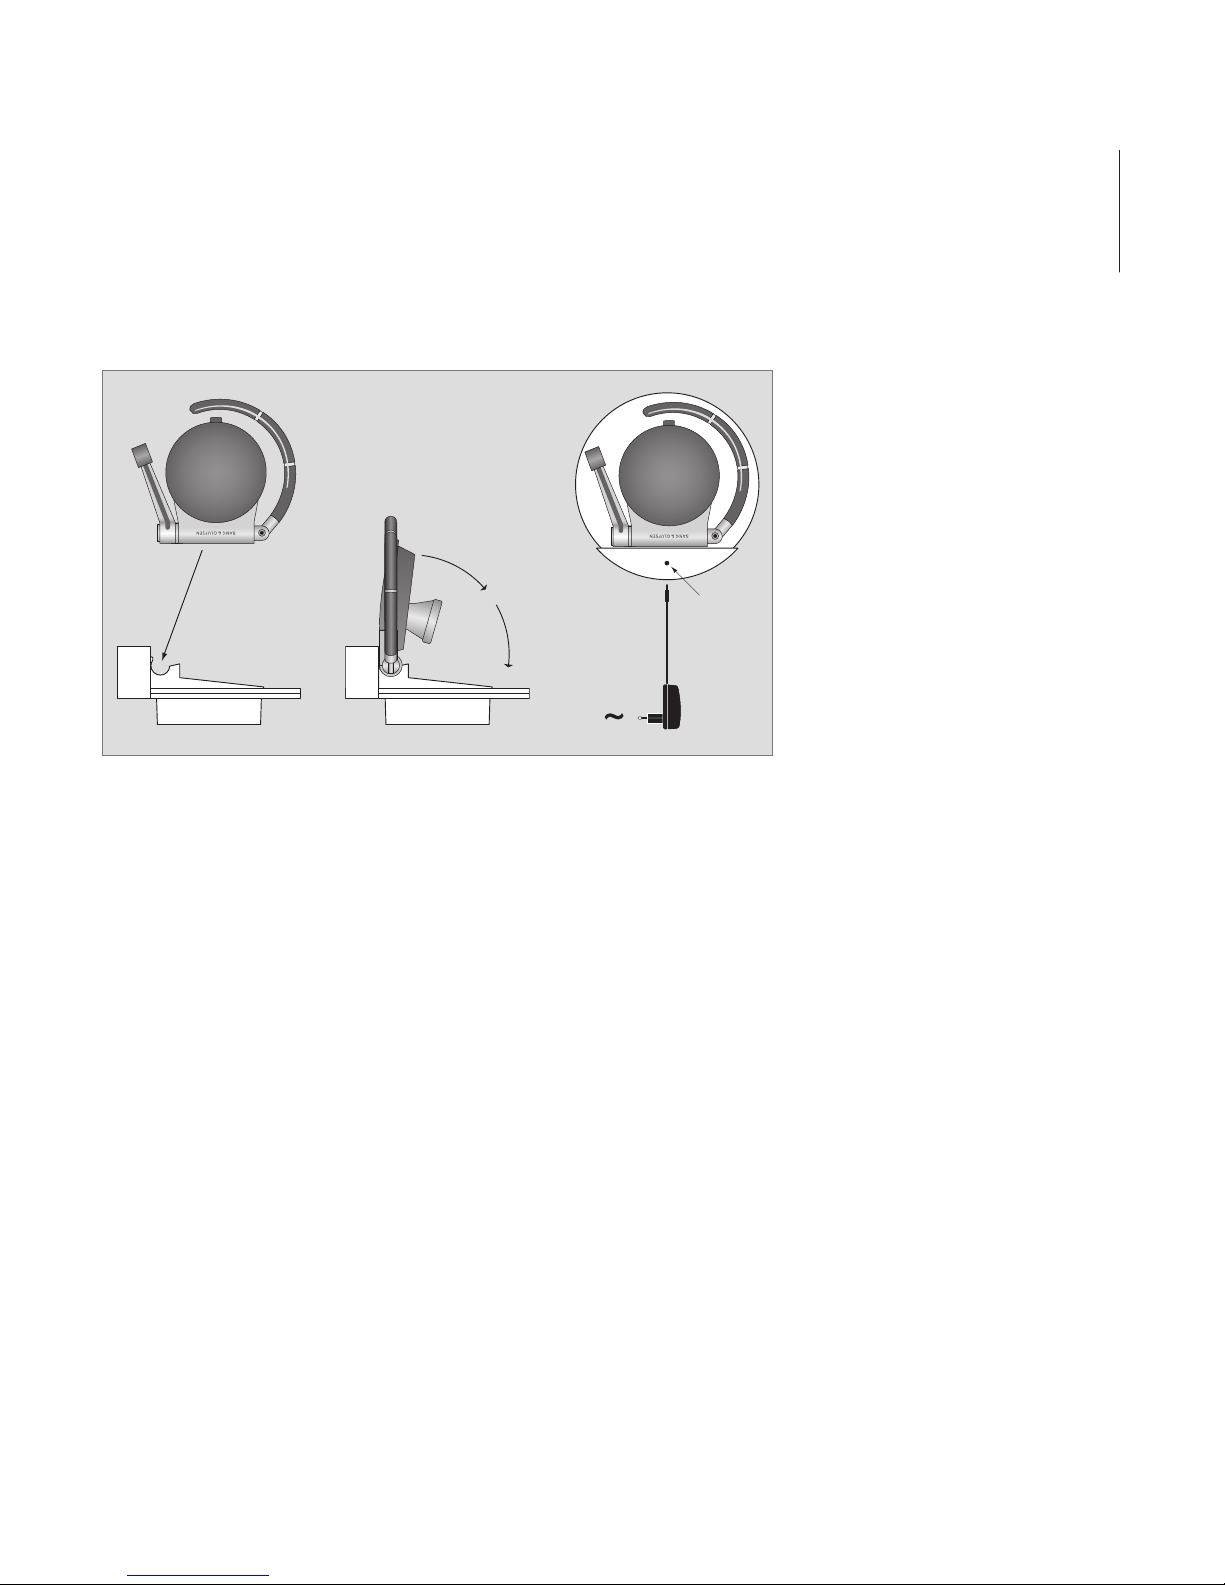
Make sure that the headset is
switched on. This is done by
folding the microphone arm out.
Ways to make a call …
– Make the call on your mobile
phone. With some models, the
call audio is automatically
transferred to the headset. With
others, you must transfer the call
audio manually. A beep sounds
from the headset when the audio
is transferred.
– If your mobile phone or device
supports voice activated calls,
press the switch to activate the
function.
– If your mobile phone or device
supports redial, press and hold
the switch for at least 1.5
seconds to redial the last dialled
number.
Answer a call …
When an incoming call is registered,
the mobile phone and headset start
ringing.
> To answer the call, push or press
the switch. A beep sounds from
the headset when the call audio
is connected.
> To reject an incoming call, press
and hold the switch until a beep
sounds in the headset.
To end a call …
There are several ways to end a call.
– Press the switch.
– Fold the microphone arm in.
– End the call manually on your
mobile phone.
A beep sounds in the headset
when the call is ended.
When using the headset, make sure
the mobile phone is no further than
10 m (30 ft) from the headset.
To transfer calls between the
mobile phone and headset …
> To transfer a call from your mobile
phone to the headset, press the
switch. A beep sounds from the
headset when the call audio is
connected.
> To transfer a call from the head-
set back to the phone, use the
mobile phone’s transfer function.
It is only possible to use Call Waiting,
place calls on hold and switch
between calls on mobile phones
that support these services and
functions.
9

Volume and the microphone
During calls, you can adjust the
volume by pushing the switch up
or down. There are eight possible
settings. When you reach the
upper or lower limit for sound
volume, a beep sounds from the
headset.
The selected volume level is used
for all subsequent calls, but the
maximum volume setting that can
be stored is 6.
To switch the microphone off
during a call, press and hold the
switch until you hear a beep from
the headset. A repeating beep is
heard until the microphone is
switched back on.
To switch the microphone back on,
press or push the switch.
Adjust the headset ringer level
During standby, you can adjust the
headset ringer level by pushing the
switch up or down. There are eight
possible settings. After each
adjustment, the ringer melody is
played once.
The selected ringer level is used for
all subsequent calls.
>> English
10

Mount the charger on the wall
If you choose, you can hang the
charger on a wall, using the charger
lid to mount the charger on the
enclosed wall bracket.
65 mm
2.56"
29 mm
1.14"
29 mm
1.14"
G
G
(1)
(2)
11
12 3
45 6

The European Parliament and the
Council of the European Union
have issued the Waste Electrical
and Electronic Equipment Directive.
The purpose of the Directive is the
prevention of waste of electrical
and electronic equipment, and to
promote the reuse and recycling
and other forms of recovery of
such waste. As such the Directive
concerns producers, distributors
and consumers.
The WEEE directive requires that
both manufacturers and end-
consumers dispose of electrical
and electronic equipment and
parts in an environmentally safe
manner, and that equipment and
waste are reused or recovered for
their materials or energy.
Electrical and electronic equipment
and parts must not be disposed of
with ordinary household refuse; all
electrical and electronic equipment
and parts must be collected and
disposed of separately.
Products and equipment which
must be collected for reuse,
recycling and other forms of
recovery are marked with the
pictogram shown.
When disposing of electrical and
electronic equipment by use of the
collection systems available in your
country, you protect the
environment, human health and
contribute to the prudent and
rational use of natural resources.
Collecting electrical and electronic
equipment and waste prevents the
potential contamination of nature
with the hazardous substances
which may be present in electrical
and electronic products and
equipment.
Your Bang & Olufsen retailer will
assist with and advise you of the
correct way of disposal in your
country.
Waste Electrical and Electronic Equipment (WEEE) –
Environmental protection
12

This product fulfils the
conditions stated in the
EEU directives 89/336 and
73/23.
This product is CE marked
according to provisions of
the R&TTE Directive
(99/5/EC). Hereby, Bang &
Olufsen declares that this
product is in compliance
with the essential
requirements and other
relevant provisions of
Directive 1995/5/EC.
13

Dansk
Præsentation af EarSet 2
EarSet 2 er et hovedsæt med
Bluetooth trådløs teknologi til
håndfri betjening af opkald via
en mobiltelefon, f.eks. Serene,
eller andre produkter med
Bluetooth trådløs teknologi.
Ring op og modtag opkald,
viderestil opkald til og fra
mobiltelefonen og oplad
hovedsættet i den medfølgende
lader. Sæt låget på laderen, så
bliver den til et praktisk etui.
Se den vejledning, der følger
med mobiltelefonen, for at få
yderligere oplysninger om
displaymeddelelser, da de
varierer fra telefon til telefon.
(A) … Ørebøjle. Vippes op og ned,
indtil højttaleren passer til øret.
(B) … Mikrofonarm. Drej den ind
for at slukke for hovedsættet, og
ud for at tænde for det.
(C) … Knap. Skub op og ned for at
justere lydstyrken. Tryk eller skub
for at besvare et indkommende
opkald. Tryk på knappen, og
hold den nede for at ringe op til
det nummer, der sidst er blevet
ringet til.
(D) … Indikatorlampe. Viser
status for hovedsættet.
(E) … Ørepude. Sæt ørepuden på
højttaleren, og opnå større
lyttekomfort.
A
C
D
CB
E
14

Indikatorlampe på hovedsættet
Indikatorlampen på hovedsættet
(D) informerer dig om
hovedsættets aktuelle tilstand.
Signalerne – som kun vises, når
hovedsættet er tændt – forklares
nedenfor:
Intet lys … Ingen strøm. Oplad
batteriet som beskrevet i ”Oplad
hovedsætbatteriet”.
Blinker langsomt grønt … Klar til
brug.
Blinker hurtigt grønt …
Indkommende eller aktivt opkald.
Blinker langsomt rødt… Klar til
brug, men batteriet trænger til
at blive ladt op.
Blinker hurtigt rødt … Under et
indkommende eller aktivt
opkald: Tegn på, at batteriet
trænger til at blive ladt op.
Indikatorlampen blinker rødt, når
der er mindre end fem minutters
taletid tilbage.
Hørbar feedback
Biplyde oplyser dig om telefonens
status. Lydene og situationerne er
beskrevet nedenfor.
Ét bip
– Grænsen for højttalerens
lydstyrke er nået
– Opkald afvist
– Genkald indledt
To bip
– Lyden tændt i hovedsættet
(stigende tone)
– Lyden slukket i hovedsættet
(faldende tone)
Gentagne bip
– Lavt batteriniveau. Gentages tre
gange med 30 sekunders
mellemrum
– Mikrofon afbrudt. Gentages
konstant med 1½ sekunds
mellemrum
15

>> Dansk
Tag hovedsættet på
> Fold mikrofonarmen ud som vist.
Hovedsættet bliver tændt.
> Placer højttaleren i dit øre, og
juster om nødvendigt ørebøjlens
højde og vinkel. Sørg for, at
mikrofonen altid peger mod din
mund. Det giver den bedste
lydkvalitet.
EarSet 2 er udelukkende beregnet
til indendørs brug under tørre
forhold og inden for et
temperaturområde på 10–40ºC.
Oplad hovedsætbatteriet
Hvis hovedsættet skal oplades, sker
det automatisk, når hovedsættet
placeres i laderen.
Om opladning …
– Laderen skal være tilsluttet
lysnettet.
– Det tager ca. tre timer at oplade
batteriet helt.
– Den minimale taletid pr.
opladning er ca. fire timer.
– Stand-by-tid pr. opladning er ca.
100 timer.
Indikatorlampe på laderen
Indikatorlampen på laderen (F)
informerer dig om laderens
aktuelle tilstand.
Slukket … Hovedsættet er ikke
tilsluttet laderen.
Lyser rødt … Igangværende
opladning.
Lyser grønt … Opladning fuldført.
16

ADVARSEL! Kun til brug med
den strømforsyning, der leveres
sammen med produktet!
Producent: Salcomp
ID-nummer: 8040017, 8040018,
8040020, 8040022, 8040023
eller 8040024.
Du kan altid placere hovedsættet i
laderen efter brug, også selvom
batteriet ikke skal oplades. Det
forringer ikke batteriets levetid, at
hovedsættet står i laderen.
TIP: Hvis du ikke ønsker at bruge
laderen som etui, kan du bruge
låget som bordstand. Placer låget
på bordet med oversiden nedad,
og placer laderen i låget.
F
17

>> Dansk
Tilmeld hovedsættet til din
mobiltelefon
For at kunne bruge hovedsættet
skal du først tilmelde det en
mobiltelefon med Bluetooth eller
til et lignende, håndfrit apparat.
Du kan kun tilmelde hovedsættet
én mobiltelefon eller ét apparat ad
gangen.
Sådan tilmelder du
hovedsættet …
> Tænd for mobiltelefonen.
> Hvis det er første gang, du
tilmelder hovedsættet, skal du
folde mikrofonarmen ud.
Hovedsættet bliver tændt.
Indikatorlampen blinker rødt og
grønt.
> Aktivér søgefunktionen på
mobiltelefonen, som beskrevet i
den vejledning, der følger med
telefonen. Når mobiltelefonen
finder hovedsættet, bliver det
identificeret som EarSet 2 i
mobiltelefonens display.
> Hvis du bliver bedt om at
indtaste en PIN-kode, skal du
trykke 0000. Hovedsættet er nu
tilmeldt telefonen.
> Hvis tilmeldingen mislykkes, skal
du slukke for hovedsættet og
gentage fremgangsmåden.
Tilmeld hovedsættet til en ny
mobiltelefon
> Tænd for mobiltelefonen.
Gennemfør de næste tre trin
inden for maks. fem sekunder.
> Tryk på knappen, og hold den
nede.
> Fold mikrofonarmen ud.
> Slip knappen, når indikator-
lampen blinker rødt og grønt.
> Aktivér søgefunktionen på
mobiltelefonen, som beskrevet i
den vejledning, der følger med
telefonen. Når mobiltelefonen
finder hovedsættet, bliver det
identificeret som EarSet 2 i
mobiltelefonens display.
> Hvis du bliver bedt om at
indtaste en PIN-kode, skal du
trykke 0000. Hovedsættet er nu
tilmeldt telefonen.
> Hvis tilmeldingen mislykkes, skal
du slukke for hovedsættet og
gentage fremgangsmåden.
18

Ring op og besvar opkald
Der er flere måder at ringe op
på. Det afhænger af, hvilken
mobiltelefon du har. Få yderligere
oplysninger i den vejledning, der
følger med din mobiltelefon.
Sørg for, at hovedsættet er tændt.
Tænd for det ved at folde
mikrofonarmen ud.
Sådan kan du ringe op …
– Ring op på din mobiltelefon. På
nogle modeller viderestilles lyden
automatisk til hovedsættet. På
andre skal du viderestille lyden
manuelt. Hovedsættet bipper,
når lyden bliver viderestillet.
– Hvis din mobiltelefon eller
dit apparat understøtter
stemmeaktiverede opkald, skal
du trykke på knappen for at
aktivere funktionen.
– Hvis din mobiltelefon eller dit
apparat understøtter genkald,
skal du trykke på knappen og
holde den nede i mindst 1½
sekund for at ringe op til det
nummer, der sidst er blevet
ringet til.
Besvar et opkald …
Når et indkommende opkald
bliver registreret, begynder
mobiltelefonen og hovedsættet at
ringe.
> Skub eller tryk på knappen for at
besvare opkaldet. Hovedsættet
bipper, når lyden bliver tilsluttet.
> Hvis du vil afvise et
indkommende opkald, skal du
trykke på knappen og holde den
nede, indtil hovedsættet bipper.
Afslut en samtale …
En samtale kan afsluttes på flere
måder.
– Tryk på knappen.
– Fold mikrofonarmen ind.
– Afslut samtalen manuelt på din
mobiltelefon.
Hovedsættet bipper, når samtalen
bliver afsluttet.
Når du bruger hovedsættet, skal du
sørge for, at mobiltelefonen ikke er
længere end 10 m væk fra
hovedsættet.
Sådan viderestiller du samtaler
mellem mobiltelefonen og
hovedsættet …
> Tryk på knappen for at viderestille
en samtale fra din mobiltelefon
til hovedsættet. Hovedsættet
bipper, når lyden bliver tilsluttet.
> Hvis du vil viderestille en samtale
fra hovedsættet tilbage til
telefonen, skal du bruge
mobiltelefonens viderestillings-
funktion.
Det er kun muligt at bruge
funktionen Banke-På, parkere
opkald og skifte mellem opkald på
mobiltelefoner, der understøtter
disse ydelser og funktioner.
19

>> Dansk
Lydstyrke og mikrofon
Under en samtale kan du justere
lydstyrken ved at skubbe knappen
op eller ned. Der er otte
indstillingsmuligheder. Når du har
nået den øvre eller nedre grænse
for lydstyrken, bipper hovedsættet.
Det valgte lydstyrkeniveau
anvendes til alle efterfølgende
opkald, men den højeste
lydstyrkeindstilling, der kan
gemmes, er 6.
Hvis du vil slå mikrofonen fra under
en samtale, skal du trykke på
knappen og holde den nede, indtil
hovedsættet bipper. Hovedsættet
bipper, indtil der tændes for
mikrofonen igen.
Hvis du vil tænde for mikrofonen
igen, skal du trykke eller skubbe på
knappen.
Juster hovedsættets
ringerniveau
Når hovedsættet er i stand-by, kan
du justere dets ringerniveau ved at
skubbe knappen op eller ned. Der
er otte indstillingsmuligheder. Efter
hver enkelt justering bliver
ringermelodien afspillet én gang.
Det valgte ringerniveau gælder for
alle efterfølgende opkald.
20
Other manuals for EarSet 2
1
Table of contents
Languages:
Other Bang & Olufsen Headset manuals