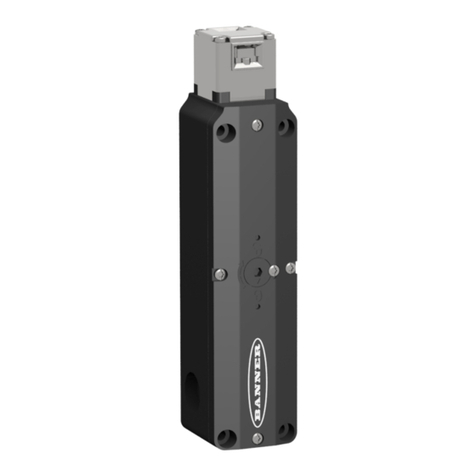
Banner SI-HG63 Series User manual

Instruction Manual
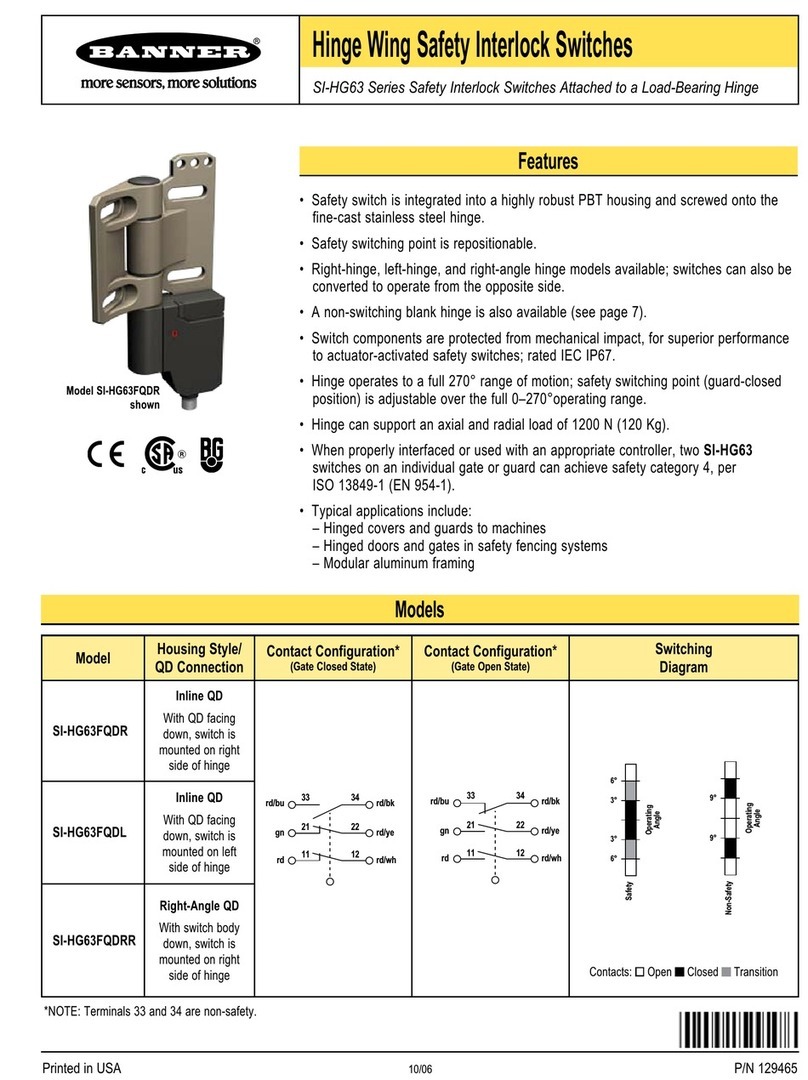
The SI-HG(Z)63 Hinge Wing Safety Interlock Switch attaches with a load-bearing hinge.
•Safety switching point is repositionable
• Switch components are protected from mechanical impact for superior performance to actuator-
activated safety switches (IP67 or IP69 rated)
• Hinge operates to a full 270° range of motion; safety switching point (guard-closed position) is
adjustable over the full 0° to 270° operating range
• Stainless steel hinge supports a load of 1800 N (180 Kg). Zinc die-cast hinge supports a load of
1200 N (120 Kg).
• When properly interfaced or used with an appropriate controller, two SI-HG(Z)63 switches on an
individual gate or guard can achieve safety category 4, per ISO 13849-1
Models
Model Construction Housing Style
SI-HG63FQDR Stainless Steel
Inline QD - With QD facing down, switch is mounted on right side of hinge
SI-HGZ63FQDR Zinc Die-cast
SI-HG63F5MR-W Stainless Steel Inline Cable - With cable exiting down, switch is mounted on right side of hinge, IP69 protection class rating
SI-HG63FQDL Stainless Steel
Inline QD - With QD facing down, switch is mounted on left side of hinge
SI-HGZ63FQDL Zinc Die-cast
SI-HG63F5ML-W Stainless Steel Inline Cable - With cable exiting down, switch is mounted on left side of hinge, IP69 protection class rating
SI-HG63FQDRR Stainless Steel
Right-Angle QD - With switch body down, switch is mounted on right of hinge
SI-HGZ63FQDRR Zinc Die-cast
SI-HG63F5MRR-W Stainless Steel Right-Angle Cable - With switch body down, switch is mounted on right side of hinge, IP69 protection class rating
SI-HG63F5MLR-W Stainless Steel Right-Angle Cable - With switch body down, switch is mounted on left side of hinge, IP69 protection class rating
SI-HG63F5MB-W Stainless Steel Inline Cables - With cables exiting up and down, switches are mounted on both sides of hinge, IP69 protection
class rating
SI-HG63A Stainless Steel
Blank Hinge; same mechanical as switch minus switch component
SI-HGZ63A Zinc Die-cast
A complete safety system is composed of two SI-HG(Z)63 switches per gate/guard (SI-HG63F5MB-W is two switches so only one is
needed for a complete system), cables (for QD models), and a safety monitoring device.
SI-HG(Z)63 Hinge Wing Safety Interlock Switch
Original Document
129465 Rev. G
16 March 2022
129465

Figure 1. Contact Configuration (Gate Closed
State) for Quick Disconnect Models
33
21
11
rd/bu
gn
rd
34
22
12
rd/bk
rd/ye
rd/wh
Figure 2. Contact Configuration (Gate Open
State) for Quick Disconnect Models
33
21
11
rd/bu
gn
rd
34
22
12
rd/bk
rd/ye
rd/wh
Figure 3. Switching Diagram
3°
3°
6°
6°
9°
9°
1.5 Nm
Set Point
1.5 Nm
11-12
21-22
33-34
Safety
Safety
Non-Safety
Contacts: Open Closed Transition
Figure 4. Contact Configuration (Gate Closed
State) for Cabled Models
pk
bn
gy
ye
wh
33
21
11
gn
34
22
12
Figure 5. Contact Configuration (Gate Open
State) for Cabled Models
pk
bn
gy
ye
wh
33
21
11
gn
34
22
12
Terminals 33 and 34 are non-safety.
Note: This symbol for a positive-opening safety contact (IEC 60947-5-1) is used in the switching diagram to
identify the point in actuator travel where the normally-closed safety contact is fully open.
Important... Read this before proceeding!
The user is responsible for satisfying all local, state, and national laws, rules, codes, and regulations relating to the use of this
product and its application. Banner Engineering Corp. has made every effort to provide complete application, installation, operation,
and maintenance instructions. Please contact a Banner Applications Engineer with any questions regarding this product.
The user is responsible for making sure that all machine operators, maintenance personnel, electricians, and supervisors are
thoroughly familiar with and understand all instructions regarding the installation, maintenance, and use of this product, and with the
machinery it controls. The user and any personnel involved with the installation and use of this product must be thoroughly familiar
with all applicable standards, some of which are listed within the specifications. Banner Engineering Corp. makes no claim regarding
a specific recommendation of any organization, the accuracy or effectiveness of any information provided, or the appropriateness of
the provided information for a specific application.
Overview
Use the SI-HG(Z)63 Hinge Wing Safety Interlock Switch to monitor the position of a guard to detect the movement, opening, or
removal. A "guard" can be a gate, door, cover, panel, barrier or other physical means that separates an individual from a hazard.
The SI-HG(Z)63 will issue a signal to the machine control system to prevent or stop (halt) hazardous situations when the guard is not
in the proper position. The SI-HG(Z)63 is designed for non-locking guarding applications, unless another means of locking is
provided.
Installation Requirements
The following general requirements and considerations apply to the installation of interlocked gates and guards for the purpose of
safeguarding. In addition, the user must refer to the relevant regulations and comply with all necessary requirements. See ANSI
B11.19, or ISO 14119 and ISO 14120, or the appropriate standard.
Hazards guarded by the interlocked guard must be prevented from operating until the guard is closed; a stop command must be
issued to the guarded machine if the guard opens while the hazard is present. Closing the guard must not, by itself, initiate
hazardous motion; a separate procedure must be required to initiate the motion. The safety switches must not be used as a
mechanical or end-of-travel stop.
Locate the guard an adequate distance from the danger zone (so the hazard has time to stop before the guard is opened sufficiently
to provide access to the hazard). The guard must open either laterally or away from the hazard, not into the safeguarded area. The
guard also should not be able to close by itself and activate the interlocking circuitry. The installation must prevent personnel from
reaching over, under, around or through the guard to access the hazard. Any openings in the guard must not allow access to the
hazard—see ANSI B11.19, ISO 13857, or the appropriate standard. The guard must be strong enough and designed to protect
personnel and contain hazards within the guarded area that can be ejected, dropped, or emitted by the machine.
Design and install the safety interlocking switches and actuators so that they cannot be easily defeated. Mount them securely so that
their physical position cannot shift, using reliable fasteners that require a tool to remove. Mounting slots in the housing, if provided,
are for initial adjustment only; final mounting holes (round) must be used for permanent location.
SI-HG(Z)63 Hinge Wing Safety Interlock Switch
2 www.bannerengineering.com - Tel: + 1 888 373 6767 P/N 129465 Rev. G

The normally closed safety contacts are of a "positive-opening" design. Positive-opening operation causes the contacts to be forced
open, without the use of springs, when the actuator is disengaged or moved from its home position. In addition, the switch(es) must
be mounted in a "positive mode", to move/disengage the actuating system and actuator from its home position and open the
normally closed contact, when the guard opens.
WARNING:
•Properly Install the Interlocked Guards
•Failure to follow these guidelines could result in serious injury or death.
• At a minimum, the interlocked guard must prevent hazards when not fully closed and must prevent
access to the hazards through any opening in the guard.
• Install the safety switches and actuators so they cannot be easily defeated and are not used as a
mechanical or end-of-travel stop. Mount at least one switch in a positive mode and verify it opens the
normally closed contact when the guard opens.
• The user must refer to the relevant regulations and comply with all necessary requirements. See ANSI
B11.19, or ISO 14119 and ISO 14120, or the appropriate standard.
CAUTION:
•Do not use the safety switch as a mechanical or end-of-travel stop.
•Catastrophic damage can cause the safety switch to fail in an unsafe manner (that is, loss of the
switching action).
• Limit the movement or rotation of the guard to prevent damage to the safety switch or the actuator.
See Mechanical Installation, Switching Diagram, Specifications for additional information.
WARNING:
•The hazard must be accessible only through the sensing field
•Incorrect system installation could result in serious injury or death.
• The installation of the SI-HG(Z)63 must prevent any individual from reaching around, under, over or
through the defined area and into the hazard without being detected.
• See OSHA CFR 1910.217, ANSI B11.19, and/or ISO 14119, ISO 14120 and ISO 13857 for information
on determining safety distances and safe opening sizes for your guarding device. Mechanical barriers
(for example, hard (fixed) guarding) or supplemental safeguarding might be required to comply with
these requirements.
Pass-through hazards and Perimeter Guarding
A pass-through hazard is associated with applications where personnel may pass through a safeguard (which issues a stop
command to remove the hazard), and then continues into the guarded area, such as in perimeter guarding. Subsequently, their
presence is no longer detected, and the related danger becomes the unexpected start or restart of the machine while personnel are
within the guarded area.
Eliminate or reduce pass-through hazards whenever possible—see ANSI B11.19 and ANSI B11.20 or ISO 11161. One method to
mitigate the risk is to ensure that once tripped, either the safeguarding device, the safety related part of the control system, or the
guarded machine's MSCs/MPCEs will latch in an OFF condition. The latch must require a deliberate manual action to reset that is
separate from the normal means of machine cycle initiation.
This method relies upon the location of the reset switch as well as safe work practices and procedures to prevent an unexpected
start or restart of the guarded machine. All reset switches must be:
•Outside the guarded area
• Located to allow the switch operator a full, unobstructed view of the entire guarded area while the reset is performed
• Out of reach from within the guarded area
• Protected against unauthorized or inadvertent operation (such as through the use of rings or guards)
If any areas within the guarded area are not visible from the reset switch, additional safeguarding must be provided.
WARNING:
•Perimeter guarding applications
•Failure to observe this warning could result in serious injury or death.
• Use lockout/tagout procedures per ANSI Z244.1, or use additional safeguarding as described by ANSI
B11.19 safety requirements or other applicable standards if a passthrough hazard cannot be eliminated
or reduced to an acceptable level of risk.
Mechanical Installation
Important: Install a safety switch in a manner which discourages tampering or defeat. Mount switches to prevent
bypassing of the switching function at the terminal chamber or Quick Disconnect (QD). A switch and its actuator
must never be used as a mechanical stop. Overtravel may cause damage to switch.
SI-HG(Z)63 Hinge Wing Safety Interlock Switch
P/N 129465 Rev. G www.bannerengineering.com - Tel: + 1 888 373 6767 3

All mounting hardware is supplied by the user. Fasteners must be of sufficient strength to guard against breakage. Use of permanent
fasteners or locking hardware is recommended to prevent the loosening or displacement of the actuator and the switch body. The
mounting holes in the switch body and the actuator accept M6 screws.
1. Make sure that excessive force is not exerted by the weight and swing of the guard, gate, or door.
2. Position blank hinges (if used) and the hinge switch(es) on the guard or gate while it is in its fully closed and latched
position.
3. Verify that the axis of rotation is identical for all hinges used. Typically, this is accomplished by using a straight edge along
the long flat edge to verify that the switch bodies are parallel.
4. Check the rotation of the guard or gate for misalignment and binding after the mounting hardware is secure.
Figure 6. Hinge Switch Installation
Setting the Switch Point
1. Verify that the hinge switches (and blank hinges, if used) are properly mounted and that the guard or gate swings freely
throughout its range of motion without binding. If binding is noticed, repeat the Mechanical Installation on page 3.
2. Place the guard in its closed and latched position.
Figure 7. Move door or hatch to closed position and secure
3. Double-check that the installation is correct and the resulting switching action is as expected.
4. To set the switching point, move the door or hatch to its closed position and fasten it (for example, by a stop) to avoid any
swiveling.
5. Tighten by hand the set screw with the supplied bit. The maximum torque is 2 N·m (1.48 lb·ft). Do not over tighten or
damage resulting in the loss of the switch point can occur. After you start tightening the set screw, do not change the
position of the hinge until after the setting process is complete.
Figure 8. Tight the setscrew
6. When the switching point is correctly set, a green ring, with no red showing, replaces the red color ring (located in the gap
between the hinge and the switch). This occurs when the set screw meets with resistance and firmly engages.
Figure 9. Red to green color ring
SI-HG(Z)63 Hinge Wing Safety Interlock Switch
4 www.bannerengineering.com - Tel: + 1 888 373 6767 P/N 129465 Rev. G

7. Insert the supplied plugs into the topside of the hinge, and the bottom of the switch, to protect the switch from dirt or debris.
8. Test the function of the switch to verify the proper (expected) operation.
Fine-Adjusting the Switch Point Setting
Use the adjustment screw to adjust the setting by ±1.5°. This can be useful to compensate for deviations during installation or later
(for example, a misplaced stop or machine vibration). To make the adjustment, insert the supplied screwdriver into the switch point
adjustment slot and turn clockwise to increase or counterclockwise to decrease the setting. For most applications, adjust the angle to
its functional minimum position.
Figure 10. Switch Point Adjustment Slot
Switch Point
Adjustment
Relocating the Switch Point Setting or Repositioning the Hinge
The switch point setting can be changed (to mount the switch in a new location, for example). Changing the setting requires
replacement of the red plastic washer. See Replacement Accessory Kit on page 13 for a kit that includes a replacement washer.
The hinge must be removed from the switch component to change the earlier switch point setting. The hinge may then be reinstalled
on the same side of the switch as before, or it may be installed to the opposite side (a left-hand hinge may be converted to a right-
hand hinge, and vice versa).
To perform either task:
1. Remove the screws fastening the hinge to the switch using the supplied tool. Retain the screws for later reuse.
Figure 11. Remove the screws
2. If you are changing the switch to the opposite side, insert a flat-blade screwdriver between the hinge housing and the plastic
plug to gently pry the plastic plugs out. Retain the plastic plugs for later reuse.
Figure 12. Remove the plugs
3. Remove the hinge portion from the switch.
Figure 13. Remove the hinge
SI-HG(Z)63 Hinge Wing Safety Interlock Switch
P/N 129465 Rev. G www.bannerengineering.com - Tel: + 1 888 373 6767 5

4. Lift the red plastic washer from the switch. Discard the plastic washer; it cannot be reused.
Figure 14. Remove the plastic washer
5. Align the switch cylinder arrow with mark “A” on the switch housing.
Note: An SW8 hex wrench is recommended for easy rotation.
Figure 15. Algin to "A"
6. Gently press and turn the switch element into the enclosure until the switch cylinder arrow aligns with mark “B” on the switch
housing. The switch element should sink into the enclosure during this process.
Figure 16. Align to "B"
7. Press the switch element into the enclosure again until it reaches the internal stop. The notch of the white insert should be
seated around the protrusion of the switch enclosure.
Figure 17. Insert seated around the protrusion
SI-HG(Z)63 Hinge Wing Safety Interlock Switch
6 www.bannerengineering.com - Tel: + 1 888 373 6767 P/N 129465 Rev. G

8. Install a new red plastic washer (from the accessories bag included with the switch) onto the switch cylinder.
Figure 18. Install a new plastic washer
9. If the hinge position on the switch is being changed (changing from a left hinge to a right, for example), remove the
rectangular plug from the switch housing and attach the hinge to that side. Install the hinge onto the switch and rotate 30° to
seat. Fasten the switch to the hinge using the supplied tool and the screws removed in step 1. The countersunk screw max.
torque is 2 Nm.
Figure 19. Change the hinge position
10. Set the new switch point setting as required.
Electrical Installation
WARNING:
•Risk of electric shock
•Use extreme caution to avoid electrical shock. Serious injury or death could result.
• Always disconnect power from the safety system (for example, device, module, interfacing, etc.),
guarded machine, and/or the machine being controlled before making any connections or replacing any
component. Lockout/tagout procedures might be required. Refer to OSHA 29CFR1910.147, ANSI
Z244-1, or the applicable standard for controlling hazardous energy.
• Make no more connections to the device or system than are described in this manual. Electrical
installation and wiring must be made by a Qualified Person 1 and must comply with the applicable
electrical standards and wiring codes, such as the NEC (National Electrical Code), NFPA 79, or IEC
60204-1, and all applicable local standards and codes.
Connection to a Machine
Electrical connection is via a 6-pin dual-key M12/micro-style QD and cordsets (see Cordsets on page 12) or via the integral cable
of the IP69 models.
Perform a risk assessment to determine the appropriate level of safety circuit performance (integrity) and the means of interfacing
the switch(es) with the machine control circuit. While Banner Engineering always recommends the highest level of safety in any
application, the user is responsible to safely install, operate, and maintain each safety system and comply with all relevant laws and
regulations.
To ensure the highest level of reliability (Control Reliable or Category 4, for example), wire the positively-driven safety contacts
(safety contacts that are closed when the actuator is engaged) from each of two individual safety switches per interlock guard
in a dual channel hookup to a safety module (for example, ES-FA-9AA), safety controller (for example, SC/XS26-2), or the safety
related part of the machine control that complies with the required level of safety performance.
1A person who, by possession of a recognized degree or certificate of professional training, or who, by extensive knowledge, training and experience, has
successfully demonstrated the ability to solve problems relating to the subject matter and work.
SI-HG(Z)63 Hinge Wing Safety Interlock Switch
P/N 129465 Rev. G www.bannerengineering.com - Tel: + 1 888 373 6767 7

Figure 20. Connect two redundant safety switches per interlock guard to an appropriate 2-channel input safety module
Safety Switch
#1
Safety Switch
#2
Input Channel
#1
Input Channel
#2
2-channel Safety Module
(2-channel E-stop Module
2-channel Gate Monitor Module, etc.)
Single gate
or guard
11
(21)
11
(21)
12
(22)
12
(22)
The non-safety contact (33/34) will switch at a greater degree (rotation) than the
safety contacts and may not indicate if the guard is slightly open (see Figure 3
on page 2). In such situations, an unused safety contact can more accurately
indicate the status of the guard.
Refer to the installation instructions provided with the safety module or safety
controller for information regarding the interface of the safety module to the
machine stop control elements.
Two functions of the safety module or safety controller are:
1. To provide a means of monitoring the contacts of both safety switches for contact failure, and to prevent the machine from
restarting if either switch fails.
2. To provide a reset routine after closing the guard and returning the safety contacts to their closed position. This prevents the
controlled machinery from restarting by simply closing the guard (reinserting the key/actuator, for example). This necessary
reset function is required by ANSI B11.0 and NFPA 79 machine safety standards.
Use only positively-driven, normally-closed safety contacts from each switch for connection to the safety module, controller, or the
safety related part of the machine control (see Figure 3 on page 2). A typical use for the normally-open non-safety contact is to
communicate status with a process controller or for other control functions that are not safety-related. Refer to the installation
instructions provided with the safety modules or controllers for more information regarding the interface of the safety module to the
machine stop control elements.
WARNING:
•Determine the safety category
•The design and installation of the safety devices and the means of interfacing of those devices could
greatly affect the level of safety circuit integrity.
• Perform a risk assessment to determine the appropriate safety circuit integrity level or safety category,
as described by ISO 13849-1, to ensure that the expected risk reduction is achieved and that all
applicable regulations and standards are met.
Important: The design, installation and the means of interfacing of the safety switches greatly affect the level of
safety circuit integrity. It is recommended that two individual safety switches be used to monitor each guard and
that the normally-closed safety contacts from each of the two safety switches be connected in a dual channel
method to a safety module or safety controller to achieve control reliability (OSHA 29CFR1910 or ANSI B11.19)
or Category 3 or 4 (ISO 13849-1). This is required to provide monitoring for safety switch failure, and to provide
the necessary reset routine, as required by NFPA 79 and IEC 60204-1. Use of only one safety switch per
interlock guard is not recommended in situations that can result in serious injury or death.
Monitoring Series-Connected Safety Switches
When monitoring the position of several guards with a single safety module or controller, the contacts of the corresponding pole of
each switch must be connected together in series. Never connect the contacts of multiple switches in parallel. Such a parallel
connection can defeat the switch contact monitoring ability of the module and could create an unsafe condition.
When multiple safety switches are series connected, the failure of one switch in the system may be masked or not be detected at all.
The following two scenarios assume two positive-opening safety switches on each guard, both connected in series to switches of a
second guard (dual channel hookup) and monitored by a safety module or safety controller:
•Masking of a failure—If a guard is opened but one switch fails to open, the redundant safety switch on that guard opens
and a protective (safety) stop occurs. If the faulty guard is then closed, the module/controller will not reset because one
channel did not open, thus complying with the required fault detection. However, if a second "good" guard is cycled (opening
and then closing both of the channels), the failure appears to be corrected (input requirements satisfied) and the module/
controller allows a reset. This system is no longer redundant and, if the second switch fails, may result in an unsafe
condition (the accumulation of faults resulting in loss of the safety function).
•Non-detection of a failure—If a functional guard is opened, both channels open and the module/controller initiates a
protective (safety) stop. If a guard with a faulty safety switch is then opened and closed before the good guard is re-closed,
the faulty switch is not detected. The system is no longer redundant and may result in a loss of safety if the redundant switch
fails to open when needed.
The system in either scenario does not inherently comply with the safety standard requirements of detecting a single fault and
preventing the next cycle (not a Category 4 application per ISO 13849-1). In multiple-guard systems using series-connected safety
switches, it is important to periodically check the functional integrity of each interlocked guard individually. Open and close each
guard separately while verifying that the machine properly responds. Operators, maintenance personnel, and others associated
with the operation of the machine must be trained to recognize failures and be instructed to correct them immediately.
SI-HG(Z)63 Hinge Wing Safety Interlock Switch
8 www.bannerengineering.com - Tel: + 1 888 373 6767 P/N 129465 Rev. G
WARNING:
•Connecting safety switches in series
•Monitoring multiple guards with a series connection of multiple safety interlock switches is not a Safety
Category 4 Application (per ISO 13849-1). A single failure can be masked or not detected at all. The
loss of a safety stop signal or an inappropriate reset can lead to serious injury or death.
• When such a configuration is used, procedures must be performed regularly to verify proper operation of
each switch. Correct all failures immediately (for example, immediately replace a failed switch).
Specifications
Contact Rating
3 A at 230 V AC max., 1.0 A at 24 V DC max.
2.5 kV maximum rated impulse withstand voltage (Uimp)
European Rating:
Ui = 250 V
Ue = 230 V AC, 24 V DC
Ithe = 4A
Utilization categories: AC-15: Ue/Ie 230 V / 3 A; DC-13: Ue/Ie 24 V / 1 A
(IEC/EN 90497-5-1)
Electrical Protection Class
II, protective insulation
Contact Function
Slow make and break contacts, 2 NC, 1 NO
Wire Connections
6-pin Micro-style quick-disconnect fitting (M12 Dual-Key-Way). Cordsets are
ordered separately.
Construction
SI-HG63..: Hinge: Cast Stainless Steel (X22CrNi 17); Switch: PBT
SI-HGZ63..: Hinge: zinc die cast (nickel finish); Switch: PBT
Environmental Rating
IP67 acc. to IEC/EN 60529
W models are IEC IP69 according to IEC/EN 60529
Operating Conditions
–25 °C to +70 °C (–13 °F to +158 °F)
(connecting cable permanently mounted; no freezing over / no condensation)
Mounting
4 × M6 screws DIN EN ISO 7984 (on flat and stiff surface)
Switching Frequency
Max. 300 operations/h (5 operations per minute)
Switching Angle
NC Contact: ± 3°, Positive-opening ± 6° (wear can cause increase by 2°)
NO Contact: ± 9°
Tolerance for all angles: 1.5°
Mechanical Load
SI-HG63..: FR1 = 1800 N max., FR2 = 750 N max., FA = 1800 N max.
SI-HGZ63..: FR1 = 1200 N max., FR2 = 500 N max., FA = 1200 N max.
For direction of loaded forces, see Operating Range
Mechanical Life
1 million operations
Excessive loading (force) and/or vibration, as well as improper installation,
can reduce the service life.
Weight
SI-HG63..: approximately 0.45 kg
SI-HG63A: approximately 0.27 kg
SI-HGZ63..: approximately 0.4 kg
SI-HGZ63A: approximately 0.22 kg
Cabled SI-HG63..: approximately 0.65 kg
Double SI-HG63..: approximately 1 kg
Application Notes
To avoid excessive radial stress in applications containing large doors, the
hinge switch must be mounted either in pairs of two, or in conjunction with a
blank hinge.
Applicable Standards
VDE 0660 T100, DIN EN 60947-1, IEC 60947-1
VDE 0660 T200, DIN EN 60947-5-1, IEC 60947-5-1
B10d
2 × 10⁶ cycles (at DC-13; 24 V; Ie2 = 0.1 A)
Short Circuit Protection
4 amp Slow Blow (gG). Recommended external fusing or overload
protection.
Rated conditional short-circuit current: 1000 A
Operating Range
0 to 270°
EU-Conformity
According to directive 2006/42/EG
According to directive 2006/95/EC
Approvals
CCSAUS B300
Certifications
Banner Engineering Europe Park
Lane, Culliganlaan 2F bus 3, 1831
Diegem, BELGIUM
Turck Banner LTD Blenheim House,
Blenheim Court, Wickford, Essex
SS11 8YT, Great Britain
Dimensions
All measurements are listed in millimeters [inches], unless noted otherwise.
For blank hinge dimensions, see Blank Hinge on page 13.
SI-HG(Z)63 Hinge Wing Safety Interlock Switch
P/N 129465 Rev. G www.bannerengineering.com - Tel: + 1 888 373 6767 9

Figure 21. Model SI-HG(Z)63FQDR 2
4.0 mm
(0.16")
19.5 mm
(0.77")
147.0 mm
(5.79")
45.0 mm
(1.77")
63.0 mm
(2.48")
6.3 mm
(0.25")
M12X1
18 mm
(0.71")
33.0 mm
(1.30)"
82.0 mm
(3.23")
33.0 mm
(1.30")
18 mm
(0.71")
Figure 22. Model SI-HG(Z)63FQDRR
127.5 mm
(5.00")
51.5 mm
(2.00")
12 mm (0.47")
45.0 mm
(1.77")
63.0 mm
(2.48")
6.3 mm
(0.25")
M12X1
18 mm
(0.71")
33.0 mm
(1.30)"
82.0 mm
(3.23")
13.5 mm (0.53")
20.0 mm (0.79")
33.0 mm
(1.30")
18 mm
(0.71")
4.0 mm
(0.16")
19.5 mm
(0.77")
Figure 23. Model SI-HG(Z)63F5MB
8.5 mm
(0.33")
191.0 mm
(7.52")
10.5 mm
(0.41")
37.0 mm
(1.46")
37.0 mm
(1.46")
19.5 mm
(0.77")
50.5 mm
(1.99")
63.0 mm
(2.48")
50.5 mm
(1.99")
82.0 mm
(3.23")
45.0 mm
(1.77")
51.0 mm
(2.01")
Figure 24. Model SI-HG(Z)63F5MR
82.0 mm
(3.23")
63.0 mm
(2.48")
24.1 mm
(0.95")
4.0 mm
(0.16")
137.0 mm
(5.39")
37.0 mm
(1.46")
13.5 mm
(0.53")
50.5 mm
(1.99")
45.0 mm
(1.77")
4.0 mm
(0.16")
2Dimensions for model SI-HG(Z)63FQDL are a mirror image.
SI-HG(Z)63 Hinge Wing Safety Interlock Switch
10 www.bannerengineering.com - Tel: + 1 888 373 6767 P/N 129465 Rev. G
Figure 25. Model SI-HG(Z)63F5MRR
4.0 mm
(0.16")
127.5 mm
(5.02")
63.0 mm
(2.48")
12.0 mm
(0.47")
82.0 mm
(3.23")
50.5 mm
(1.99")
37.0 mm
(1.46")
51.0 mm
(2.01")
45.0 mm
(1.77")
4.0 mm
(0.16")
Guard Opening Calculation (before switching)
The size opening between the machine frame and the guard can be estimated based on the table provided. This can assist in
determining safety distance as described by ANSI B11.19 or ISO 13857.
Example
A guard with a 40 mm aluminum profile (A) and a width of 900 mm (B) is safeguarded by SI-HG(Z)63 safety interlocking switch. The
switching point is set (fixed) while guard is closed, the positive-opening switching point is set at α = 6° in the opening direction
(assuming that the point has not been finely-adjusted).
In the table, find the "B" row of "900" and then follow over to the 6° column and note the number (94.1 mm). The approximate
opening in the guard at the switching point (C1) can be found by subtracting the width of the guard.
C1 = C – A = 94.1 mm – 40 mm = 54.1 mm (at initial installation).
where:
α = Opening angle of the guard at the point of switching
A = Width of the guard in mm
B = Length of the guard in mm
C = Distance travel by outside of guard
C1 = Size of the opening in the guard at the point of switching
α 3° 4° 5° 6° 7° 8° 9°
B mm C mm
100 5.2 7.0 8.7 10.5 12.2 13.9 15.6
200 10.5 14.0 17.4 20.9 24.4 27.8 31.3
300 15.7 20.9 26.1 31.4 36.6 41.8 46.9
400 20.9 27.9 34.9 41.8 48.7 55.7 62.6
SI-HG(Z)63 Hinge Wing Safety Interlock Switch
P/N 129465 Rev. G www.bannerengineering.com - Tel: + 1 888 373 6767 11

500 26.2 34.9 43.6 52.3 60.9 69.6 78.2
600 31.4 41.9 52.3 62.7 73.1 83.5 93.9
700 36.6 48.8 61.0 73.2 85.3 97.4 109.5
800 41.9 55.8 69.7 83.6 97.5 111.3 125.1
900 47.1 62.8 78.4 94.1 109.7 125.3 140.8
1000 52.3 69.8 87.2 104.5 121.9 139.2 156.4
1100 57.6 76.7 95.9 115.0 134.1 153.1 172.1
1200 62.8 83.7 104.6 125.4 146.2 167.0 187.7
1300 68.0 90.7 113.3 135.9 158.4 180.9 203.4
1400 73.3 97.7 122.0 146.3 170.6 194.8 219.0
1500 78.5 104.6 130.7 156.8 182.8 208.8 234.7
Accessories
Safety Monitoring Devices
The Safety Interlock Switches are contact based devices. To perform their safety function these switches need to be connected to
an appropriate safety monitoring device like an ES-FA-xAA, SC22, SC26 or XS26.
Table 1: Safety controller models
Non-Expandable Models Expandable Models Description
SC26-2 XS26-2 26 convertible I/O and 2 redundant solid state safety outputs
SC26-2d XS26-2d 26 convertible I/O and 2 redundant solid state safety outputs with display
SC26-2e XS26-2e 26 convertible I/O and 2 redundant solid state safety outputs with Ethernet
SC26-2de XS26-2de 26 convertible I/O and 2 redundant solid state safety outputs with display and Ethernet
SC10-2roe 10 inputs, 2 redundant relay safety outputs (3 contacts each) (ISD and Ethernet compatible)
XS26-ISDd 26 inputs, 2 redundant solid state safety outputs with display, Ethernet, and 8 ISD channels
Single or dual channel switch monitoring:
Model Description
UM-FA-9A 3 Normally Open (NO) Redundant-output 6 A Contacts
UM-FA-11A 2 Normally Open (NO) Redundant-output 7 A Contacts, plus 1 Normally Closed (NC) Auxiliary Contact
ES-FA-9AA 3 Normally Open (NO) Redundant-output 6 A Contacts
ES-FA-11AA 2 Normally Open (NO) Redundant-output 7 A Contacts, plus 1 Normally Closed (NC) Auxiliary Contact
Cordsets
6-Pin M12 Dual Key Cordsets—Single Ended
Model Length Style Dimensions Pinout (Female)
MQEAC-606 2 m (6.56 ft)
Straight
M12 x 1
ø14.5 mm
(0.57")
42 mm Typ.
(1.65")
3
4
5
6
1
2
1 = Red/White
2 = Red
3 = Green
4 = Red/Yellow
5 = Red/Black
6 = Red/Blue
MQEAC-615 5 m (16.40 ft)
MQEAC-630 9.14 m (30 ft)
MQEAC-606RA 1.83 m (6 ft)
Right-angle
32 mm Typ.
(1.26")
M12 x 1
ø 14.5 mm
(0.57")
28 mm Typ.
(1.1")
MQEAC-615RA 4.57 m (15 ft)
MQEAC-630RA 9.14 m (30 ft)
SI-HG(Z)63 Hinge Wing Safety Interlock Switch
12 www.bannerengineering.com - Tel: + 1 888 373 6767 P/N 129465 Rev. G
Additional Pinout Information for SI-HG(Z)63 Hinge Wing Safety Interlock Switch
Pin Contact Wire Color Pin Contact Wire Color
1 11 Red/White (rd/wh) 2 12 Red (rd)
3 21 Green (gr) 4 22 Red/Yellow (rd/ye)
5 33 Red/Black (rd/bk) 6 34 Red/Blue (rd/bu)
Blank Hinge
Model Construction Description Dimensions
SI-HG63A Stainless Steel
Blank hinge; same mechanical specifications as SI-
HG(Z)63 Series hinge switches, but without the safety
switch component
4.0 mm
(0.16")
19.5 mm
(0.77")
82.9 mm
(3.26")
45.0 mm
(1.77")
63.0 mm
(2.48")
6.3 mm
(0.25")
18 mm
(0.71")
33.0 mm
(1.30)"
82.0 mm
(3.23")
33.0 mm
(1.30")
18 mm
(0.71")
SI-HGZ63A Zinc Die-cast
Replacement Accessory Kit
Model Kit Includes
SI-HG63-TK1
2 plugs
1 plastic washer
1 bit
1 screwdriver
1 installation instructions
SI-HG63-setscrew-5 5 replacement setscrews
Product Support and Maintenance
Checkout
At switch installation or replacement and at machine set up, a Designated Person 3 must test each switch for proper machine
shutdown response and check the switch(es) and installation for proper operation, physical damage, mounting (looseness), and
excessive environmental contamination. This must also take place on a periodic schedule determined by the user, based on the
severity of the operating environment and the frequency of switch actuations. Adjust, repair, or replace components as needed. If
inspection reveals contamination on the switch, thoroughly clean the switch and eliminate the cause of the contamination. Replace
the switch and/or appropriate components when any parts or assemblies are damaged, broken, deformed, or badly worn; or if the
electrical/mechanical specifications (for the environment and operating conditions) have been exceeded. Always test the control
system for proper functioning under machine control conditions after performing maintenance, replacing the switch, or replacing
any component of the switch.
Repairs
Do not attempt any repairs to the safety interlocking switch. It contains no field-replaceable components. Return it to
Banner Engineering for warranty repair or replacement.
Contact Banner Factory Application Engineering. They will attempt to troubleshoot the system from your description of the problem.
If they conclude that a component is defective, they will issue a return merchandise authorization (RMA) number for your paperwork,
and give you the proper shipping address.
3A Designated Person is identified in writing by the employer as being appropriately trained to perform a specified checkout procedure.
SI-HG(Z)63 Hinge Wing Safety Interlock Switch
P/N 129465 Rev. G www.bannerengineering.com - Tel: + 1 888 373 6767 13

Important: Pack the safety switches carefully. Damage that occurs in return shipping is not covered by
warranty.
Standards and Regulations
The list of standards below is included as a convenience for users of this Banner device. Inclusion of the standards below does not
imply that the device complies specifically with any standard, other than those specified in the Specifications section of this manual.
U.S. Application Standards
ANSI B11.0 Safety of Machinery, General Requirements, and Risk Assessment
ANSI B11.19 Performance Criteria for Safeguarding
NFPA 79 Electrical Standard for Industrial Machinery
International/European Standards
EN ISO 12100 Safety of Machinery – General Principles for Design — Risk Assessment and Risk Reduction
ISO 14119 (EN 1088) Interlocking Devices Associated with Guards – Principles for Design and Selection
ISO 14120 Safety of machinery – Guards – General requirements for the design and construction of fixed and movable guards
ISO 13857 Safety of Machinery – Safety Distances to Prevent Hazard Zones Being Reached
IEC 62061 Functional Safety of Safety-Related Electrical, Electronic and Programmable Control Systems
EN ISO 13849-1 Safety-Related Parts of Control Systems
EN 60204-1 Electrical Equipment of Machines Part 1: General Requirements
IEC 60947-1 Low Voltage Switchgear – General Rules
IEC 60947-5-1 Low Voltage Switchgear – Electromechanical Control Circuit Devices
IEC 60529 Degrees of Protection Provided by Enclosures
IEC 61508 Functional Safety of Electrical/Electronic/Programmable Electronic Safety-Related Systems
EU/UK Declaration of Conformity (DoC)
Banner Engineering Corp. herewith declares that these products are in conformity with the provisions of the listed directives,
regulations, and all essential health and safety requirements have been met. For the complete DoC, please go to
www.bannerengineering.com.
Product Directive
SI-HG(Z)63 Hinge Wing Safety Interlock Switch EU: Machinery Directive 2006/42/EC
UK: Machinery (Safety) Regulations 2008
Representative in EU: Spiridon Lachanidis, Managing Director, Banner Engineering Europe Park Lane, Culliganlaan 2F bus 3,
1831 Diegem, BELGIUM
Representative in UK: Tony Coghlan, Managing Director, Turck Banner LTD Blenheim House, Blenheim Court, Wickford, Essex
SS11 8YT, Great Britain
Banner Engineering Corp. Limited Warranty
Banner Engineering Corp. warrants its products to be free from defects in material and workmanship for one year following the date of shipment. Banner Engineering Corp. will repair or
replace, free of charge, any product of its manufacture which, at the time it is returned to the factory, is found to have been defective during the warranty period. This warranty does not
cover damage or liability for misuse, abuse, or the improper application or installation of the Banner product.
THIS LIMITED WARRANTY IS EXCLUSIVE AND IN LIEU OF ALL OTHER WARRANTIES WHETHER EXPRESS OR IMPLIED (INCLUDING, WITHOUT LIMITATION, ANY
WARRANTY OF MERCHANTABILITY OR FITNESS FOR A PARTICULAR PURPOSE), AND WHETHER ARISING UNDER COURSE OF PERFORMANCE, COURSE OF DEALING OR
TRADE USAGE.
This Warranty is exclusive and limited to repair or, at the discretion of Banner Engineering Corp., replacement. IN NO EVENT SHALL BANNER ENGINEERING CORP. BE LIABLE TO
BUYER OR ANY OTHER PERSON OR ENTITY FOR ANY EXTRA COSTS, EXPENSES, LOSSES, LOSS OF PROFITS, OR ANY INCIDENTAL, CONSEQUENTIAL OR SPECIAL
DAMAGES RESULTING FROM ANY PRODUCT DEFECT OR FROM THE USE OR INABILITY TO USE THE PRODUCT, WHETHER ARISING IN CONTRACT OR WARRANTY,
STATUTE, TORT, STRICT LIABILITY, NEGLIGENCE, OR OTHERWISE.
Banner Engineering Corp. reserves the right to change, modify or improve the design of the product without assuming any obligations or liabilities relating to any product previously
manufactured by Banner Engineering Corp. Any misuse, abuse, or improper application or installation of this product or use of the product for personal protection applications when the
product is identified as not intended for such purposes will void the product warranty. Any modifications to this product without prior express approval by Banner Engineering Corp will void
the product warranties. All specifications published in this document are subject to change; Banner reserves the right to modify product specifications or update documentation at any time.
Specifications and product information in English supersede that which is provided in any other language. For the most recent version of any documentation, refer to:
www.bannerengineering.com.
For patent information, see www.bannerengineering.com/patents.
SI-HG(Z)63 Hinge Wing Safety Interlock Switch
© Banner Engineering Corp. All rights reserved
This manual suits for next models
14
Table of contents
Other Banner Switch manuals

Banner
Banner RP-LS42F LE Series User manual

Banner
Banner R95C User manual

Banner
Banner SI-RF Series User manual

Banner
Banner RP-LS42F LE Series User manual

Banner
Banner PICO-GUARD SFI-D1EDPXT6 User manual

Banner
Banner R95C Series User manual

Banner
Banner R95C User manual

Banner
Banner Sure Cross MultiHop DX80DR9M-H5 User manual

Banner
Banner SI-GL42 Series User manual

Banner
Banner SI-RFST-UP8 User manual