manuals.online logo
Brands
  1. Home
  2. •
  3. Brands
  4. •
  5. Barricade
  6. •
  7. Automobile Accessories
  8. •
  9. Barricade R110299 User manual

Barricade R110299 User manual

STEP 1 // Unplug the factory license plate light harnesses,
and the trailer plug connector and pull away from the bumper.
If equipped unplug and remove the factory backup sensors.
STEP 2 // Push the red tab outwards, and press the black
tab to unplug the license plate light harness. Unplug both
sides.
STEP 3 // From underneath the vehicle, locate and remove
the (2) 21mm bolts from the upper frame rail mount. Do the
same on the opposite side. **Note: Factory hardware will be
reused.
STEP 4 // From under the vehicle, remove the (2) 21mm
bolts from the lower frame rail mount. Do the same on the
opposite side. Carefully remove the bumper from the vehicle.
**Note: Factory hardware will be reused.
R110299
R110300
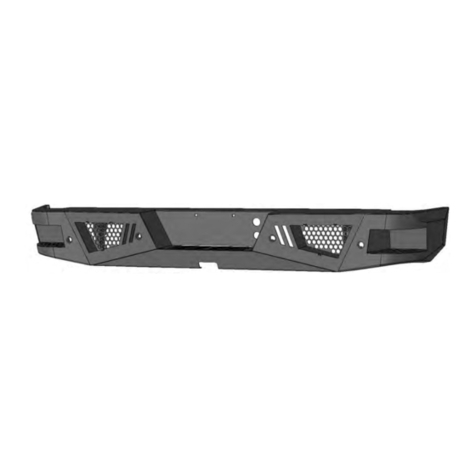
Tubular Rear Bumper
(09-18 RAM)
TOOLS REQUIRED:
15, 16, 18, 21mm Sockets
3/8” or 1/2” Ratchet & Extensions
10mm Wrench
Trim Panel Removal Tool
Flat Head Screw Driver
Allen Wrench
CONTENTS:
(1) Rear Bumper
(2) Bumper Brackets
(2) Mesh Grille Inserts
(2) Fog Lights - Optional
(1) Fog Light Harness - Optional
(2) Bolt Plates
(4) M12x1.75x40mm Bolts
(4) M12 Flat Washers
(4) M12 Lock Washers
(4) Rear Camera Rubber Plugs
(2) LED License Plate Lights
(4) Splice Connectors
(10) Zip Ties
STEP 8 // If choosing not to use the LED fog lights, install
the (2) mesh grille inserts into the bumper using the (2) M6
flat washers, lock washers, and nuts.
STEP 6 // If equipped re-install the factory reverse sensors w/ the rubber
grommet flush to the outer face of the bumper. **Note: The factory trim
bezel does not get re-used. Using the supplied 4mm screws to apply slight
pressure to either side of the sensor. Over tightening of the screws can cause
sensor damage. For vehicles w/o sensors install the supplied rubber plugs.
STEP 10 // Remove the (2) 16mm bolts on each side
securing the bumper mount to the factory rear bumper.
Remove bumper mount.
STEP 9 // Located behind the license plate, remove the (2)
16mm bolts securing the center of the bumper mount to the
bumper.
STEP 5 // Using a flat head screw driver, push in the metal
tabs on the trailer plug connector and remove from the factory
bumper. Transfer to new bumper.
STEP 7 // Optional Light: If choosing the LED fog light
option, install the (2) LED Fog lights into the bumper using the
(2) M8x1.25x30mm bolts, flat washers, lock washers, and
nuts.
STEP 13 // Insert the supplied license plate light through the license plate,
and into the prerunner bumper. Secure using the washer and nut. Splice the
license plate lights into the factory license plate light harnesses using the
supplied splice connectors.
STEP 15 // Optional Light Wiring: Install the Red 12+
volt wire to the positive battery terminal. Connect the Black
ground wire to the negative battery terminal. Mount the fuse in
a safe location away from any damage that could occur. Tuck
away any extra wiring.
STEP 16 // Optional Light Wiring: Route the on/off
switch to the interior of the vehicle using a suitable body grommet.
Mount the switch in the desired location. Zip tie any extra loose wiring
away from any damage that could occur. Installation is now complete.
STEP 14 // Optional Light Wiring: Connect the (2) LED
Fog lights into the supplied harness. Be sure to zip tie the
access wiring away from any damage that could occur.
STEP 11 // Attach the bumper mount to the new bumper
using the (1) bolt plate, and (2) M12x1.75x40mm bolts, lock
washers, and flat washers on each side.
STEP 12 // Attach the prerunner bumper to the vehicle using the
factory hardware from Steps 3 & 4. Be sure to center the bumper,
and adjust height of bumper to desired location. Then reinstall the
trailer harnesses. If equipped, reinstall the backup camera harness-
es.

This manual suits for next models

1

Other Barricade Automobile Accessories manuals

Barricade LD1 User manual

Barricade

Barricade LD1 User manual

Barricade J123325-JL User manual

Barricade

Barricade J123325-JL User manual

Barricade R108980 User manual

Barricade

Barricade R108980 User manual

Popular Automobile Accessories manuals by other brands

Subaru S0A367010 installation instructions

Subaru

Subaru S0A367010 installation instructions

AMP Research PowerStep 75124-01 installation guide

AMP Research

AMP Research PowerStep 75124-01 installation guide

SuperATV Door Bags installation instructions

SuperATV

SuperATV Door Bags installation instructions

Tuff Tonneaus Ford PX Ranger Dual Cab installation instructions

Tuff Tonneaus

Tuff Tonneaus Ford PX Ranger Dual Cab installation instructions

Aries 4524 installation manual

Aries

Aries 4524 installation manual

Rockfox R1200GS installation guide

Rockfox

Rockfox R1200GS installation guide

Lippert Components SOLERA SLIDER installation manual

Lippert Components

Lippert Components SOLERA SLIDER installation manual

Thetford 24571 installation instructions

Thetford

Thetford 24571 installation instructions

Lippert Promaster installation manual

Lippert

Lippert Promaster installation manual

VW 1K8 071 609 Fitting instructions

VW

VW 1K8 071 609 Fitting instructions

Craftsman 50244 Operator's manual

Craftsman

Craftsman 50244 Operator's manual

Bluecell BC-V6 user manual

Bluecell

Bluecell BC-V6 user manual

Steelcraft DS5 manual

Steelcraft

Steelcraft DS5 manual

Car-Interface CI-RL4-MIB100 manual

Car-Interface

Car-Interface CI-RL4-MIB100 manual

Dometic DVF Holding Tank Vent Filter Installation and operating manual

Dometic

Dometic DVF Holding Tank Vent Filter Installation and operating manual

Park Safe PSC23 user manual

Park Safe

Park Safe PSC23 user manual

TrailFX 8038H quick start guide

TrailFX

TrailFX 8038H quick start guide

Oasis Charger JuiceBar 320 Series instruction manual

Oasis Charger

Oasis Charger JuiceBar 320 Series instruction manual

manuals.online logo
manuals.online logoBrands
  • About & Mission
  • Contact us
  • Privacy Policy
  • Terms and Conditions

Copyright 2025 Manuals.Online. All Rights Reserved.