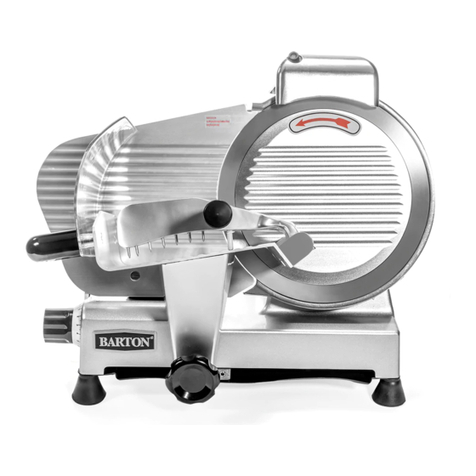
Barton 90802 Original instruction manual

SAVE THIS MANUAL: KEEP THIS MANUAL FOR SAFETY WARNINGS, PRECAUTIONS, ASSEMBLY,
OPERATING, INSPECTION, MAINTENANCE AND CLEANING PROCEDURES. WRITE THE PRODUCT’S
SERIAL NUMBER ON THE BACK OF THE MANUAL NEAR THE ASSEMBLY DIAGRAM (OR MONTH
AND YEAR OF PURCHASE IF PRODUCT HAS NO NUMBER).
OWNER’S MANUAL AND SAFETY INSTRUCTIONS
ITEM: 90802
FOR QUESTIONS PLEASE CALL OUR CUSTOMER SUPPORT: (909) 628 0880 MON-FRI 9AM TO 3PM PST
SEMI-AUTOMATIC MEAT SLICER 12” 300W

1
It is important that all operators of this food processing machinery read the instructions and follow the
instructions on usage and maintenance. It is the responsibility of the owner that all operators are trained
and use this machine safely and correctly. This machine should not be used by any unauthorized or
inexperienced personnel.
Regular sanitizing and cleaning is the responsibility of the operator, and is important to prevent illness.
The operator must follow all guidelines and laws instated by your local and State health departments.
Contaminated machines will spread bacteria and food-borne pathogens.
Read all instructions carefully before operating. When operating, stay alert and use common sense.
Store this manual in a safe and accessible place.
GENERAL SAFETY WARNINGS
Read all safety warnings and instructions. Failure to follow the warnings and instructions may
result in electric shock, re and/or serious personal injury. Save all warnings and instructions
for future reference.
SAFETY
The warnings, precautions, and instructions discussed in this instruction manual cannot cover all possible
conditions and situations that may occur. It must be understood by the operator that common sense and
caution are factors which cannot be built into this product, but must be supplied by the operator. Read
carefully and understand all instructions before operating. Failure to follow the safety rules and other
basic safety precautions may result in serious personal injury.
SHARP KNIFE BLADE: DO NOT touch knife when unit is on. Keep hands away from
all moving parts. DO NOT operate without knife cover and knife sharpener properly
installed.
The power source must comply with the electric requirements on the label or it may cause re or
machine issues if improperly used.
The machine must be used on a at surface. If the machine is not secure in use, electric shock and
other issues are possible.
ALWAYS turn off and unplug the machine in the event of an emergency.
To avoid serious injury, DO NOT place your hands or any other body part in the open machine.
In case of electrical wire damage, discontinue use and consult a licensed technician before using.
The machine is not waterproof. Washing in water can cause electric shock or damage to the machine’s
mechanical and electrical parts.
Please turn off all switches and unplug the machine when not in operation.
If the machine stops working properly, immediately unplug the machine and consult a technician before
use.
DO NOT cut meat frozen below -6 degrees Celsius
Federal law prohibits anyone under the age of 18 from using or cleaning electric meat slicers.
IMPORTANT SAFETY INFORMATION

2
Before cleaning or removing any parts, ALWAYS turn the machine OFF and unplug the slicer.
Prior to operating, the knife guard must ALWAYS be securely installed and the knife should be fully
shielded.
Before slicing, check that the Food Chute is properly in place. A loose food chute can damage the
knife.
Close the Slice Deector whenever the slicer is in operation.
Use the End-weight, not your hand, to hold products while you are slicing. NEVER put your hand on
or around the food chute when the slicer is on.
The slicer must be electrically grounded to a properly sourced outlet. If you are unsure, contact a
licensed technician to check.
ALWAYS clean the knife before sharpening.
DO NOT use this machine to cut frozen meat or meat with bones.
IMPORTANT SAFETY INFORMATION
SAVE THESE WARNINGS

3
SHARPENER
GUARD CUTTER
PUSHER
CARRIAGE
HANDLE
SLICER
SCALE PLATE
POWER SWITCH
THICKNESS REGULATOR
POWER: 110V / 60HZ / 300W
SLICER THICKNESS: 0-16MM
BLADE DIAMETER: 300MM
WIDTH: 220MM
FEATURES

4
1. The slicer should be placed on a sturdy surface that is at and free of obstruction and will support the
weight of the machine.
2. Make sure that the line voltage of your main power source matches the rated voltage of the machine.
3. Turn the switch ON and let the machine run for about 2-3 minutes, make certain the machine is running
without any problems.
4. Turn the switch for the pilot lamp ON, the power indicator should light up and the blade will rotate.
5. Adjust the slicer thickness by turning the slicer thickness regulator on. Turn the xing positioner knob.
6. Push the product carriage back and forth over the blade with a continuous motion using the product
pusher handle and the push knob at the same time.
7. After slicing the desired amount of meat at the zero position. Turn the xing position knob and allow it to
go back to the original position.
CLEANING THE MEAT SLICER
1. ALWAYS turn off and unplug the machine before cleaning and make sure to turn the slicer thickness
regulator to zero.
2. NEVER use harsh chemicals or abrasives to clean the machine. Never use brushes or other utensils
that can damage the machine.
3. Use a damp cloth with mild detergent to clean the machine and dry thoroughly to prohibit rusting.
4. When cleaning the blade and blade protector, ALWAYS wear safety gloves and DO NOT touch the sharp
end of the blade directly.
CLEANING THE MEAT SLICER
1. BLADE MAINTENANCE: Always clean and dry the blade after every use. Sharpen the blade regularly
to prevent rusting.
2. GUIDE LUBRICATION: Push the carriage to one side and clean the Guide with mild detergent and dry it
thoroughly. Smear the Guide surface with cooking to lubricate. This should be done every week to prevent
sticking.
3. AXLE LUBRICATION: Clean with mild detergent and dry thoroughly. Spread cooking oil on both sides
of the axles. Do this once a week to avoid sticking.
4. LOCALIZING HEAD LUBRICATION: Clean the localizing head and spread cooking oil on it. Put the
xing positioner back in the original position and repeat these steps once a week.
SHARPENING THE BLADE
1. Clean the edge of the blade before sharpening and pull the sharpener out and lubricate sharpener axles.
2. Turn the sharpener 180 ° and press the right side of the sharpening stone next to the blade. Make sure
the stone is in a nesting close to the blade’s edge and sharpen for three seconds to remove the burr.
3. Continue to do this on both sides of the blade for 1-2 minutes and continually check that the blade
is sharpened to satisfaction. Once done, put the sharpener back into the original position and keep the
sharpening stone clean.
OPERATION AND MAINTENANCE

THE MANUFACTURER AND/OR DISTRIBUTOR HAS PROVIDED THE PARTS LIST AND ASSEMBLY
DIAGRAM IN THIS MANUAL AS A REFERENCE TOOL ONLY. NEITHER THE MANUFACTURER OR
DISTRIBUTOR MAKES ANY REPRESENTATION OR WARRANTY OF ANY KIND TO THE BUYER THAT
HE OR SHE IS QUALIFIED TO MAKE ANY REPAIRS TO THE PRODUCT, OR THAT HE OR SHE IS
QUALIFIED TO REPLACE ANY PARTS OF THE PRODUCT. IN FACT, THE MANUFACTURER AND/OR
DISTRIBUTOR EXPRESSLY STATES THAT ALL REPAIRS AND PARTS REPLACEMENTS SHOULD BE
UNDERTAKEN BY CERTIFIED AND LICENSED TECHNICIANS, AND NOT BY THE BUYER. THE BUYER
ASSUMES ALL RISK AND LIABILITY ARISING OUT OF HIS OR HER REPAIRS TO THE ORIGINAL
PRODUCT OR REPLACEMENT PARTS THERETO, OR ARISING OUT OF HIS OR HER INSTALLATION
OF REPLACEMENT PARTS THERETO.
Record Product’s Serial Number Here:
Note: If product has no serial number, record month and year of purchase instead.
Note: Some parts are listed and shown for illustration purposes only and are not available individually
as replacement parts.
PLEASE READ THE FOLLOWING CAREFULLY
5
WARRANTY
PRODUCT MADE IN CHINA
Table of contents
Other Barton Kitchen Appliance manuals