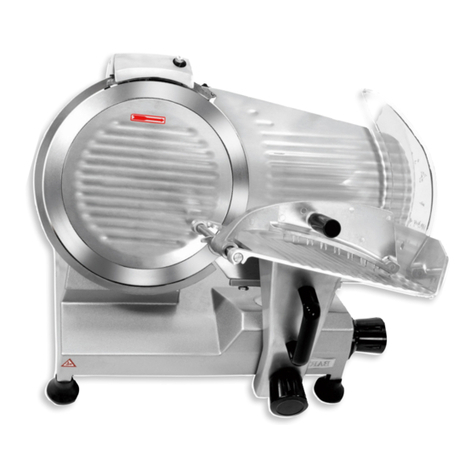
Barton SEMI-AUTOMATIC 90801 Original instruction manual

SAVE THIS MANUAL: KEEP THIS MANUAL FOR SAFETY WARNINGS, PRECAUTIONS, ASSEMBLY,
OPERATING, INSPECTION, MAINTENANCE AND CLEANING PROCEDURES. WRITE THE PRODUCT’S
SERIAL NUMBER ON THE BACK OF THE MANUAL NEAR THE ASSEMBLY DIAGRAM (OR MONTH
AND YEAR OF PURCHASE IF PRODUCT HAS NO NUMBER).
OWNER’S MANUAL AND SAFETY INSTRUCTIONS
ITEM: 90801
FOR QUESTIONS PLEASE CALL OUR CUSTOMER SUPPORT: (909) 628 0880 MON-FRI 9AM TO 3PM PST
SEMI-AUTOMATIC MEAT SLICER 10”

1
It is important that all operators of this food processing machinery read the instructions and follow the
instructions on usage and maintenance. It is the responsibility of the owner that all operators are trained
and use this machine safely and correctly. This machine should not be used by any unauthorized or
inexperienced personnel.
Regular sanitizing and cleaning is the responsibility of the operator, and is important to prevent illness.
The operator must follow all guidelines and laws instated by your local and State health departments.
Contaminated machines will spread bacteria and food-borne pathogens.
Read all instructions carefully before operating. When operating, stay alert and use common sense.
Store this manual in a safe and accessible place.
GENERAL SAFETY WARNINGS
Read all safety warnings and instructions. Failure to follow the warnings and instructions may
result in electric shock, re and/or serious personal injury. Save all warnings and instructions
for future reference.
SAFETY
The warnings, precautions, and instructions discussed in this instruction manual cannot cover all possible
conditions and situations that may occur. It must be understood by the operator that common sense and
caution are factors which cannot be built into this product, but must be supplied by the operator. Read
carefully and understand all instructions before operating. Failure to follow the safety rules and other
basic safety precautions may result in serious personal injury.
SHARP KNIFE BLADE: DO NOT touch knife when unit is on. Keep hands away from
all moving parts. DO NOT operate without knife cover and knife sharpener properly
installed.
The power source must comply with the electric requirements on the label or it may cause re or
machine issues if improperly used.
The machine must be used on a at surface. If the machine is not secure in use, electric shock and
other issues are possible.
ALWAYS turn off and unplug the machine in the event of an emergency.
To avoid serious injury, do not place your hands or any other body part in the open machine.
In case of electrical wire damage, discontinue use and consult a licensed technician before using.
The machine is not waterproof. Washing in water can cause electric shock or damage to the
machine’s mechanical and electrical parts.
Please turn off all switches and unplug the machine when not in operation.
If the machine stops working properly, immediately unplug the machine and consult a technician
before use.
DO NOT cut meat frozen below -6 degrees Celsius
IMPORTANT SAFETY INFORMATION

2
Before cleaning or removing any parts, always turn the machine OFF and unpug the slicer.
Federal law prohibits anyone under the age of 18 from using or cleaning electric meat slicers.
Prior to operating, the knife gaurd must ALWAYS be securely installed and the knife should be fully
shielded.
Before slicing, check that the Food Chute is properly in place. A loose food chute can damage the knife.
Close the Slice Deector whever the slicer is in operation.
Use the Endweight, not your hand, to hold products while you are slicing. NEVER put your hand on or
around the food chute when the slicer is on.
The slicer must be electrically grounded to a properly sourced outlet. If you are unsure, contact a
licensed technician to check.
ALWAYS clean the knife before sharpening.
DO NOT use this maching to cut frozen meat or meat with bones.
IMPORTANT SAFETY INFORMATION
SAVE THESE SAFETY WARNINGS!

3
Made of alluminum allow this machine is long lasting and conforms to the national
sanitation standards.
FEATURES
User friendly and convenient operation.
State-of-the-Art belt transmission offers a quieter operation than many other standard
models on the market today.
FEATURES AND SPECIFICATIONS

4
1. Unpack the items in the package. Put the meat slicer onto a clean and smooth place.
(Notice: The behind of the fuselage should stay to have the 150 cm the above space, easy
to operation).
2. Check power supply. ALWAYS use the corresponding voltage indicated on the machine
label, otherwise damage to the motor can occur.
3. Check the power cord, if damage is noted, unplug the machine immediately and have it
repaired by a qualied technician.
4. Check to make sure none of the machine parts are loose, such as wheel assembly,
bearing plate assembly and the protecting cover of the slicing knife.
5. Clean up all the debris on the machine. With a clean cloth carefully wipe surface of the
machine.
1. Press the start switch, the slicer should start working. Allow the slicing knife to run for
1~2 minutes without cutting anything. Conrm the slicing motion is working normally. (The
slicing knife should run counter-clockwise.)
PRE-OPERATION CHECKLIST
OPERATION
2. Place food on the slicing board and hold in place with the end weight. This unit is not
intended to be used to slice bones or frozen products. Thaw food before slicing.
3. Turn the thickness adjusting handle to desired thickness.
4. Press the start button to turn on the unit. The power light will turn on.
5. Push the table back and forth. The slices will fall into the receiving area. Do not push or
catch slices with your hand.
6. When slicing is complete, turn off the machine. The light will turn off. Turn the thickness
adjusting handle to close to the slicer table.
NEVER load food on the board when the machine is on.
CLEANING YOUR MEAT SLICER AFTER USE
1. Before you clean the meat slicer, you must shut off the power rst. Next, turn the thickness
adjuster down to “0” scale.
2. Do not use water to wash this product directly. Do not use abrasives or strong chemicals
to wipe the surface of the product and the slicing knife. Use a piece of wet cloth with soap
to wipe the surface of the product, and then use a piece of dry cloth to wipe it up. ALWAYS
clean the Meat Slicer after every use.
3. Take off the protective cover of the slicing knife and clean it as well as the slicing knife
with food-safe sanitizer and wipe it off. To prevent the slicing knife from rusting and to avoid
food borne bacteria, always make sure the slicing knife is wiped until completely dry.
OPERATIONS

5
SHARPENING THE BLADE
1. The blade needs to be sharpened frequently. Before sharpening, the blade
should be wiped clean and unit turned off and unplugged.
2. Loosen the handle of the blade shelf, then raise up the shelf to the grinding wheel.
Revolve it into place and then x the handle to secure the knife.
3. Turn on the machine. Press the handle of the grinding wheel shelf to the back of the
blade. Keep in place for 30-40 seconds.
4. Turn off the machine after moving the grinding wheel shelf to its original place.
5. Rotate the thickness adjusting handle to close the table.
MAINTENANCE
Always turn off and unplug the slicer before cleaning or sanitizing.
1. Clean and sanitize the knife and all surfaces with a food-safe sanitizer, making
sure to follow all instructions listed on the product container.
2. For tough stains and food debris, a nylon brush may be used. After, use a clean wet cloth
to wipe the area again.
3. Every 6 months, an inspection should be done to look out for damaged parts. This can
affect the function of the slicer. Food debris can get stuck in the damaged parts therefore
contaminate the unit.
4. Make sure that parts have proper lubrication. Use food-safe lubrication oils.
5. Add lubricating oil (SAE140 lubricating oil) onto the sliding part of the axle. Move the food
carrier right-and-left to let lubricating oil fully penetrate until the food carrier can be moved
easily. Do this each time for a week.
6. Check whether the screws of the gearing have become loose, whether the lubricating
parts have been frayed or burned. Reinforce the loose screws and add food-safe lubricating
oil (SAE140 lubricating oil).
7. Loosen the xing screw of the grinding wheel, then lift the grinding wheels to check
whether they move or not and then put them down to the correct position, lock the position
xing screw of the grinding wheel again. Check whether there are any gaps between the
grinding wheels and the slicing knife.
8. Loosen the xing screw of the grinding wheel, then lift the grinding wheels to check
whether they move or not and then put them down to the correct position, lock the position
xing screw of the grinding wheel again. Check whether there are any gaps between the
grinding wheels and the slicing knife.
MAINTENANCE

6
If the slicing knife is not runing, it may be because the knife supporting pan is locked. If
that is the case, shut off the power and unlock it.
If the strap is not working properly, check to see if the screws at the button of the base
are tight enough and check whether the strap is too loose. If so, tighten the screws and/
or adjust the degree of tightness of the strap.
If the meat slicer will not be in use for an extended period, unplug it and store it in a clean
dry area away from children.
TROUBLESHOOTING
TROUBLESHOOTING

7
TROUBLESHOOTING

8
PARTS DIAGRAM

9
PARTS LIST

10
PARTS LIST

11
PARTS LIST

12
PARTS LIST

THE MANUFACTURER AND/OR DISTRIBUTOR HAS PROVIDED THE PARTS LIST AND ASSEMBLY
DIAGRAM IN THIS MANUAL AS A REFERENCE TOOL ONLY. NEITHER THE MANUFACTURER OR
DISTRIBUTOR MAKES ANY REPRESENTATION OR WARRANTY OF ANY KIND TO THE BUYER THAT
HE OR SHE IS QUALIFIED TO MAKE ANY REPAIRS TO THE PRODUCT, OR THAT HE OR SHE IS
QUALIFIED TO REPLACE ANY PARTS OF THE PRODUCT. IN FACT, THE MANUFACTURER AND/OR
DISTRIBUTOR EXPRESSLY STATES THAT ALL REPAIRS AND PARTS REPLACEMENTS SHOULD BE
UNDERTAKEN BY CERTIFIED AND LICENSED TECHNICIANS, AND NOT BY THE BUYER. THE BUYER
ASSUMES ALL RISK AND LIABILITY ARISING OUT OF HIS OR HER REPAIRS TO THE ORIGINAL
PRODUCT OR REPLACEMENT PARTS THERETO, OR ARISING OUT OF HIS OR HER INSTALLATION
OF REPLACEMENT PARTS THERETO.
Record Product’s Serial Number Here:
Note: If product has no serial number, record month and year of purchase instead.
Note: Some parts are listed and shown for illustration purposes only and are not available individually
as replacement parts.
PLEASE READ THE FOLLOWING CAREFULLY
13
WARRANTY
PRODUCT MADE IN CHINA
Table of contents
Other Barton Kitchen Appliance manuals
Popular Kitchen Appliance manuals by other brands

Russell Hobbs
Russell Hobbs RHPC1000 Series Instructions & warranty

TYLZA
TYLZA TYWC298S instruction manual

Lacor
Lacor 69286 Instructions for use and maintenance

Zanussi
Zanussi GC 20M Instructions for use and care

Panasonic
Panasonic MX-AC400 operating instructions

Wilbur Curtis Company
Wilbur Curtis Company PTT310 brochure