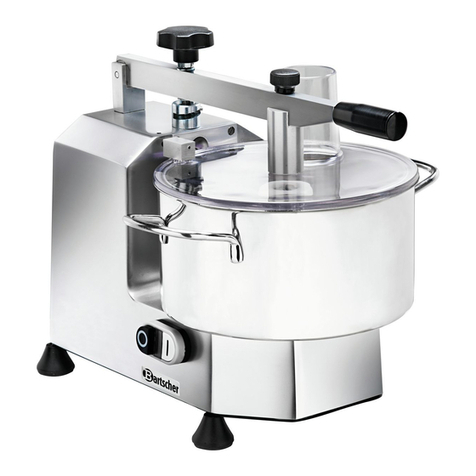
Bartscher GMS550 User manual

GMS550
120325

Bartscher GmbH
Franz-Kleine-Str. 28
D-33154 Salzkotten
Germany
Phone: +49 5258 971-0
Fax: +49 5258 971-120
Technical Support Hotline: +49 5258 971-197
www.bartscher.com
Version: 3.0
Date of preparation: 2023-06-19
EN
2

120325 1 / 22
Original instruction manual
1Safety............................................................................................................2
1.1 Explanation of Signal Words....................................................................2
1.2 Safety instructions....................................................................................3
1.3 Intended Use ...........................................................................................6
1.4 Unintended Use.......................................................................................6
2General information.......................................................................................7
2.1 Liability and Warranty ..............................................................................7
2.2 Copyright Protection ................................................................................7
2.3 Declaration of Conformity ........................................................................7
3Transport, Packaging and Storage................................................................8
3.1 Delivery Check.........................................................................................8
3.2 Packaging................................................................................................8
3.3 Storage....................................................................................................8
4Technical Data...............................................................................................9
4.1 Technical Specifications ..........................................................................9
4.2 Functions of the Appliance.......................................................................9
4.3 List of Components of the Appliance .....................................................10
4.4 Protective Elements of the Appliance .................................................... 11
5Installation and operation ............................................................................12
5.1 Installation..............................................................................................12
5.2 Operation...............................................................................................14
6Cleaning ......................................................................................................19
6.1 Safety Instructions for Cleaning.............................................................19
6.2 Cleaning.................................................................................................20
7Disposal....................................................................................................... 22

Safety
2 / 22 120325
EN
Diese Bedienungsa nleitung beschreibt di eI nstallation, Bedienu ngu nd Wartung des Geräts u ndg ilt als wichtige Infor mationsquelle un dN achschlagewer k.Di e Kenntnis aller enthalt enenSic herheitshinw eiseu ndH andlungs anweisungen schafft die V oraussetzung für d as sichere und sac hgerechte Arbeite n mitd emG erät.D arüber hin aus müssen die für den Eins atzbereich des Geräts gelt enden örtlichen Un fallverhütungsvorsc hriften und allgemein en Sicherheitsb estimmungen eingehalt en werden. Diese Bedi enungsanleitung ist Bestandt eild es Produkts und muss i n unmittelbarer Nähe d es Geräts für das In¬stall ations-, Bedienungs- , Wartungs- und Reinigu ngspersonal jederzeit z ugänglich auf¬b ewahrt werden. Wenn das Ger ät an eine dritte Person
weitergegeben wird , muss die Bedienungsa nleitung mit ausgehä ndigt werden.
Read this instruction manual before using and keep it available
at all times!
This instruction manual contains information about installation, operation and
maintenance of the appliance and constitutes an important source of information
and reference guide. The knowledge of all operational and safety instructions
included in this manual is a prerequisite for safe and proper handling of the
appliance. Additionally, accident prevention, occupational health and safety, and
legal regulations in force in the area the appliance is used apply.
Before you start using the appliance, especially before turning it on, read this
instruction manual in order to avoid personal injuries and property damages.
Improper use may cause damage.
This instruction manual forms and integral part of the product and must be stored in
an immediate vicinity of the appliance and be available at all times. The instruction
manual should be transferred together with the appliance.
1 Safety
This appliance has been manufactured in accordance with technical standards
currently in force. However, the appliance may be a source of hazards if used
improperly or contrary to its intended purpose. All persons using the appliance must
consider information included in this instruction manual and observe safety
instructions.
1.1 Explanation of Signal Words
Important safety instructions and warning information are indicated in this
instruction manual with appropriate signal words. You must strictly follow the
instructions, to prevent accidents, personal injuries and property damages.
DANGER!
The signal word DANGER warns against hazards that lead to severe
injuries or death if the hazards are not avoided.
WARNING!
The signal word WARNING warns against hazards that may lead to
moderate or severe injuries or death if the hazards are not avoided.

Safety
120325 3 / 22
EN
CAUTION!
The signal word CAUTION warns against hazards that may lead to
light or moderate injuries if the hazards are not avoided.
,di e
IMPORTANT!
The signal word IMPORTANT indicates possible property damages,
which may occur if safety instructions are not observed.
NOTE!
The symbol NOTE indicates subsequent information and guidelines
for the user on usage of the appliance.
1.2 Safety instructions
Electrical Current
•Too high a mains voltage or incorrect installation may cause electric shock.
•The appliance may be connected only if data on the rating plate correspond with
the mains voltage.
•To avoid short-circuit, the appliance should be kept dry.
•If there are malfunctions during operation, disconnect the appliance from the
power supply.
•Do not touch the appliance’s plug with wet hands.
•Never take hold of the appliance if it has fallen into water. Immediately
disconnect the appliance from the power supply.
•Any repairs or housing opening may be carried out by professionals and
relevant workshops only.
•Do not transport the appliance, holding it by the power cord.
•Do not allow the power cord to come into contact with heat sources or sharp
edges.
•Do not bend, pinch nor knot the power cord.
•Always completely unwind the power cord.
•Never place the appliance or other objects on the power cord.
•Always take hold of the plug to disconnect the appliance from the power supply.

Safety
4 / 22 120325
EN
•Check the power cord regularly for damage. Do not use the appliance if the
power cord is damaged. If this cable is damaged, it must be replaced by
customer service or a qualified electrician in order to avoid dangers.
Safety When Operating the Vegetable Cutter
•Always use protective gloves during the appliance operation!
•Never insert any objects or tools into the appliance!
•Never put hands or other body parts into the cutting area or outlet opening to
remove the cut products.
•Never put any objects under the appliance or between the appliance feet and
the working surface.
•Never open the appliance protective cover during operation or after filling it with
food products.
•Never unscrew the safety lock knob during operation or earlier that 5 seconds
after switching the appliance off.
•Never use the appliance if protective elements are not properly attached or have
been removed.
•Never place the appliance upside down.
•The appliance, working surfaces, and floor around the appliance must be always
dry, free from dust, residuals of cut products, and foreign bodies in order to
avoid the risk of slipping on wet floor or residuals of vegetables.

Safety
120325 5 / 22
EN
Supervised Usage only
•Only supervised appliance may be used.
•Always remain in an immediate vicinity of the appliance.
Operating Personnel
•The appliance may only be operated by qualified personnel and trained
specialist personnel.
•This appliance may not be operated by persons (including children) with limited
physical, sensory or mental capabilities, nor by persons with limited experience
and/or limited knowledge.
•Children should be supervised to ensure that they are not playing with or
switching on the appliance.
Improper Use
•Unintended or prohibited use may cause damage to the appliance.
•The appliance may only be used when its technical condition is flawless and
allows for safe operation.
•The appliance may only be used when all connections are executed according
to rules of law in force.
•The appliance may only be used when it is clean.
•Use only original spare parts. Never attempt to repair the appliance on your own.
•Do not introduce any changes in the appliance nor modify it.

Safety
6 / 22 120325
EN
1.3 Intended Use
As described below, every use of the appliance for a purpose differing and/or
diverging from its intended standard use, is prohibited and considered to be an
unintended use.
The following is an intended use:
–Slicing and grating suitable fruit and vegetables.
The appliance is intended for professional use only.
1.4 Unintended Use
An unintended use may lead to personal injuries or property damages caused by
hazardous voltage, fire or high temperature. The appliance may only be used to
perform tasks described in this instruction manual.

General information
120325 7 / 22
EN
2 General information
2.1 Liability and Warranty
All information and instructions in this instruction manual account for legal
regulations in force, current level of technical engineering knowledge as well as our
expertise and experience, developed over the years. If special models or additional
options are ordered, or state-of-the-art technical solutions were implemented, the
actual scope of delivery of the appliance may, in some circumstances, differ from
descriptions and numerous drawings in this instruction manual.
The manufacturer is not liable for any damages nor faults stemming from:
–failure to observe instructions,
–unintended use,
–technical alterations introduced by the user,
–usage of unapproved spare parts.
We reserve the right to introduce technical modifications to the product, intended for
improvement of the appliance and its performance.
2.2 Copyright Protection
This instruction manual, and texts, drawings and images included in it, as well as its
other components are copyright protected. It is prohibited to reproduce this
instruction manual (including its excerpts), in any form and by any means, and to
use and/or transfer its content to third parties without manufacturer’s written
permission. Violation of the above results in obligation to pay compensation. We
reserve the right to claim further damages.
2.3 Declaration of Conformity
The appliance meets the currently applicable standards and guidelines of the
European Union. We confirm the above in the EC Declaration of Conformity. We
may provide relevant Declaration of Conformity upon request.

Transport, Packaging and Storage
8 / 22 120325
EN
3 Transport, Packaging and Storage
3.1 Delivery Check
Immediately upon reception, check the delivery for completeness and possible
shipping damage. In the case of visible transport damage refuse to accept the
appliance or accept it conditionally. Mark and note the scope of damage in shipping
documents/consignment list of the shipping company and lodge a complaint.
Concealed damage must be reported immediately upon its discovery, as
compensation claims may only be filed within applicable time limits.
If you find that parts or accessories missing, please contact our Customer Service
Department.
3.2 Packaging
Do not dispose of the appliance cardboard box. It may be used to store the
appliance when relocating or when shipping the appliance to our service point in the
case of any damages.
The packaging and its elements are made of recyclable materials. Particularly,
these are: plastic films and bags, cardboard box.
When disposing of the packaging, observe applicable domestic regulations.
Recyclable packaging materials should be recycled.
3.3 Storage
Leave the packaging closed until installation of the appliance; observe external
indications concerning method of placing and storage. Store the packaging in the
following conditions only:
–in closed rooms;
–in dry and dust-free surrounding;
–away from aggressive agents;
–in a location protected against sunlight;
–in a location protected against mechanical shocks.
In the case of extended storage (over three months), make sure you check the
condition of the packaging and the parts regularly. If needed, replace the packaging
with a new one.

Technical Data
120325 9 / 22
EN
4 Technical Data
4.1 Technical Specifications
Name:
Vegetable cutter GMS550
Art. No.:
120325
Material:
Cast aluminium
Hopper dimensions (W x D) | Ø in mm:
1x 160 x 74 | 1x 58
Degree of protection:
IP23
Connected load:
0,55 kW | 230 V | 50 Hz
Dimensions (W x D x H), in mm:
240 x 630 x 500
Weight, in kg:
29,2
We reserve the right to implement technical modifications.
Version / Characteristics
•Control: button
•ON/OFF switch
•The set includes:
–1 grating disk Z3a, 3 mm
–1 grating disk Z5a, 5 mm
–1 grating disk Z7a, 7 mm
–1 slicing disk E2a, 2 mm
–1 slicing disk E4a, 4 mm
–1 pusher
4.2 Functions of the Appliance
With the vegetable cutter, using appropriate cutting disks, vegetables or fruit can be
cut into various shapes such as slices, bars, cubes or chips.

Technical Data
10 / 22 120325
EN
4.3 List of Components of the Appliance
Fig. 1
1. Pusher stamper lever
2. Pusher for round chute opening
3. Round chute opening
4. Protective cover pin (2 pcs)
5. START/STOP button
6. Safety lock knob
7. Housing
8. Foot (4 pcs)
9. Outlet opening
10.Protective cover for cutting disks
11.Oval chute opening
12.Pusher for oval chute opening
13.Slicing disk E2a
14.Slicing disk E4a
15.Grating disk Z5a
16. Grating disk Z7a
17.Grating disk Z3a

Technical Data
120325 11 / 22
EN
Control Elements
STOP button, red
START button, green
Fig. 2
4.4 Protective Elements of the Appliance
Protective Measures
The appliance is equipped with 2 safety devices (microswitches):
–a safety interlock with a microswitch, which stops operation of the
machine when the protective cover of the cutting disk is opened.
–a microswitch on the chute opening, which disconnects the appliance
when the oval pusher stamper lever is raised.
Residual Risks
Following the regulations, despite all mechanical and electrical protective measures
the appliance is equipped with, residual risks exist that cannot be completely
precluded. In this instruction manual they are indicated by the warning word
WARNING. Observe also warning indications on warning stickers placed on the
appliance.
Residual risks (e.g., risk of cutting) can occur when removing, inserting and
cleaning the cutting disks. Be particularly careful when handling and always wear
sturdy, soft and cut-resistant five-finger gloves.

Installation and operation
12 / 22 120325
EN
5 Installation and operation
5.1 Installation
CAUTION!
Incorrect installation, positioning, operation, maintenance or misuse of
the appliance may lead to personal injury or property damage.
Positioning and installation, as well as repairs may be performed by
authorised technical service only and in compliance with the applicable
national law.
NOTE!
The manufacturer disclaims all liability and provides no warranty for
damages, which may be attributed to non-observance of regulations or
incorrect installation.
Unpacking / Positioning
•Unpack the appliance, remove all external and internal packaging elements and
shipment safeguards.
CAUTION!
Choking hazard!
Prevent children from accessing package materials, for instance: plastic
bags and EPS.
•If the appliance is covered with a protective film, remove it. Remove the film
slowly, so no glue residues are left. Remove any glue residues with the use of a
suitable solvent.
•Be careful not to damage the rating plate and warning labels fixed on the
appliance.
•Never place the appliance in humid or wet environment.
•Place the appliance in a way making the connections easily accessible, so that
they may be quickly disconnected if such a need arises.
•The appliance should be placed on surfaces that are:
–even, with sufficient bearing capacity, resistant to water, dry and resistant
to high temperatures;

Installation and operation
120325 13 / 22
EN
–sufficiently large, and thus enabling usage of the appliance with no
problems;
–easily accessible;
–well ventilated.
•Make sure that the appliance is earthed.
•During positioning of the cutter take into consideration space required for
positioning, as well as place for container collecting cut vegetables and products
to be cut.
•Leave sufficient free space around the cutter to assure free movements of
operator and for movement of another person.
•The location of the appliance must be properly illuminated; illumination must
include the entire work station and must not dazzle the operator.
•Do not cover nor block the appliance ventilation openings in order to avoid
overheating or injuries and damages.
•A distance of at least 20 cm must be maintained between walls, objects,
shelving, etc. and the vegetable cutter in order to use the appliance safely.
Power supply connection
•Verify if technical data of the appliance (see rating plate) correspond with the
local electric power grid specification.
•Connect the appliance to a single, properly grounded mains socket with
protective contact. Do not connect the appliance to a multi-socket.
•The power cord should be laid in a way preventing anyone from threading on it
or tripping against it.

Installation and operation
14 / 22 120325
EN
5.2 Operation
WARNING
Injury hazard!
Blades of the cutting disks are very sharp!
Always wear sturdy, soft and cut-resistant five-finger gloves when
attaching, removing, cleaning the cutting disks to allow a firm grip on the
items.
Never press the cut products with hand, always use delivered pusher!
Appliance Preparation
1. Before use, thoroughly clean the appliance and equipment observing
instructions in section 6.2 'Cleaning'.
2. Prepare products for cutting.
3. Select appropriate cutting disks and install them in the appliance before starting
the cutting process.
Fig. 3
Fig. 4
4. Use the knob to loosen the safety
lock by rotating it counter-clockwise.
5. Raise the stamper lever high and
open the protective cover wide.
6. First, fit the plastic ejector disk and
then the cutting disk of your choice.
ATTENTION!
The fitting of the ejector disk is essential for proper operation of the
machine. The ejector disk should always be fitted first.
7. Close the protective cover and secure it by rotating the safety lock knob
clockwise.

Installation and operation
120325 15 / 22
EN
8. Press the green START button so that the cutting disks engage properly.
Vegetable/Fruit Cutting
1. Before the cutting process make sure that vegetables are suitable in range of
type, quality, and size. Prepare vegetables.
2. Place a suitable dish under the outlet opening.
3. Connect the appliance to a single grounded socket.
4. Before starting the cutting process, lift the stamper lever of the oval chute
opening and hold it in this position.
5. Place products to be cut in the oval or round opening.
ATTENTION!
Place vegetables one by one into the chute opening as follows: 1 potato, 1
carrot, etc.
6. To start the appliance, press the green
START button with your right hand and
hold the stamper lever with your left
hand.
7. Then gradually lower the stamper lever,
pressing it gently to obtain better cutting
results.
ATTENTION!
Do not press the stamper lever too
hard; otherwise the appliance
components will be over-pressed.
Fig. 5
8. When the stamper lever reaches the end, lift it.
The cutting process may be repeated until obtaining required amount of vegetables.
9. To cut cylindrical vegetables such as carrot, cucumber, zucchini, etc., into round
slices, insert vegetables into the small round chute opening and gently press the
product downwards with the pusher.
10.Repeat the described cycle until the required amount of vegetables has been
cut.
11.When the cutting process is complete, switch the appliance off using the red
STOP button.
12.Disconnect the appliance from power supply (pull the plug out).

Installation and operation
16 / 22 120325
EN
Cutting Disks
Dicing disks
for vegetables or potatoes, for example, for
one-pot dishes
NOTE!
The disks of the D series can
only be used in combination
with the corresponding disks of
the E series.
D8x8a + E8a
D10x10a + E10a
Model:
D8x8a
D10x10a
Dice size:
8 x 8 mm
10 x 10 mm
Art. No.:
120290
120291
Slicing disks
e.g. for cucumber, tomato, pepper, onion, leek,
potato, red cabbage, white cabbage, pineapple,
kiwi
Model:
E2a
E4a
E8a
E10a
Slice
thickness
2 mm
4 mm
8 mm
10 mm
Art. No.:
120292
120293
120294
120295

Installation and operation
120325 17 / 22
EN
Frenching disks
e.g. for raw vegetables, carrot, radish,
cucumber
Model:
H3a
H4a
Slice
thickness
3 mm
4 mm
Art. No.:
120296
120297
Chipping disks
e.g. for raw vegetables, white cabbage, apple,
radish, beetroot, chocolate, yellow cheese (soft
and hard)
Model:
Z3a
Z5a
Z7a
Chip
thickness:
3 mm
5 mm
7 mm
Art. No.:
120298
120299
120300
NOTE!
Cutting disks marked with a tick are already included in the scope of
delivery.

Installation and operation
18 / 22 120325
EN
Removing and Attaching Cutting Disks
ATTENTION!
Never rotate the safety lock knob while the appliance is running; first,
switch the machine off.
1. Use the knob to loosen the safety lock by rotating it counter-clockwise.
2. Lift the stamper lever and open the protective cover wide.
3. Rotate the cutting disk counter-clockwise.
Fig. 6
Fig. 7
4. Cover the blades of the cutting disk
(e.g. with a cloth).
5. Then lift the cutting disk high by
putting one hand under the disk.
Pull the disk out.
6. Then apply the required cutting disk.
This manual suits for next models
1
Table of contents
Other Bartscher Cutter manuals