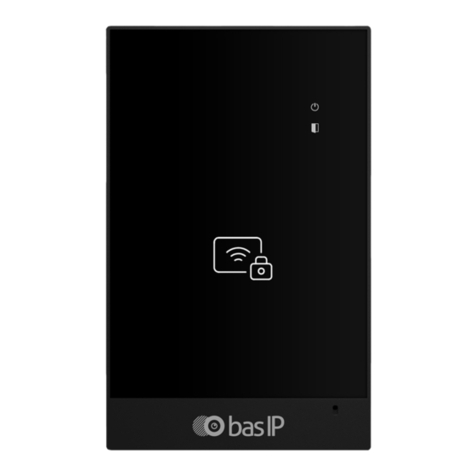
basIP CR-02BD User manual

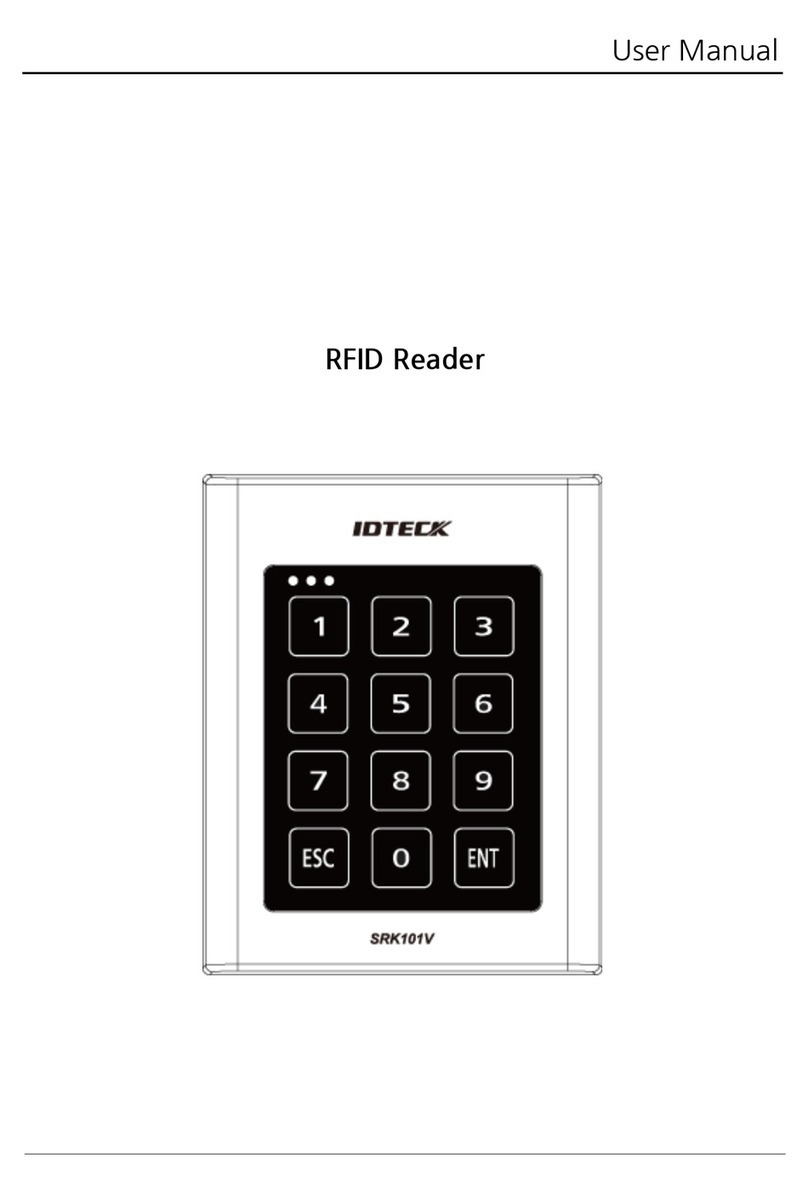
quickstart guideCR-02BDREADER WITH CONTROLLERFull User ManualExternal contactless card and key fob reader with built-in controllerUsing an external network proximity card reader BAS-IP CR-02BD,you can read contactless cards, key fobs, as well as mobile identifiers from mobile devices and open the connected lock.and UKEY technology support: Mifare® Plus and Mifare® Classic, Bluetooth, NFC card, key fob, and mobile ID reader.wiki.bas-ip.com1Loudspeaker2Power indicator3Opens door indicator4Card reader

To configure the reader remotely via the WEB interface, you needto connect to it with an Internet browser on your PC. The panel mustbe connected in the same network segment as the PC from whichit is planned to perform the configuration.To find the device in the LAN, it is required to use the Remote searchand upgrade tool.In the Internet browser, in the address entry box, you must enterthe IP address of the reader, after which the user name and passwordentry window will appear.LoginBy default, user password is 123456.• Username to enter the settings: admin. The password required for entry corresponds to the password for access to the settings•of the reader and is the installer password.

After successful authorization, the following interface will be displayed:MainDevice info• Framework: a version of the framework. Launcher: a version of the launcher.• Serial number: serial number of the device which will be used•for the communication with Link software.Network info• DHCP: current DHCP status. IP address: current IP address of the device.• Subnet mask: used subnet mask.• Gateway: gateway address.• DNS server: DNS server address.• MAC address: physical address of the device.•

Network• DHCP: enable / disable the automatic retrieval of network settings.• IP: reader IP address.By default, the reader can have a static IP address 192.168.1.90 or 192.168.1.91• Mask: subnet mask.• Gateway: the main gateway.• DNS: DNS server address.Custom NTP• Current device date / time: showsthe current device's date and time. URL: field to enter custom NTP server•address. Timezone: choose used timezone.•Management system• Use the BAS-IP Link server: enable / disablethe usage of the BAS-IP Link server. URL: management server address.• Password: access password.• Send realtime logs to the server:•enable / disable panel logging to server. Heartbeat to server: enable / disable•sending current panel status to the server.network settings

Device• Mode: device operation mode (an individual mode must be set for the reader).When working with the elevator module, it is necessary to set a unit mode. Building: building number.• Unit: unit number.• Flor: floor number.• Apartment: apartment number.• Device number: device enumeration number.•Numeration of the readersIf you have several readers that have one logical address, then in the «No.» field specify the value 2, 3, 4, 5, etc., up to 9.Device settings• Volume level: adjust the volume levelof the reader's speaker.Relay settings• Relay position: Selection of the initial stateof the panel relay when the device is turned on.Selection of the initial state of the panel relaywhen the device is turned on. Switch when the device is turned on - whenthe device is turned on, the relay will switchthe position to the opposite; when the deviceis turned off, the relay will return to its originalposition.Do not switch when the device is turned on -the relay will not switch the position whenthe device is turned on and off.Apartment settings

ApartmentsHere you can add, edit or look at a list of flats and get detailedinformation about each apartment. An apartment is a logical entityto bind identifiers, access codes, redirection rules, and other informationabout residents.How to add a new apartment to the device memory?1 Log in to the device web interface.2 Open the Apartment tab. Click New Apartment and fill3 in the required information: building No. (from 1 to 999) • unit No. (from 00 to 99) • floor No. (from 00 to 98) • apartment No. (from 01 to 99) •By default, the username is adminand the password is 123456After saving the information, the apartment is added to the general table, which contains: apartment address•• apartment Name• conditional number of inhabitants in an apartment• amount of identifiers that are issued to a particular apartment.Identifiers can be created in the Identifiers section of the Access management tab• amount of created forward queues for the apartment.Forwardings are configured in the corresponding tab• ability to edit information or delete one or several selected apartments.4 Enter an Apartment name(without specialcharacters).For example, Smiths. 6 Confirm information to save it. 5 Indicate the number of residentsfor this flat.

Access managementAccess managementAt this part, you can change information about: Master card•This card is used to add other cards to panel memory. Here you can specify the card number. To add a master card if its number is unknown: Open Access management tab of panel wen interface. • Enter 0 in the Master card field and submit changes.• Bring the card to a panel reader and wait for the BEEP signal, which means that•the master card has been successfully registered.To add a user card using the master card: Bring the card to a panel reader to switch to the adding user cards mode.• Bring the user card to the reader. After reading the card, you will hear the BEEP signal,•which means the successful registration of the card. Open the Identifiers tab in the web interface, where the added card will be displayed.•• Add missing information about the card and save changes. The time between adding cards must not exceed 10 seconds.This method is convenient for mass and quick identifiers adding.But identifiers are not connected to the necessary apartment, so we recommend addingidentifiers through the web interface.• Wiegand type for a card reader. Wiegand-26, Wiegand-34, and Wiegand-58 typesare available for work. Identifier representation systems•All identifiers can be displayed in Decimal and HEX numeral systems.Support and update of new Wiegandmodes require updating the firmwareof the Wiegand controller in the servicecenter.

Locks management At this part, you can configure the functioning of 1 or 2 (when using SH-42) locks.The following parameters can be configured: Lock open time is a period (1-300 sec) during which relay contacts will be closed or open•(depending on the lock type), and a lock will stay open. Lock open delay is a period (1-300 sec) after which relay contacts will close or open after•sending a signal to open a lock.• Impulse opening mode: one or multiple pulses. It is available to set pulse durationand time between pulses for multiple pulses mode.If an electromechanical lock is used, it is recommended to select one impulse.If an electromagnetic lock is installed, we recommend setting multiple pulses. These settingswill help the locks work correctly and for a long time, especially mechanical as it might breakif the voltage is applied to it for too long. Keep the lock open or not if SIP registration is lost.•It is necessary to set no SIP registration time for this parameter.

Open lock In this section, you can remotely open lock #1 or lock #2 (when using SH-42) by clickingthe corresponding button. Additional settings Here you can: Set the Floor number for further features that work only with the elevator control•module EVRC-IP.• Enable / disable features of sending the elevator to the indicated floor number whenthe lock is open using an identifier or from the monitor. Enable / disable monitor secure mode is a feature of alarm deactivation on an indoor•monitor when bringing an identifier (that is linked with the monitor) to the panel reader.Server manage access In this section, you can enable and configure working mode when all identifiers are not storedin a panel memory but on a server. When the identifier is brought to the reader, the panelwill send a request to the server and wait for a response - to give access or not.The timeout for receiving a response from the server is up to 15 seconds. After this time, the panel automatically goesto its database and gives access or not.

To configure this feature you must: Log in to the entrance panel web interface. •By default, the username is admin, and the password is 123456 Open the Access management tab and find the Server manage access section.• Enable the feature.• Click Use custom server and enter it. You can use the Link server.• Submit settings.•Door sensor input It is possible to connect a door sensor or additional button to the door sensor input.In this section, you can enable/disable and configure their work.After device installation and electric connection, you must do the following stepsfor correct work: Log in to the entrance panel web interface.•• Open the Access management tab and find the Door sensor input section.• Enable sensor or button functioning by ticking the corresponding box.• Choose the appropriate input mode: Door sensor mode is used to monitor the door state. If the door is not closed, after• the expiration of the response time in Logs/Link logs will be shown that the door is open. Door entry button mode is recommended when the connected button is used• as an additional, remote from the panel, entry button.• If you use Door sensor mode, set the Response time after which the mode will be activated.• For the Door sensor, you can enable the option to resend a trigger message to Link logsand set the delay time before resending.• Submit settings.By default, the username is admin, and the password is 123456

Also, you can check and update the current door sensor input status (open / closed).IdentifiersHere you can add or view a table with previously added identifiers. This table containsinformation about the identifier owner, its type, number, validity period, amount of availablepasses, and the number of the lock that identifiers are allowed to open. How to add a new identifier to a panel memory• Log in to the entrance panel web interface. Go to Access management --> Identifiers.• Click New Identifier.• Enter all required information in the opened window:• choose an Apartment number from the previously created list in the corresponding tab • owner name • owner type: Guest or Owner • identifier type and number •By default, the username is admin, and the password is 123456

3 identifiers types are available: Card: EM-Marin or Mifare card. In the Identifier number field, you must enter a card number•in decimal format, without comas. Usually, the number is printed on the card in decimalor hexadecimal format. You can use this link to convert a value from one to another system.Also, you can bring the card to a panel reader, and the number will be displayed in this tabor Logs, from where it can be copied. UKEY allows using smartphones as identifiers (BAS-IP UKEY app is required). You must•enter the identifier number in the Identifier number field. To find out the number, bringthe phone to a reader and the number will be displayed in the Logs, from where it can becopied into this field. Also, the UKEY number is printed under the QR codes in the order. QR code: The automatically generated QR must be downloaded from the web interface•and uploaded to a mobile device for further use. Enter all required information in the opened window:• choose an Apartment number from the previously created list in the corresponding tab • owner name • owner type: Guest or Owner • identifier type and number • • choose Access restrictions (when access is allowed for the identifier) from the previously created list in the corresponding tab (optional) set Period restrictions for identifier validity (optional) • set Passes restrictions (optional); • set Lock # that is allowed to open for the identifier (#1, #2 (if SH-42 is used) or both). • Confirm the information.•If necessary, you can edit / delete added identifiers.

How to add a new identifier to a panel memory• Log in to the entrance panel web interface. Go to Access management --> Access Restrictions.• Click Restriction and enter all required information: • restriction Name • date of restriction start and end •By default, the username is admin, and the password is 123456Access restrictionsIn this menu, you can set the access restrictions according to which the access peculiaritiesof various users and their identifiers are determined. For example, you can create a restrictionthat will provide access at a chosen time or day and apply it to necessary identifiers.There are two options for a period indicating: All day: you are required to specify only the date (day / month / year) of the beginning•and end of this rule If the аll day option is disabled, you must specify the date (day / month / year) and set•this restriction start and end time.

• frequency of repetitionsAvailable options are: Never: the restriction will work once• Daily: the restriction will be active every day for a specified time period.•For example, the identifier will work every day from 9:00-18:00 Weekly: the restriction will work on the specified days and hours, e.g., every Tuesday•or every Monday and Friday (depending on settings) Every 2 weeks: the restriction will repeat every two weeks on the specified days.•For example, if you create a restriction that works from Monday to Wednesday, thenthe identifier will be active from Monday to Wednesday with 2 weeks intervals Monthly: the restriction will be active every month, e.g., every 15th day of the month• Yearly: the restriction will repeat every year, e.g., every 15th of December• Custom: you can set the necessary dates, days, and months for restriction repetition: • daily: the restriction will be active every day for a specified time period. • In Every column, you can indicate after how many days the restriction will be activatedagain, e.g., every 5th day. weekly: you can configure restriction repetition on specific days of the week. • In Every column, you can indicate after how many weeks the restriction will be activated again. According to the screen, the identifiers linked with the restriction will work from 9:00-19:00 on Mondays, Wednesdays, and Fridays every 5 weeks. monthly: you can configure restriction repetition on specific dates each month. • According to the screen, the identifiers linked with the restriction will work from 9:00-19:00 every 1st, 7th, 14th, and 21st day of the month. In Every column, you can indicate after how many months the restriction will be activated again, e.g., every 7th month. Also, it is available to configure restriction repetition every month on the first / second / third / fourth / fifth / last specific day of the week, e.g., on the first Tuesday of every month. According to the following image, the identifiers linked with the restriction will work from 9:00-19:00 every last working day of the month. • frequency of repetitionsTwo parameters are available: Infinitely: a restriction will always work; • Until: a restriction will be active until the indicated date. •• Confirm settings.

LogsThis tab contains a log that displays all the events that happened with the panel: loginto the web interface, an unknown identifier used, etc. When the number of events exceeds10,000, the oldest entries are deleted.List of all events displayed in the logPriorityCategoryEventSystemSystemInfoInfoLogin to the web interfaceFailed login attempt to the web interfaceIncoming callOutgoing callLowAccessAccessAccessAccessAccessAccessAccessAccessAccess granted by the web interfaceAccess granted by remote serverLock opened by response device Lock opened by identifierLock opened by exit buttonGeneral access code enteredDoor was closedDoor was opened Medium

List of all events displayed in the logPriorityCategoryEventAccessAccessAccessAccessAccessAccessAccessEmergency Lock opened too long Not valid identifier Wrong input code Access denied by remote serverAccess denied by the web interface Unknown identifierUnknown QR codeTamper triggered HighEmergencyEmergencyEmergencyEmergencyEmergency event cancelEmergency event startLight indicationCall to the rescue service CriticalYou can sort events by date from most recent to oldest and vice versa.To do this, click the Date / Time column.Also, there is a filter with the help of which you can configure a flexible data displayand quick search. To do this, you need to click the Filters button, set the necessaryparameters, and click Apply: In the Field name line, select the search parameter:• category: the display of events with the selected category (access, system) • event: the display of events from previous tables by their names • priority: the display of events with selected low/medium/high priority • date/time: the display of events for the exact date and time •• Choose search condition: equal: the display of events by a selected parameter. So, if you choose events equal • to low priority, you will see all Login to the web interface and Failed login attempt to the web interface events, etc. not equal: the display of events that do not correspond to the selected parameter. • So, if you select events not equal to low priority, you will see all events except those with low priority• Choose Field Value depending on the selected column.

SecurityPasswords management• Old password: Current password input field.• New password: New password input field. Confirm: Confirm the password input field.•Default valuesThe default admin password is 123456

SystemSettings In this tab, you can back up or restore module settings, export / importdata, update software, change the language, reboot the device, etc.In this section, you can save all web interfacesettings (except network settings) by clickingthe Backup whole settings button.If necessary, you can choose the downloadedfile and restore saved settings.You can also reset the device to the defaultsettings by clicking the corresponding button.Export / Import data If necessary, you can export or import datafrom the Apartments, Forward, Identifiers,and Access Restrictions tabs. To export,you must click Download and a ZIP archivewith tables will be saved on your computer.Data import is used to copy the exportedinformation to other individual panels.To do this, choose ZIP archive and clickConfirm.When importing data into the panel, allcurrent data in the Apartments, Forward,Identifiers, and Access Restrictions tabswill be deleted and replaced with new(importing) information withoutthe possibility of restoring.Warning!Import of incorrect format data will causethe panel malfunctioning.

Clear data In this section, you can delete data aboutone or more categories: Apartments, Logs,Forward, Identifiers, and Access restrictions.To clear data, select category / ies andclick Delete. As a result, the data will beirrevocably deleted.Device languageWarning!Before each software update, makea panel settings backup copy, so thatin case of an update error, you canalways restore the previous settings.4 device languages are available for setting: Russian• English•• Ukrainian Spanish•Firmware upgrade By default, the BAS-IP server is used for updates.You have several ways to update panel firmware: Automatically: check for software updates and if it is released, click Update Firmware.•The update process will take some time and in the end, the panel will reboot.If there are no updates, information about the current firmware version will be provided

• Manually: download the necessary firmware from the webpage, click Choose fileand upload the downloaded file. Click Update Firmware and wait for the processto complete (in the end the panel will reboot)You also can use a custom server (is used in closed intercom networks) for firmware updates.The custom server must meet certain conditions for its correct work: the server must havethe version.json file and the file with the necessary firmware.The version.json file must contain information and structure as in the example: Device name• Model (doubles the name)• Device type: panel is a standard value•for all panels Firmware version• Firmware name (doubles the firmware version)• Firmware build date• Commit hash value• Description of changes• Link to the firmware file•How to configure custom serveruse for firmware updates• Log in to the device web interface. Go to System tab --> Firmware upgrade section.• Enable use of a custom server.• Enter the link to the server (with version.json• and firmware files) in the Custom server field. Submit settings.•To update firmware from a custom server, you alsomust check for updates and click Update Software.By default, the username is admin, and the password is 123456RebootThe section contains a buttonfor panel soft reset.
Other manuals for CR-02BD
2
Table of contents
Other basIP RFID System manuals
Popular RFID System manuals by other brands
metraTec
metraTec QuasarMR1 Technical documentation
Stid
Stid ARCS-A/BT1 installation instructions

SILLA
SILLA PRISM SOLAR RFID Instructions for installation, use and maintenance manual
suprema
suprema XPass D2 installation guide
NXP Semiconductors
NXP Semiconductors OM5578 PN7150 user manual
Slate
Slate R1260U Technical information manual
