manuals.online logo
Brands
  1. Home
  2. •
  3. Brands
  4. •
  5. BE QUIET!
  6. •
  7. Computer Hardware
  8. •
  9. BE QUIET! Shadow Rock 2 User manual

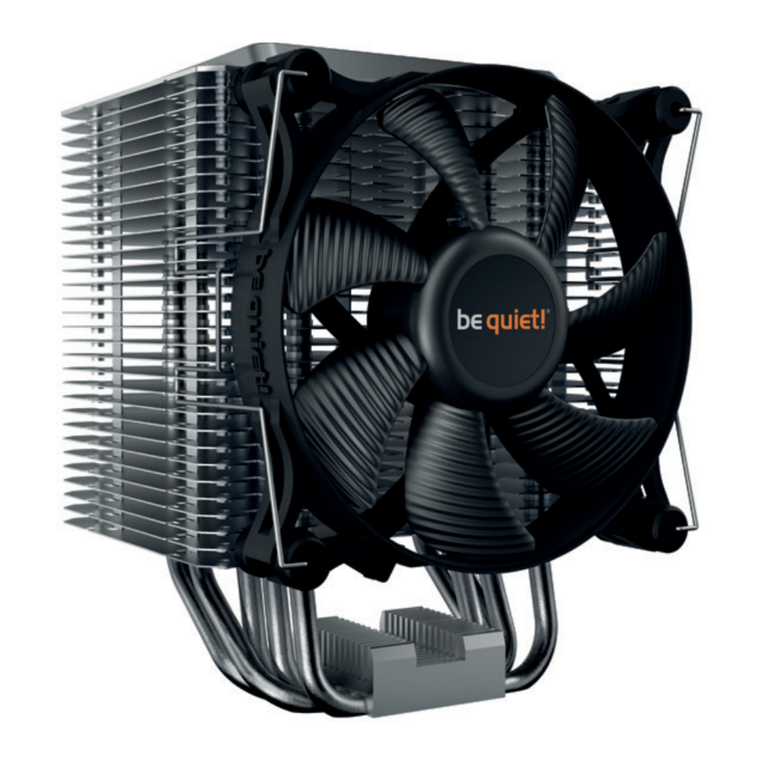
BE QUIET! Shadow Rock 2 User manual

Introduction: Congratulations on your purchase of a high-quality be quiet!
product. These instructions provide step-by-step help with the installation process.
If you encounter problems during installation, please don’t hesitate to contact
us at ser[email protected]. Our customer service team will gladly answer your
questions. be quiet! cannot assume any responsibility for damages related to
compatibility problems.
Einleitung:Vielen Dank, dass Sie sich für ein hochwertiges be quiet! Produkt

sein, und Sie Schritt für Schritt durch diesen leiten. Sollten bei der Installation
Schwierigkeiten auftreten, zögern Sie nicht, uns unter ser[email protected] zu
kontaktieren. Unser Customer-Service-Team steht Ihnen gerne für Fragen zur
Verfügung. be quiet! kann keinerlei Haftung für durch Kompatibilitätsprobleme
bedingte Schäden übernehmen.
Introduction : Nous vous remercions d’avoir choisi un produit de qualité
be quiet!. Cette notice est conçue pour vous aider à installer votre matériel. Elle vous

de cette installation, n’hésitez pas à nous contacter à [email protected]. Notre
équipe se fera un plaisir de répondre à vos questions. be quiet! ne peut assumer la
responsabilité des dommages résultants de problèmes d’incompatibilité.
Wprowadzenie: 






Instrucciones: Muchas gracias por haber elegido un producto de calidad de
be quiet! Estas instrucciones le ayudarán en el proceso de instalación y le guiarán


cliente estará encantado de ayudarle. be quiet! no asume ninguna responsabilidad
por los daños debidos a problemas de compatibilidad.
Installation: NOTE: If your mainboard already has a retention module for

required for installation are on hand before attempting to install the cooler.
Installation: ACHTUNG: Sollte Ihr Mainboard bereits über ein Retention-
Modul zur Befestigung von CPU-Kühlern verfügen, so entfernen Sie dieses
zunächst. Überprüfen Sie vor dem Einbau des Kühlers, ob sämtliche Teile zur
Installation vorhanden sind.
Montage : ATTENTION

veuillez vous assurer da la présence de l'ensemble des pièces nécessaires au montage.



Montaje: ATENCIÓN: Si la placa base ya dispone de un módulo de retención

ventilador, compruebe que tiene todas las piezas para la instalación.
Scope of delivery/ Lieferumfang/ Contenu/
Zestaw zawiera/ Contenido Quantity
be quiet! Shadow Rock 2 CPU cooler/ be quiet! Shadow Rock 2

Rock 2 be quiet!/ Ventilador de CPU be quiet! Shadow Rock 2
1
Silence optimized be quiet! fan/ Geräuschoptimierter be quiet!

wentylator be quiet!/ Ventilador optimizado de be quiet!
1
Intel/AMD back plate/ Intel/AMD Backplate/ Plaque arrière Intel/
AMD/ backplate Intel/AMD/ Placa de apoyo de Intel/AMD 1
Intel mounting brackets/ Intel Montagebrücken/ Supports de

de Intel
2

 4
AMD mounting brackets/ AMD Montagebrücken/ Supports de

de AMD
2

 4

 4

 4
LGA2011 spacer nuts/ LGA2011 Distanzmuttern/

dystansowe LGA2011/ Tuercas distanciadoras LGA2011
4



4

 1

 1
1366, 2011
775 1150, 1155, 1156
Socket
LGA2011
Socket
LGA1155, 1156, 1150, 1366, 775
Socket
AM2(+), AM3(+), FM1, FM2
Socket
754, 939, 940
Installing the back plate: Move the long screws through the drill holes from the rear toward the
front of the back plate . Please mind that the correct drill hole is used for the respective socket. Then use the
 
they click into place.
Befestigung der Backplate: Platzieren Sie die längeren Schrauben auf der Rückseite der Backplate

 . Diese
werden seitlich an der Schraube angedrückt bis diese einrasten.
Fixation de la plaque arrière : Placez les vis longues à l'arrière de la plaque dans les perforations.

arrière sur la carte mère, utilisez en dernier les entretoises C . Ces dernières sont appliqués contre les vis

Mocowanie backplate:  
backplate 
 .

Fijación de placa de apoyo: coloque los tornillos más largos 
parte posterior de la placa de apoyo 
 que se aprieta

Note: 
the fastening point of the intel back plate.
Achtung:
der Aussparungen der Backplate liegen.
Attention :
s'insère dans les découpes de celle-ci .
Uwaga:
 .
Atención:
esté dentro de las ranuras de la placa de apoyo .
( Bottom view )
1366
1150, 1155, 1156
775
754
939
940
AM2(+)
AM3(+)
FM1/ FM2
Intel LGA775/ 1155/ 1156/ 1150/ 1366 & AMD

Warranty:
• 

• Guarantee work can only be processed with an included copy of the purchase
receipt from an authorised be quiet! dealer.
• Manipulation of any kind, structural changes of any kind as well as damages

• 
www.bequiet.com.

For further information, you can contact us via e-mail: ser[email protected]
Garantie:
• 

• Eine Garantieabwicklung ist nur in Verbindung mit einer beigefügten Kopie
des Kaufbeleges eines autorisierten be quiet! Händlers möglich.
• 

totalen Garantieverlust.
• Es gelten unsere Allgemeinen Garantiebestimmungen, die Sie unter
www.bequiet.com im Internet abrufen können.

Unterstützung erreichen Sie uns via der E-Mail: [email protected].
Garantie :
• 

• 
auprès d’un distributeur be quiet! agréé.
• 

totale de la garantie.
• Les conditions détaillées de garantie peuvent être consultées sur le site web
www.bequiet.com dans la rubrique Service/Conditions de garantie.

Si vous avez des questions sur nos produits, veuillez nous contacter par mail à
l'adresse suivante : [email protected]
Gwarancja:
• 

• 
dowodu zakupu u autoryzowanego dystrybutora be quiet!.
• 


• 
Internecie pod adresem www.bequiet.com.


Garantía:
• 

• 

• 


• 
la página web www.bequiet.com dentro de la sección de servicio técnico /


Si tiene más preguntas acerca de nuestros productos, póngase en contacto con

Correo electrónico del servicio de atención: [email protected]
Installation of the CPU cooler:
 ,
 as tight as possible while still being careful. Check that all screws are tightened and

Montage des CPU-Kühlers: ACHTUNG: Entfernen Sie zunächst die Schutzfolie von der Unterseite des
 mit Hilfe des Sechkant-
Maulschlüssels vorsichtig bis zum Anschlag an. Überprüfen Sie vor der Inbetriebnahme des Rechners, ob alle
Schrauben richtig und fest angezogen sind. Der Kühler muss mit dem Mainboard fest verbunden sein!
Montage du ventirad :
 
 
la carte mère.

  

Montaje del ventilador de la CPU: ATENCIÓN: 
  hasta el tope. Antes de poner en marcha el ordenador, compruebe que todos los

Intel LGA2011
Connecting the fan:
Anschluss des Lüfters: 
Raccordement du ventilateur :

Conexión de los ventiladores:
Fan
Intel & AMD
 First screw the spacing nut into the threads of
 is used for this.
Befestigung der LGA2011 Haltevorrichtung: Schrauben Sie zuerst die Distanzmuttern
in die Gewinde des LGA2011 Sockelrahmens. Verwenden Sie hierzu den Sechskant-Maulschlüssel .
Fixation du système de support LGA2011 : Commencez par visser les entretoises dans
 .

dystansowe  .
: atornille primero las tuercas distanciadoras
 .
Intel LGA2011
Installation of the mounting brackets: or AMD onto
the bottom of the cooler. Use the short screws for this  through
the Intel mounting brackets  on top.
Installation der Montagebrücken: Bringen Sie die zwei Montagebrücken für Intel oder AMD an
der Unterseite des Kühlers an. Verwenden Sie hierzu die kurzen Schrauben . Für Intel die Sechskantmutter mit Hülse
von unten durch die Intel Montagebrücke stecken und diese mit der Sechskantmutter 
Installation des supports de montage:  ou AMD sous le
  , placez-le
dessous, à travers les supports de montage Intel  .
 lub AMD
 
   od góry.
Instalación de los puentes de montaje:  o AMD en la
parte inferior del ventilador. Para ello emplee los tornillos cortos . 
  en la parte superior.
AMD
1366, 2011
1150, 1155, 1156
775
Intel
Intel & AMD
Application of the heat-conducting paste: Clean any sediment away from the CPU. Apply a small
drop of the heat-conducting paste onto the surface of the CPU. Distribute that into a thin, uniform coat. NOTE:
Too much heat-conducting paste impedes the transfer of heat and thus the cooling performance! The amount

Aufbringen der Wärmeleitpaste:

Kühlleistung! Die mitgelieferte Menge ist für 2-3 Anwendungen ausreichend.
Application de pâte thermique:Nettoyez le processeur, pour enlever les éventuels résidus de pâte thermique. Déposez une petite goutte de pâte thermique
sur la surface du processeur et veuillez l'étaler en une mince couche uniforme. ATTENTION : une quantité trop importante de pâte thermique réduit le transfert de




Aplicación de la pasta conductora de calor: En caso necesario limpie los posibles restos que queden en la CPU. Aplique una gotita de pasta conductora
de calor 

Intel & AMD
Installation of the CPU cooler: NOTE: 
of the cooler! Place the cooling element on the CPU. Tighten the screws on the back plate from below until the
end of the threads. Check that all screws are tightened and correctly situated before turning on the computer.

Montage des CPU-Kühlers: ACHTUNG: Entfernen Sie zunächst die Schutzfolie von der Unterseite des

Anschlag an. Überprüfen Sie vor der Inbetriebnahme des Rechners, ob alle Schrauben richtig und fest angezogen
sind. Der Kühler muss mit dem Mainboard fest verbunden sein!
Montage du ventirad :

remettre l'ordinateur en service, contrôlez que toutes les vis sont en place et serrées correctement. Le radiateur





Montaje del ventilador de la CPU: ATENCIÓN: 

hasta el tope. Antes de poner en marcha el ordenador, compruebe que todos los tornillos estén bien apretados.

Intel LGA775/ 1155/ 1156/ 1150/ 1366 & AMD
Socket

Socket


Socket



Other BE QUIET! Computer Hardware manuals

BE QUIET! DARK ROCK 2 User manual

BE QUIET!

BE QUIET! DARK ROCK 2 User manual

BE QUIET! DARK ROCK 4 User manual

BE QUIET!

BE QUIET! DARK ROCK 4 User manual

BE QUIET! Silent wings 2 User manual

BE QUIET!

BE QUIET! Silent wings 2 User manual

BE QUIET! DARK ROCK PRO 4 User manual

BE QUIET!

BE QUIET! DARK ROCK PRO 4 User manual

BE QUIET! Light Wings BL073 User manual

BE QUIET!

BE QUIET! Light Wings BL073 User manual

BE QUIET! SHADOW ROCK TOPFLOW SR1 User manual

BE QUIET!

BE QUIET! SHADOW ROCK TOPFLOW SR1 User manual

BE QUIET! PURE LOOP 2 User manual

BE QUIET!

BE QUIET! PURE LOOP 2 User manual

BE QUIET! SHADOW ROCK 3 User manual

BE QUIET!

BE QUIET! SHADOW ROCK 3 User manual

BE QUIET! PURE LOOP 2 FX User manual

BE QUIET!

BE QUIET! PURE LOOP 2 FX User manual

BE QUIET! DARK POWER PRO 13 User manual

BE QUIET!

BE QUIET! DARK POWER PRO 13 User manual

BE QUIET! PSU SHROUD User manual

BE QUIET!

BE QUIET! PSU SHROUD User manual

BE QUIET! PURE ROCK SLIM User manual

BE QUIET!

BE QUIET! PURE ROCK SLIM User manual

BE QUIET! SILENT WINGS 4 User manual

BE QUIET!

BE QUIET! SILENT WINGS 4 User manual

BE QUIET! DARK ROCK PRO 2 User manual

BE QUIET!

BE QUIET! DARK ROCK PRO 2 User manual

BE QUIET! DARK ROCK PRO TR4 User manual

BE QUIET!

BE QUIET! DARK ROCK PRO TR4 User manual

BE QUIET! SHADOW ROCK LP User manual

BE QUIET!

BE QUIET! SHADOW ROCK LP User manual

BE QUIET! PURE ROCK SLIM User manual

BE QUIET!

BE QUIET! PURE ROCK SLIM User manual

BE QUIET! sTRX4 User manual

BE QUIET!

BE QUIET! sTRX4 User manual

BE QUIET! SILENT LOOP 2 User manual

BE QUIET!

BE QUIET! SILENT LOOP 2 User manual

BE QUIET! Pure Loop BW005 User manual

BE QUIET!

BE QUIET! Pure Loop BW005 User manual

BE QUIET! DARK ROCK PRO TR4 User manual

BE QUIET!

BE QUIET! DARK ROCK PRO TR4 User manual

BE QUIET! PURE BASE 600 User manual

BE QUIET!

BE QUIET! PURE BASE 600 User manual

BE QUIET! DARK ROCK SLIM User manual

BE QUIET!

BE QUIET! DARK ROCK SLIM User manual

BE QUIET! PURE ROCK 2 User manual

BE QUIET!

BE QUIET! PURE ROCK 2 User manual

Popular Computer Hardware manuals by other brands

TDK Dualeta iQA Series datasheet

TDK

TDK Dualeta iQA Series datasheet

Buffalo DriveStation HD-HB160U2 user manual

Buffalo

Buffalo DriveStation HD-HB160U2 user manual

CMC 30 HP30 Installation and operation instruction

CMC

CMC 30 HP30 Installation and operation instruction

CAMBRIONIX ModIT-MAX user manual

CAMBRIONIX

CAMBRIONIX ModIT-MAX user manual

Intel BX80571E7400 - Core 2 Duo 2.8 GHz Processor Guidelines

Intel

Intel BX80571E7400 - Core 2 Duo 2.8 GHz Processor Guidelines

CARVIN XD360 Extreme Drive Operation manual

CARVIN

CARVIN XD360 Extreme Drive Operation manual

C-Smartlink DMH25 manual

C-Smartlink

C-Smartlink DMH25 manual

NETGEAR WG511T Specifications

NETGEAR

NETGEAR WG511T Specifications

VOS 5G quick start guide

VOS

VOS 5G quick start guide

TDK DEA Series Specifications

TDK

TDK DEA Series Specifications

CEM Elastix 2.2.0 Step-by-step guide

CEM

CEM Elastix 2.2.0 Step-by-step guide

JVC SA-DV60E instructions

JVC

JVC SA-DV60E instructions

ESD CAN-PCIe/200 Hardware manual

ESD

ESD CAN-PCIe/200 Hardware manual

Renesas FP-80B user manual

Renesas

Renesas FP-80B user manual

Hartmann PCIE101A user manual

Hartmann

Hartmann PCIE101A user manual

Entron EN1280 Application note

Entron

Entron EN1280 Application note

ASROCK NUC 1100 BOX Series user manual

ASROCK

ASROCK NUC 1100 BOX Series user manual

Protech Systems BE-0981 Quick reference guide

Protech Systems

Protech Systems BE-0981 Quick reference guide

manuals.online logo
manuals.online logoBrands
  • About & Mission
  • Contact us
  • Privacy Policy
  • Terms and Conditions

Copyright 2025 Manuals.Online. All Rights Reserved.