manuals.online logo
Brands
  1. Home
  2. •
  3. Brands
  4. •
  5. BE QUIET!
  6. •
  7. Computer Hardware
  8. •
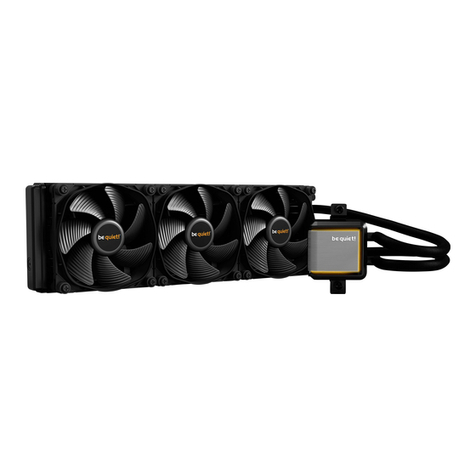
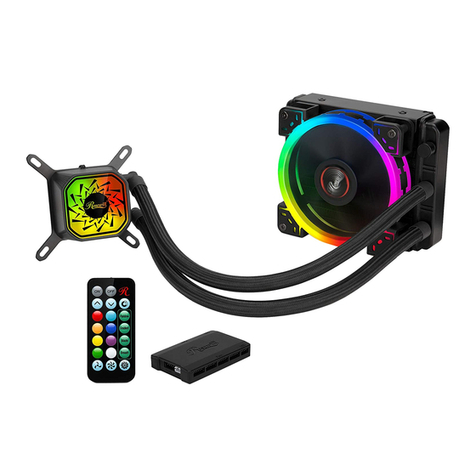
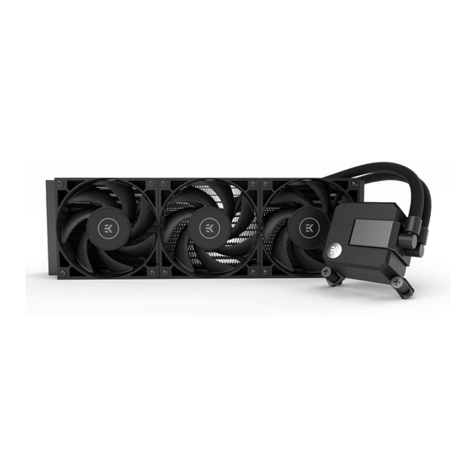
  9. BE QUIET! PURE LOOP 2 FX User manual

BE QUIET! PURE LOOP 2 FX User manual

360mm
280mm
240mm
2
» Product information for this CPU cooler
» Produktinformationen zu diesem CPU-Kühler
» Informations produit pour ce système de refroidissement
» Información del producto para este refrigerador de CPU
» Informacje produktowe dla tego coolera CPU
» Engelstalige productinformatie voor deze processorkoeler
» Produktinformation för den här processorkylaren, på engelska
» Подробнаяинформацияоданномкулередляпроцессора
» 此CPU散熱器的產品資訊
» 此CPU散热器的产品信息
» 製品情報CPUクーラー
NL
SE
www.bequiet.com/BW013
www.bequiet.com/BW014
www.bequiet.com/BW015
240mm
280mm
360mm
3
Einleitung: Vielen Dank, dass Sie sich für ein be quiet!
Produkt entschieden haben. Diese Anleitung wird Ihnen beim
Installationsprozess behilflich sein. Sollten bei der Installation
Schwierigkeiten auftreten, kontaktieren Sie bitte unseren
Kundenservice unter [email protected]. be quiet! kann
keinerlei Haftung für durch Kompatibilitätsprobleme bedingte
Schäden übernehmen.
Garantie:
• 3 Jahre Herstellergarantie für Endkonsumenten (nur Erst-
erwerb vom autorisierten be quiet! Händler), ab Datum
des Kaufbelegs
• Eine Garantieabwicklung ist nur in Verbindung mit einer
beigefügten Kopie des Kaufbeleges eines autorisierten
be quiet! Händlers möglich
• Manipulationen und bauliche Veränderungen jeglicher
Art, sowie Beschädigungen durch äußere mechanische
Einwirkungen führen zum totalen Garantieverlust
• Es gelten unsere allgemeinen Garantiebestimmungen, die
Sie unter www.bequiet.com im Internet abrufen können
Listan GmbH .Wilhelm-Bergner-Straße 11c .21509 Glinde
Germany
Für weitere Unterstützung erreichen Sie uns via E-Mail:
[email protected]
Für die Montage des Kühlers empfehlen wir die
Installation außerhalb des Gehäuses.
!
Introduction: Thank you for deciding to purchase a be quiet!
product. The following instructions will guide you through the
installation process. If you do encounter installation problems,
please don't hesitate to contact our customer services by
mailing [email protected]. Please note that be quiet!
cannot accept liability for damage caused by compatibility
problems.
Warranty:
• 3-year manufacturer guarantee for consumers (original
purchase from authorized be quiet! dealers only)
• Guarantee work can only be processed with a copy
included of the purchase receipt from an authorized be
quiet! dealer
• Manipulation and structural changes of any kind, including
any damage caused by external mechanical force, will lead
to a complete voiding of the guarantee
• Our General Warranty Conditions apply, which can be
viewed on bequiet.com
Listan GmbH .Wilhelm-Bergner-Straße 11c .21509 Glinde
Germany
For further information contact us via e-mail:
[email protected]
We recommend preparatory mounting of the cooler
outside the PC case for subsequent installation.
!
V1/22 V1/22
4
Part name / Bezeichnung Quantity / Anzahl
be quiet! Pure Loop 2 FX CPU cooler
be quiet! Pure Loop 2 FX CPU Kühler 1
Light Wings fan
Light Wings Lüfter
240 / 280: 2
360: 3
ARGB-PWM-Hub
ARGB-PWM-Hub 1
Intel backplate
Intel Backplate 1
Intel mounting brackets
Intel Montagebrücken 2
Intel mounting brackets LGA 1700
Intel Montagebrücken LGA 1700 2
Short AMD mounting brackets
Kurze AMD Montagebrücken 2
Intel spacer nut A
Intel Gewindebolzen A 4
Intel spacer nut B
Intel Gewindebolzen B 4
AMD Spacer nuts
AMD Abstandbolzen 4
Mounting bracket fastening screws
Befestigungsschrauben für die Montagebrücke 4
SCOPE OF DELIVERY / LIEFERUMFANG
1
2
3
4
5
6
7
8
9
10
11
5
Part name / Bezeichnung Quantity / Anzahl
Intel backplate screws
Intel Backplate-Schrauben 4
AMD backplate screws
AMD Backplate-Schrauben 4
Radiator mounting screws
Radiator Befestigungsschrauben
240 / 280: 8
360: 12
Fan mounting screws
Lüfter Befestigungsschrauben
240 / 280: 8
360: 12
Hub mounting screws
Hub-Befestigungsschrauben 4
O-Rings
O-Ringe 4
Thermal paste
Wärmeleitpaste 1
Bottle of coolant
Flasche mit Kühlflüssigkeit 1
Small Cable Tie
Kleiner Kabelbinder 3
Double sided tissue tape
Doppelseitiges Klebeband 1
12
13
14
15
16
17
18
19
20
21
20
20
6
Assembly of the cooler mounting frame
Prior to mounting the cooler, please detach both
plastic holders of the AMD retention module. The
factory-mounted backplate on the rear side of the
motherboard is required for further installation of
the cooler.
Aufbau des Kühlerbefestigungsrahmens
Bitte entfernen Sie zur Kühlermontage die
beiden Kunststoffhalterungen des AMD-
Retentionmoduls. Die werkseitig auf der
Mainboard-Rückseite befestigte Backplate wird
für die weitere Installation des Kühlers benötigt.
The following parts are needed for this:
Pure Loop 2 FX CPU cooler (1), Light Wings fans (2), ARGB-PWM-Hub (3), short AMD mounting brackets
(7), AMD spacer nuts (10), AMD backplate screws (13), radiator mounting screws (14), fan mounting
screws (15), Hub mounting screws (16), thermal paste (18), double sided tissue tape (21)
Es werden folgende Bauteile benötigt:
Pure Loop 2 FX CPU-Kühler (1), Light Wings Lüfter (2), ARGB-PWM-Hub (3), kurze AMD
Montagebrücken (7), AMD Abstandsbolzen (10), AMD Backplate-Schrauben (13), Radiator
Befestigungsschrauben (14), Lüfter Befestigungsschrauben (15), Hub-Befestigungsschrauben (16),
Wärmeleitpaste (20), Doppelseitiges Klebeband (21)
AMD: AM5 / AM4
7
Place the four AMD spacer nuts over the bolt
threads of the backplate on the front side and
fix both the AMD mounting brackets using the
AMD backplate screws.
Platzieren Sie über die Vorderseite die vier
AMD Abstandsbolzen über den Gewinden der
Backplate und fixieren die beiden kurzen AMD
Montagebrücken mit Hilfe der AMD Backplate-
Schrauben.
8
AMD: AM5 / AM4
Mounting the fans on the radiator
Affix the fans to the radiator with the fan mounting
screws. We recommend installation in a push
configuration. With the fans facing towards the
model name on the radiator, mount them on the
hose side.
Befestigung der Lüfter am Radiator
Befestigen Sie die Lüfter mit den Lüfter
Befestigungsschrauben am Radiator. Wir
empfehlen die Installation in einer Push Kon-
figuration. Die Lüfter, mit der Modellbezeichnung
auf den Radiator gerichtet, montieren Sie auf
der Schlauchseite.
3
9
Affixing the radiator to the case
Fix the radiator of Pure Loop 2 FX with the
radiator mounting screws to the case. You can
use a normal crosshead screwdriver for this.
Befestigung des Radiators am Gehäuse
Befestigen Sie den Radiator der Pure Loop 2
FX mit den Radiator Befestigungsschrauben
am Gehäuse. Hierzu können Sie einen üblichen
Kreuz-Schraubendreher verwenden.
4
10
Affixing the ARGB-PWM-Hub to the case
Mount the ARGB-PWM-Hub with the Hub
mounting screws or the double sided tissue
tape on a suitable position in your PC case. We
recommend either the rear of the mainboard
tray or a 2.5” HDD slot. Next, connect the 5V
ARGB pin and the PWM pin with the mainboard.
Then connect the SATA connector with the PSU.
Now connect the ARGB connector and the
PWM connector of the fans with the ARGB-
PWM-Hub. The connector marked RPM carries
the rpm signal of the connected device to the
Mainboard fan header.
Please find further information on the
illumination on page 26.
Befestigung des ARGB-PWM-Hub am Gehäuse
Befestigen Sie den ARGB-PWM-Hub mit den Hub-
Befestigungsschrauben oder dem doppelseitigen
Klebeband an einer geeigneten Stelle im Gehäuse.
Wir empfehlen die Rückseite des Mainboard-
Schlittens oder ein 2,5”-Laufwerksschacht.
Verbinden Sie anschließend den 5V ARGB-Stecker
und den PWM-Stecker mit dem Mainboard. Den
SATA-Anschluss verbinden Sie mit dem Netzteil.
Schließen Sie nun den ARGB-Anschluss und
PWM-Anschluss der Lüfter an den ARGB-PWM-
Hub. Der Anschluss mit der Bezeichnung RPM
gibt das Tacho-Signal des angeschlossenen
Gerätes an das Mainboard weiter.
Weitere Informationen zur Beleuchtung
finden Sie auf S. 26.
4
11
AMD: AM5 / AM4
Mounting of the CPU block
First peel off the protective film from the underside
of the cooler. Apply thermal paste on the CPU
surface. The tube contains enough for about 1 or
2 applications.
Caution: The thermal paste supplied should not
be swallowed. If any is swallowed, drink lots of
water and urgently seek the advice of a doctor.
Store it beyond the reach of children. Avoid
contact with skin and eyes.
Montage des CPU-Blocks
Entfernen Sie zunächst die Schutzfolie von
der Unterseite des Kühlers. Tragen Sie die
Wärmeleitpaste auf die CPU-Oberfläche auf.
Der Inhalt reicht für ca.1-2 Anwendungen.
Vorsicht: Die mitgelieferte Wärmeleitpaste
ist nicht zum Verzehr geeignet. Bei Verzehr
ausreichend Wasser trinken und umgehend
einen Arzt aufsuchen. Außerhalb der Reichweite
von Kindern aufbewahren. Vermeiden Sie Haut-
und Augenkontakt.
12
Place the CPU block centrally over the short
AMD mounting brackets, such that these allow
the CPU block to be screwed down. For this you
can use a normal crosshead screwdriver. Next
connect the pump and the ARGB illumination to
the ARGB-PWM-Hub.
Please continue on page 26.
Legen Sie den CPU-Block mittig auf die
kurzen AMD Montagebrücken, sodass sich
der CPU-Block mit selbigen verschrauben
lässt. Hierzu können Sie einen üblichen Kreuz-
Schraubendreher verwenden. Anschließend
schließen Sie die Pumpe sowie die ARGB
Beleuchtung an den ARGB-PWM-Hub an.
Bitte lesen Sie auf S. 26 weiter.
6
13
Affixing the backplate
Place the Intel backplate screws in the notches
found on the rear of the Intel backplate. Observe
the drilled holes for the actual CPU socket. Use
the O-rings to fasten the backplate screws on
the Intel backplate. Once the Intel backplate is
assembled for the actual Intel socket, position it
beneath the motherboard. Make sure that the Intel
backplate screws exactly match the positions of
the motherboard holes.
Befestigung der Backplate
Platzieren Sie die Intel Backplate Schrauben
in die auf der Rückseite der Intel Backplate
befindlichen Aussparungen. Beachten Sie
hierzu die Bohrlöcher für den jeweiligen
Sockel. Verwenden Sie zur Befestigung der
Backplate-Schrauben auf der Intel-Backplate
die O-Ringe. Sobald die Intel-Backplate für
den jeweiligen Intel-Sockel zusammengebaut
ist, positionieren Sie es unter dem Mainboard.
Achten Sie dabei darauf, dass die Intel Backplate-
Schrauben genau in den Mainboardlöchern
positioniert sind.
The following parts are needed for this:
Pure Loop 2 FX CPU cooler (1), Light Wings fans (2), ARGB-PWM-Hub (3), Intel Backplate (4), Intel
mounting brackets (5), Intel mounting brackets LGA 1700 (6), Intel spacer nut B (9), mounting bracket
fastening screws (11), Intel backplate screws (12), radiator mounting screws (14), fan mounting screws
(15), Hub mounting screws (16), O-rings (17), thermal paste (18), double sided tissue tape (21)
Es werden folgende Bauteile benötigt:
Pure Loop 2 FX CPU-Kühler (1), Light Wings Lüfter (2), ARGB-PWM-Hub (3), Intel Backplate (4), Intel
Montagebrücken (5), Intel Montage-brücken LGA 1700 (6), Intel Gewindebolzen B (9),
Befestigungsschrauben für die Montagebrücke (11), Intel Backplate-Schrauben (12), Radiator
Befestigungsschrauben (14), Lüfter Befestigungsschrauben (15), Hub-Befestigungsschrauben (16),
O-Ringe (17), Wärmeleitpaste (18), Doppelseitiges Klebeband (21)
Intel LGA 1700 / 1200 / 1150 / 1151 / 1155
14
Installation of the mounting bridges
Screw the Intel spacer nut B onto the
previously positioned Intel backplate. Then
position, depending on your socket, the Intel
mounting brackets or Intel mounting brackets
LGA 1700 over the Intel spacer nut B and affix
these with the mounting bracket fastening
screws. You can use any cross-tip screwdriver
for this.
Installation der Montagebrücken
Schrauben Sie die Intel Gewindebolzen B auf
die zuvor platzierte Intel Backplate. Dann
positionieren Sie abhängig von Ihrem Sockel
die Intel Montagebrücken oder Intel Montage-
brücken LGA 1700 auf den Intel Gewinde-
bolzen B, um sie dann mit den Befestigungs-
schrauben für die Montagebrücken zu
fixieren. Hierzu können Sie einen üblichen
Kreuzschraubendreher nutzen.
15
3
Intel LGA 1700 / 1200 / 1150 / 1151 / 1155
Mounting the fans on the radiator
Affix the fans to the radiator with the fan
mounting screws. We recommend installation in a
push configuration. With the fans facing towards
the model name on the radiator, mount them on
the hose side.
Befestigung der Lüfter am Radiator
Befestigen Sie die Lüfter mit den Lüfter
Befestigungsschrauben am Radiator. Wir
empfehlen die Installation in einer Push Kon-
figuration. Die Lüfter, mit der Modellbezeichnung
auf den Radiator gerichtet, montieren Sie auf
der Schlauchseite.
16
Affixing the radiator to the case
Fix the radiator of Pure Loop 2 FX with the
radiator mounting screws to the case. You can
use a normal crosshead screwdriver for this.
Befestigung des Radiators am Gehäuse
Befestigen Sie den Radiator der Pure Loop 2
FX mit den Radiator Befestigungsschrauben
am Gehäuse. Hierzu können Sie einen üblichen
Kreuz-Schraubendreher verwenden.
4
17
Affixing the ARGB-PWM-Hub to the case
Mount the ARGB-PWM-Hub with the Hub
mounting screws or the double sided tissue
tape on a suitable position in your PC case. We
recommend either the rear of the mainboard
tray or a 2.5” HDD slot. Next, connect the 5V
ARGB pin and the PWM pin with the mainboard.
Then connect the SATA connector with the PSU.
Now connect the ARGB connector and the
PWM connector of the fans with the ARGB-
PWM-Hub. The connector marked RPM carries
the rpm signal of the connected device to the
Mainboard fan header.
Please find further information on the
illumination on page 26.
Befestigung des ARGB-PWM-Hub am Gehäuse
Befestigen Sie den ARGB-PWM-Hub mit den Hub-
Befestigungsschrauben oder dem doppelseitigen
Klebeband an einer geeigneten Stelle im Gehäuse.
Wir empfehlen die Rückseite des Mainboard-
Schlittens oder ein 2,5”-Laufwerksschacht.
Verbinden Sie anschließend den 5V ARGB-Stecker
und den PWM-Stecker mit dem Mainboard. Den
SATA-Anschluss verbinden Sie mit dem Netzteil.
Schließen Sie nun den ARGB-Anschluss und
PWM-Anschluss der Lüfter an den ARGB-PWM-
Hub. Der Anschluss mit der Bezeichnung RPM
gibt das Tacho-Signal des angeschlossenen
Gerätes an das Mainboard weiter.
Weitere Informationen zur Beleuchtung
finden Sie auf S. 26.
5
18
Intel LGA 1700 / 1200 / 1150 / 1151 / 1155
Mounting of the CPU block
First peel off the protective film from the underside
of the cooler. Apply thermal paste on the CPU
surface. The tube contains enough for about 1 or
2 applications.
Caution: The thermal paste supplied should not
be swallowed. If any is swallowed, drink lots of
water and urgently seek the advice of a doctor.
Store it beyond the reach of children. Avoid
contact with skin and eyes.
Montage des CPU-Blocks
Entfernen Sie zunächst die Schutzfolie von
der Unterseite des Kühlers. Tragen Sie die
Wärmeleitpaste auf die CPU-Oberfläche auf.
Der Inhalt reicht für ca.1-2 Anwendungen.
Vorsicht: Die mitgelieferte Wärmeleitpaste
ist nicht zum Verzehr geeignet. Bei Verzehr
ausreichend Wasser trinken und umgehend
einen Arzt aufsuchen. Außerhalb der Reichweite
von Kindern aufbewahren. Vermeiden Sie Haut-
und Augenkontakt.
19
Place the CPU block centrally over the Intel
mounting brackets or Intel mounting brackets
LGA 1700, such that these allow the CPU block
to be screwed down. For this you can use a
normal crosshead screwdriver. Next connect
the pump and the ARGB illumination to the
ARGB-PWM-Hub.
Please continue on page 26.
Legen Sie den CPU-Block mittig auf die Intel
Montagebrücken oder Intel Montagebrücken
LGA 1700, sodass sich der CPU-Block mit
selbigen verschrauben lässt. Hierzu können
Sie einen üblichen Kreuzschraubendreher
verwenden. Anschließend schließen Sie die
Pumpe sowie die ARGB-Beleuchtung an den
ARGB-PWM-Hub an.
Bitte lesen Sie auf S. 26 weiter.
7
20
Intel LGA 2011(-3) square ILM / LGA 2066
Assembly of the cooler mounting frame
First screw the Intel spacer nuts A into the
threaded holes of the socket frame. Place
both the Intel mounting brackets over the bolts
and affix these with the fixing screws for the
mounting bridges. To do this you can use a
normal crosshead screwdriver.
Aufbau des Kühlerbefestigungsrahmens
Schrauben Sie zuerst die Intel Gewindebolzen A
in die Gewinde des Sockelrahmens. Platzieren
Sie die beiden Intel Montagebrücken auf
den Intel Gewindebolzen und schrauben Sie
diese mit den Befestigungsschrauben für die
Montagebrücken fest. Hierzu können Sie
einen üblichen Kreuz-Schraubendreher nutzen.
The following parts are needed for this:
Pure Loop 2 FX (1), Light Wings fans (2), ARGB-PWM-Hub (3), Intel mounting brackets (5), Intel spacer
nuts A (8), mounting bracket fastening screws (11), radiator mounting screws (14), fan mounting
screws (15), Hub mounting screws (16), thermal paste (18), double sided tissue tape (21)
Es werden folgende Bauteile benötigt:
Pure Loop 2 FX (1), Light Wings Lüfter (2), ARGB-PWM-Hub (3), Intel Montagebrücken (5),
Intel Gewindebolzen A (8), Befestigungsschrauben für die Montagebrücke (11), Radiator
Befestigungsschrauben (14), Lüfter Befestigungsschrauben (15), Hub-Befestigungsschrauben (16),
Wärmeleitpaste (18), Doppelseitiges Klebeband (21)

Other BE QUIET! Computer Hardware manuals
BE QUIET! DARK ROCK PRO TR4 User manual

BE QUIET!

BE QUIET! DARK ROCK PRO TR4 User manual

BE QUIET! DARK ROCK 3 User manual

BE QUIET!

BE QUIET! DARK ROCK 3 User manual
BE QUIET! Shadow Rock User manual

BE QUIET!

BE QUIET! Shadow Rock User manual

BE QUIET! SHADOW BASE 800 FX User manual

BE QUIET!

BE QUIET! SHADOW BASE 800 FX User manual

BE QUIET! DARK ROCK TF User manual

BE QUIET!

BE QUIET! DARK ROCK TF User manual

BE QUIET! PSU SHROUD User manual

BE QUIET!

BE QUIET! PSU SHROUD User manual

BE QUIET! SHADOW ROCK 3 User manual

BE QUIET!

BE QUIET! SHADOW ROCK 3 User manual

BE QUIET! PURE ROCK SLIM User manual

BE QUIET!

BE QUIET! PURE ROCK SLIM User manual

BE QUIET! SILENT WINGS 3 User manual

BE QUIET!

BE QUIET! SILENT WINGS 3 User manual

BE QUIET! PURE BASE 600 User manual

BE QUIET!

BE QUIET! PURE BASE 600 User manual

BE QUIET! Shadow Rock 2 User manual

BE QUIET!

BE QUIET! Shadow Rock 2 User manual

BE QUIET! SILENT WINGS 4 User manual

BE QUIET!

BE QUIET! SILENT WINGS 4 User manual

BE QUIET! SILENT LOOP 2 User manual

BE QUIET!

BE QUIET! SILENT LOOP 2 User manual

BE QUIET! DARK ROCK PRO TR4 User manual

BE QUIET!

BE QUIET! DARK ROCK PRO TR4 User manual

BE QUIET! DARK ROCK TF User manual

BE QUIET!

BE QUIET! DARK ROCK TF User manual

BE QUIET! PURE ROCK SLIM User manual

BE QUIET!

BE QUIET! PURE ROCK SLIM User manual

BE QUIET! Pure Rock User manual

BE QUIET!

BE QUIET! Pure Rock User manual

BE QUIET! DARK ROCK SLIM User manual

BE QUIET!

BE QUIET! DARK ROCK SLIM User manual

BE QUIET! DARK ROCK 2 User manual

BE QUIET!

BE QUIET! DARK ROCK 2 User manual

BE QUIET! SHADOW ROCK LP User manual

BE QUIET!

BE QUIET! SHADOW ROCK LP User manual

BE QUIET! PURE LOOP 2 User manual

BE QUIET!

BE QUIET! PURE LOOP 2 User manual

BE QUIET! Light Wings BL073 User manual

BE QUIET!

BE QUIET! Light Wings BL073 User manual

BE QUIET! DARK ROCK PRO 4 User manual

BE QUIET!

BE QUIET! DARK ROCK PRO 4 User manual

BE QUIET! DARK ROCK PRO 3 User manual

BE QUIET!

BE QUIET! DARK ROCK PRO 3 User manual
Popular Computer Hardware manuals by other brands

Velleman VMP403 user manual

Velleman

Velleman VMP403 user manual

Analog Devices UG-397 user guide

Analog Devices

Analog Devices UG-397 user guide

ekwb EK-QuantumX Delta TEC user guide

ekwb

ekwb EK-QuantumX Delta TEC user guide

Roland SRJ-JV80-16 owner's manual

Roland

Roland SRJ-JV80-16 owner's manual

ASROCK Rack 2U4N-F/X202 Quick installation guide

ASROCK Rack

ASROCK Rack 2U4N-F/X202 Quick installation guide

Advantech UNO-2484G user manual

Advantech

Advantech UNO-2484G user manual

United Electronic Industries DN-SL-514 Series user manual

United Electronic Industries

United Electronic Industries DN-SL-514 Series user manual

Compex wpj558 Hardware guide

Compex

Compex wpj558 Hardware guide

ekwb EK-FC1080 GTX FTW Installation and mounting manuals

ekwb

ekwb EK-FC1080 GTX FTW Installation and mounting manuals

Renesas SuperH HS0720KCU01HE Addendum

Renesas

Renesas SuperH HS0720KCU01HE Addendum

ETAS ETK-S20.1 user guide

ETAS

ETAS ETK-S20.1 user guide

Feasycom FCS-BT671 user guide

Feasycom

Feasycom FCS-BT671 user guide

Rosslare MD-IO84 installation guide

Rosslare

Rosslare MD-IO84 installation guide

TAG MCLAREN AUDIO AV192R Manufacturing Instructions

TAG MCLAREN AUDIO

TAG MCLAREN AUDIO AV192R Manufacturing Instructions

ioSafe 1513+ quick start guide

ioSafe

ioSafe 1513+ quick start guide

McIntosh MX123 owner's manual

McIntosh

McIntosh MX123 owner's manual

NEX ROBOTICS LMD18200 quick start guide

NEX ROBOTICS

NEX ROBOTICS LMD18200 quick start guide

miniDSP 4x10 user manual

miniDSP

miniDSP 4x10 user manual

manuals.online logo
manuals.online logoBrands
  • About & Mission
  • Contact us
  • Privacy Policy
  • Terms and Conditions

Copyright 2025 Manuals.Online. All Rights Reserved.