Beaver Meridian User manual
Meridian®
Product Service
Manual

Table Of Contents
A
B
i
ii
iii
iv
C
Setup.....................................................
Service
Refilling The Confection.....................
Removing The Cash...........................
The Coin Mechanism.........................
The Dispense Conversion...................
Specifications.........................................
1-2
3-6
7-9
10-12
13-16
17
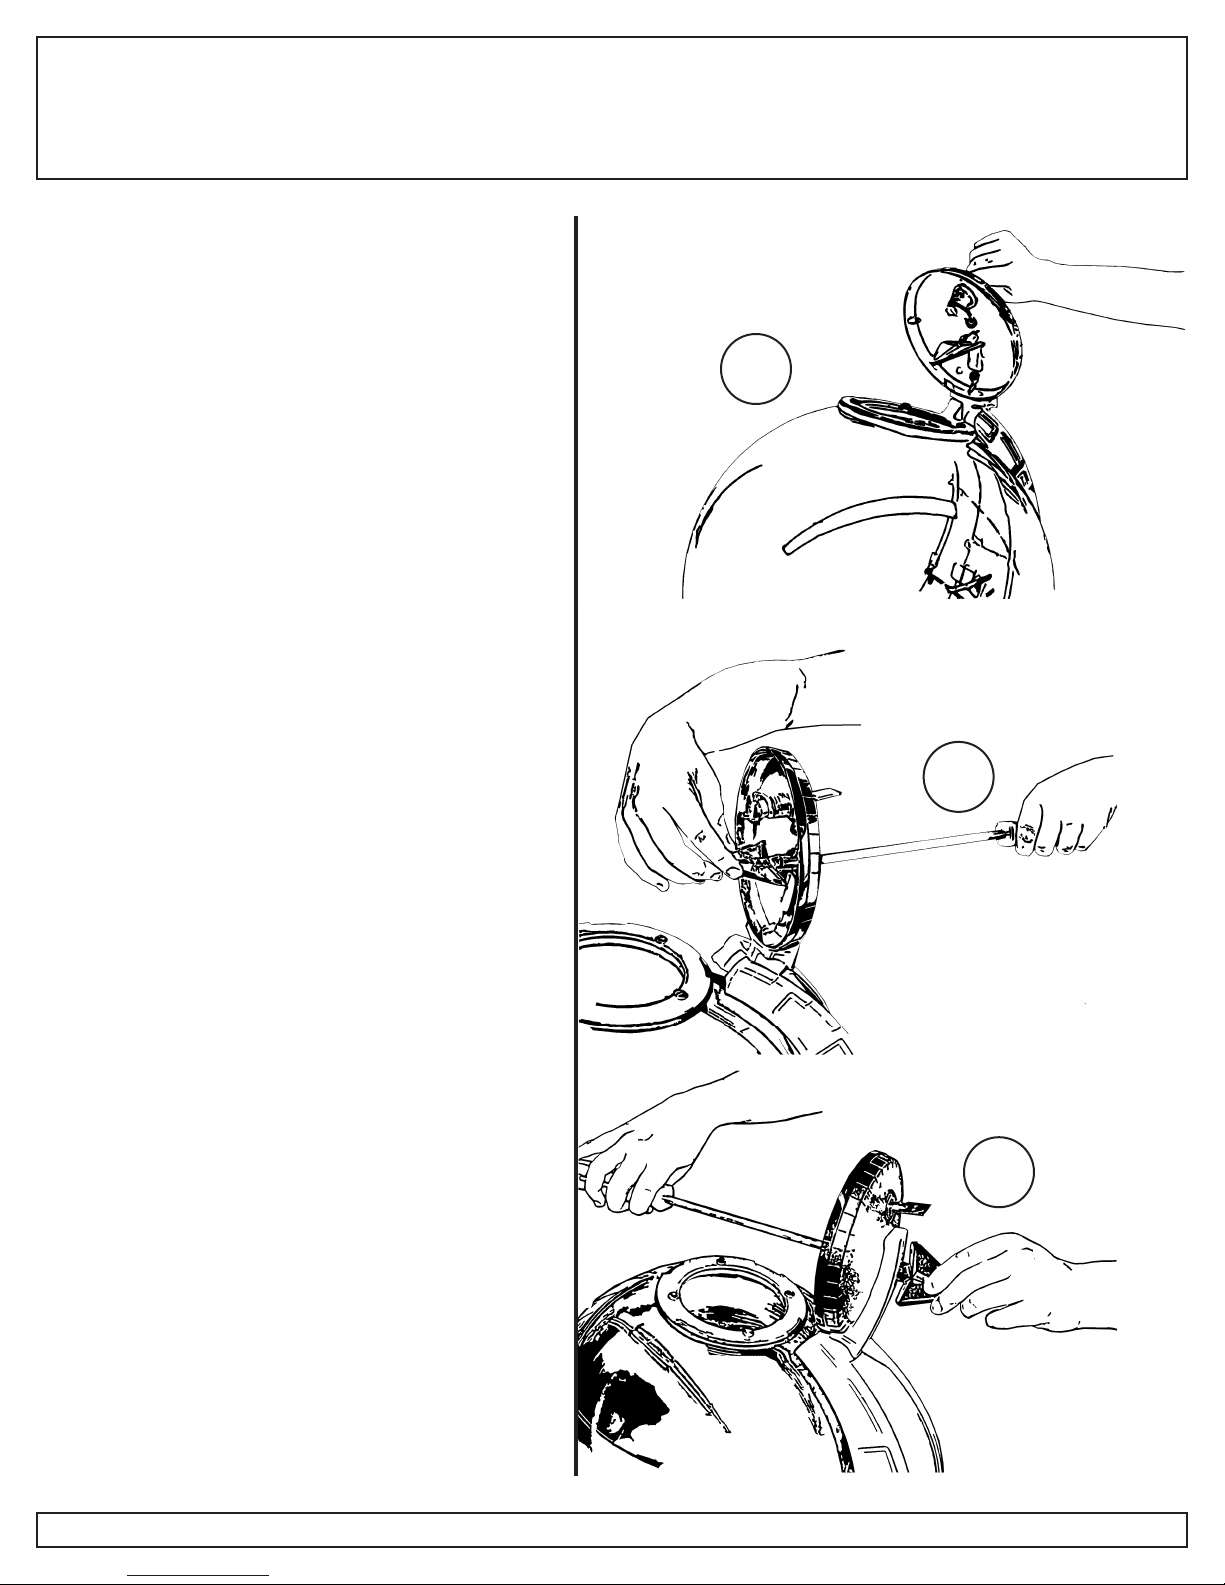
Setup
1. Check machine for any shipping
damage.
2. Unlock and open the lid.
3. Remove the spearhead from
under the lid using a red robertson
screwdriver.
4. Reattach the spearhead to the
top of the lid hinge. The spearhead
will align itself into position.
4
3
2
A1

6
5
5. Fill the ball globe with selected
product.
6. Close the lid and lock into place.
7. Buff the entire machine to
remove dirt and fingerprints. A
sparkling machine will attract more
customers.
A2

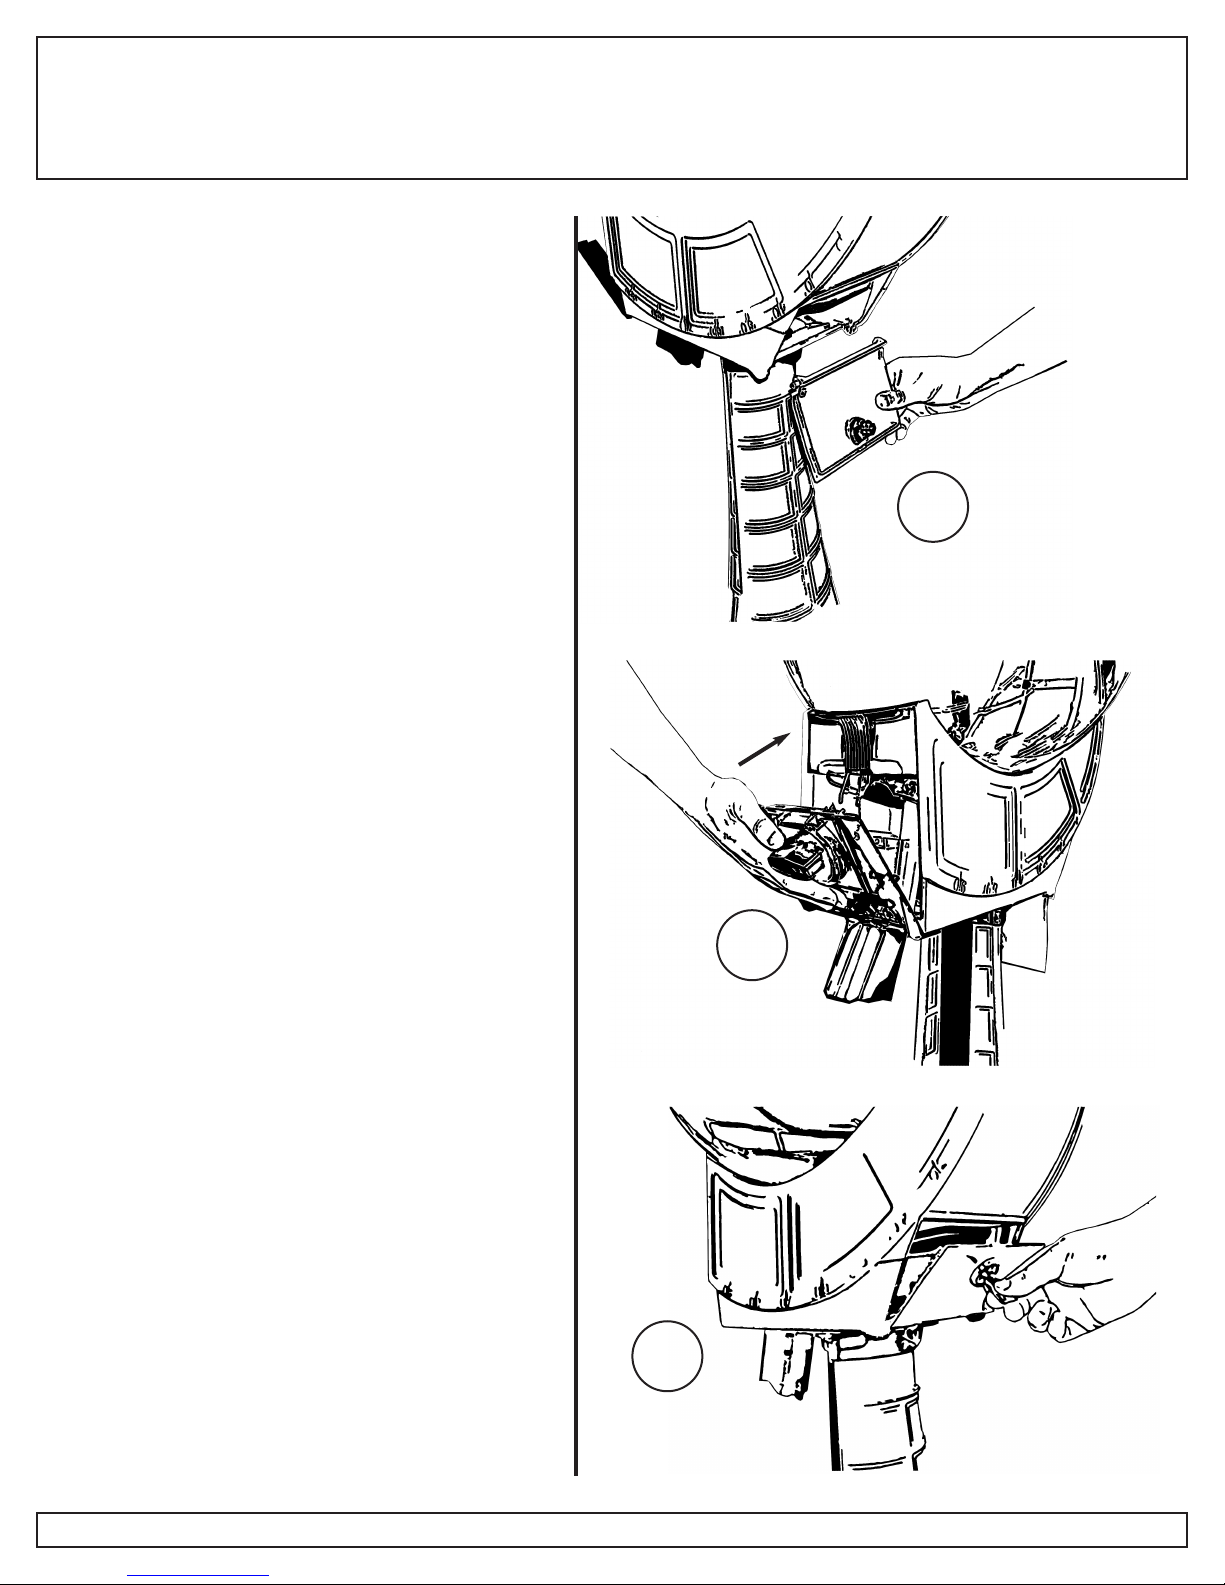
Service
1. Unlock and open the lid.
2. Unlock and open the rear service
door at the back of the machine.
3. Pull the mechanism frame-
locking rod backward, releasing the
mechanism frame. The locking rod is
located inside the back of the machine
at the top of the housing. Be sure to
support the bottom of the mechanism
frame incase the frame falls forward
when releasing the locking rod.
3
1
2
B (i) 3
Refilling The Confection

5
4. Tilt the mechanism frame
outward from the top of the frame.
5. Release the ball globe service
head with the left and right locking
pins located just inside the front of the
machine.
6. Tilt the top of the ball globe
service head forward and then lift
straight up and remove from the
machine.
B (i) 4
6
4
Locking
pin
B (i) 5
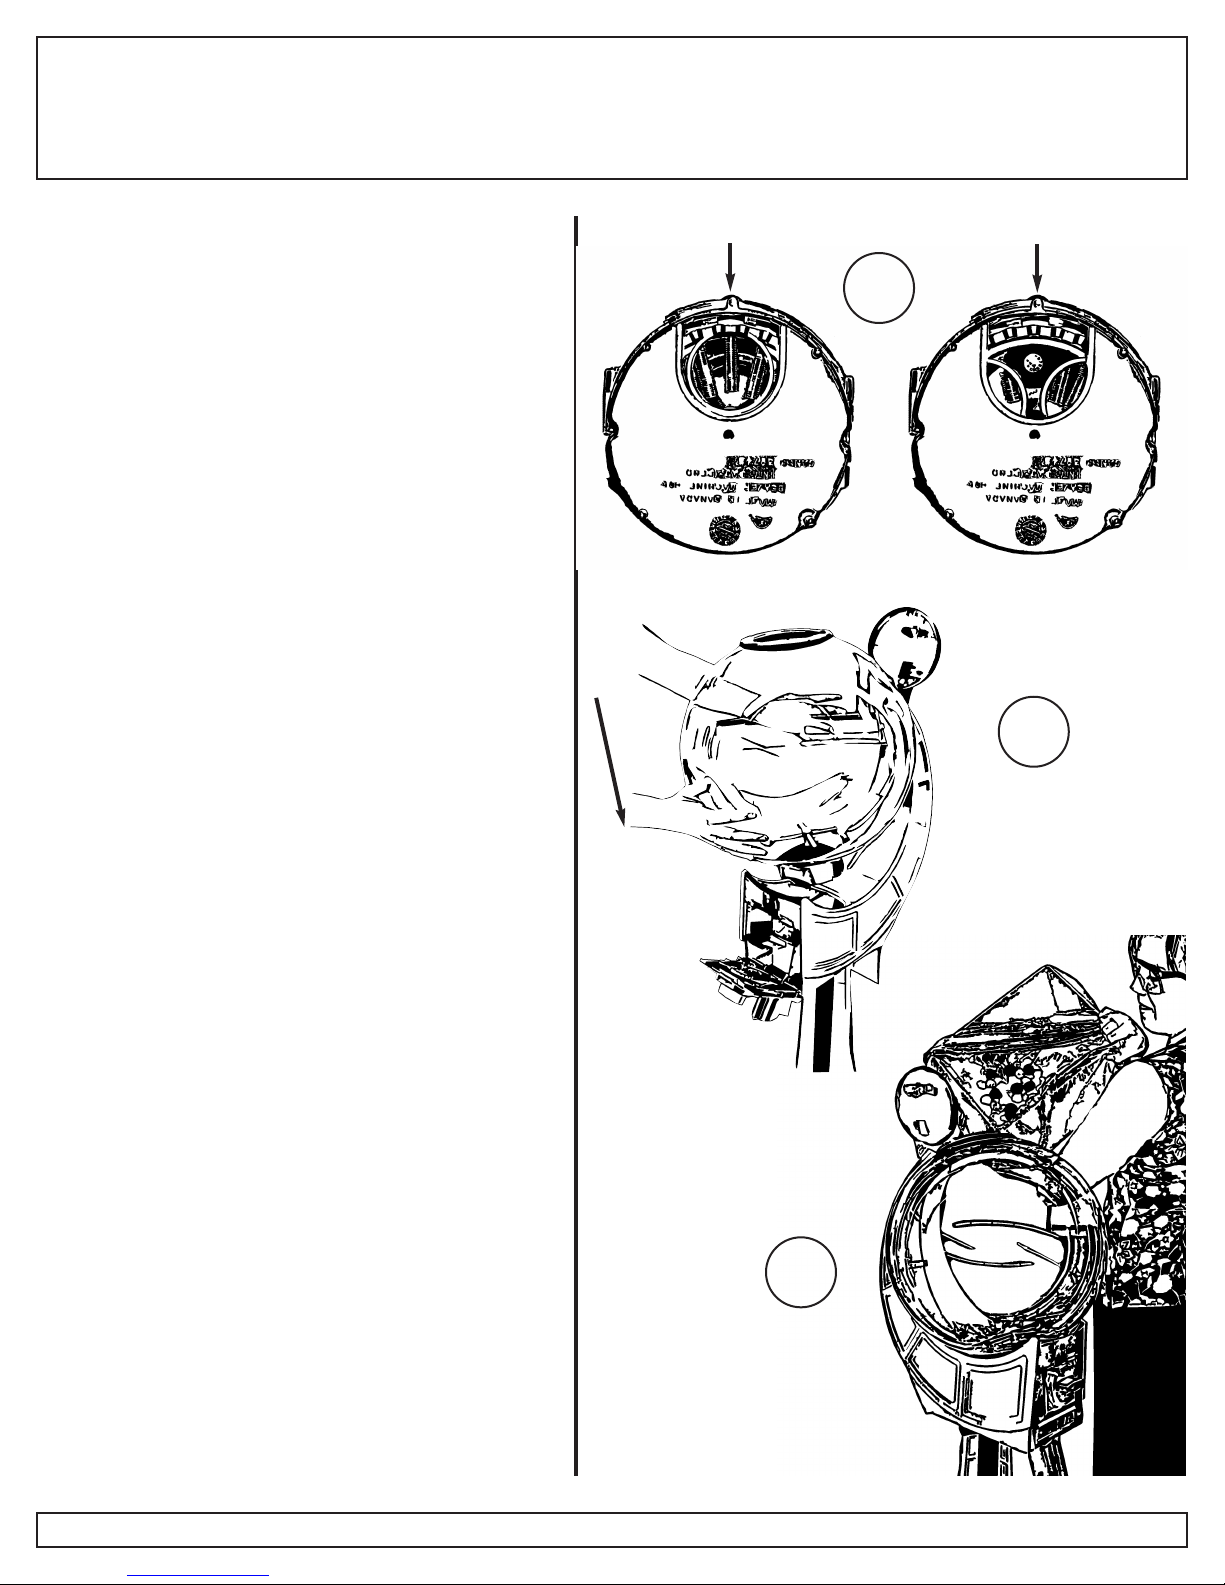
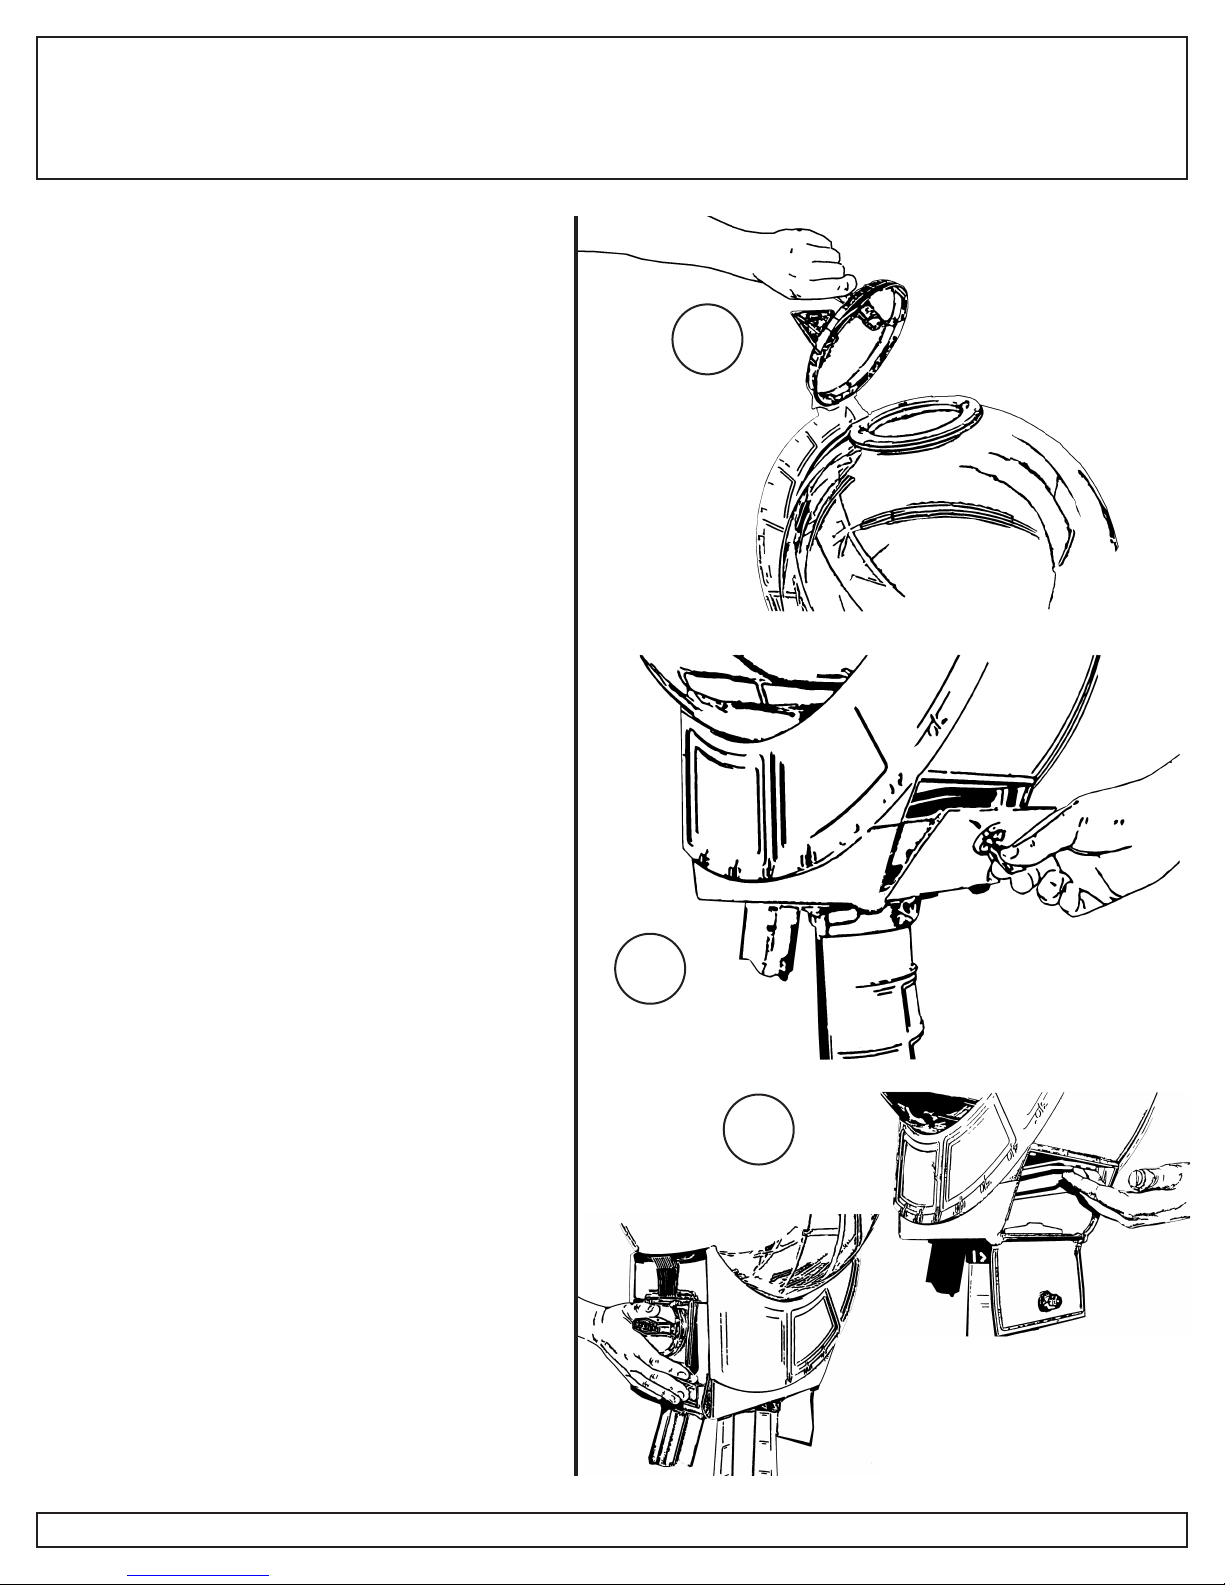
7. Pour out any remaining product
from the ball globe into a clean plastic
bowl or plastic bag.
8. Make sure that one of the
dispense wheel holes is centered with
the housing hole or the product will
not dispense properly.
9. Place the ball globe service
head back onto the machine and lock
into place with the left and right
locking pins.
10. Fill the ball globe with selected
product.
9
10
Correct Incorrect
8

B (i) 6
11. Close the lid and lock into place.
12. Tilt the mechanism frame
upwards so it is flush with the body of
the machine. Lock the mechanism
frame into place with the mechanism-
locking rod located inside the back of
the machine.
13. Close the rear service door and
lock into place.
13
12
10

Service
B (ii) 7
1. Unlock and open the rear service
door at the back of the machine.
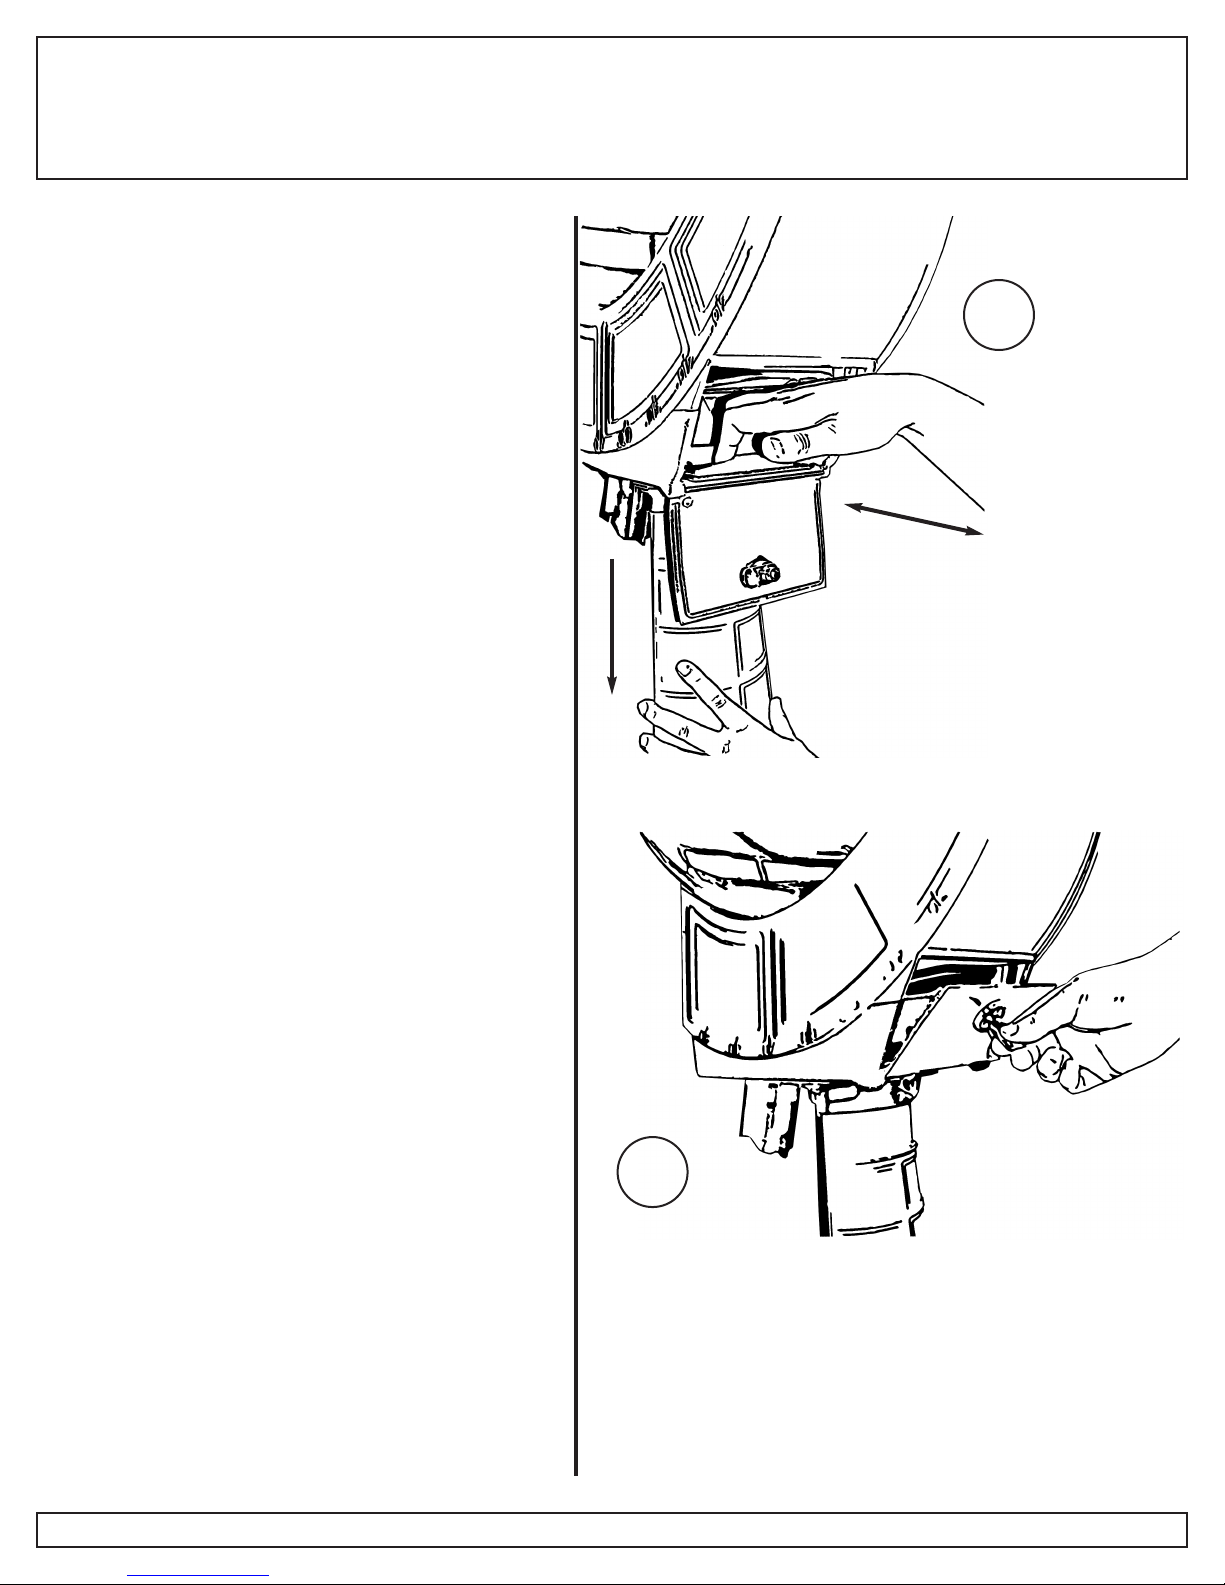
2. Pull the locking-slide backwards
and hold it in the back position. Then
with your other hand slide the top cash
bag cover up.
3. Release the locking slide so that
the top cash bag cover is locked into a
higher position. You should be able to
see the top of the cash bag chute at
this stage.
Removing The Cash
2
1
3
Cash bag
chute
Locked
into a
higher
position

4. Remove the bottom cash bag
cover by sliding it up and off the
support stand wings.
This will expose the entire cash bag.
5. Remove the cash bag-locking
fork. This will release the cash bag.
6. Empty the coins from the cash
bag and reassemble it back onto the
machine. Make sure that the cash bag
opening is securely wrapped around
the holder chute and the cash bag-
locking fork is placed back onto the
machine.
7. Place the bottom cash bag cover
back onto the machine, aligning the
two tabs into the stand base mounting
holes.
B (ii) 8
5
4
8
8. Pull the locking-slide back,
holding it in the back position. Then
with your other hand slide the top cash
bag cover down and release the
locking-slide so that the cash bag
cover is locked into place.
9. Close the service door and lock
into place.
10. Buff the entire machine to
remove dirt and fingerprints. A
sparkling machine will attract more
customers.
B (ii) 9
9

Service
1. Unlock and open the rear service
door at the back of the machine.
2. Pull the mechanism frame-
locking rod backward, releasing the
mechanism frame. The locking rod is
located inside the back of the machine
at the top of the housing. Be sure to
support the bottom of the mechanism
frame incase the frame falls forward
when releasing the locking rod.
3. Tilt the mechanism frame
outward from the top of the frame.
B (iii) 10
1
2
The Coin Mechanism
3

B (iii) 11
4. Slide the mechanism off the
frame for maintenance.
5. Lift the mechanism frame up and
off the machine. Separate the chute
door from the frame and lubricate all
of the hinge tabs.
6. Reassemble the chute door onto
the frame and place back onto the
machine.
7. Slide the mechanism back into
the frame.
4
5
Lubricate
hinge tabs
9
B (iii) 12
8. Lift off the service door from the
machine and lubricate all of the hinge
tabs.
9. Tilt the mechanism frame back
upwards so it is flush with the body of
the machine. Lock the mechanism
frame into place with the mechanism-
locking rod located inside the back of
the machine.
10. Place the service door back onto
the machine and lock into place.
8
10
Service
B (iv) 13
1. Unlock and open the lid.
2. Unlock and open the rear service
door at the back of the machine.
3. Pull the mechanism frame-
locking rod backward, releasing the
mechanism frame. The locking rod is
located inside the back of the machine
at the top of the housing. Be sure to
support the bottom of the mechanism
frame incase the frame falls forward
when releasing the locking rod.
The Dispense Conversion
3
1
2

B (iv) 14
6
4
4. Tilt the mechanism frame
outward from the top of the frame.
5. Release the ball globe service
head with the left and right locking
pins located inside the front of the
machine.
6. Tilt the top of the ball globe
service head forward and then lift
straight up and remove from the
machine.
7. Pour out any remaining product
from the ball globe into a clean plastic
bowl or plastic bag.
Locking
pin 5

B (iv) 15
8. Removing the three adapter
screws in the bottom of the ball globe
and then seperate the ball globe from
the hopper.
9. Change the dispense conversion
and then reassemble the ball globe
onto the hopper.
10. Make sure that one of the
dispense wheel holes is centered with
the housing hole or the product will
not dispense properly.
11. Place the ball globe service
head back onto the machine and lock
into place with the left and right
locking pins.
12. Fill the ball globe with selected
product.
Correct Incorrect
10
11
8

B (iv) 16
13. Close the lid and lock into place.
14. Tilt the mechanism frame
upwards so it is flush with the body of
the machine. Lock the mechanism
frame into place with the mechanism-
locking rod located inside the back of
the machine.
15. Close the rear service door and
lock into place.
15
14
13

Specifications
D17
COLOR OPTIONS
Red
Blue
Yellow
SPECIFICATIONS
Height: 55” / 1397 mm
Width: 18” / 457 mm
Depth: 18” / 457 mm
Weight: 65 lbs / 29 kg
Capacity: 2000 psc of
850 count gum
For more information about any Beaver Products, please contact our sales department at:
BEAVER MACHINE CORPORATION
1341 Kerrisdale Blvd.
Newmarket, Ontario
Canada L3Y 8Z8
©2006 Beaver Machine Corporation
7/06
All prices and specifications are subject to change without prior notice.
PRODUCT COMPATIBILITY
Table of contents
Popular Vending Machine manuals by other brands


Westomatic
Westomatic H2O Hydration Station Cleaning guide

Royal Vendors
Royal Vendors Merlin IV Service and parts manual

Multiplex
Multiplex FreshBlender FAQ & Troubleshooting

Elektral
Elektral Tru-VEND Midi Buffet STD User & maintenance manual

Three Square Market
Three Square Market Kiosk Guide

AMS
AMS SENSIT II Operation and service manual