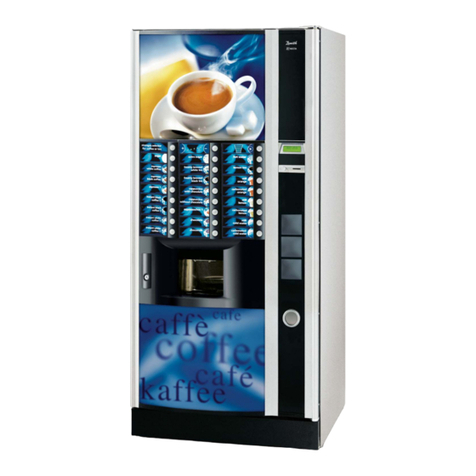
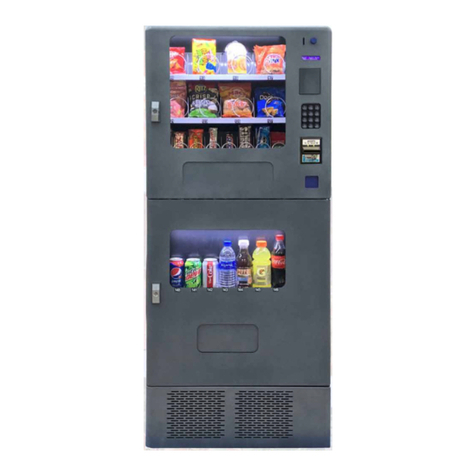
Necta Astro User manual

Necta ASTRO Touch screen upgrade kit by QUVEND Zrt.- MANUAL
2
TABLE of content
1 Introduction..................................................................................................................................... 3
2 What is in the box, tools needed..................................................................................................... 4
3 Installation....................................................................................................................................... 5
3.1 Unplug the machine from the power mains ........................................................................... 5
3.2 Disassembly of the door.......................................................................................................... 5
3.3 Installation of the Display........................................................................................................ 6
3.4 Installation of the power supply.............................................................................................. 8
3.5 Make electric shock protection tests ...................................................................................... 9
4 Programming................................................................................................................................. 10
4.1 General information.............................................................................................................. 10
4.2 Programming/custom fitting................................................................................................. 11
5 Troubleshooting- Cleaning the screen .......................................................................................... 12
6 Disclaimer...................................................................................................................................... 13

Necta ASTRO Touch screen upgrade kit by QUVEND Zrt.- MANUAL
3
1Introduction
This product is an upgrade kit for Necta Astro machines, and including all hardware and software to
replace the physical button of the Necta Astro to a Touch Screen.
The display does not interrupts to the machine’s software, just replacing the physical buttons do
digital ones, connect to the machine via the button cables
The display is very easy to install (takes around 30 minutess),
The display is fully customizable and very easily: by replacing –jpeg files: Languages, background,
buttons, info screens.
The monochrome display of the Astro stays on place, this display replaces the physical keys.

Necta ASTRO Touch screen upgrade kit by QUVEND Zrt.- MANUAL
4
2What is in the box, tools needed
What is in the box?
Display (item 1)
Display mounting kit (item 2)
Door back panels (upper and lower) (item 3)
Power supply unit (item 4)
Power supply cable (item 5)
stickers (Item 6)
Srews (item 7)
SD CARD (item 8 is inserted into the display)
Tools needed:
Screwdriver
rasp or drill
paper scalpel
Computer with paint and SC card slot
ITEM 1
ITEM 2
ITEM 3
ITEM 3
ITEM 4
ITEM 5
ITEM 6
ITEM 7
ITEM 8

Necta ASTRO Touch screen upgrade kit by QUVEND Zrt.- MANUAL
5
3Installation
3.1 Unplug the machine from the power mains
3.2 Disassembly of the door
A. Remove the door back covers
B. Remove the side door cover
C. Remove the upper plastic cover
D. Disconnect and remove the keyboard and the console above
E. Remove the mid cover
F. Remove the cup door (this is not going to be replaced)
Step B Step C / D Step E
Starting point
Step A
Step B
Step B
Step C abd D
Step E

Necta ASTRO Touch screen upgrade kit by QUVEND Zrt.- MANUAL
6
3.3 Installation of the Display
A. Stick the 2 stickers following he signs on them (Item 6)
B. Drill or rasp holes where it is marked on the stickers
C. Replace the mid cover, but keep it loosened
D. Take the power supply unit (Item 4) and lace the plug over the electric channel (hole) of the
mid console
E. place carefully the display (Item 1)
F. Place the display mounting kit (Item 2)
G. Cut the plastic cover to appropriate size (around 405*405mm)
H. Put the resized plastic cover to its place and fasten it properly
I. Replace the side cover and also tighten the mid cover bolts
J. Connect the keyboard cables and the power supply unit to the display
K. Move the lighting form the old upper back door cover to the new one (Item 3)
Step A
Step B
Step D
Step D
Step E
Step F

Necta ASTRO Touch screen upgrade kit by QUVEND Zrt.- MANUAL
7
Step G
Step I
Step J
Step K
Step K

Necta ASTRO Touch screen upgrade kit by QUVEND Zrt.- MANUAL
8
3.4 Installation of the power supply
A. Remove the back panels (behind the canisters) of the Machine
B. Remove the right hand side metal box
C. Remove the side plate of the power supply unit (Item 4) and use it as a marker
D. Mount the power supply unit as it is in the picture
E. Power the power supply unit
F. Properly hide and fix the cables
G. Assembly the machine
Step A, B, C
Step C
Step D
Step E
Step F

Necta ASTRO Touch screen upgrade kit by QUVEND Zrt.- MANUAL
9
3.5 Make electric shock protection tests
Ou must be a certified mechanic to makte the installation and you need to do all of the tests needed.

Necta ASTRO Touch screen upgrade kit by QUVEND Zrt.- MANUAL
10
4Programming
4.1 General information
We offer 5 different theme. The Themes defines where the buttons are place on the display, but all
appearance (background, texts, prices, buttons, desing, languages) can be modified easily by
replacing proper –jpeg files
You can find an SD card in your display (Item9). It includes the software started at each booting by
the touchscreen and all of the .jpeg files. Please never remove the config.exe and the autoexec.ini
files from there.
In the root of the SD card you need to have the config.exe
The program works from the \Storage Card\touchsoft\ folder, you need to have the files you wish to
use in this folder.
.exe-the touchsoft template program
autoexec.bat (with proper calibration),
logo.jpg (pic at starting),
\pictures folder the pictures going to appear in the display.
oYou can find here 5 screensaver files (screensaver.jpg) These files are going to
activated after 10 minutes and going to change repetitively after 10 seconds
oYou can find in certain themes language .jpeg files
oYou can find an info .jpeg file
oIn sub directories (lang1-3) you can find the language backgrouns (if applies) and the
button .jpg files. There are 2 versions of the buttons, unpushed and pushed.
The display is rotated 90degrees from its original position, so all pictures should be also rotated to
appear properly.

Necta ASTRO Touch screen upgrade kit by QUVEND Zrt.- MANUAL
11
4.2 Programming/custom fitting
A. Choose from the 5 themes which you wish to use. Each theme has a folder in the sd card.
Now we continue with “touchsoft_v3_Buttons” theme
B. Copy and replace all files and folders from the selected folder (“touchsoft_v3_Buttons”) to
the \Storage Card\touchsoft\ folder
C. Check that in the \Storage Card\touchsoft\ you have the selected .exe file (in this example
touchsoft_v3.exe)
D. Check the content of the autoexec.bat file in the \Storage Card\. It should be “EXE="\Storage
Card\touchsoft\touchsoft_v3.exe"
E. Now you can replace the startup Logo in \Storage Card\touchsoft\logo.jpg. WHEN
REPLACING ANY JPEG FILE, YOU NEED TO MAKE SURE THAT THE NEW FILE HAS EXACTY THE
SAME RESOLUTION (main pictures: 1280*1024) and should be 32bit file. You can easily edit
files with MS paint or any other software
F. You can replace and custom fit complete display, replace all jpg files, all buttons,
backgrounds.
V1 Black
V1 White
V2 Color
V3 Buttons
V3 Image

Necta ASTRO Touch screen upgrade kit by QUVEND Zrt.- MANUAL
12
5Troubleshooting- Cleaning the screen
Most of the problems are solves
Screen pushed and different button answers: Remove the screen and completely clean it.
Screensaver does not activate or change quickly: Clean the screen.
CLEANING:
A. Dismount the touch screen
B. Remove the bolts
C. Clean the full surface of the screen and the frame
Step B
Step C
Step D

Necta ASTRO Touch screen upgrade kit by QUVEND Zrt.- MANUAL
13
6Disclaimer
The touch screen is reused, the buyer need to check the quality safeness and conformity of the
product at handover.
The product can be cleaned with the same materials as similar electric equipments.
Touch screen needs regular deep cleaning (every 30 days)
The software of the package (excluding MS software) are owned by IVP Zrt, and prohibited to be
copied without the approval of IVP Zrt.
Only qualified technician is allowed to installation and especially electrical connections of the kit.
Before use of the machine, electric shock protection tests should be made before use the machine.
Warranty
Due to low price, the seller gives 7days replacement warranty after the date of handover,
considering this is a used upgrade kit, no further warranty included. The warranty related transport
cost is the responsibility of the buyer.
The expressed warranty obligation of the Seller does not cover the following cases:
The failure of the product is due to unprofessional or improper use, or the Buyer builts-in or
operates the poduct in an environment which doesn’t meet the requirements expressed in
present Fixing and Operational Manual
Seller or any third party tried to repair or modify arbitrarily the product and/or the
connected software without the prior permission of the Seller.
If the error falling under warranty obligations are due to reasons of force majeure.
Indemnification
Indemnification of Seller shall be governed by the relevant provisions of the Hungarian Civil Code.
Parties agree that they maximize the sum of all claims arisen from this contract to be paid by the
Seller in the sum of the total Selling price. This limitation of the payable sum of the claims is not
applicable for claims stated in the Hungarian Civil Code 6:152.§.
All legal disputes between Seller and Buyer shall be governed by the Hungarian laws, and the
jurisdiction is the Seat of the Seller.
Other manuals for Astro
1
Table of contents
Other Necta Vending Machine manuals

Necta
Necta SINFONIA GF6 Operating instructions

Necta
Necta Samba Top Owner's manual

Necta
Necta Colibri Manual

Necta
Necta Canto Plus Espresso Owner's manual
Necta
Necta Snakky User manual

Necta
Necta Zenith Fresh Brew Instant Installation guide
Necta
Necta Snakky 6-30R/I User manual

Necta
Necta Snakky Service manual

Necta
Necta StarFood Installation guide
Necta
Necta Sfera 6-36 R/F User manual