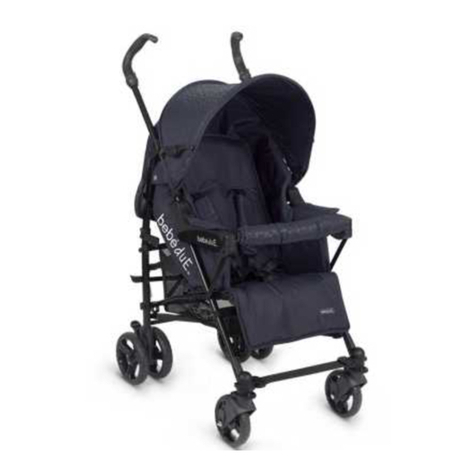
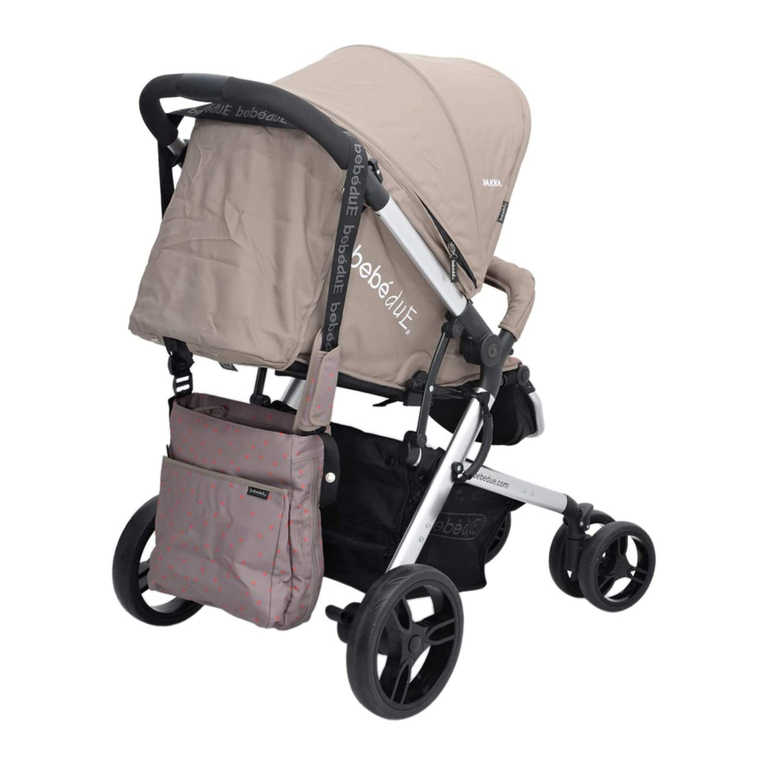
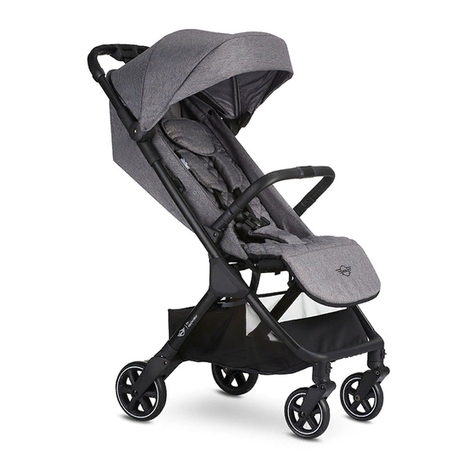
bebeduE nik User manual

Silla de paseo
Pushchair
Poussette
Passeggino
Carrinho de passeio
IMPORTANTE: guarde estas instrucciones para consultas futuras
IMPORTANT: save these instructions for future reference
IMPORTANT: conservez ces instructions pour référence future
IMPORTANTE: conservare queste instruzioni per riferimenti futuri
IMPORTANTE: guarde estas instruçoes para referência futura
UNE-EN: 1888:2012
IN: ST021-17V1


Contenido / Content / Contenu / Contenuto / Conteúdo
5
Partes / Parts / Pièces / Parti / Peças 6
Imágenes / Images / Immagini / Imagens 8
Español 12
English 16
Français 20
Italiano 24
Português 28
3

CONTENIDO
CONTENT
CONTENU
CONTENUTO
CONTEÚDO
Al abrir la caja compruebe que contiene las siguientes piezas. Si echa alguna en falta,
póngase en contacto con su vendedor local.
When you open the box, check it contains the folloing parts. If anything is missing,
contact your local supplier.
Lorsque vous ouvrirez le carton, vérifiez qu’il contient les pièces suivantes. S’il en
manque, contactez votre vendeur local.
All’apertura della confezione, verificare che vi siano contenuti tutti gli elementi elen-
cati. Se uno di essi non dovesse essete presente, rivolgersi al rivenditore locale.
Ao abrir a caixa, comprove que esta contém as seguintes peças. No caso de faltar
alguma peça, contacte os eu vendedor local.
A. Chasis y asiento
B. Dos ruedas traseras
C. Dos ruedas delanteras
D. Capota
E. Protector frontal
Impermeable
Estas instrucciones
A. Châssis et siège
B. Deux roues arrière
C. Deux roues avant
D. Canopy
E. Bumper
Habillage pluie
Ces instructions
A. Chassi e assento
B. Duas rodas traseiras
C. Duas rodas dianteiras
D. Capota
E. Protetor frontal
Capa impermeável
Instruções
A. Chasis and seat
B. Two back wheels
C. Two front wheels
D. Canopy
E. Bumper
Waterproof cover
These instructions
A. Telaio e seduta
B. Due ruote posteriori
C. Due ruote anteriori
D. Capottina
E. Bracciolo di protezione
Impermeabile
Istruzioni
ES
EN
FR
IT
PT
4

IMPORTANTE: leer detenidamente y guardar estas instrucciones para consultas
futuras.
IMPORTANT: please read carefully and save these instructions for future reference.
AVIS IMPORTANT: lisez avec attention et conservez ces instructions pour référence
future.
IMPORTANTE: leggere attentamente e conservare queste instruzioni per riferimenti
futuri.
IMPORTANTE: leia atentamente e guarde estas instruções para referência futura.
ES
EN
FR
IT
PT
C
A
D
B
E
5

12
PARTES PARTS PIÈCES PARTI PEÇAS
11
10
9
8
7
5
4
3
2
1
6
6

1 Manillar / 2Botón regulación manillar / 3Correa regulación respaldo
4Freno / 5Ruedas traseras / 6Cesta portaobjetos / 7 Ruedas delanteras / 8Palanca de
fijación ruedas delanteras / 9 Reposa píés / 10 Botón extracción bumper / 11 Bumper
12 Capota
1 Grip / 2Grip adjustment button / 3Backrest adjustment / 4Brake lever
5Rear wheel / 6Basket / 7 Front wheel / 8Front wheel lock / 9 Footrest
10 Protector removal button / 11 Bumper / 12 Hood
1 Guidon / 2Bouton réglage guidon/ 3Réglage dossier / 4Frein / 5Roue arrière
6Panier / 7 Roue avant / 8Levier fixation pivotante avant 9 Repose-pieds
10 Bouton démontage arceau / 11 Arceau avant / 12 Capote
1 Manubrio / 2Pulsante regolazione manubrio / 3Cinturino di regolazione del
schienale della sedia / 4Freno / 5Ruota posteriore / 6Cestello / 7 Ruote anteriori
8Leva fissaggio ruota piroettante anteriore / 9Poggiapiedi / 10 Pulsante rimozione
protettore /11 Protettore frontale / 12 Capotta
1 Guiador / 2Botão de regulação do guiador / 3Alça de ajuste de encosto da cadeira
4Travão / 5Roda traseira / 6Cesta / 7 Rodas dianteiras / 8Alavanca de bloqueio do
giro da roda dianteira / 9Apoio de pés / 10 Botão de extração do protetor / 11 Protetor
dianteiro / 12 Capota
ES
EN
FR
IT
PT
7

INSTRUCCIONES INSTRUCTIONS ISTRUZIONI INSTRUÇÕES
1
4
7
10
2
5
8
11
3
6
9
12
8

13
16
19
22
14
17
20
23
15
18
21
24
9

INSTRUCCIONES
25
28
31
34
26
29
32
35
27
30
33
36
10

37
40
43
38
41
39
42
11

INSTRUCCIONES
1. MONTAJE DE LA SILLA DE PASEO
1.1. DESPLEGADO
•Liberarelsegurodecierredelchasis(A)(fig.1)
•Desplegarelchasistirandodeamboslados(fig.2y3),hastaquequedetotalmente
abierto(fig.4)
•Levantarelmanillarpulsandosimultáneamentelosdosbotonesinteriores(fig.5).
Elmanillardisponededosposiciones(fig.6y7),quepuedenservariadaspulsando
simultáneamente ambos botones laterales y moviéndolo al mismo tiempo, hacia
arriba o hacia abajo.
1. 2. MONTAJE Y DESMONTAJE DE LAS RUEDAS
• Montar las ruedas traseras (B), introduciendo lateralmente su eje en los
correspondientes alojamientos, en los lados inferiores de la parte trasera (fig. 8).
Empujar la rueda hasta oír el “clic” de encaje y asegurarse de que queda correctamente
fijada tirando de ella hacia fuera. Las ruedas traseras pueden ser extraídas, tirando
hacia fuera del resorte que está debajo de cada soporte de rueda, al tiempo que se tira
delaruedahaciaelexteriordesualojamiento(fig.9)
• Montar las ruedas delanteras (C), introduciendo sus ejes en los alojamientos
inferioresdelapartedelantera(fig.10).Empujarlaruedahastaoírel“clic”deencajey
asegurarse de que queda correctamente fijada tirando de ella hacia afuera. Las ruedas
delanteras pueden ser extraídas, tirando hacia afuera del resorte que está debajo
de cada soporte de rueda, al tiempo que se tira de la rueda hacia el exterior de su
alojamiento(fig.11)Elgirodelasruedasdelanteras,puedeserbloqueadoaccionando
haciaabajolosresortesblancosquehaysobrecadarueda(fig.10).Delmismomodo
accionando hacia arriba los citados mecanismos, queda liberado el giro de las ruedas.
1. 3. MONTAJE DE LA CAPOTA
•Introducirunodelosdossoporteslateralesdelacapota(D),eneltubocorrespondiente
delchasis(fig.12)hastaquequedecorrectamentecolocadorodeandoeltubo.
•Repetirlamismaoperaciónenelladocontrario(fig.13)
•Tirardelacapotahaciaarriba,hastaoírel“clic”defijaciónenamboslados(fig.14)
•Fijarlosdoscierresrápidosdecadaladodelfaldónposteriordelacapota,ensus
correspondientesalojamientosdelavestiduradelasiento(fig.15y16)
1. 4. COLOCACIÓN DEL PROTECTOR FRONTAL
•Colocarelprotector(E)ensuscorrespondientesalojamientos(fig.17y18),hastaoír
el “clic” de los mecanismos de fijación. Asegurarse de que queda correctamente fijado
tirando hacia arriba desde ambos lados.
•Paraextraerelprotector,pulsarlosdosbotonesdedesbloqueolaterales(fig.18),
tirando simultáneamente hacia arriba.
12

ES
•Ladefensapuedeapartarsesinnecesidaddeextraerlatotalmente,liberándolade
unosolodelosladosygirándolahaciaelladocontario(fig.19)
2. MANEJO DE LA SILLA DE PASEO
2. 1. FRENO DE SEGURIDAD
• Para accionar el freno de seguridad, presione hacia abajo con la punta del pie, el
mecanismorojosobrelaruedatraseraderecha(fig.20),hastaoírel“clic”defijación.
Asegúrese de que la silla quede correctamente inmovilizada.
• Para liberar el freno de seguridad, presione hacia abajo con la punta del pie, el
mecanismo verde sobre la rueda trasera izquierda (fig. 21), hasta oír el “clic” de
liberación.
•Usesiempreelfrenocuandonoestésujetandolasillaporelmanillar.
2. 2. RECLINACIÓN DEL RESPALDO DEL ASIENTO
•Parareclinaroenderezarelrespaldo,desliceconunamanoeldispositivodebloqueo
delascintasdelaparteanteriordelrespaldo,mientrassujetaytensalascorreas(fig.
22),hastallevarloalaposicióndeseada(fig.23).Tiredelapartesuperiordelrespaldo
hastalaposiciónelegida(fig.24)
•Parabebésreciénnacidosodecortaedad,esaconsejablecolocarelrespaldoensu
posicióndemáximareclinación(fig.25)
3. REGULACIÓN DEL ANGÚLO DEL REPOSAPIES
•Elreposapiésdisponedetresposicionesdeinclinación,simplementehayquetirardeél
haciaarriba(fig.26)hastaoírel“clic”defijaciónenlaposiciónelegida(fig.27)
•Parabajarelreposapiéstiredeelhaciaarriba,masalládesuposiciónhorizontal(fig.
28),paraliberarelmecanismodefijaciónypoderbajarlohastalaposicióndeseada.
•Parabebésreciénnacidosodecortaedad,esaconsejablecolocarelreposapiésensu
posiciónhorizontal(fig.27)
4. FIJACIÓN DEL ARNÉS
•Introducirlasfijacióndeunadelasdospartesdelcinturón,enlaranuradelapieza
finaldelacintapectoraldelmismolado(fig.29)
•Introduzcaelconjuntoformadoporcinturónycintapectoral,enelladocorrespondiente
delahebilladelatiradeentrepiernas(fig.30)hastaoírel“clic”defijación.
•Repitalasdosoperacionesanterioresconlaotrapartedelcinturónylaotracintapectoral.
13

• Asegúrese de que el arnés queda correctamente abrochado, tirando de la hebilla
hacia fuera.
•Paraliberarelarnéspulsarenelbotóncentraldelahebilla(fig.31)
•Ajustarelcinturónylassujecionespectorales,siesnecesario,recogiendoosoltando
lascorrespondientescintas(fig.31y32)
5. REGULACIÓN DE LA ALTURA DEL ARNÉS
•Elarnésdisponededosposicionesdealtura,conelfindeadaptarsealcrecimiento
del bebé.
•Paracambiarlaposición,extraerlacintapectoraldesdelapartetraseradelrespaldo,
introduciendo la hebilla de terminación por la ranura del respaldo (fig. 33) hasta
extraerlatotalmenteporlapartedelantera(fig.34)
•Introducirlahebilladeterminaciónextraída,desdelapartedelantera,enlaranurade
lanuevaposición(fig.35),hastaextraerlatotalmenteporlapartetrasera(fig.36)
•Repitalasdosoperacionesanterioresconlacintapectoraldelladoopuesto.
•Parabebésreciénnacidosodecortaedad,lascintaspectoralesdebencolocarseen
su posición inferior, hasta que el niño alcance la altura adecuada para utilizarlas en la
posición superior.
6. PLEGADO
•Bloquearelgirodelasruedasdelanteras.
•Plegarlacapotayempujarladesdearribahaciaabajo,hastasuposicióninferior(fig.37)
•Llevarelrespaldodelasientohastasuposiciónmasvertical(fig.38)
•Pulsarlosdosbotoneslateralesinterioresdelmanillar,empujandosimultáneamente
delmismohaciaabajohastatocarlostuboslateralesdelchasis(fig.39y40)
•Tirarhacia arribadela cintaqueseencuentraenelángulodeunióndeasientoy
respaldo,bajolavestidura(fig.41),levantandolasillahastaquequedeplegada.
•Fijarelsegurodecierrequeseencuentraenunlateral(fig.42)
•Lasillaquedaraenposicióndeplegada,listaparasutransporteoguardado(fig.43)
INSTRUCCIONES
14

ES
lEste vehículo es para niños desde los 0 meses y hasta los 15 kg máximo.
lNo deje al niño desatendido.
lAsegurarse de que todos los dispositivos de cierre están engranados antes del uso.
lPara evitar lesiones, segúrese de que el niño se mantiene alejado durante el desplegado
y el plegado de este producto.
lNo permita que le niño juege con este producto.
lUsar siempre el sistema de retención.
lEste producto no es adecuado para correr o patinar.
lNo coloque a más de un niños ni otros bolsos, bienes o accesorios en la silla de paseo.
lNo permita que el niño se ponga de pie en la extensión del asiento.
lNunca cuelge bolsas o accesorios no diseñados para el objeto. Podrían desastabilizar el
cochecito.
lNo utilice la silla de paseo en escaleras convencionales ni mecánicas.
lSiempre que estacione la silla, ponga los frenos.
lAsegúrese de que la silla está completamente erguida y compruebe que todos los
cierres están colocados antes de sentar al niño en la silla.
lNo coloque un peso excesivo en la silla ya que se puede desestabilizar. El peso
máximo de cualquier niño que use la silla no debe superar los 15 kg.
lCualquier artículo que se coloque en la cesta no debe exceder los 2 kg.
lNo use la silla de paseo cerca de un fuego directo ni la exponga a una llama,
barbacoa o calefactor.
lNo use la silla si faltara algún tornillo, tuerca, perno, etc. o tuviera algún componente
dañado.
lAsegúrese de que regularmente realiza inspecciones rutinarias completas y lleva a cabo
el mantenimiento y la limpieza de la silla de paseo.
lTenga en cuenta que el estampado, los dibujos de color y los accesorios de la silla de
paseo de este manual de instrucciones pueden variar del producto que ha comprado.
lSólo se deben usar repuestos proporcionados o recomendados por el fabricante /
distribuidor.
lCualquier carga fijada al manillar y/o a la parte trasera del respaldo y/o en los laterales
del vehículo puede afectar a la estabilidad del vehículo.
lEl dispositivo de estacionamiento se debe activar cuando se coloca y retira al niño.
lSe recomienda usar la posición más reclinada para los bebés recién nacidos.
La seguridad del niño puede verse afectada si no se siguen estas instrucciones. bebédue
no se hace responsable de posibles daños si no se siguen las anteriores advertencias.
ADVERTENCIAS
15

INSTRUCTIONS
1. ASSEMBLING THE PUSHCHAIR
1. 1. UNFOLDING
•Releasethesafetylockonthechassis(A)(fig.1)
•Openupthechassisbypullingonbothsides(fig.2&3),untilitisfullyopened(fig.4)
•Liftupthehandlebarbypressingthetwoinsidebuttonsatthesametime(fig.5).The
handlebarhastwopositions(fig.6&7),whichcanbechangedbypressingbothside
buttons at once and moving it up or down at the same time.
1. 2. FITTING AND REMOVING THE WHEELS
•Fitthebackwheels(B)byinsertingtheiraxleintotheappropriatehousingsatthe
sides, at the bottom on the back (fig. 8). Press each wheel until it clicks into place
and make sure it is properly secured by pulling it outwards. The back wheels can be
removed by pulling the spring under each wheel bracket outwards, and at the same
timepullingthewheeloutofitshousing(fig.9)
•Fitthefrontwheels(C)byinsertingtheiraxlesintothehousingsatthebottomon
thefront(fig.10).Presseachwheeluntilitclicksintoplaceandmakesureitisproperly
secured by pulling it outwards. The front wheels can be removed by pulling the spring
under each wheel bracket outwards, and at the same time pulling the wheel out of its
housing(fig.11).Thefrontwheelscanbestoppedfromturningbypressingdownthe
whiteleverslocatedovereachwheel(fig.10).Likewise,pulltheseleversuptoallow
the wheels to turn freely.
1. 3. FITTING THE CANOPY
•Insertoneofthetwocanopysidesupports(D)intothetubeprovidedonthechassis
(fig.12)untilitiscorrectlypositionedaroundthetube.
•Dothesameontheoppositeside(fig.13)
•Pullthecanopyupwardsuntilyouhearitclickintoplaceonbothsides(fig.14)
•Fixthetwopressstudsoneachsideofthebackflaponthecanopyatthepoints
providedontheseatpadding(fig.15&16)
1. 4. FITTING THE BUMPER
•Fit the bumper (E) into the housings provided (fig. 17 and 18), until the fixing
mechanisms click into place. Make sure it is properly secured by pulling it up at both
sides.
• Toremovethebumper,pressthesideunlockingbuttons(fig.18),atthesametime
pulling upwards.
•Thesafetyguardcanbeopenedwithoutremovingitcompletely,byreleasingjust
onesideandturningittotheotherside(fig.19)
16

EN
2. USING THE PUSHCHAIR
2. 1. SAFETY BRAKE
• To apply the safety brake, press the red mechanism over the right back wheel
downwithyourtoe(fig.20)untilitclicksintoplace.Makesurethechairisproperly
immobilised.
• Toreleasethe safetybrake,pressthe greenmechanismoverthe leftback wheel
downwithyourtoe(fig.21)untilitclicksintoplace.
•Alwaysusethebrakewhenyouarenotholdingthepushchairbythehandlebar.
2. 2. ADJUSTING THE ANGLE OF THE SEAT BACK
• Toangletheseatbackupordown,useonehandtoslidethelockingdeviceonthe
tapesonthefrontoftheseatback,whileholdingandtensingthestraps(fig.22)until
youhaveitinthedesiredposition(fig.23).Pullthetopoftheseatbackintothedesired
position(fig.24)
•Fornewly-bornorveryyoungbabies,itisadvisabletoreclinetheseatbackasmuch
aspossible(fig.25)
3. SETTING THE ANGLE OF THE FOOTREST
• Thefootrestcanbesetatthreeanglessimplybypullingitupwards(fig.26)untilitclicks
intoplace(fig.27)
• Tolowerthefootrestpullitupwardspastitshorizontalposition(fig.28)toreleasethe
fixing mechanism and then lower it to the desired position.
• Fornewly-bornorveryyoungbabies,itisadvisabletokeepthefootrestinahorizontal
position(fig.27)
4. FITTING THE HARNESS
• Insertthefixingsononeofthetwopartsofthebeltintotheslotintheendpart
ofthechestbeltonthesameside(fig.29)
•Inserttheassemblymadeupofthebeltandthecheststrapintothecorrectsideof
thebuckleonthestrapbetweenthelegs(fig.30)untilyouhearitclickintoplace.
•Repeattheabovetwostepswiththeothersideofthebeltandtheothercheststrap.
17

•Makesuretheharnessisproperlyfastenedbypullingthebuckleoutwards.
• Toreleasetheharnesspressthebuttoninthemiddleofthebuckle(fig.31)
•Adjustthebeltand thechest strapsifnecessarybyshortening orlettingoutthe
appropriatetapes(fig.31&32)
5. ADJUSTING HARNESS HEIGHT
•Theharnesshastwoheightpositionsinordertoadaptasyourbabygrows.
• Tochangetheposition,removethecheststrapfromthebackoftheseat,byrunning
theendbucklethroughtheslotintheseatback(fig.33)untilitiscompletelyclearat
thefront(fig.34)
•Runtheendbuckleyouhavetakenoutthroughtheslotinthenewposition,fromthe
front(fig.35),untilitiscompletelyclearattheback(fig.36)
•Repeattheabovetwostepswiththecheststrapontheotherside.
•Fornewly-bornorveryyoungbabies,thecheststrapsmustbelocatedinthebottom
position until the child is tall enough to use them in the top position.
6. FOLDING
•Lockthefrontwheelssothattheycannotturn.
•Foldupthecanopyandpushitdownwardsintoitsloweredposition(fig.37)
•Placetheseatbackinitsmostverticalposition(fig.38)
•Press the two side buttons inside the handlebar, at the same time pushing the
handlebardownuntilittouchesthechassissidetubes(fig.39&40)
•Pullthetapelocatedattheanglebetweentheseatandtheback,underthepadding,
upwards(fig.41),liftingtheseatuntilitisfolded.
•Setthesafetylockfittedatoneside(fig.42)
•Thechairwillnowbefoldedup,readyfortransportorstorage(fig.43)
INSTRUCTIONS
18

lThis vehicle is for children from 0 months to 15 kg maximum.
lNever leave the child unattended.
lMake sure that all the locking devices are engaged before use.
lTo prevent injury, make sure that the child is kept clear while it is folded and unfolded.
lDo not allow your child to play with this product.
lAlways use the retaining system.
lThis product is not suitable for use when running or skating.
lNever put more than one child, nor bags, items or accessories on the stroller.
lNever allow your child to stand on the extension to the seat.
lDo not hang bags from the handle, as this could destabilise the stroller.
lDo not use the stroller on staircases or escalators.
lWhenever you park the stroller, put the brakes on.
lMake sure that the stroller is completely upright and check that all the locks are in place
before putting your child into the stroller.
lDo not put too much weight in the chair, as this could destabilise it. The maximum
weight of any child using the seat must not exceed 15 kg.
lNo article placed on the basket may exceed 2 kg.
lDo not use the stroller close to an open fire, or expose it to a flame, a barbecue or heater.
lIf the stroller is missing a screw, bolt, nut, etc. or any part of it has been damaged,
do not use it.
lMake sure you regularly carry out complete routine inspections and maintain and clean
the stroller.
lThe pattern, colours and accessories of the stroller in this instruction manual
may not be the same as the product you bought.
lDo not use accessories that have not been approved by the manufacturer.
lAny load attached to the handle affects the stability of the stroller.
lThe parking device must be activated when a child is put into the chair or taken out of it.
lFor newborn babies, you should use the flattest position.
Your child’s safety may be endangered if these instructions are not followed. BebéDue is
not responsible for any damages caused by a failure to follow the warnings
above.
WARNINGS EN
19

INSTRUCTIONS
1. MONTAGE DE LA POUSSETTE
1. 1. DÉPLIAGE
•Débloquerleboutondeverrouillageduchâssis(A)(fig.1)
•Déplierlechâssisentirantsurlesdeuxcôtés(fig.2et3),jusqu’àsonouverturetotale
(fig.4)
•Souleverleguidonenappuyantenmêmetempssurlesdeuxboutonsintérieurs(fig.5).
Leguidonadeuxpositions(fig.6et7).Pourleséchanger,appuyersimultanémentsurles
deux boutons latéraux et bouger le guidon en même temps, vers le haut ou vers le bas.
1. 2. MONTAGE ET DÉMONTAGE DES ROUES
•Monterlesrouesarrière(B)enintroduisantlatéralementleuraxedanslesorifices
correspondants, sur les côtés inférieurs de la partie arrière (fig. 8). Pousser la roue
jusqu’àentendreun«clic»deblocageets’assurerqu’elleestbienfixéeenlatirant
vers l’extérieur. Pour extraire les roues arrière, tirer vers l’extérieur sur le ressort situé
sous chaque support de roue, et en même temps tirer la roue pour l’extraire de son
logement(fig.9)
•Monterlesrouesavant(C)enintroduisantlatéralement leuraxe danslesorifices
inférieursdelapartieavant(fig.10).Pousserlarouejusqu’àentendreun«clic»de
blocage et s’assurer qu’elle est bien fixée en la tirant vers l’extérieur. Pour extraire les
roues avant, tirer vers l’extérieur sur le ressort situé sous chaque support de rouer, et
enmêmetempstirerla rouepourl’extrairedesonlogement(fig.11).Pourbloquer
les roues, pousser sur les ressorts blancs qui sont sur chaque roue (fig. 10). Pour
débloquer les roues et qu’elles puissent tourner, tirer les ressorts vers le haut.
1. 3. MONTAGE DU CANOPY
•Introduireundesdeuxsupportslatérauxducanopy(D)dansletubecorrespondant
duchâssis(fig.12)jusqu’àcequ’ilsoitbienmisenplacedansletube.
•Répéterlamêmeopérationdel’autrecôté(fig.13)
•Tirerducanopyverslehautjusqu’àentendrele«clic»deblocagedesdeuxcôtés
(fig.14)
•Fixerlesdeuxboutonsdeverrouillagerapidesdechaquecôtédelacollerettearrière
ducanopydanslesorificescorrespondantsdel’habillagedusiège(fig.15et16).
1. 4. MISE EN PLACE DU BUMPER
•Placerlebumper(E)danslesorificescorrespondants(fig.17et18),jusqu’àentendre
le«clic»desmécanismesdeverrouillage.S’assurerqu’ilestbienfixéentirantversle
hautdesdeuxcôtés.
•Pourextrairelebumper,presserlesdeuxboutonsdedéverrouillagelatéraux(fig.18)
en tirant en même temps vers le haut.
20
This manual suits for next models
3
Table of contents
Languages:
Other bebeduE Stroller manuals
Popular Stroller manuals by other brands
Mee-go
Mee-go Uno+ instruction manual
Joolz
Joolz Geo3 Mono instruction manual
Delta Children
Delta Children Little Folks EXPLORATION instruction manual

Thuasne
Thuasne Quatro Marathon user manual
Babylo
Babylo Compact Stroller instruction manual
Kool Karz Playground
Kool Karz Playground Range Rover Sport SVR manual
