BEKA BA474ND Installation and operating instructions

Supplied by
Call us on +44 (0)118 916 9420 | Email info@247able.com
.com
Installation & Maintenance Instructions
BA474ND

Installation & Maintenance Instructions
BA474ND
Type n certified field mounting indicating temperature
transmitter with intrinsically safe sensor input
Reading Office
Cutbush Park, Danehill, Lower Earley,
Reading, Berkshire. RG6 4UT. UK.
Tel: +44 (0)118 9311188
Email: [email protected]
Aberdeen Office
Unit 6 Airside Business Park, Kirkhill Industrial Estate,
Dyce, Aberdeen. AB21 0GT. UK.
Tel: +44 (0)1224 725999
Email: [email protected]
Internet: www.able.co.uk
e-procurement: www.247able.com
Registered in England No: 01851002
VAT No: GB 417 2481 61

Issue 7
4th March 2014
BA474ND
Type n certified
field mounting
indicating temperature
transmitter with
intrinsically safe sensor
input
Issue 7

2
1. Description
2. Documentation
3. Operation
3.1 Controls
4. Type nA certification
4.1 ATEX certificate
4.2 Zones, gas groups & T rating
4.3 Intrinsically safe sensor input
terminals 1, 2, 3 & 4.
4.4 4/20mA output terminals 5 & 6
4.5 Certification label
5. Electrical system design
5.1 Use as a Type nA instrument
5.2 Use as a Type nA instrument with intrinsically
safe sensor input terminals.
5.3 Use as a temperature indicator
6. Installation
6.1 Location
6.2 Installation procedure
6.3 Intrinsically safe sensor input
6.4 EMC
7. Configuration
7.1 Configuration menu
7.1.1 Access
7.1.2 Summary of functions
7.2 Description of configuration menu functions
7.2.1 Transmitter input ‘InPut’
7.2.2 Thermocouple type ‘t.tYPE’
7.2.3 Units of digital display ‘dEG’
7.2.4 Display resolution ‘rESn’
7.2.5 Cold junction compensation ‘CJC’
7.2.6 Sensor fault analogue indication ‘FAuLT’
7.2.7 Configuration of 4/20mA output ‘CAL’
7.2.8 Configuration of bargraph display ‘bAr’
7.2.9 Access code ‘CodE’
7.2.10 Resistance thermometer type ‘r.tYPE’
7.2.11 Decimal point position ‘dP’
7.2.12 Lower input & display ‘in-Lo’
7.2.13 Higher input & display ‘in-Hi’
7.3 Default configuration
8. Configuration example
9. Maintenance
9.1 Fault finding during commissioning
9.2 Fault finding after commissioning
9.3 Servicing
9.4 Routine maintenance
9.5 Guarantee
9.6 Customer comments
10. Accessories
10.1 Scale and Tag marking
10.2 Tag plate
10.3 Pipe mounting kits
10.4 Alarms
10.4.1 Solid state output
10.4.2 Type nL certification
10.4.3 Alarm configuration
10.4.4 Alarm selection ‘Alr1’ & ‘Alr2’
10.4.5 Alarm enable ‘EnbL’
10.4.6 Setpoint adjustment ‘SP1’
10.4.7 Alarm function ‘Hi.Lo’
10.4.8 Alarm output status ‘no.nC’
10.4.9 Hysteresis ‘HStr’
10.4.10 Alarm delay ‘dELA’
10.4.11 Alarm silence time ‘SiL’
10.4.12 Access setpoint ‘ACSP’
10.4.13 Adjusting alarm setpoints from
operational mode.
Appendix 1
ATEX dust certification
Appendix 2
IECEx certification
The BA474ND is CE marked to show compliance with the European Explosive Atmospheres
Directive 94/9/EC and the European EMC Directive 2004/108/EC
CONTENTS

3
1. DESCRIPTION
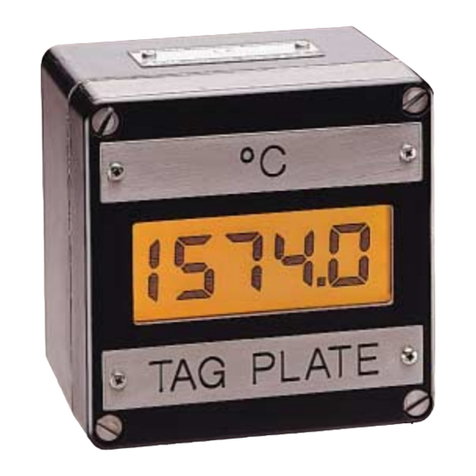
The BA474ND is a field mounting, Type n certified
4/20mA loop powered temperature transmitter with a
certified galvanically isolated intrinsically safe sensor
input and a large easy to read display. The
instrument, which is HARTenabled, may be
conditioned on-site to operate with most common
thermocouples and resistance thermometers and will
provide a linear 4/20mA output proportional to
temperature, plus a digital temperature display.
Voltage and resistance inputs may be scaled allowing
the BA474ND to display variables other than
temperature such as position and weight.
Optional factory fitted alarms provide two galvanically
isolated solid state outputs that may be
independently configured for high or low operation.
For installation in poorly illuminated areas, an
optional factory fitted loop powered display backlight
is available.
The BA474ND has been ATEX certified Ex nA with
an intrinsically safe Ex [ia] sensor input by European
Notified Body Intertek Testing and Certification Ltd
(ITS). The transmitter complies with the ATEX
Directive 94/9/EC for installation in Zone 2 explosive
gas atmospheres. The certified galvanically isolated
intrinsically safe input allows the transmitter to be
directly connected to sensors in Zone 0 & 1 without
the need for Zener barriers or galvanic isolators.
The transmitter is also ATEX certified Ex tD for use in
combustible dust atmospheres - see Appendix 1.
For international applications the BA474ND has
IECEx Ex nA & nL gas certification and Ex tD dust
certification. The sensor input has been certified
intrinsically safe Ex [ia] and [iaD] – see Appendix 2.
Fig 1 Simplified block diagram
2. DOCUMENTATION
This instruction manual describes the installation and
configuration of the BA474ND Indicating
Temperature Transmitter for ATEX Type nA
applications in gas atmospheres. System design
information for IECEx installations and for use in
combustible dust atmospheres is contained in
appendices to this manual.
The transmitter is HART Registered and is compliant
with HART protocol standard revision 7. HART
commissioning information is included in the
BA47X/67X Indicating Temperature Transmitter
HARTInterface Guide which may be downloaded
from www.beka.co.uk/manuals
3. OPERATION
Fig 1 shows a simplified diagram of the BA474ND
Indicating Temperature Transmitter. The input,
which may be from a resistance thermometer,
thermocouple, or a dc voltage or resistance, is
digitised and transferred to the instrument processor
via an optical isolator. The processor linearises the
input signal, displays the resulting temperature in the
selected units of measurement and controls the
4/20mA output current.
3.1 Controls
All functions of the transmitter may be configured via
the four push buttons which are located behind the
removable switch cover – see Fig 5. For applications
where frequent adjustments are required the
BA474ND transmitter is available with an optional
external membrane keypad. Buttons respond within
0.5 seconds of being operated and unless
continuously pushed the transmitter display will return
to the operating mode after 2 seconds.
In the operational mode, i.e. when the transmitter is
displaying the input signal, these push buttons have
the following functions:
Button Function
While this button is operated the transmitter
will show the display corresponding to 4mA
output.
▲While this button is operated the transmitter
will show the display corresponding to
20mA output.
+Transmitter displays output current in mA
followed by output as % of the range.
P + Transmitter displays HARTshort address
followed by firmware version number.
P + EEntry to configuration menu.
When fitted with optional alarms
P + Entry to alarm set point menu. See 10.4.12
E + Transmitter displays alarm 1 setpoint
E + Transmitter displays alarm 2 setpoint
P Activated alarm reverts to the non-alarm
condition for the configured alarm silence
time. See 10.4.11

4
4. TYPE nA CERTIFICATION
The BA474ND transmitter is Ex nA certified allowing
the instrument and the associated sensor to be
installed in a Zone 2 hazardous area without the
need for Zener barriers or galvanic isolators.
The transmitter sensor input, terminals 1, 2, 3 & 4, is
certified galvanically isolated and intrinsically safe Ex
[ia]. When the BA474ND transmitter is installed in a
Zone 2 hazardous area, the input terminals may
therefore be directly connected to a sensor in Zone 0
or 1 without the need for Zener barriers or galvanic
isolators.
4.1 ATEX certificate
Notified Body Intertek Testing and Certification Ltd
have issued the BA474ND with an EC-Type
Examination Certificate number ITS09ATEX26157.
The transmitter bears the community mark and
subject to local codes of practice may be installed in
any of the European Economic Area (EEA) member
countries. ATEX certificates are also acceptable for
installations in Switzerland.
This main section of this instruction manual describes
ATEX installations in explosive gas atmospheres
conforming with EN 60079-14 Electrical Installations
in Hazardous Areas. When designing systems for
installation outside the UK the local Code of Practice
should be consulted.
For use in the presence of combustible dust, please
refer to Appendix 1, which describes ATEX
installations complying with EN 61241-14.
4.2 Zones, gas groups and T rating
The BA474ND has been certified as Group II
Category 3G Ex nA IIC T5 apparatus, permitting
installation in:
Zone 2 explosive gas air mixture not likely
to occur, and if it does will only
exist for a short time.
Be used with gases in groups:
Group A propane
Group B ethylene
Group C hydrogen
Having a temperature classification of:
T1 450oC
T2 300oC
T3 200oC
T4 135oC
T5 100oC
At an ambient temperature between –20 and +60oC.
Notes:
a. The guaranteed operating temperature range of
the BA474ND Indicating Temperature Transmitter
is –40 to +70oC for the transmitter and –20 to
+70oC for the display.
b. The BA474ND also has ATEX Ex nL [energy
limiting] certification, but following de-harmonising
of EN 60079-15:2005 in May 2013 this type of
protection has been replaced by Ex ic [intrinsically
safe in normal operation i.e. without faults].
4.3 Intrinsically safe Sensor input
terminals 1, 2, 3 & 4.
In addition to Ex nA certification, the ATEX certificate
states that the BA474ND Indicating Temperature
Transmitter, ‘incorporates a galvanically isolated
intrinsically safe input that permits direct connection
to measuring elements in any gas hazardous Zone.’
This is the sensor input, terminals 1, 2, 3 & 4, which
is certified as Group II Category (1) G Ex [ia] IIC T5.
When the BA474ND transmitter is located these
permits direct connection to sensors installed in:
Zone 0 explosive gas air mixture
continuously present.
Zone 1 explosive gas air mixture
likely to occur in normal
operation.
With a gas in groups:
Group A propane
Group B ethylene
Group C hydrogen
Thermocouples, resistance thermometers and
potentiometers comply with the requirements for
simple apparatus. i.e. generate less than 1.5V;
100mA or 25mW and may be connected to the
transmitter input without a safety analysis. Active
devices, such as a voltage source, may also be
connected providing safety is assessed using the
entity concept.
The intrinsic safety parameters for sensor terminals
1, 2, 3 & 4 are:
Uo = 6.0V
Io = 30.3mA
Po = 46mW
Ui = 6.0V
Ii = 100mA
Pi = 0.194W
Co = 23.8µF
Lo = 3mH

5
4.4 4/20mA output - terminals 5 & 6
The BA474ND Indicating Temperature Transmitter is
loop powered via these terminals which have the
following input safety parameters:
Ui = 30V
Ii = 100mA
Pi = 0.5W
When installed in a Zone 2 hazardous area the
transmitter must be powered from a supply with
output safety parameters in normal operation equal to
or less than the above.
4.5 Certification label information
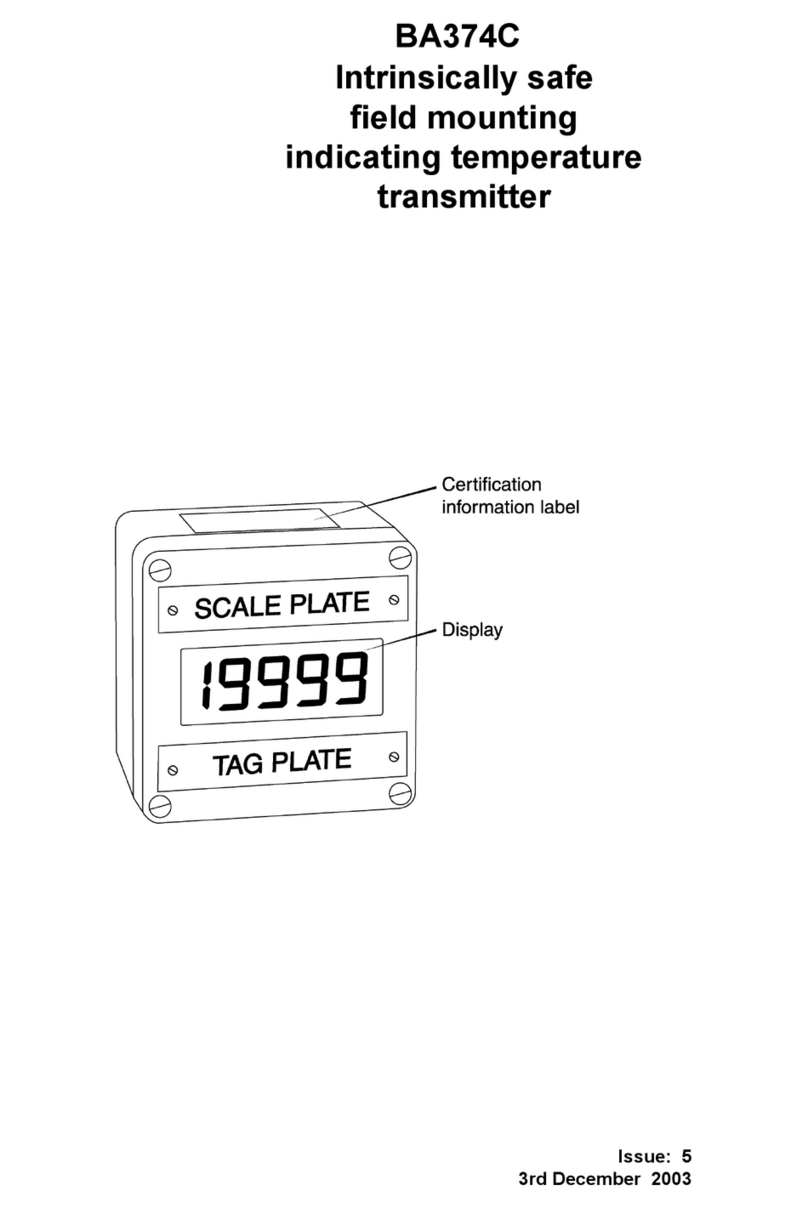
The certification information label is fitted in a recess
on the top outer surface of the enclosure. It shows
details of the ATEX gas and dust certifications plus
BEKA associates name and location. IECEx gas and
dust certification are also included.
The instrument serial number and the year of
manufacture are recorded on a separate label inside
the terminal compartment.
5. ELECTRICAL SYSTEM DESIGN
The BA474ND indicating temperature transmitter
may be used as a Type nA instrument with both the
instrument and the sensor in Zone 2 or, using the
sensor input intrinsic safety approval, the sensor may
be installed in Zone 0 or 1.
BEKA Application Guide AG310 provides
comprehensive information on the design, installation
and maintenance of [Extra low voltage dc] Ex nA
instrumentation. The guide may be downloaded
from the BEKA website.
The transmitter is available with an optional factory
fitted display backlight enabling it to be read at night
or in poor lighting conditions, this increases the
minimum operating voltage of the transmitter.
The operating voltage range between terminals 5 & 6
of the BA474ND transmitter at all currents is:
without backlight 9.0 to 30V
with backlight 15.5 to 30V
5.1 Use as a Type nA instrument
The Type nA certification allows the BA474ND
transmitter and the sensor to be installed in a Zone 2
hazardous area as shown in Fig 2.
There are two requirements when designing a
BA474ND loop:
1. The output voltage of the supply powering
the transmitter loop must be equal to or less
than 30.0V in normal operation.
2. The voltage between terminal 5 & 6 of the
BA474ND at all currents must be between:
9 and 30V without a backlight
15.5 and 30V with a backlight
Fig 2 Typical Type nA BA474ND loop

6
3. The transmitter supply current should be
limited by fuses to 100mA to ensure that Ii is
not exceeded. The fuses should be mounted
in clearly marked terminal blocks so that the
circuit can be easily be isolated.
When designing a transmitter loop it is necessary to
establish that the sum of the voltage drops caused by
the transmitter, the load and the cable resistance is
less than the minimum supply voltage. For the
transmitter loop shown in Fig 2.
Minimum operating voltage of BA474ND 9.0V
without optional backlight.
Maximum voltage drop caused by 5.0V
250load.
(250x 20mA)
Maximum voltage drop caused by 0.2V
cable resistance & fuses.
(10x 20mA)
______
Total maximum voltage drop 14.2V
The power supply voltage must therefore be above
14.2V but below the maximum 30.0V permitted by
the BA474ND Type nA certificate.
5.2 Use as a Type nA instrument with an
intrinsically safe input
Ex nA certification permits the BA474ND transmitter
to be installed in a Zone 2 hazardous area and the
intrinsically safe Ex [ia] input permits direct
connection to a sensor installed in Zone 0 or 1 as
shown in Fig 3. No Zener barrier or galvanic isolator
is required thus reducing complexity and cost.
There are four requirements when designing a
BA474ND loop:
1. The output voltage of the supply powering
the transmitter loop must be less than 30.0V
in normal operation.
2. The voltage between terminal 5 & 6 of the
BA474ND at all currents must be between:
9 and 30V without a backlight
15.5 and 30V with a backlight
3. The transmitter supply current should be
limited by fuses to 100mA to ensure that Ii is
not exceeded. The fuses should be mounted
in clearly marked terminal blocks so that the
circuit can be easily be isolated.
4. The intrinsically safe input wiring connected
to terminals 1, 2, 3 & 4 must be segregated
from the non intrinsically safe 4/20mA output
wiring connected to terminals 5 & 6. See
section 6.3
Fig 3 Typical Type nA BA474ND loop using
intrinsically safe sensor input terminals
5.3 Use as a temperature indicator
The BA474ND may also be used as just a
temperature indicator by ignoring the instrument’s
4/20mA output current. The systems shown in Figs
2 and 3 may be used without the load, the
transmitters terminals 5 & 6 may be directly connect
to a dc supply with an output voltage between 9 and
28V, or between 15.5 and 28V if the BA474ND is
fitted with an optional backlight. No load resistor is
required.

7
6. INSTALLATION
BEKA Application Guide AG310 provides
comprehensive information on the installation of
[Extra low voltage dc] Ex nA instrumentation. The
guide may be downloaded from the BEKA website.
6.1 Location
The BA474ND Indicating Temperature Transmitter is
housed in a robust IP66 glass reinforced polyester
(GRP) enclosure incorporating an armoured glass
window and stainless steel fittings. It is suitable for
exterior mounting in most industrial environments,
including offshore and wastewater treatment
installations. Please consult BEKA associates if high
vibration is anticipated.
The BA474ND enclosure is surface mounting.
Accessory kits described in sections 10 of this
manual enable the instrument to be mounted onto a
vertical or horizontal pipe.
The field terminals and the two mounting holes are
located in a separate compartment with a sealed
cover allowing the instrument to be installed without
exposing the display assembly.
The BA474ND earth terminal is connected to the
carbon loaded GRP enclosure. If this enclosure is not
bolted to an earthed post or structure, the earth
terminal should be connected to a local earth.
The BA474ND enclosure is supplied with a bonding
plate to ensure electrical continuity between the three
conduit / cable entries.
The BA474ND liquid crystal display has maximum
contrast when viewed from directly ahead and slightly
below the centre line of the instrument. Without a
backlight there is very little degradation of contrast
when viewed from above the centre line, but slight
degradation may be noticeable when the instrument
is fitted with a backlight.
6.2 Installation Procedure
Fig 4 illustrates the instrument installation procedure.
a. Remove the instrument terminal cover by
unscrewing the two captive 'A' screws.
b. Mount the instrument on a flat surface and
secure with two M6 screws through the 'B'
holes. Alternatively use one of the mounting
kits described in section 10.3
c. Remove the temporary hole plug and install
an appropriate IP rated Ex n or Ex e cable
gland or conduit fitting. If more than one
entry is required, one or both of the IP66
Ex e stopping plugs may be replaced with
an appropriate IP rated Ex n or Ex e cable
gland or conduit fitting.
d. Connect the field wiring to the terminals as
shown in Fig 5.
e. Replace the instrument terminal cover and
evenly tighten the two 'A' screws.
Fig 4 BA474ND installation procedure

8
Fig 5 Dimensions and terminal connections
6.3 Intrinsically safe sensor inputs
When the transmitter is connected directly to a
sensor in Zone 0 or 1, the intrinsically safe input
wiring connected to terminals 1, 2, 3 & 4 must be
segregated from the non-intrinsically safe 4/20mA
output wiring connected to terminals 5 & 6.
An insulating partition separates the intrinsically safe
and non-intrinsically safe terminals within the
transmitter terminal enclosure. Conductors of
intrinsically safe circuits and non-intrinsically safe
circuits should not be contained in the same cable
and should enter the terminal compartment via
separate glands or conduit entries. See EN 60079-
14 section 12 for detailed cable requirements.
6.4 EMC
The BA474ND complies with the requirements of the
European EMC Directive 2004/108/EC. For specified
immunity, all wiring should be in screened twisted
pairs with the screens earthed at one point in the safe
area.

9
7. CONFIGURATION
The BA474ND Indicating Temperature Transmitter
may be configured and calibrated via HARTdigital
communication, or configuration may be performed
using the menu accessed via the four push buttons
located behind the instrument switch cover, see
Fig 5. When frequent adjustments are required the
transmitter can be supplied with a keypad mounted
on the outside of this cover.
Configuration and calibration via HARTmay be
performed using a portable configurator connected to
the BA474ND test pillars, which are located adjacent
to terminals 5 & 6, or to any other point in the 4/20mA
loop. Alternatively, proprietary configuration software
installed on a personal computer may be used. In
addition to the configuration functions available via
the transmitter push buttons, HARTcommunication
enables loop calibration and custom linearisation to
be performed, see the BA47XBA67X Indicating
Temperature Transmitter HARTInterface Guide
which may be downloaded from
www.beka.co.uk/manuals
.
7.1 Configuration menu
Throughout this manual the four BA474ND push
buttons are identified P E ▼▲and legends
displayed by the transmitter are shown within
inverted commas e.g. ‘CAL’ and ‘dEG’. Section
7.1.2 contains a summary of each configuration
function including a cross reference to a more
detailed description.
The functions contained in the configuration menu
vary depending upon the transmitter input selected,
see Figs 6, 7 & 8.
When the transmitter is being configured, the
transmitter 4/20mA output current is locked at the
value prior to entering the configuration menu.
When the optional alarms are fitted additional
functions are added to the configuration menu which
are described in section 10.4.
7.1.1 Access
Access to the configuration menu is obtained by
operating the Pand Ebuttons simultaneously. If the
transmitter is not protected by an access code the
first parameter 'InPut’ will be displayed. If the
transmitter is protected by an access code, ‘CodE’
will be displayed first. Pressing Pwill allow the four
digit security code to be entered digit by digit using
the or button to adjust the flashing digit and Pto
move control to the next digit. When the correct code
has been entered, pressing Ewill cause the first
parameter ‘InPut’ to be displayed. If an incorrect
code is entered, or no button is pressed for ten
seconds, the transmitter will automatically return to
the operating mode.
If the transmitter displays ‘LoC’ when the Pand E
buttons are operated simultaneously, the transmitter
push buttons have been locked by a HART
command, see the BA47XBA67X Indicating
Temperature Transmitter HARTInterface Guide
which may be downloaded from
www.beka.co.uk/manuals
7.1.2 Summary of functions
The functions that may be configured vary depending
upon the input selected.
Thermocouple and RTD inputs
The BA474ND will always display sensor
temperature.
Configuration allows:
Digital display units and resolution to be selected.
Bargraph display to represent required part of the
digital displayed range.
4/20mA output current to have required input
range.
Voltage and resistance inputs
The BA474ND can display the voltage or resistance
input in any engineering units.
Configuration allows:
Zero and span of digital display to be adjusted.
Bargraph display to represent required part of the
digital displayed range.
4/20mA output current to have required input
range.
Each of the functions in the configuration menu is
summarised below, including a cross-reference to a
more detailed description.
Transmitter Summary
display of function
‘InPut’ Transmitter input
Selects one of the following inputs:
Thermocouple ‘tHC’
3 wire RTD ‘3rtd’
4 wire RTD ‘4rtd’
Differential RTD ‘d_rtd’
Voltage ‘Volt’
3 wire resistance ‘3rES’
4 wire resistance ’4rES’
See section 7.2.1
The content of the configuration menu depends upon
which transmitter input is selected, see following
summary and Figs 6, 7 and 8.

10
For Thermocouple Input – see Fig 6
Transmitter Summary
display of function
‘t.tYPE’ Thermocouple type
Selects 1 of 8 common types of
thermocouple.
See section 7.2.2
‘dEG’ Units of digital display
Selects 1 of 4 units of temperature.
See section 7.2.3
‘rESn’ Display resolution
Selects low or high display resolution.
See section 7.2.4
‘CJC’ Cold junction compensation
Turns thermocouple cold junction
compensation on or off.
See section 7.2.5
‘FAuLt’ Sensor fault analogue indication
Selects 1 of 3 under/over range output
currents to indicate that a sensor fault has
been detected. Analogue fault indication
may be disabled.
See section 7.2.6
‘CAL’ Configuration of 4/20mA output
Defines input at which transmitter output
is 4 & 20mA.
See section 7.2.7
‘bAr’ Configuration of bargraph display
Defines digital display at which bargraph
is zero and full scale.
See section 7.2.8
‘CodE’ Access code for configuration menu
Enters four digit configuration menu
access code. Default code 0000 disables
this function.
See section 7.2.9
For Resistance Thermometer (RTD) Input see Fig 7
Transmitter Summary
display of function
‘r.tYPE’ Resistance thermometer type
Selects Pt100 or Pt1000 sensor
See section 7.2.10
‘dEG’ Units of digital display
Selects 1 of 4 units of temperature.
See section 7.2.3
‘rESn’ Display resolution
Selects low or high display resolution.
See section 7.2.4
Transmitter Summary
display of function
‘FAuLt’ Sensor fault analogue indication
Selects 1 of 3 under/over range output
currents to indicate that a sensor fault has
been detected. Analogue fault indication
may be disabled.
See section 7.2.6
‘CAL’ Configuration of 4/20mA output
Defines input at which transmitter output
is 4 & 20mA.
See section 7.2.7
‘bAr’ Configuration of bargraph display
Defines digital display at which bargraph
is zero and full scale.
See section 7.2.8
‘CodE’ Access code for configuration menu
Enters four digit configuration menu
access code. Default code 0000 disables
this function.
See section 7.2.9
For Voltage and Resistance Inputs – see Fig 8
Transmitter Summary
display of function
‘dP’ Decimal point position
Defines position of displayed decimal
point.
See section 7.2.11
‘in-Lo’ Lower input and display
Defines lower voltage or resistance input
‘inVAL’ and corresponding digital display
‘diSP’.
See section 7.2.12
‘in-Hi’ Higher input and display
Defines higher voltage or resistance input
‘inVAL’ and corresponding digital display
‘diSP’.
See section 7.2.13
‘CAL’ Configuration of 4/20mA output
Defines the input at which transmitter
output is 4 & 20mA.
See section 7.2.7
‘bAr’ Configuration of bargraph display
Defines digital display at which bargraph
is zero and full scale.
See section 7.2.8
‘CodE’ Access code for configuration menu
Enters four digit configuration menu
access code. Default code 0000 disables
this function. See section 7.2.9

11
7.2 Description of configuration menu
functions
This section contains a detailed description of each
function in the configuration menu. It should be read
in conjunction with Figs 6, 7 & 8.
7.2.1 Transmitter input ‘InPut’
This function enables the BA474ND indicating
temperature transmitter to be conditioned to operate
with a thermocouple, 3 or 4 wire resistance
thermometer, voltage or 3 or 4 wire resistance input.
A differential resistance thermometer input may also
be selected. A differential thermocouple input is
achieved by selecting the thermocouple input in this
function and turning the cold junction compensation
off in the CJC function – see 7.2.5.
Sensor Transmitter
display
Thermocouple ‘tHC’
3 wire RTD ‘3rtd’
4 wire RTD ‘4rtd’
Differential RTD ‘d_rtd’
Voltage ‘VoLt’
3 wire resistance ‘3rES’
4 wire resistance ’4rES’
The ‘InPut’ function is the first function displayed
when entering the configuration menu, or it may be
selected from within the menu by operating the or
button. To enter the function press Pwhich will
reveal the existing setting which may be changed
using the or button. When the required input
has been selected press Eto enter the selection and
return to the ‘InPut’ prompt in the configuration menu.
7.2.2 Thermocouple type ‘t.tYPE’
This function enables one of eight common
thermocouples to be selected. The following table
shows the thermocouple types, indicator display and
the operating temperature range.
THC BA474ND Temperature
Type Display range oC
B ‘b’ 200 to 1820
E ‘E’ -200 to 1000
J ‘J’ -210 to 1200
K ‘H’ -200 to 1372
N ‘n’ -200 to 1300
R ‘r’ -50 to 1768
S ‘S’ -50 to 1768
T ‘t’ -200 to 400
The ‘t.tYPE’ function may be selected from within the
menu by operating the or button. To enter the
function press Pwhich will reveal the existing setting
which may be changed using the or button.
When the required thermocouple has been selected,
press Eto enter the selection and return to the
‘t.tYPE’ prompt in the configuration menu.
7.2.3 Units of digital display ’dEG’
The transmitter digital display may be in one of four
units of temperature.
Units Transmitter Display
oC
oC
oF
oF
r r
K H
When oC or oF are selected the units of measurement
are shown at the top left hand corner of the display
when the transmitter is in the operating mode.
The ‘dEG’ function may be selected from within the
menu by operating the or button. To enter the
function press Pwhich will reveal the existing setting
which may be changed using the or button.
When the required units have been selected, press E
to enter the selection and return to the ‘dEG’ prompt
in the configuration menu.
7.2.4 Display resolution ‘rESn’
This function defines the resolution of the transmitter
display but does not affect the resolution of the
4/20mA output current.
Resolution Transmitter Display
Lo 0 0 0 0 0
Hi 0 0 0 0.0
The ‘rESn’ function may be selected from within the
menu by operating the or button. To enter the
function press Pwhich will reveal the existing setting
which may be changed using the or button.
When the required resolution has been selected,
press Eto enter the selection and return to the ‘rESn’
prompt in the configuration menu.
7.2.5 Cold junction compensation ‘CJC’
The temperature of the thermocouple cold junction,
which is the transmitter input terminals, is measured
and added to the thermocouple output so that the
transmitter displays and transmits the hot junction
temperature. If cold junction compensation is not
required e.g. for differential measurements with two
thermocouples, this function allows it to be turned off.
The ‘CJC’ function may be selected from within the
configuration menu by operating the or button.
To enter the function press Pwhich will reveal the
existing setting which may be changed using the
or button. When set as required, press Eto enter
the selection and return to the ‘CJC’ prompt in the
configuration menu.

12
7.2.6 Sensor fault analogue indication ‘FAuLt’
The sensor fault analogue indication function appears
in the menu when the transmitter is configured for a
resistance thermometer or a thermocouple input.
When a fault is detected the transmitter’s 4/20mA
output current is set to the specified under or over
range fault value and the transmitter’s digital display
flashes. One of three fault currents may be selected,
or the fault indication may be turned off.
Irrespective of how the function is set the transmitter
display will flash when a sensor fault is detected.
Selected Output Transmitter
fault current current display
‘oFF’ No fault indication Flashes
‘dn3.6’ 3.6mA *Flashes
‘dn3.8’ 3.8mA Flashes
‘uP 21’ 21.0mA Flashes
* Not recommended when HART
communication is used.
The ‘FAuLt’ function may be selected from within the
configuration menu by operating the or button.
To enter the function press Pwhich will reveal the
existing setting which may be changed using the
or button. When set as required, press Eto enter
the selection and return to the ‘FAuLT’ prompt in the
configuration menu.
The typical detection thresholds and approximate
response times are:
Thermocouple > 5k10 sec
RTD sensor < 5>5001 sec
RTD sense leads > 5010 sec
In the time between a fault developing in an RTD
sense lead or a thermocouple and the fault being
detected, the transmitter output and display may drift
from the last correct measured value.
7.2.7 Configuration of 4/20mA output ‘CAL’
This function defines the relationship between the
transmitter input and the 4/20mA output current.
‘ZEro’ defines the transmitter input at which the
output is 4mA and ‘SPAn’ defines the input at which
the output is 20mA.
This function does not affect the transmitter display
which is fixed for thermocouple and resistance
thermometer inputs and adjusted via the ‘in-Lo’ and
‘in-Hi’ functions for resistance and voltage inputs.
The ‘CAL’ function may be selected from within the
menu by operating the or button. To enter the
function press Pwhich will display the ‘ZEro’ function
in the sub-menu, pressing Pagain will reveal the
existing transmitter input at which the transmitter
output current is 4mA. Input is shown in units which
depend upon how the transmitter input ‘InPut’ and
display ‘dEG’ have been configured, as shown
below:
Configured Input
transmitter input shown as
Thermocouple oC, oF, K or r
Resistance thermometer oC, oF, K or r
Voltage mV
Resistance Ohms
The input, at which the transmitter output current is
4mA, may be changed using the or button to
adjust the flashing digit and the Pbutton to move
control to the next digit. When the required input has
been selected, press Eto enter the selection and
return to the ‘ZEro’ prompt.
The ‘SPAn’ function, which defines the input at which
the transmitter current output is 20mA, may be
selected from within the sub-menu by operating
either the or button. To enter the function press
Pwhich will reveal the existing transmitter input at
which the transmitter output current is 20mA. Again
the input will be shown in units which depend upon
how the transmitter has been configured.
The input, at which the transmitter output current is
20mA, may be changed using the or button to
adjust the flashing digit and the Pbutton to move
control to the next digit. When the required input has
been selected, press Eto enter the selection and
return to the ‘SPAn’ prompt.
Note: When configured for a voltage input, operating
the Pbutton when the 0.1mV digit is flashing in the
‘Zero’ or ‘SPAn’ sub-menus increases the input
resolution to 0.01mV which is indicated by the display
colon being activated. When the required input has
been selected, pressing Eenters the selection and
returns the transmitter to the ‘ZEro’ or ‘SPAn’ prompt
in the sub-menu.
If, when configured for a voltage or resistance input
the displayed decimal point has been set to
autorange, it may be necessary to manually position
the decimal point before adjusting ‘ZEro’ or ‘SPAn’.
This can be achieved by repeatedly operating the P
button until the activated decimal point flashes, the
decimal point can then be positioned using either the
or button. Pressing the Pbutton again will
return control to one of the digits.

13
7.2.8 Configuration of bargraph display ‘bAr’
This function contains three sub-functions that justify
the bargraph display and define the relationship
between the bargraph and the transmitter digital
display.
Sub-function ‘b.tYPE’ enables the bargraph to be left,
centre or right justified, or to be turned off. Sub-
functions ‘bArLo’ and ‘bArhi’ define the transmitter
digital display at which the bargraph starts and is at
full scale.
The ‘bAr’ function may be selected from within the
configuration menu by operating the or button.
To enter the function press Pwhich will display the
‘b.tYPE’ sub-function, pressing Pagain will reveal the
existing bargraph justification. The or button
will scroll through the four options, when the required
justification is displayed, pressing Ewill enter the
selection and return the display to the ‘b.tYPE’
prompt in the sub-menu from which ‘bArLo’ may be
selected using the or button.
‘bArLo’ defines the transmitter digital display at which
the bargraph starts, to enter the function press P
which will reveal the existing setting. The display
may be changed using the or button to adjust
the flashing digit and the Pbutton to move control to
the next digit. When the required starting display has
been selected, press Eto return to the ‘bArLo’ prompt
in the sub-menu from which the ‘bArHi’ function may
be selected.
‘bArHi’ defines the transmitter digital display at which
the bargraph is full scale, to enter the function press
Pwhich will reveal the existing setting. The display
may be changed using the or button to adjust
the flashing digit and the Pbutton to move control to
the next digit. When the required display has been
selected, press Etwice to return to enter the new
values and return to the ‘bAr’ prompt in the
configuration menu.
Note: If, when configured for a voltage or resistance
input the displayed decimal point has been set to
autorange, it may be necessary to manually position
the decimal point before adjusting ‘bArLo’ or ‘bArHi’.
This can be achieved by repeatedly operating the P
button until the activated decimal point flashes, the
decimal point can then be positioned using either the
or button. Pressing the Pbutton again will
return control to one of the digits.
7.2.9 Access code for configuration menu
‘CodE’
Access to the configuration menu may be protected
by a four digit security code which must be entered to
gain access. New instruments are supplied
configured with the default code 0000 which allows
unrestricted access to the menu.
To enter a new access code select ‘CodE’ in the
configuration menu by operating the or button.
To enter the function press Pwhich will reveal the
current access code with one digit flashing. The code
may be changed using the or button to adjust
the flashing digit and the Pbutton to move control to
the next digit. When the required code has been
selected, press Eto enter the selection and return to
the ‘CodE’ prompt in the configuration menu. The
revised access code will be activated when the
transmitter is returned to the operating mode.
If the access code is lost please contact BEKA
associates.
7.2.10 Resistance thermometer type ‘r.tYPE’
This function configures the BA474ND to operate
with a Pt100 or Pt1000 resistance thermometer input.
The ‘r.tYPE’ function may be selected from within the
configuration menu by operating the or button.
To enter the function press Pwhich will reveal the
existing setting which may be changed using the
or button.
Resistance Transmitter
thermometer display
Pt100 100r
Pt1000 1000r
When the required resistance thermometer has been
selected, press Eto enter the selection and return to
the ‘r.tYPE’ prompt in the configuration menu.
7.2.11 Decimal point position ‘dP’
This function defines the position of the decimal point
in the operating mode when the transmitter is
configured for a voltage or a resistance input.
Note: This function does not appear in the
configuration menu when the transmitter is
configured for a thermocouple or a resistance
thermometer input.
The ‘dP’ function may be selected from within the
menu by operating the or button. To enter the
function press Pto reveal the existing position of the
decimal point which may be moved to the required
fixed position, omitted, or set to autorange by
operating the or button. Autorange, which is
selected when all the decimal points are activated,
ensures that the transmitter numeric display is always
shown with maximum resolution irrespective of the
value. When set as required, press Eto enter the
selection and return to the ‘dP’ prompt in the
configuration menu.

14
7.2.12 Lower input & display ‘in-Lo’
This function, which only appears in the menu when
the transmitter is configured for a voltage or
resistance input, defines the transmitter lower input
voltage or resistance ‘inVAL’ and the corresponding
transmitter digital display ‘diSP’.
Note: This function does not affect the transmitter
output current which is defined by the ‘CAL’ function.
The ‘in-Lo’ function may be selected from within the
configuration menu by operating the or button.
To enter the function press Pwhich will display
‘inVAL’ in the sub-menu, pressing Pagain will reveal
the existing transmitter lower input voltage or
resistance. ‘InVAL’ is shown in units that depend
upon how the transmitter input ‘inPut’ has been
configured, as shown below:
Configured ‘inVAL’
transmitter input units resolution
Voltage mV 0.1 or 0.01mV
Resistance 0.1
‘inVAL’ may be adjusted using the or button to
adjust the flashing digit and the Pbutton to move
control to the next digit. When configured for a
voltage input, operating the Pbutton when the 0.1mV
digit is flashing increases the resolution to 0.01mV
which is indicated by the display colon being
activated. When the required input has been
selected, press Eto enter the selection and return to
the ‘inVAL’ prompt in the sub-menu.
‘diSP’ which is the transmitter display corresponding
to ‘inVAL’ may be selected from within the sub-menu
by operating either the or button. To enter the
function press Pwhich will reveal the existing lower
transmitter display. The display may be changed
using the and buttons to adjust the flashing digit
and the Pbutton to move control to the next digit.
When the required transmitter display has been
selected, press Etwice to enter the selection and
return to the configuration menu.
Note: When the displayed decimal point has been
set to autorange, it may be necessary to manually
position the decimal point before adjusting ‘inVAL’.
This can be achieved by repeatedly operating the P
button until the activated decimal point flashes, the
decimal point can then be positioned using either the
or button. Pressing the Pbutton again will
return control to one of the digits.
7.2.13 Higher input & display ‘in-Hi’
This function which only appears in the menu when
the transmitter is configured for a voltage or
resistance input, defines the transmitter higher input
voltage or resistance ‘inVAL’ and the corresponding
transmitter digital display ‘diSP’.
Note: This function does not affect the transmitter
output current which is defined by the ‘CAL’ function.
The ‘in-Hi’ function may be selected from within the
configuration menu by operating the or button.
To enter the function press Pwhich will display
‘inVAL’ in the sub-menu, pressing Pagain will reveal
the existing transmitter higher input voltage or
resistance. ‘InVAL’ is shown in units which depend
upon how the transmitter input ‘inPut’ has been
configured, as shown below:
Configured ‘inVAL’
transmitter input units resolution
Voltage mV 0.1 or 0.01mV
Resistance 0.1
‘inVAL’ may be adjusted using the or button to
adjust the flashing digit and the Pbutton to move
control to the next digit. When configured for a
voltage input, operating the Pbutton when the 0.1mV
digit is flashing increases the resolution to 0.01V
which is indicated by the display colon being
activated. When the required input has been
selected, press Eto enter the selection and return to
the ‘inVAL’ prompt in the sub-menu.
‘diSP’ which is the transmitter display corresponding
to ‘inVAL’ may be selected from within the sub-menu
by operating either the or button. To enter the
function press Pwhich will reveal the existing higher
transmitter display. The display may be changed
using the or button to adjust the flashing digit
and the Pbutton to move control to the next digit.
When the required transmitter display has been
selected, press Etwice to enter the selection and
return to the configuration menu.
Note: When the displayed decimal point has been
set to autorange, it may be necessary to manually
position the decimal point before adjusting ‘inVAL’.
This can be achieved by repeatedly operating the P
button until the activated decimal point flashes, the
decimal point can then be positioned using either the
or button. Pressing the Pbutton again will
return control to one of the digits.

15

16

17

18
7.3 Default configuration
If the transmitter’s configuration is not specified at the
time of ordering, the instrument will be configured as
follows but can easily be reconfigured on-site.
Function Factory default
Transmitter input ‘InPut’ 3 wire RTD
Sensor type ‘t.tYPE’ Pt100
Units of digital display ‘dEG’ ºC
Display resolution ‘rESn’ Low
Sensor fault ‘FAuLt’ Off
4/20mA output ‘CAL’ 0.0 to 100.0
Bargraph display ‘bAr’ Left hand
justification.
Bargraph starts at
digital display 0.0
and finishes at
digital display
100.0
Access code ‘CodE’ 0000 which
disables this
function.
Table of contents
Other BEKA Transmitter manuals