BEKA BA674D User manual

Issue 9
4th July 2019
BA674D
Field mounting
indicating temperature
transmitter
Issue 9

1. Description
2. Documentation
3. Operation
3.1 Controls
4. Electrical system design
4.1 Use as a temperature indicator
5. Installation
5.1 Location
5.2 Installation procedure
5.3 EMC
6. Configuration
6.1 Configuration menu
6.1.1 Access
6.1.2 Summary of functions
6.2 Description of configuration menu functions
6.2.1 Transmitter input ‘InPut’
6.2.2 Thermocouple type ‘t.tYPE’
6.2.3 Units of digital display ‘dEG’
6.2.4 Display resolution ‘rESn’
6.2.5 Cold junction compensation ‘CJC’
6.2.6 Sensor fault analogue indication ‘FAuLT’
6.2.7 Configuration of 4/20mA output ‘CAL’
6.2.8 Configuration of bargraph display ‘bAr’
6.2.9 Access code ‘CodE’
6.2.10 Resistance thermometer type ‘r.tYPE’
6.2.11 Decimal point position ‘dP’
6.2.12 Lower input & display ‘in-Lo’
6.2.13 Higher input & display ‘in-Hi’
6.3 Configuration defaults
7. Configuration example
8. Maintenance
8.1 Fault finding during commissioning
8.2 Fault finding after commissioning
8.3 Servicing
8.4 Routine maintenance
8.5 Guarantee
8.6 Customer comments
9. Accessories
9.1 Scale and Tag marking
9.2 Tag plate
9.3 Pipe mounting kits
9.4 Alarms
9.4.1 Solid state output
9.4.2 Alarm configuration
9.4.3 Alarm selection ‘Alr1’ & ‘Alr2’
9.4.4 Alarm enable ‘EnbL’
9.4.5 Setpoint adjustment ‘SP1’
9.4.6 Alarm function ‘’hi.Lo’
9.4.7 Alarm output status ‘no.nC’
9.4.8 Hysteresis ‘HStr’
9.4.9 Alarm delay ‘dELA’
9.4.10 Alarm silence time ‘SiL’
9.4.11 Access setpoint ‘ACSP’
9.4.12 Adjusting alarm setpoints from
operational mode.
2
CONTENTS
The BA674D is CE marked to show compliance with the European EMC Directive 2014/30/EU

1. DESCRIPTION
The BA674D is a field mounting, 4/20mA loop
powered temperature transmitter with a large easy to
read display. The instrument, which is HART
enabled, may be conditioned on-site to operate with
most common thermocouples and resistance
thermometers and will provide a linear 4/20mA output
proportional to temperature, plus a digital
temperature display. Voltage and resistance inputs
may be scaled allowing the BA674D to display
variables other than temperature such as position
and weight.
Optional factory fitted alarms provide two galvanically
isolated solid state outputs that may be
independently configured for high or low operation.
For installation in poorly illuminated areas, an
optional factory fitted loop powered display backlight
is available.
Fig 1 Simplified block diagram
2. DOCUMENTATION
This instruction manual describes the installation and
configuration of the BA674D Indicating Temperature.
The transmitter is HART Registered and is compliant
with HART protocol standard revision 7. HART
commissioning information is included in the BA47X/
67X Indicating Temperature Transmitter HART
Interface Guide which may be downloaded from
www.beka.co.uk/manuals
3. OPERATION
Fig 1 shows a simplified diagram of the BA674D
Indicating Temperature Transmitter. The input,
which may be from a resistance thermometer,
thermocouple, or a dc voltage or resistance, is
digitised and transferred to the instrument processor
via an optical isolator. The processor linearises the
input signal, displays the resulting temperature in the
selected units and controls the 4/20mA output
current.
3.1 Controls
All functions of the transmitter may be configured via
the four push buttons which are located behind the
removable switch cover – see Fig 4. For applications
where frequent adjustments are required the BA674D
transmitter is available with an optional external
membrane keypad. Buttons respond within 0.5
seconds of being operated and unless continuously
pushed the transmitter display will return to the
operating mode after 2 seconds.
In the operational mode, i.e. when the transmitter is
displaying the input signal, these push buttons have
the following functions:
Button Function
While this button is operated the transmitter
will show the display corresponding to 4mA
output.
▲While this button is operated the transmitter
will show the display corresponding to
20mA output.
+Transmitter displays output current in mA
followed by output as % of the range.
P + Transmitter displays HARTshort address
followed by firmware version number.
P + EEntry to configuration menu. See 6.1.1
When fitted with optional alarms
P + Entry to alarm set point menu. See 9.4.11
E + Transmitter displays alarm 1 setpoint
E + Transmitter displays alarm 2 setpoint
P Activated alarm reverts to the non-alarm
condition for the configured alarm silence
time. See 9.4.10
3

4. ELECTRICAL SYSTEM DESIGN
The BA674D is a smart HARTenabled loop
powered 4/20mA Indicating Temperature
Transmitter. The transmitter is available with an
optional factory fitted loop powered display backlight
that does not require additional field wiring or a
separate supply but it does increases the
transmitter’s minimum operating voltage.
Operating voltage range between terminals 5 & 6:
without backlight 9.0 to 28V
with backlight 15.5 to 28V
When designing a transmitter loop it is necessary to
establish that the sum of the voltage drops caused by
the transmitter, the load and the cable resistance is
less than the minimum supply voltage.
For the transmitter loop shown in Fig 2
Minimum operating voltage of BA674D 9.0V
without optional backlight.
Maximum voltage drop caused by 5.0V
250load.
(250x 20mA)
Maximum voltage drop caused by 0.2V
cable resistance.
(10x 20mA)
______
Total maximum voltage drop 14.2V
Fig 2 Typical BA674D temperature measuring loop
The power supply voltage must therefore be greater
than 14.2V at all output currents.
4.1 Use as a temperature indicator
The BA674D may also be used as just a temperature
indicator by ignoring the instrument’s 4/20mA output
current. The load shown in Fig 2 may be omitted and
terminals 5 & 6 connected directly to the power
supply.
5. INSTALLATION
5.1 Location
The BA674D Indicating Temperature Transmitter is
housed in a robust IP66 glass reinforced polyester
(GRP) enclosure incorporating an armoured glass
window and stainless steel fittings. It is suitable for
exterior mounting in most industrial environments,
including offshore and wastewater treatment
installations at ambient temperatures between –20º
and +70ºC. Please consult BEKA associates if high
vibration is anticipated.
The BA674D enclosure is surface mounting.
Accessory kits described in section 9 of this manual
enable the instrument to be mounted onto a vertical
or horizontal pipe.
The field terminals and the two mounting holes are
located in a separate compartment with a sealed
cover allowing the instrument to be installed without
exposing the display assembly.
The BA674D earth terminal is connected to the
carbon loaded GRP enclosure. If this enclosure is not
bolted to an earthed post or structure, the earth
terminal should be connected to a local earth.
The BA674D enclosure is supplied with a bonding
plate to ensure electrical continuity between the three
conduit / cable entries.
The BA674D liquid crystal display has maximum
contrast when viewed from directly ahead and slightly
below the centre line of the instrument. Without a
backlight there is very little degradation of contrast
when viewed from above the centre line, but slight
degradation may be noticeable when the instrument
is fitted with a backlight.
5.2 Installation Procedure
Fig 3 illustrates the instrument installation procedure.
a. Remove the instrument terminal cover by
unscrewing the two captive 'A' screws.
b. Mount the instrument on a flat surface and
secure with two M6 screws through the 'B'
holes. Alternatively use one of the mounting
kits described in section 9.3
4

c. Remove the temporary hole plug and
install an appropriate IP rated cable gland
or conduit fitting. If more than one entry is
required, one or both of the IP66 stopping
plugs may be replaced with an
appropriate IP rated cable gland or
conduit fitting.
Cable glands, conduit fittings, blanking plugs
and cables must be suitable for continuous
use at the maximum operating temperature.
d. Connect the field wiring to the terminals as
shown in Fig 4.
e. Replace the instrument terminal cover and
evenly tighten the two 'A' screws.
Fig 3 BA674D installation procedure
Fig 4 Dimensions and terminal connections
5.3 EMC
The BA674D complies with the requirements of the
European EMC Directive 2014/30/EU. For specified
immunity, all wiring should be in screened twisted
pairs with the screens earthed at one point.
5

6. CONFIGURATION
The BA674D Indicating Temperature Transmitter
may be configured and calibrated via HARTdigital
communication, or configuration may be performed
using the menu accessed via the four push buttons
located behind the instrument switch cover, see Fig
4. When frequent adjustments are required the
transmitter can be supplied with a keypad mounted
on the outside of this cover.
Configuration and calibration via HARTmay be
performed using a portable configurator connected to
the BA674D test pillars located by terminals 5 & 6.
Alternatively, proprietary configuration software
installed on a personal computer may be used. In
addition to the configuration functions available via
the transmitter push buttons, HARTcommunication
enables loop calibration and custom linearisation to
be performed. See the BA47X/67X Indicating
Temperature Transmitter HARTInterface Guide
which may be downloaded from
www.beka.co.uk/manuals
6.1 Configuration menu
Throughout this manual the four BA674D push
buttons are identified PE▼▲and legends
displayed by the transmitter are shown within
inverted commas e.g. ‘CAL’ and ‘dEG’. Section
6.1.2 contains a summary of each configuration
function including a cross reference to a more
detailed description.
The functions contained in the configuration menu
vary depending upon the transmitter input selected,
see Figs 5, 6 & 7.
When the transmitter is being configured, the
transmitter 4/20mA output current is locked at the
value prior to entering the configuration menu.
When the optional alarms are fitted additional
functions are added to the configuration menu which
are described in section 9.4.
6.1.1 Access
Access to the configuration menu is obtained by
operating the Pand Ebuttons simultaneously. If the
transmitter is not protected by an access code the
first parameter 'InPut’ will be displayed. If the
transmitter is protected by an access code, ‘CodE’
will be displayed first. Pressing Pwill allow the four
digit security code to be entered digit by digit using
the or button to adjust the flashing digit and Pto
move control to the next digit. When the correct code
has been entered, pressing Ewill cause the first
parameter ‘InPut’ to be displayed. If an incorrect
code is entered, or no button is pressed for ten
seconds, the transmitter will automatically return to
the operating mode. If the transmitter displays ‘LoC’
when the Pand Ebuttons are operated
simultaneously, the transmitter push buttons have
been locked by a HARTcommand – see
BA47X/67X Indicating Temperature Transmitter
HARTInterface Guide which may be downloaded
from www.beka.co.uk/manuals.
6.1.2 Summary of functions
The functions that may be configured vary depending
upon the input selected.
Thermocouple and RTD inputs
The BA674D will always display sensor temperature.
Configuration allows:
Digital display units and resolution to be selected.
Bargraph display to represent required part of the
digital displayed range.
4/20mA output current to have required input
range.
Voltage and resistance inputs
The BA674D can display the voltage or resistance
input in any engineering units.
Configuration allows:
Zero and span of digital display to be adjusted.
Bargraph display to represent required part of the
digital displayed range.
4/20mA output current to have required input
range.
Each of the functions in the configuration menu is
summarised below, including a cross-reference to a
more detailed description.
Transmitter Summary
display of function
‘InPut’ Transmitter input
Selects one of the following inputs:
Thermocouple ‘tHC’
3 wire RTD ‘3rtd’
4 wire RTD ‘4rtd’
Differential RTD ‘d_rtd’
Voltage ‘Volt’
3 wire resistance ‘3rES’
4 wire resistance ’4rES’
See section 6.2.1
The content of the configuration menu depends upon
which transmitter input is selected, see following
summary and Figs 5, 6 and 7.
6

For Thermocouple Input – see Fig 5
Transmitter Summary
display of function
‘t.tYPE’ Thermocouple type
Selects 1 of 8 common types of
thermocouple.
See section 6.2.2
‘dEG’ Units of digital display
Selects 1 of 4 units of temperature.
See section 6.2.3
‘rESn’ Display resolution
Selects low or high display resolution.
See section 6.2.4
‘CJC’ Cold junction compensation
Turns thermocouple cold junction
compensation on or off.
See section 6.2.5
‘FAuLt’ Sensor fault analogue indication
Selects 1 of 3 under/over range output
currents to indicate that a sensor fault has
been detected. Sensor fault analogue
indication may be disabled.
See section 6.2.6
‘CAL’ Configuration of 4/20mA output
Defines input at which transmitter output
is 4 & 20mA.
See section 6.2.7
‘bAr’ Configuration of bargraph display
Defines transmitter digital display at which
bargraph is zero and full scale.
See section 6.2.8
‘CodE’ Access code for configuration menu
Enters four digit configuration menu
access code. Default code 0000 disables
this function.
See section 6.2.9
For Resistance Thermometer (RTD) Input see Fig 6
Transmitter Summary
display of function
‘r.tYPE’ Resistance thermometer type
Selects Pt100 or Pt1000 sensor
See section 6.2.10
‘dEG’ Units of digital display
Selects 1 of 4 units of temperature.
See section 6.2.3
‘rESn’ Display resolution
Selects low or high display resolution.
See section 6.2.4
Transmitter Summary
display of function
‘FAuLt’ Sensor fault analogue indication
Selects 1 of 3 under/over range output
currents to indicate that a sensor fault has
been detected. Sensor fault analogue
indication may be disabled.
See section 6.2.6
‘CAL’ Configuration of 4/20mA output
Defines transmitter input at which
transmitter output is 4 & 20mA.
See section 6.2.7
‘bAr’ Configuration of bargraph display
Defines digital display at which bargraph
is zero and full scale.
See section 6.2.8
‘CodE’ Access code for configuration menu
Enters four digit configuration menu
access code. Default code 0000 disables
this function.
See section 6.2.9
For Voltage and Resistance Inputs – see Fig 7
Transmitter Summary
display of function
‘dP’ Decimal point position
Defines position of displayed decimal
point.
See section 6.2.11
‘in-Lo’ Lower input and display
Defines lower voltage or resistance input
‘inVAL’ and corresponding digital display
‘diSP’.
See section 6.2.12
‘in-Hi’ Higher input and display
Defines higher voltage or resistance input
‘inVAL’ and corresponding digital display
‘diSP’.
See section 6.2.13
‘CAL’ Configuration of 4/20mA output
Defines the transmitter input at which
transmitter output is 4 & 20mA.
See section 6.2.7
‘bAr’ Configuration of bargraph display
Defines digital display at which bargraph
is zero and full scale.
See section 6.2.8
‘CodE’ Access code for configuration menu
Enters four digit configuration menu
access code. Default code 0000 disables
this function. See section 6.2.9
7

6.2 Description of configuration menu
functions
This section contains a detailed description of each
function in the configuration menu. It should be read
in conjunction with Figs 5, 6 & 7.
6.2.1 Transmitter input ‘InPut’
This function enables the BA674D indicating
temperature transmitter to be conditioned to operate
with a thermocouple, 3 or 4 wire resistance
thermometer, voltage or 3 or 4 wire resistance input.
A differential resistance thermometer input may also
be selected. A differential thermocouple input is
achieved by selecting the thermocouple input in this
function and turning the cold junction compensation
off in the CJC function – see 6.2.5.
Sensor Transmitter
display
Thermocouple ‘tHC’
3 wire RTD ‘3rtd’
4 wire RTD ‘4rtd’
Differential RTD ‘d_rtd’
Voltage ‘VoLt’
3 wire resistance ‘3rES’
4 wire resistance ’4rES’
The ‘InPut’ function is the first function displayed
when entering the configuration menu, or it may be
selected from within the menu by operating the or
button. To enter the function press Pwhich will
reveal the existing setting which may be changed
using the or button. When the required input
has been selected press Eto enter the selection and
return to the ‘InPut’ prompt in the configuration menu.
6.2.2 Thermocouple type ‘t.tYPE’
This function enables one of eight common
thermocouples to be selected. The following table
shows the thermocouple types, indicator display and
the operating temperature range.
THC BA674D Temperature
Type Display range oC
B ‘b’ 200 to 1820
E ‘E’ -200 to 1000
J ‘J’ -210 to 1200
K ‘H’ -200 to 1372
N ‘n’ -200 to 1300
R ‘r’ -50 to 1768
S ‘S’ -50 to 1768
T ‘t’ -200 to 400
The ‘t.tYPE’ function may be selected from within the
menu by operating the or button. To enter the
function press Pwhich will reveal the existing setting
which may be changed using the or button.
When the required thermocouple has been selected,
press Eto enter the selection and return to the
‘t.tYPE’ prompt in the configuration menu.
6.2.3 Units of digital display ’dEG’
The transmitter digital display may be in one of four
units of temperature.
Units Transmitter Display
oC
oC
oF
oF
r r
K H
When oCoroF are selected the units of measurement
are shown at the top left hand corner of the display
when the transmitter is in the operating mode.
The ‘dEG’ function may be selected from within the
menu by operating the or button. To enter the
function press Pwhich will reveal the existing setting
which may be changed using the or button.
When the required units have been selected, press E
to enter the selection and return to the ‘dEG’ prompt
in the configuration menu.
6.2.4 Display resolution ‘rESn’
This function defines the resolution of the transmitter
display but does not affect the resolution of the
4/20mA output current.
Resolution Transmitter Display
Lo 0 0 0 0 0
hi 0 0 0 0.0
The ‘rESn’ function may be selected from within the
menu by operating the or button. To enter the
function press Pwhich will reveal the existing setting
which may be changed using the or button.
When the required resolution has been selected,
press Eto enter the selection and return to the ‘rESn’
prompt in the configuration menu.
6.2.5 Cold junction compensation ‘CJC’
The temperature of the thermocouple cold junction,
which is the transmitter input terminals, is measured
and added to the thermocouple output so that the
transmitter displays and transmits the hot junction
temperature. If cold junction compensation is not
required e.g. for differential measurements with two
thermocouples, this function allows it to be turned off.
The ‘CJC’ function may be selected from within the
configuration menu by operating the or button.
To enter the function press Pwhich will reveal the
existing setting which may be changed using the
or button. When set as required, press Eto enter
the selection and return to the ‘CJC’ prompt in the
configuration menu.
8

6.2.6 Sensor fault analogue indication ‘FAuLt’
The sensor fault analogue indication function
appears in the menu when the transmitter is
configured for a resistance thermometer or a
thermocouple input.
When a fault is detected the transmitter’s 4/20mA
output current is set to the specified under or over
range fault value and the transmitter’s digital display
flashes as shown below. One of three fault currents
may be selected, or the fault indication may be
turned off. Irrespective of how the function is set
the transmitter display will flash when a sensor fault
is detected.
Selected Output Transmitter
fault current current display
‘oFF’ No fault indication Flashes
‘dn3.6’ 3.6mA *Flashes
‘dn3.8’ 3.8mA Flashes
‘uP 21’ 21.0mA Flashes
* Not recommended when HART
communication is used.
The ‘FAuLt’ function may be selected from within the
configuration menu by operating the or button.
To enter the function press Pwhich will reveal the
existing setting which may be changed using the
or button. When set as required, press Eto enter
the selection and return to the ‘FAuLT’ prompt in the
configuration menu.
The typical detection thresholds and approximate
response times are:
Thermocouple > 5k10 sec
RTD sensor < 5>5001 sec
RTD sense leads > 5010 sec
In the time between a fault developing in an RTD
sense lead or a thermocouple and the fault being
detected, the transmitter output and display may drift
from the last correct measured value.
6.2.7 Configuration of 4/20mA output ‘CAL’
This function defines the relationship between the
transmitter input and the 4/20mA output current.
‘Zero’ defines the transmitter input at which the
output is 4mA and ‘Span’ defines the input at which
the output is 20mA.
This function does not affect the transmitter display
which is fixed for thermocouple and resistance
thermometer inputs and adjusted via the ‘in-Lo and
‘in-Hi’ functions for resistance and voltage inputs.
The ‘CAL’ function may be selected from within the
menu by operating the or button. To enter the
function press Pwhich will display the ‘ZEro’ function
in the sub-menu, pressing Pagain will reveal the
existing transmitter input at which the transmitter
output current is 4mA. Input is shown in units which
depend upon how the transmitter input ‘InPut’ and
display ‘dEG’ have been configured, as shown
below:
Configured Input
transmitter input shown as
Thermocouple oC, oF, K or r
Resistance thermometer oC, oF, K or r
Voltage mV
Resistance Ohms
The input, at which the transmitter output current is
4mA, may be changed using the or button to
adjust the flashing digit and the Pbutton to move
control to the next digit. When the required input has
been selected, press Eto enter the selection and
return to the ‘ZEro’ prompt in the sub menu.
The ‘SPAn’ function, which defines the input at which
the transmitter current output is 20mA, may be
selected from within the sub-menu by operating
either the or button. To enter the function press
Pwhich will reveal the existing transmitter input at
which the transmitter output current is 20mA. Again
the input will be shown in units which depend upon
how the transmitter has been configured and may be
changed using the or button to adjust the
flashing digit and the Pbutton to move control to the
next digit. When the required input has been
selected, press Eto enter the selection and return to
the ‘SPAn’ prompt.
Note: When configured for a voltage input, operating
the Pbutton when the 0.1mV digit is flashing in the
‘Zero’ or ‘SPAn’ sub-menus increases the input
resolution to 0.01mV which is indicated by the display
colon being activated. When the required input has
been selected, pressing Eenters the selection and
returns the transmitter to the ‘ZEro’ or ‘SPAn’ prompt
in the sub-menu.
If, when configured for a voltage or resistance input
the displayed decimal point has been set to
autorange, it may be necessary to manually position
the decimal point before adjusting ‘ZEro’ or ‘SPAn’.
This can be achieved by repeatedly operating the P
button until the activated decimal point flashes, the
decimal point can then be positioned using either the
or button. Pressing the Pbutton again will
return control to one of the digits.
9

6.2.8 Configuration of bargraph display ‘bAr’
This function contains three sub-functions that justify
the bargraph display and define the relationship
between the bargraph and the transmitter digital
display.
Sub-function ‘b.tYPE’ enables the bargraph to be left,
centre or right justified, or to be turned off. Sub-
functions ‘bArLo’ and ‘bArHi’ define the transmitter
digital display at which the bargraph starts and is at
full scale.
The ‘bAr’ function may be selected from within the
configuration menu by operating the or button.
To enter the function press Pwhich will display the
‘b.tYPE’ sub-function, pressing Pagain will reveal the
existing bargraph justification. The or button
will scroll through the four options, when the required
justification is displayed, pressing Ewill enter the
selection and return the display to the ‘b.tYPE’
prompt in the sub-menu from which ‘bArLo’ may be
selected using the or button.
‘bArLo’ defines the transmitter digital display at which
the bargraph starts, to enter the function press P
which will reveal the existing setting. The display
may be changed using the or button to adjust
the flashing digit and the Pbutton to move control to
the next digit. When the required starting display has
been selected, press Eto return to the ‘bArLo’
prompt in the sub-menu from which the ‘bArHi’
function may be selected.
‘bArHi’ defines the transmitter digital display at which
the bargraph is full scale, to enter the function press
Pwhich will reveal the existing setting. The display
may be changed using the or button to adjust
the flashing digit and the Pbutton to move control to
the next digit. When the required display has been
selected, press Etwice to return to enter the new
values and return to the ‘bAr’ prompt in the
configuration menu.
Note: If, when configured for a voltage or resistance
input the displayed decimal point has been set to
autorange, it may be necessary to manually position
the decimal point before adjusting ‘bArLo’ or ‘bArHi’.
This can be achieved by repeatedly operating the P
button until the activated decimal point flashes, the
decimal point can then be positioned using either the
or button. Pressing the Pbutton again will
return control to one of the digits.
6.2.9 Access code for configuration menu
‘CodE’
Access to the configuration menu may be protected
by a four digit security code which must be entered to
gain access. New instruments are supplied
configured with the default code 0000 which allows
unrestricted access to the menu.
To enter a new access code select ‘CodE’ in the
configuration menu by operating the or button.
To enter the function press Pwhich will reveal the
current access code with one digit flashing. The code
may be changed using the or button to adjust
the flashing digit and the Pbutton to move control to
the next digit. When the required code has been
selected, press Eto enter the selection and return to
the ‘CodE’ prompt in the configuration menu. The
revised access code will be activated when the
transmitter is returned to the operating mode.
If the access code is lost please contact BEKA
associates.
6.2.10 Resistance thermometer type ‘r.tYPE’
This function configures the BA674D to operate with
a Pt100 or Pt1000 resistance thermometer input.
The ‘r.tYPE’ function may be selected from within the
configuration menu by operating the or button.
To enter the function press Pwhich will reveal the
existing setting which may be changed using the
or button.
Resistance Transmitter
thermometer display
Pt100 100r
Pt1000 1000r
When the required resistance thermometer has been
selected, press Eto enter the selection and return to
the ‘r.tYPE’ prompt in the configuration menu.
6.2.11 Decimal point position ‘dP’
This function defines the position of the decimal point
in the operating mode when the transmitter is
configured for a voltage or a resistance input.
This function does not appear in the configuration
menu when the transmitter is configured for a
thermocouple or a resistance thermometer input.
The ‘dP’ function may be selected from within the
menu by operating the or button. To enter the
function press Pto reveal the existing position of the
decimal point which may be moved to the required
fixed position, omitted, or set to autorange by
operating the or button. Autorange, which is
selected when all the decimal points are activated,
ensures that the transmitter numeric display is
always shown with maximum resolution irrespective
of the value. When set as required, press Eto enter
the selection and return to the ‘dP’ prompt in the
configuration menu.
10
6.2.12 Lower input & display ‘in-Lo’
This function, which only appears in the menu when
the transmitter is configured for a voltage or
resistance input, defines the transmitter lower input
voltage or resistance ‘inVAL’ and the corresponding
transmitter digital display ‘diSP’.
This function does not affect the transmitter output
current which is defined by the ‘CAL’ function.
The ‘in-Lo’ function may be selected from within the
configuration menu by operating the or button.
To enter the function press Pwhich will display
‘inVAL’ in the sub-menu, pressing Pagain will reveal
the existing transmitter lower input voltage or
resistance. ‘InVAL’ is shown in units that depend
upon how the transmitter input ‘inPut’ has been
configured, as shown below:
Configured ‘inVAL’
transmitter input units resolution
Voltage mV 0.1 or 0.01mV
Resistance 0.1
‘inVAL’ may be adjusted using the or button to
adjust the flashing digit and the Pbuttontomove
control to the next digit. When configured for a
voltage input, operating the Pbutton when the 0.1mV
digit is flashing increases the resolution to 0.01mV
which is indicated by the display colon being
activated. When the required input has been
selected, press Eto enter the selection and return to
the ‘inVAL’ prompt in the sub-menu.
‘diSP’ which is the transmitter display corresponding
to ‘inVAL’ may be selected from within the sub-menu
by operating either the or button. To enter the
function press Pwhich will reveal the existing lower
transmitter display. The display may be changed
using the and buttons to adjust the flashing digit
and the Pbutton to move control to the next digit.
When the required transmitter display has been
selected, press Etwice to enter the selection and
return to the configuration menu.
Note: When the displayed decimal point has been
set to autorange, it may be necessary to manually
position the decimal point before adjusting ‘inVAL’.
This can be achieved by repeatedly operating the P
button until the activated decimal point flashes, the
decimal point can then be positioned using either the
or button. Pressing the Pbutton again will
return control to one of the digits.
6.2.13 Higher input & display ‘in-Hi’
This function which only appears in the menu when
the transmitter is configured for a voltage or
resistance input, defines the transmitter higher input
voltage or resistance ‘inVAL’ and the corresponding
transmitter digital display ‘diSP’.
This function does not affect the transmitter output
current which is defined by the ‘CAL’ function.
The ‘in-Hi’ function may be selected from within the
configuration menu by operating the or button.
To enter the function press Pwhich will display
‘inVAL’ in the sub-menu, pressing Pagain will reveal
the existing transmitter higher input voltage or
resistance. ‘InVAL’ is shown in units which depend
upon how the transmitter input ‘inPut’ has been
configured, as shown below:
Configured ‘inVAL’
transmitter input units resolution
Voltage mV 0.1 or 0.01mV
Resistance 0.1
‘inVAL’ may be adjusted using the or button to
adjust the flashing digit and the Pbutton to move
control to the next digit. When configured for a
voltage input, operating the Pbutton when the 0.1mV
digit is flashing increases the resolution to 0.01V
which is indicated by the display colon being
activated. When the required input has been
selected, press Eto enter the selection and return to
the ‘inVAL’ prompt in the sub-menu.
‘diSP’ which is the transmitter display corresponding
to ‘inVAL’ may be selected from within the sub-menu
by operating either the or button. To enter the
function press Pwhich will reveal the existing higher
transmitter display. The display may be changed
using the or button to adjust the flashing digit
and the Pbutton to move control to the next digit.
When the required transmitter display has been
selected, press Etwice to enter the selection and
return to the configuration menu.
Note: When the displayed decimal point has been
set to autorange, it may be necessary to manually
position the decimal point before adjusting ‘inVAL’.
This can be achieved by repeatedly operating the P
button until the activated decimal point flashes, the
decimal point can then be positioned using either the
or button. Pressing the Pbutton again will
return control to one of the digits.
11

12

13

14

6.3 Default configuration
If the transmitter’s configuration is not specified at the
time of ordering, the instrument will be configured as
follows but can easily be reconfigured on-site.
Function Factory default
Transmitter input ‘InPut’ 3 wire RTD
Sensor type ‘t.tYPE’ Pt100
Units of digital display ‘dEG’ ºC
Display resolution ‘rESn’ Low
Sensor fault ‘FAuLt’ Off
4/20mA output ‘CAL’ 0.0 to 100.0
Bargraph display ‘bAr’ Left hand
justification.
Bargraph starts at
digital display 0.0
and finishes at
digital display
100.0
Access code ‘CodE’ 0000 which
disables this
function.
15

7. CONFIGURATION EXAMPLE
In this example a BA674D indicating temperature
transmitter is required to display temperature in
degrees Celsius with maximum resolution. The
temperature sensor is a 3 wire Pt100 resistance
thermometer and the 4/20mA transmitter output is
required to representing –10 to +250oC. . A left hand
justified bargraph representing 100.0 to 200.0oCis
required. Resistance thermometer failure is to be
indicated by an overrange output current of 21.0mA.
After configuration access to the configuration menu
is to be protected by code 1209.
Configuration is performed using the four push
buttons which are located behind the removable
switch cover below the digital display – see Fig 4.
The BA674D can be supplied with factory fitted
external push buttons if frequent adjustments are
required.
The transmitter configuration may also be performed
via HARTcommunication from a local or remote
configurator. The HARTcommunication protocol
includes additional functions allowing the complete
temperature loop, including the temperature sensor
and the transmitter load, to be calibrated, see the
BEKA HARTInterface Guide which may be
downloaded from www.beka.co.uk/manuals
Step 1 Access the configuration menu &
select the type of input.
See: Fig 6 and section 6.2.1
New BA674D indicating temperature
transmitters are supplied conditioned
with default access code ‘0000’ that
allows unrestricted access to the
configuration menu.
To enter the configuration menu press
buttons Pand Esimultaneously which
will cause the first prompt ‘InPut’ to be
displayed. Press Pto enter the function
and the transmitter will display the
current type of input. To configure the
transmitter to operate with a three wire
resistance thermometer press the or
button until ‘3rtd’ is displayed. When
selected press Eto enter the selection
and return to the ‘InPut’ prompt in the
configuration menu.
Step 2 Select resistance thermometer type
See: Fig 6 and section 6.2.10
Using the or button select the
‘r,tYPE’ prompt from the configuration
menu and press Pto enter the function
which enables the type of resistance
thermometer to be selected. The
transmitter will display the existing type
of resistance thermometer, using the
or button select ‘100r’ which is the
required Pt100 sensor. Enter the
selection by pressing the Ebutton that
will return the display to the ‘r.tYPE’
prompt in the configuration menu.
Step 3 Select units of digital display
See: Fig 6 and section 6.2.3
Using the or button select ‘dEG’
from the configuration menu and press
Pto enter the function which enables
the digital display units of measurement
to be selected. Using the or button
scroll through the options and select ‘ºC’
which represents degrees Celsius.
Press Eto enter the selection and return
the transmitter display to the ‘dEG’
prompt in the configuration menu.
Step 4 Select display resolution
See: Fig 6 and section 6.2.4
Using the or button select ‘rESn’
from the configuration menu and press
Pto enter the function which determines
the resolution of the digital display.
Using the or button select ‘hi’ to
provide the required 0.1 resolution
display. Press Eto enter this selection
and return the display to the ‘rESn’
prompt in the configuration menu.
Step 5 Sensor fault detection
See: Fig 6 and section 6.2.6
Using the or button select ‘FAuLt’,
the input sensor fault detection function,
from the configuration menu and press
P.Usingtheor button scroll
through the options and select ‘uP 21’
which forces the output current to
21.0mA when a sensor failure is
detected. Enter the selection by
pressing Ewhich will also return the
transmitter display to the ‘FAuLt’ prompt
in the configuration menu.
Step 6 Configuration of 4/20mA output
See: Fig 6 and section 6.2.7
The BA674D transmitter input at which
the transmitter output current is 4mA
and 20mA is defined by the ‘CAL’
function which contains two sub-
functions.
Using the or button select ‘CAL’
from the configuration menu and press
Pwhich will show the ‘ZEro’ sub-
function prompt. Press Pagain to enter
this sub-function, which will reveal the
existing input at which the transmitter
output current is 4mA. Adjust the
display to the required –0010.0 using
the or button to adjust the flashing
digit and the Pbutton to move control to
16

the next digit. A negative display is
achieved by scrolling the most
significant digit below zero using the
button. When set press Eto enter the
new value and return to the ‘ZEro’ sub-
function prompt from which the ‘SPAn’
sub-function, which defines the display
at which the output is 20mA, may be
selected using the or button.
Press Pto enter this sub-function, which
will reveal the existing input at which the
transmitter output current is 20mA.
Adjust the display to 0250.0 using the
or button to adjust the flashing digit
and the Pbutton to move control to the
next digit.
Finally press Etwice, first to enter the
selection and return to the ‘SPAn’ sub-
function prompt, and again to return to
the ‘CAL’ function prompt in the
configuration menu.
Step 7 Configuration of bargraph display
See: Fig 6 and section 6.2.8
This function contains three sub-
functions that justify the bargraph
display and define the transmitter digital
display at which the bargraph starts and
finishes.
Using the or button select ‘bAr’
from the configuration menu and press
Pwhich will show the ‘b.tYPE’ sub-
function prompt. Press Pagain to enter
this sub-function, which will reveal the
existing bargraph justification. Using the
or button scroll through the options
and select ‘LEFt’ which will start the
bargraph on the left hand side of the
display. Press Eto enter the selection
and return to the ‘b.tYPE’ sub-function
prompt from which, using the or
button, the ‘bArLo’ sub-function may be
selected. Press Pto enter the ‘bArLo’
sub-function which will reveal the
existing digital display at which the
bargraph starts. Set the display to
0100.0 using the or button to
adjust the flashing digit and the Pbutton
to move control to the next digit. When
set, press Eto enter the new value and
return to the ‘bArLo’ sub-function prompt
from which the ‘bArHi’ sub-function may
be selected. Press Pto enter the
‘bArHi’ sub-function which will reveal the
existing digital display at which the
bargraph finishes. Set the display to
0200.0 using the or button to
adjust the flashing digit and the Pbutton
to move control to the next digit.
Finally press Etwice, first to enter the
selection and return to the ‘bArHi’ sub-
function prompt, and again to return to
the ‘bAr’ function prompt in the
configuration menu.
Step 8 Enter the configuration menu access
code.
See Fig 6 and section 6.2.9
This function defines the four digit code
that must be entered to obtain access to
the BA674D transmitter’s configuration
menu.
Using the or button select the
‘CodE’ prompt from the configuration
menu and press Pwhich, for a new
instrument, will show the default code
‘0000’ with the first digit flashing. Using
the or button to adjust the flashing
digit and the Pbutton to transfer control
to the next digit, set the display to 1209.
Press Etwice to enter the new access
code and return the BA674D to the
display mode via the ‘CodE prompt.
This completes the instrument
configuration. The BA674D transmitter
will now function as specified at the
beginning of this example. Access to
the configuration is protected by code
1209 which must be entered each time a
change is made.
17

8. MAINTENENCE
The BA674D indicating temperature transmitter
should only be maintained by trained competent
personnel.
8.1 Fault finding during
commissioning
If a BA674D fails to function during commissioning
the following procedure should be followed:
Symptom Cause Check
No display or
output current
Incorrect wiring
Low supply
voltage
Wiring
That voltage
between terminals
5 & 6 is between 9
& 28V at all output
currents. Terminal
5 positive.
or between
15 .5 & 28V at all
output currents if
optional backlight
is fitted.
Digital display is
over or under
range showing
9.9.9.9.9
or
-9.9.9.9.9
with all decimal
points flashing.
Incorrect wiring of
THC or RTD input
Input is outside
specified range for
voltage or
resistance input.
Wiring and input
configuration.
Wiring and input
configuration.
Bargraph is over
or under range.
with scale
flashing, bargraph
displaying all or
just one segment.
Input is outside
specified range for
bargraph.
Reconfigure
bargraph display.
Digital display &
bargraph flashing
and 4/20mA fixed
at 3.6, 3.8 or
21.0mA
Sensor fault
detection has
been activated.
Sensor and input
wiring.
8.2 Fault finding after
commissioning
ENSURE PLANT SAFETY BEFORE STARTING
MAINTENANCE
If a BA674D fails after it has been functioning
correctly the following procedure should be followed:
Symptom Cause Check
No display or
output current
Wiring or power
supply fault.
Wiring
That voltage
between terminals
5 & 6 is between 9
& 28V. Terminal 5
positive.
or
15 .5 & 28V if
optional backlight
is fitted.
Digital display &
bargraph flashing
and 4/20mA fixed
at 3.6, 3.8 or
21.0mA
Sensor fault
detection has
been activated.
Sensor and input
wiring.
If this procedure does not reveal the cause of the
fault we recommend that the transmitter is replaced.
8.3 Servicing
We recommend that faulty BA674D indicating
temperature transmitters are returned to BEKA
associates or to our local agent for repair.
8.4 Routine maintenance
The mechanical and electrical condition of the
transmitter should be regularly checked. Initially an
annual inspection is recommended, but the
inspection frequency should be adjusted to suit the
environmental conditions.
8.5 Guarantee
Transmitters which fail within the guarantee period
should be returned to BEKA associates or our local
agent. It is helpful if a brief description of the fault
symptoms is provided.
8.6 Customer comments
BEKA associates is always pleased to receive
comments from customers about our products and
services. All communications are acknowledged and
whenever possible, suggestions are implemented.
18

9. ACCESSORIES
9.1 Scale and tag marking
BA674D indicating temperature transmitters are fitted
with a blank escutcheon around the liquid crystal
display. If specified when the transmitter is ordered,
this can be supplied printed with units of
measurement and tag information, plus a scale for
the horizontal bargraph. Alternatively, information
may be added on-site via an embossed strip, dry
transfer or a permanent marker.
To gain access to the display escutcheon remove the
terminal cover by unscrewing the two 'A' screws
which will reveal two concealed 'D' screws.
Unscrew all four 'D' screws and carefully lift off the
front of the instrument. The location of these screws
is shown in Fig 3.
After adding the required legends, or fitting a new
pre-printed self-adhesive escutcheon, ensure that the
gasket is correctly positioned before reassembling
the instrument enclosure.
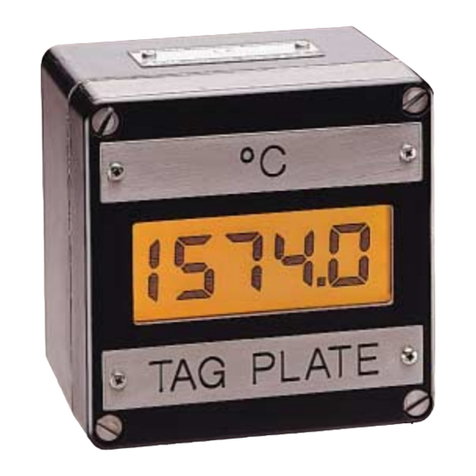
9.2 Tag plate
The BA674D can be supplied with a blank or custom
laser etched stainless steel plate secured by two
screws to the front of the instrument enclosure. This
plate can accommodate:
1 row of 9 alphanumeric characters 10mm high
or 1 row of 11 alphanumeric characters 7mm high
or 2 rows of 18 alphanumeric characters 5mm
high
9.3 Pipe mounting kits
Two pipe mounting kits are available for securing the
BA674D to a horizontal or vertical pipe.
BA392D Stainless steel bracket secured by two
worm drive hose clips for 60 to 80mm
outside diameter pipes.
BA393 Heavy-duty stainless steel bracket
secured by a single 'V' bolt. Will clamp to
any pipe with an outside diameter
between 40 and 80mm.
19

9.4 Alarms
The BA674D can be supplied with two solid state
single pole alarm outputs that may be independently
programmed as high or low alarms with normally
open or normally closed outputs. Fig 8 illustrates the
conditions available and shows which are fail safe,
i.e. in the alarm condition the output is open.
WARNING
Alarms should not be used for critical
safety applications such as a shut down
system.
Fig 8 Alarm outputs
When an alarm is activated an annunciator appears
on the left hand side of the BA674D display. This
shows which alarm has been activated and will flash
if the alarm is delayed or silenced.
Programmable functions for each alarm include
adjustable setpoint, hysteresis, alarm delay and
alarm accept.
9.4.1 Solid state output
Each alarm has a galvanically isolated single pole
solid state switch output as shown in Fig 9. The
outputs are polarised and current will only flow in one
direction. Terminals 8 and 10 should be connected
to the positive side of the supply.
Ron = 8 ohms + 1.2V
Roff = greater than 180k
Note: Because of the series protection diodes
some test meters may not detect a closed alarm
output.
Fig 9 Equivalent circuit of each alarm output
The maximum rating of each alarm output is 30Vdc;
100mA.
WARNING
Connection of an alarm output to a supply
greater than 30V may rupture the internal
encapsulated fuse.
Fig 10 Typical alarm application
20
Table of contents
Other BEKA Transmitter manuals

BEKA
BEKA BA378C User manual

BEKA
BEKA BA478C User manual

BEKA
BEKA BA574C User manual

BEKA
BEKA BA578C User manual

BEKA
BEKA BA374C User manual

BEKA
BEKA BA678C User manual

BEKA
BEKA BA374NC User manual

BEKA
BEKA BA474ND Installation and operating instructions

BEKA
BEKA BA474D Installation and operating instructions
Popular Transmitter manuals by other brands

THine
THine SerDes THCV231-Q manual

Leuze electronic
Leuze electronic DDLS 500 Series manual

Absolute Process Instruments
Absolute Process Instruments API 6380 G HV Series quick start guide

SpreadNet
SpreadNet SN960-PENDANT installation instructions

Q5X
Q5X CoachMic QT-AD10C quick start guide

Telcoma Automations
Telcoma Automations NOIRE2E quick start guide