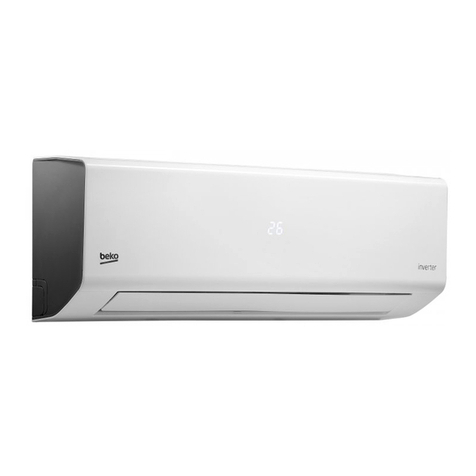
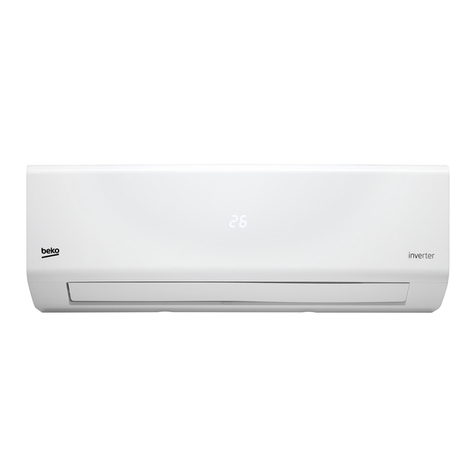
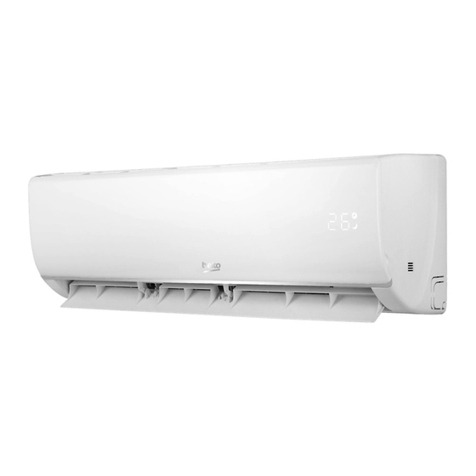
Beko BK 3500 User manual

Split Air Conditioner
User Manual
BK 2600
BK 3500


ƾ
ƾ
ƾ
2SHUDWLRQDQGPDLQWHQDQFHQRWLFHVIRURSHUDWLRQ
1
ƾƾ%HVXUHWRSXOORXWWKHSRZHU
ƾ
ƾƾ
ƾ
(DUWK7KHJURXQG
EHFRQQHFWHG
,IQRWSOHDVHDVNWKHTXDOLILHGSHUVRQ
QHOWRLQVWDOO)XUWKHUPRUHGRQWFRQQ
HFWHDFKZLUHWRWKHJDVSLSHZDWHU
SLSHGUDLQDJHSLSHRUDQ\RWKHULPSU
RSHUSODFHV
SOXJZKHQQRWXVLQJWKHDLUFR
QGLWLRQHUIRUDORQJWLPH
2WKHUZLVHWKHDFFXPXODWHGGXVW
PD\FDXVHILUHRUHOHFWULFVKRFN
6HOHFWWKHPRVWDSSURSULDWHWHP
SHUDWXUH
.HHSURRPFRRl-
HUWKDQRXWVLGH
DERXWGHJUHH
,WFDQSUHFOXGHWKHHOHFWULFLW\ZDVWHG
'RQWOHDYHZLQGRZVDQG
GRRUVRSHQIRUDORQJWLPH
ZKLOHRSHUDWLQJWKHDLUFRQGLWLRQHU
,WFDQGHFUHDVHWKHDLUFRQGLWLRQLQJ
FDSDFLW\
'RQWEORFNWKHDLULQWDNHRURXWOHW
YHQWVRIERWKWKHRXWGRRUDQGLQGRRU
XQLWV
,WFDQGHFUHDVHWKHDLUFRQGLWLRQLQJ
FDSDFLW\RUFDXVHDPDOIXQFWLRQ
.HHSFRPEXVWLEOHVSUD\DZD\
IURPWKHXQLWVPRUHWKDQP
,WFDQFDXVHDILUHRUH[SORVLRQ
,ILWLVGDPDJHGLWPD\OHDGWR
WKHIDOORIWKHXQLWDQGFDXVH
WKHLQMXU\
3OHDVHQRWHZKHWKHUWKHLQVWDOOHG
VWDQGLVILUPHQRXJKRUQRW
'RQWVWHSRQWKHWRSRIWKH
RXWGRRUXQLWRUSODFHVRPHWKLQJ
RQLW
$VIDOOLQJRIIWKHRXWGRRUXQLW
FDQEHGDQJHURXV
'RQWDWWHPSWWRUHSDLU
WKHDLUFRQGLWLRQHUE\\RXUVHOI
7KHZURQJUHSDLUZLOOOHDGWR
DQHOHFWULFVKRFNRUILUHVR
\RXVKRXOGFRQWDFWWKHVHUYLFH
FHQWHUWRUHSDLU

2
ƾ
ƾ
ƾ
ƾ
ƾ
ƾ
ƾ
ƾ
Notices for operation
If the supply cord is damaged, it must be replaced
by the manufacturer or its service agent or a
similarly qualified person in order to avoid a
hazard.
7KHDLUIORZGLUHFWLRQFDQEHDGMXVWHGDSSUR
SULDWHO\$WRSHUDWLQJDGMXVWWKHYHUWLFDODLUIORZ
GLUHFWLRQE\DGMXVWLQJWKHORXYHUVRIXSZDUGGR
ZQZDUGGLUHFWLRQ$QGWKHQKROGWZRHQGVRI
OHIWDQGULJKWORXYHUWRDGMXVWWKHKRUL]RQWDODLU
IORZ
/RXYHURIOHIWULJKWGLUHFWLRQ /RXYHURIXSZDUG
GRZQZDUGGLUHFWLRQ
'RQWLQVHUW\RXUKDQGVRUVWLFNLQWRWKHDLU
LQWDNHRURXWOHWYHQWV
2WKHUZLVHLWZLOOFDXVHDFFLGHQW
'RQWEORZWKHZLQGWRDQLPDOVDQGSODQWV
GLUHFWO\,WFDQFDXVHDEDGLQIOXHQFHWRWKHP
'RQWDSSO\WKHFROGZLQGWRWKHERG\IRUD
ORQJWLPH
,WFDQFDXVHWKHKHDOWKSUREOHPV
'RQWXVHWKHDLUFRQGLWLRQHUIRURWKHUSXUSRVHV
VXFKDVGU\LQJFORWKHVSUHVHUYLQJIRRGVHWF
6SODVKLQJZDWHURQWKHDLUFRQGLWLRQHUFDQ
FDXVHDQHOHFWULFVKRFNDQGPDOIXQFWLRQ
'RQWSODFHDVSDFHKHDWHUQHDUWKHDLU
FRQGLWLRQHU
2U&2WR[LFRVLVPD\RFFXUIRULPFRPSOHWH
EXUQLQJ

1RWLFHVIRUXVH
:RUNLQJSULQFLSOHDQGVSHFLDOIXQFWLRQVIRUFRROLQJ
3ULQFLSOH
$QWLIUHH]LQJIXQFWLRQ
:RUNLQJSULQFLSOHDQGVSHFLDOIXQFWLRQVIRUKHDWLQJ
3ULQFLSOH
'HIURVWLQJ
Air conditioner absorbs heat in the room and transmit to outdoor and discharged, so that
indoor ambient temperature decreased, its cooling capacity will increase or decrease by
outdoor ambient temperature.
If the unit is running in COOL mode and in low termperature, there will be frost formed on
the heat exchanger, when indoor heat exchanger temperature decreased below 0 , the
indoor unit microcomputer will stop compressor running and protect the unit.
ć
Air conditioner absorbs heat from outdoor and transmits to indoor, in this way to increase
room temperature. This is the heat pump heating principle, its heating capacity will be
reduced due to outdoor temperature decrease.
If outdoor temperature becomes very low, please operate with other heating equipments.
When out frost will
form on outdoor unit, that will effect the heating effect, at this time, the auto defrosting
function will act, the heat running will stop for 8-10mins.
During the auto defrosting, the fan motors of indoor unit and outdoor unit will stop.
During the defrosting, the indoor indicator flashes, the outdoor unit may emit vapor.
This is due to the defrosting, it isn't malfunction.
After defrosting finished,the heating will recover automatically.
3
door temperature is low but high humidity, after a long while running,
The climate type of this unit is according to the nameplate.
The external static pressures at which the appliance was tested should be zero Pa.

4
Notices for use
Anti-cool wind function:
In "Heat" mode, under the following three kinds of state, if indoor heat exchanger doesn't
arrive at certain temp., indoor fan will not act, in order to prevent cool wind blowing(within
2 mins):
1. Heating starts. $IWHU$XWR'HIURVW¿QLVKHG. 3.Heating under the low temperature.
The operating temperature range (outdoor temperature) for cooling unit is 18ć~43ć˗
for cooling and heating unit is -7ć~43ć.
Gentle Breeze
In the following situation, the indoor unit may blow gentle breeze, and
the guide louver rotate to a certain position:
1. In “Heat” mode, the unit turned on, the compressor doesn’t arrive the starting condition.
2. In “Heat” mode, the temperature arrive at the setting value and the compressor stop
running about 1min.
Working temperature range
Maximum cooling
Minimum cooling
Maximum heating
Minimum heating
Indoor sideDB/WB(oC) Outdoor sideDB/WB(
35/24
21/15
24/---
20/---
43/-
21/-
21/15.5
-7/-

1DPHVDQGIXQFWLRQVRIHDFKSDUW
Ņ
ň
Ń
ʼn
Ł
ł
ņ
Ņ
ł
ň
ʼn
ń
Ň
Ń
Ł
,QGRRUXQLW
$LULQ
$LURXW
2XWGRRUXQLW
:LUHOHVV
UHPRWHFRQWURO
$LULQ
$LURXW
3RZHUFDEOH
5HPRWHFRQWURO
)URQWSDQHO
)LOWHU
*XLGHORXYHU
:DOOSLSH
%LQGWDSH
&RQQHFWLRQZLUH
'UDLQDJHSLSH
ńņ
Ň
˖&RRO
˖'U\
˖)DQ
˖+HDW
˖6HW WHPS
˖5XQ
7KH SDWWHUQ LQ GLVSOD\HU˖

ƽPress this button to select LIGHT on or o
in the displayer. When the LIGHT o n is
LIGHT button
LIGHT
set,the icon will be displayed and the
indicator light in the displayer will be on.
When the LIGHT o is set, the icon will
not be display ed and the indicator light
in the displayer will be o.
Names and functions of wireless remote control
ƽ
ON/OFF button
ON/OFF
Remote control
Signal transmitter
AUTO
COOL
DRY
FAN
HEAT
(only for cooling and heating unit)
Don't drop or throw the remote control; Don't let any liquid in the remote control and
Note: Be sure that there are no obstructions between receiver and remote controller ;
Middle fan
put the remote control directly under the sunlight or any place where is very hot.
ƽPress this button, Auto, Cool,Dry, Fan,
Heat mode can be selected circularly.
MODE button
MODE
Auto mode is default while power on.
Under Auto mode,the temperature will not
be displayed; Under Heat mode, the
initial value is 28 ;Under other
modes, the initial value is 25 .
ƽPress this button, Sleep On and Sleep
O can be selected. After powered on,Sleep
SLEEP button
SLEEP
O is defaulted. After the unit is turned
o, the Sleep function is canceled. After
Sleep function set up, the signal of Sleep
will display. In this mode, the time of timer
can be adjusted. Under Fan and Auto
modes, this function is not available.
ƽPress this button, Auto, Low, Middle, High
speed can be circularly selected. After
FAN button
FAN
powered on,Auto fan speed is default.
Under Dehumidify mode, Low fan speed
only can be set up.
Low fan
High fan
ƽPress this button, the clock can be set up,
signal blink and display.Within 5
CLOCK button
CLOCK
seconds, the value can be adjusted by
pressing + or - button, if continuously
press this button for 2 seconds above,
in every 0.5 seconds, the value on ten place
of Minute will be increased 1. During blinking,
repress the Clock button, signal will be
constantly displayed and it denotes the
setting succeeded. After powered on, 12:00
is defaulted to display and signal will
be displayed. If there is signal be
value is Clock value, otherwise is Timer value.
displayed that denotes the current time
Operation of wireless remote control
(oF)
82
(oF)
77
Press this button, the unit will be turned on,
press it once more, the unit will be turned
o. When turning on or turning o the unit,
the Timer, Sleep function will be canceled,
but the presetting time is still remained.
adjustable, low fan speed is imperative,
Note:Under the Dry mode, the fan speed isn't
adjustable, low fan speed is imperative,
but when operating this button, the wireless
6

Remote control
ƽ
X-FAN button
X-FAN
ƽ
+ button
+
ƽPresetting temperature can be decreased.
Press this button, the temperature can be
- button
-
set up, continuously press this button
and hold for two seconds, the relative
contents can quickly change, until unhold
this button and send the order that the
(oF) signal will be displayed all the time.
The temperature adjustment is unav-
ailable under the Auto mode, but the order
can be sent by if pressing this button.
Names and functions of wireless remote control
Operation of wireless remote control
PressingX-FAN button in COOL or DRY
mode,the icon is displayed and the
even though you have turned o the unit.
After energization, X-FAN OFF is defaulted.
X-FAN is not available in AUTO,FAN or
HEAT mode.
Note:X-FAN (or BLOW:same function,
dierent name)
indoor fan will continue operation for
10 minute in order to dry the indoor unit
In Cool or Heat mode, press this button
can turn on or turn o the Turbo function.
After turned on the Turbo function, its
signal will be displayed. When switching
the mode or changing fan speed, this
function will be canceled automatically.
For presetting temperature increasing.
Press this button,can set up the temperature,
when unit is on . Continuously
press and
hold this button for more than 2 seconds,
the corresponding contents will be
changed
rapidly, until unpress the button
laying all along. In Auto mode, the temp-
erature can not be set up, but operate this
button can send the signal. Centigrade
setting range :16-30; Fahrenheit scale
setting range 61-86.
then send the information, is disp-
with multifunction; For some function, which the model dosen't have, if press the
corresponding button on the remote controller that the unit will keep the original
running
status.
Notice: This is a general use remote controller, it could be used for the air conditioners
7
ƽPress this button, could select displaying
the indoor setting temperature or indoor
ambient temperature.When the indoor unit
rstly power on it will display the setting
temperature, if the temperature's displaying
status is changed from other status to" ",
displays the ambient temperature, 5s later
or within 5s, it receives other remote control
signal that will return to display the setting
temperature. if the users haven't set up the
temperature displaying status,that will
display the setting temperature.
TEMP button
TEMP
(This function is applicable to partial of models)
ƽ
TURBO button
TURBO

OFF
This is an universal use remote controller. If
remote controller sends the following three
kinds of status that the swing status of main
unit will be:
When the guide louver start to swing up and
down, if turn o the Swing, the air guide louver
will stop at current position.
which indicates the guide louver swings up
and down between that all ve positions.
ƽPress this button, to set up swing angle,
which circularly changes as below:
SWING UP AND DOWN BUTTON
TIMER ON TIMER ON BUTTON
Time r On setting : Signa l “ON ” wil l blin k
an d display , signa l wil l conceal , the
numerica l sectio n wil l becom e the time r
on settin g status . Durin g 5 second s blink ,
by pressin g ˇor ˉbutto n to adjus t the
time valu e of numerica l section , ever y
pres s o f tha t button , the valu e wil l be
increase d or decrease d 1 minute . Hol d
pressin g ˇor ˉbutton , 2 second s later ,
it quickl y change , the wa y of chang e is :
Durin g the initia l 2.5 seconds , ten number s
chang e in the on e plac e of minute , then
the one plac e is constant , ten number s
chang e in the ten s plac e of minut e at 2.5
second s spee d an d carry . Durin g 5s blink ,
pres s the Time r button , the time r settin g
succeeds . Th e Time r On ha s bee n se t up ,
repres s the time r On button , the Time r
On wil l be canceled . Befor e settin g the
Timer , pleas e adjus t the Cloc k to the
curren t actua l time .
TIMER OFF BUTTON
Once press this key to enter into
TIMER OFF setup, in which case
the TIMER OFF icon will blink.
The method of setting is the same
TIMER OFF
as for TIMER ON.
ƽ
Remote control
Names and functions of wireless remote control
Operation of wireless remote control
with multifunction; For some function, which the model dosen't have, if press the
corresponding button on the remote controller that the unit will keep the original
running status.
Notice: This is a general use remote controller, it could be used for the air conditioners
ƽ
8

This function indicates that moisture on evaporator of indoor unit will be blowed after the unit
About X-FAN function
is stopped to avoid mould.
1. Having set X-FAN function on: After turning off the unit by pressing ON/OFF button
indoor fan will continue running for about 10 min. at low speed. In this period, press
X-FAN to stop indoor fan directly.
2. Having set X-FAN function off: After turning off the unit by pressing ON/OFF button, the
button complete unit will be off directly.
Operation of wireless remote control
Introduction for special function
1. After powered on, press ON/OFF button, the unit will start to run.(Note: When
it is powered off, the guide louver of main unit will close automatically.)
2. Press MODE button, select desired running mode.
3. Pressing +or - button, to set the desired temperature. (It is unnecessary
to set the temp. at AUTO mode.)
4. Pressing FAN button, set fan speed, can select AUTO FAN, LOW, MID
and HIGH.
5. Pressing button, to select the swing.
1. Press SLEEP button, to set sleep.
2. Press TIMER ON and TIMER OFF button, can set the scheduled timer on
3. Press LIGHT button, to control the on and off of the displaying part of the
unit (This function may be not available for some units).
4. Press TURBO button, can realize the ON and OFF of TURBO function.
or timer off.
Guide for operation- General operation
Guide for operation- Optional operation
When AUTO RUN mode is selected, the setting temperature will not be displayed on the
LCD, the unit will be in accordance with the room temp. automatically to select the suitable
running method and to make ambient comfortable.
About turbo function
If start this function, the unit will run at super-high fan speed to cool or heat quickly so that
the ambient temp. approachs the preset temp. as soon as possible.
About AUTO RUN
9

Press +and - buttons simultaneously to lock or unlock the keyboard. If the remote controller
is locked, the icon
flicker for three times. If the keyboard is unlocked, the mark will disappear.
1. Press swing up and down button continuously more than 2s,the main unit will swing back
and forth from up to down, and then loosen the button, the unit will stop swinging and present
position of guide louver will be kept immediately.
2. Under swing up and down mode, when the status is switched from off to , if press this
button again 2s later, status will switch to off status directly; if press this button again
within 2s,the change of swing status will also depend on the circulation sequence stated above.
About switch between Fahrenheit and Centigrade
Under status of unit off, press MODE and - buttons simultaneously to switch ćand
ƾ
ƾ
ƾAbout swing up and down
About lock
will be displayed on it, in which case, press any button, the mark will
Operation of wireless remote control
Changing batteries and notices
10
ƾ
ƽ
ƽ
ƽ
ƽ
ƽ
Slightly to press the place with , along the arrowhead direction to push the back cover of wireless
remote control. (As show in figure)
Take out the old batteries. (As show in figure)
Insert two new AAA1.5V dry batteries, and pay attention to the polarity.
(As show in figure)
Attach the back cover of wireless remote control. (As show in figure)
When changing the batteries, do not use the old or different batteries,
If the wireless remote control will not be used for a long time, please
otherwise, it can cause the malfunction of the wireless remote control.
take them out, and don't let the leakage liquid damage the wireless
remote control.
The operation should be in its receiving range.
It should be placed at where is 1m away from the TV set or stereo sound sets.
If the wireless remote control can not operate normally, please take them out,
after 30s later and reinsert, if they cannot normally run, please change them.
Sketch map for
changing batteries
NOTE:

If the wireless remote control is lost
or broken, please use the manual switch
Auto mode, but the temperature and fan
button. At this time, the unit will run at the
To open the panel, the manual switch
is on the displayer box.
It's a special selective buttonfor the users ,who are not accustomed to the
light at sleeping.
Get the displayer indicator light on: When setting the light function,the mark will
pressing this button. In which case,the diss-
player indicator light will be on if the AC receives
Get the displayer indicator light off: If cancel the light function,the mark will disap-
per on the remote controller screen by pressing this
button. In which case, the displayer indicator light will
be off if the AC receives this signal.
Displayer indicator light control of indoor unit
ƽ
ƽ
display on the remote controller screen by
this signal.
Emergency operation
Emergency operation
speed cannot be changed. The operation
was shown as below:
Turn on the unit: At unit turned off, press
the button,the unit will run at Auto mode
immediately.The microcomputer will accord
ƽ
to the indoor temperature to select (Cooling,
Heating, Fan) and obtain the comfortable effect.
Turn off the unit: At unit turned on, press the
button, the unit will stop working.
ƽ
Manual switch
Fig.3
11

ć
ƽ
ƽ
ƽ
ć
ĸCleanWKHDLUILOWHU
Ĺ
ķ
D
E
Clean and care
&DXWLRQ
7XUQSRZHURIIDQGSXOORXWWKHSRZHUSOXJEHIRUHFOHDQLQJDLUFRQGLWLRQHURULWPD\FDXVH electric
VKRFN
1HYHUVSULQNOHZDWHURQWKHLQGRRUXQLWDQGWKHRXWGRRUXQLWIRUFOHDQLQJEHFDXVHLWFDQFDXVH an
HOHFWULFVKRFN
9RODWLOHOLTXLGHJWKLQQHURUJDVROLQHZLOOGDPDJHWKHDLUFRQGLWLRQHU6RZLSHWKHXQLWVZLWKD
GU\VRIWFORWKRUDFORWKVOLJKWO\PRLVWHQHGZLWKZDWHURUFOHDQVHU
&OHDQWKHIURQWSDQHO
&OHDQWKHDLUILOWHU5HFRPPHQGHGRQFHHYHU\WKUHHPRQWKV
127(,IGXVWLVPXFKPRUHDURXQGWKHDLUFRQGLWLRQHUWKHDLUILOWHUVVKRXOGEHFOHDQHGPDQ\WLPHV
$IWHUWDNLQJRIIWKHILOWHUGRQWWRXFKWKHILQRILQGRRUXQLWLQRUGHUWRDYRLGKXUW\RXUILQJHUV
7DNHGRZQWKHDLUILOWHU
$WWKHVORWRIVXUIDFHSDQHOWRRSHQDQDQJOHSXOOWKHDLUILOWHU
GRZQZDUGDQGWDNHLWRXWSOHDVHVHHWKH)LJDE
7RFOHDQWKHGXVWDGKHULQJWRWKHILOWHUV\RXFDQHLWKHU
XVHDYDFXXPFOHDQHURUZDVKWKHPZLWKZDUPZDWHU
WKHZDWHUZLWKWKHQHXWUDOGHWHUJHQWVKRXOGEHORZ
GHJUHHDQGGU\LWLQWKHVKDGH
127(1HYHUXVHZDWHUDERYHWRFOHDQRULWFDQ
FDXVHGHIRUPDWLRQRUGLVFRORUDWLRQ1HYHUSDUFKLWE\
ILUHRUFDQFDXVHDILUHRUGHIRUPDWLRQ
,QVHUWWKHDLUILOWHU
5HLQVHUWWKHILOWHUVDORQJWKHGLUHFWLRQRIDUURZKHDGDQG
WKHQWRFRYHUWKHFRYHUDQGFODVSLW
)LJ
:KHQFOHDQLQJWKHIURQWSDQHOSOHDVHGLSWKHFORWKLQWRWKHZDWHUWHPSHUDWXUHRIEHORZthen to dry
WKHFORWKDQGZLSHWKHGLUW\SDUW
1RWH3OHDVHGRQRWWRLPPHUVHWKHIURQWSDQHOLQZDWHUGXHWRWKHUHDUHPLFURFRPSXWHUFRPSRQHQWV and
FLUFXLWGLDJUDPVRQWKHIURQWSDQHO
12

ķ%HVXUHWKDWQRWKLQJREVWUXFWVWKHDLURXWOHWDQGLQWDNHYHQWV
ĸ
Ĺ&KHFNWKDWZKHWKHUWKHbatteriesRIDLUFRQGLWLRQHUDUH
FKDQJHGRUQRW
ĺ&KHFNWKDWZKHWKHUWKHLQVWDOODWLRQVWDQGRIWKHRXWGRRU
XQLWLVGDPDJHGRUQRW,IGDPDJHGSOHDVHFRQWDFWWKHGHDOHU
ķ
ĸ
Ĺ
ĺ
Ļ
Clean and care
&KHFNEHIRUHXVH
&KHFNWKDWZKHWKHUJURXQGZLUHLVSURSHUO\FRQQHFWHGRUQRW
0DLQWDLQDIWHUXVH
7XUQPDLQSRZHURII
&OHDQWKHILOWHUDQGLQGRRUDQGRXWGRRUXQLWVERGLHV
&OHDUGXVWDQGREVWUXFWLRQVIURPWKHRXWGRRUXQLW
5HSDLQWWKHUXELJLQRXVSODFHRQWKHRXWGRRUXQLWWRSUHYHQWLWIURP spreading.
$GRSWWKHVSHFLDOVKLHOGWRFRYHUWKHRXWGRRUXQLWDYRLGWKHUDLQZDWHUGXVWHQWHULQWR
WKHXQLWDQGJHWUXVW
13

2QFHWKHDLUFRQGLWLRQHULVVWRSSHGLWZLOO
QRWRSHUDWHLQDSSUR[LPDWHO\PLQXWHVWR
SURWHFWLWVHOI
ƽ
ƽ
ƽ
ƽ
ƽ
ƽ
Troubleshooting
&$87,21
'RQWDWWHPSWWRUHSDLUWKHDLUFRQGLWLRQHUE\\RXUVHOILWFDQFDXVHDQHOHFWULFVKRFNRU
ILUH3OHDVHFKHFNWKHIROORZLQJLWHPVEHIRUHDVNLQJIRUUHSDLULWFDQVDYH\RXUWLPHDQG
PRQH\
3KHQRPHQRQ 7URXEOHVKRRWLQJ
1RWRSHUDWHLPPHGLDWHO\ZKHQWKHDLU
FRQGLWLRQHULVUHVWDUWHG
7KHUHVXQXVXDOVPHOOEORZLQJIURPWKHRXWOHW
DIWHURSHUDWLRQLVVWDUWHG
7KHXQLWKDVQRSHFXOLDUVPHOOE\LWVHOI,IKDV
WKDWLVGXHWRWKHVPHOODFFXPXODWHGLQWKH
DPELHQW
6ROXWLRQPHWKRG&OHDQLQJWKHILOWHU
,ISUREOHPVWLOOKDVVRQHHGWRFOHDQDLU
FRQGLWLRQHU3OHDVHFRQWDFWZLWKthe authorized
PDLQWHQDQFHFHQWHU
6RXQGRIZDWHUIORZFDQEHKHDUGGXULQJ
WKHRSHUDWLRQ
7KHDLUFRQGLWLRQHULVVWDUWHGZKHQLWLV
UXQQLQJWKHFRPSUHVVRUVWDUWHGRUVWRSSHG
UXQQLQJRUWKHXQLWLVVWRSSHGVRPHWLPHV
WKHUHLVVZRRVKRUJXUJOHWKHVRXQGLVGXH
WRUHIULJHUDQWIORZLQJWKH\DUHQRWPDOIXQFWL
RQV
,Q&22/PRGHVRPHWLPHVWKHPLVWHPLWWHG
IURPWKHDLURXWOHWYHQW :KHQWKHLQGRRUWHPSHUDWXUHDQGKXPLGLW\
DUHYHU\KLJKWKLVSKHQRPHQRQZRXOG
KDSSHQ7KLVLVFDXVHGE\WKHURRPDLULV
VZLIWO\FRROHGGRZQ$IWHUUXQQLQJIRUDZKLOH
LQGRRUWHPSHUDWXUHDQGKXPLGLW\ZLOOIDOO
GRZQWKHPLVWZLOOGLHDZD\
&UHDNLQJQRLVHFDQEHKHDUGZKHQVWDUWRU
VWRSWKHXQLW 7KLVLVFDXVHGE\WKHGHIRUPDWLRQRISODVWLF
GXHWRWKHFKDQJHVRIWHPSHUDWXUH
:DLWLQJ
14

ƽ
ƽ
ƽ
ƽ
ƽ
ƽ
ƽ
ƽ
ƽ
ƽ
ƽ
ƽ
ƽ
ƽ
ƽ
ƽ
ƽ
ƽ
ƽ
ƽ
ƽ
ƽ
7URXEOHVKRRWLQJ
3KHQRPHQRQ 7URXEOHVKRRWLQJ
7KHXQLWFDQQRWUXQ.+DVWKHSRZHUEHHQVKXWGRZQ"
,VSRZHUSOXJORRVHG"
,VWKHFLUFXLWSURWHFWLRQGHYLFHWULSSHGRIIRUQRW"
,VYROWDJHKLJKHURUORZHU"
7HVWHGE\SURIHVVLRQDOV
,VWKH7,0(5FRUUHFWO\XVHG"
&RROLQJ+HDWLQJHIILFLHQF\LVQRWJRRG ,V7HPSVHWWLQJVXLWDEOH"
:HUHLQOHWDQGRXWOHWYHQWVREVWUXFWHG"
,VILOWHUGLUW\"
$UHWKHZLQGRZVDQGGRRUVFORWKHG"
'LG)DQVSHHGVHWDWORZVSHHG"
,VWKHUHDQ\KHDWVRXUFHVLQWKHURRP"
:LUHOHVVUHPRWHFRQWUROLVQRWDYDLODEOH.7KHXQLWLVLQWHUIHUHGE\DEQRUPDORUIUHTXHQW
IXQFWLRQVVZLWFKRYHURFFDVLRQDOO\WKHFRQWUROOHU
FDQQRWRSHUDWH$WWKLVWLPH\RXQHHGWRSXOORXW
RIWKHSOXJDQGUHLQVHUWLW
,VLWLQLWVUHFHLYLQJUDQJH"2UREVWUXFWHG"
7RFKHFNWKHYROWDJHLQZLUHOHVVUHPRWHFRQWURO inside
LVFKDUJHGRWKHUZLVHWRUHSODFHWKHEDWWHULHV
:KHWKHUWKHZLUHOHVVUHPRWHFRQWUROLVGDPDJHG
,IZDWHUOHDNDJHLQWKHURRP.7KHDLUKXPLGLW\LVRQWKHKLJKVLGH
&RQGHQVLQJZDWHURYHUIORZHG
7KHFRQQHFWLRQSRVLWLRQRILQGRRUXQLWGUDLQDJH
SLSHLVORRVHG
,IZDWHUOHDNDJHLQRXWGRRUXQLW.:KHQWKHXQLWLVUXQQLQJLQ&22/PRGHWKH pipe
DQGFRQQHFWLRQRISLSHZRXOGEHFRQGHQVHG due
WRWKHZDWHUFRROHGGRZQ
:KHQWKHXQLWLVUXQQLQJLQ$XWR'HIURVWLQJ mode
WKHLFHWKDZHGDQGIORZHGRXW
:KHQWKHXQLWLVUXQQLQJLQ+($7PRGHWKH water
DGKHUHGRQKHDWH[FKDQJHUGULSSHGRII
1RLVHIURPLQGRRUXQLWHPLWWHG 7KHVRXQGRIIDQRUFRPSUHVVRUUHOD\LVVZLWFKLQJ
RQRURII
:KHQWKHGHIURVWLQJLVVWDUWHGRUVWRSUXQQLQJ
LWZLOOVRXQG7KDWLVGXHWRWKHUHIULJHUDQWIORZHG
WRWKHUHYHUVHGLUHFWLRQ
%UHDNLQJRII
15

ƽ
ƽ
ƽ
ƽ
7URXEOHVKRRWLQJ
3KHQRPHQRQ 7URXEOHVKRRWLQJ
,QGRRUXQLWFDQQRWGHOLYHUDLU.
0RLVWXUHRQDLURXWOHWYHQW.,IXQLWLVUXQQLQJXQGHUWKHKLJKKXPLGLW\IRU
DORQJWLPHWKHPRLVWXUHZLOOEHFRQGHQVHG
RQWKHDLURXWOHWJULOODQGGULSRII
,PPHGLDWHO\VWRSDOORSHUDWLRQVDQGSOXJRXWFRQWDFW
WKHGHDOHULQIROORZLQJVLWXDWLRQV
7KHUHLVKDUVKVRXQGGXULQJRSHUDWLRQ.
7KHWHUULEOHRGRUVHPLWWHGGXULQJRSHUDWLRQ.
:DWHULVOHDNLQJLQWKHURRP.
$LUVZLWFKRUSURWHFWLRQVZLWFKRIWHQEUHDNV.
&DUHOHVV\VSODVKZDWHURUVRPHWKLQJLQWRXQLW.
7KHUHLVDQDEQRUPDOKHDWLQSRZHUVXSSO\FRUG
DQGSRZHUSOXJ
6WRSUXQQLQJDQGSXOORXWRIWKHSOXJ
,Q+($7PRGHZKHQWKHWHPSHUDWXUHRI indoor
KHDWH[FKDQJHULVYHU\ORZWKDW will stop deliver
DLULQRUGHUWRSUHYHQWFRRO air. (Within 2min)
,Q+($7PRGHZKHQWKHRXWGRRUWHPSHUDWXUH
LVORZRUKLJKKXPLGLW\WKHUHDUHPXFKIURVWEH
IRUPHGRQWKHRXWGRRUKHDWH[FKDQJHUWKDWWKH
XQLWZLOODXWRPDWLFDOO\GHIURVWLQGRRUXQLWVWRS
EORZLQJDLUIRUPLQ
'XULQJWKHGHIURVWLQJWKHUHLVZDWHUIORZLQJRXW
RUYDSRUEHSURGXFHG
,QGHKXPLGLI\LQJPRGHVRPHWLPHVLQGRRU fan will
VWRSLQRUGHUWRDYRLGFRQGHQVLQJ water be vapo-
rized DJDLQUHVWUDLQWHPSHUDWXUH rising.
16

6HOHFWDSRVLWLRQZKHUHWKHFRQGHQVLQJZDWHUFDQEHHDVLO\GUDLQHGRXWDQGWKHSODFH
LVHDVLO\FRQQHFWHGIRURXWGRRUXQLW
&DQVHOHFWWKHSODFHZKHUHLVVWURQJHQRXJKWRZLWKVWDQGWKHIXOOZHLJKWDQGYLEUDWLRQRI
WKHXQLW$QGZLOOQRWLQFUHDVHWKHQRLVH
Make sure that the indoor unit installation should accord with installation dimension
diagram requirements.
6HOHFWDORFDWLRQIURPZKLFKQRLVHDQGRXWIORZDLUHPLWWHGE\XQLWZLOOQRWLQFRQYHQLHQFH
QHLJKERUVDQLPDOVSODQWV
6HOHFWDORFDWLRQZKHUHWKHUHVKRXOGEHVXIILFLHQWYHQWLODWLRQ
6HOHFWDORFDWLRQZKHUHWKHUHVKRXOGEHQRREVWUXFWLRQVFRYHUWKHLQOHWDQGRXWOHWYHQW
7KHORFDWLRQVKRXOGEHDEOHWRZLWKVWDQGWKHIXOOZHLJKWDQGYLEUDWLRQRIWKHRXWGRRUXQLW
DQGSHUPLWVDIHLQVWDOODWLRQ
6HOHFWDGU\SODFHEXWGRQRWH[SRVHXQGHUWKHGLUHFWVXQOLJKWRUVWURQJZLQG
6HOHFWDORFDWLRQZKHUHWKHFKLOGUHQFDQQRWUHDFK
7KHXQLWLQVWDOODWLRQZRUNPXVWEHGRQHE\TXDOLILHGSHUVRQQHODFFRUGLQJWRWKHORFDO
UXOHVDQGWKLVPDQXDO
%HIRUHLQVWDOODWLQJSOHDVHFRQWDFWZLWKORFDODXWKRUL]HGPDLQWHQDQFHFHQWHULIXQLWLV
QRWLQVWDOOHGE\WKHDXWKRUL]HGPDLQWHQDQFHFHQWHUWKHPDOIXQFWLRQPD\QRWVROYHG
GXHWRGLVFRPPRGLRXVFRQWDFWV
:KHQUHPRYLQJWKHXQLWWRWKHRWKHUSODFHSOHDVHILUVWO\FRQWDFWZLWKWKHDXWKRUL]HG
0DLQWHQDQFH&HQWHULQWKHORFDODUHD
ƽ
ƽ
ƽ
ƽ
ƽ
ƽ
1RWLFHVIRULQVWDOODWLRQ
,PSRUWDQW1RWLFHV
%DVLF5HTXLUHPHQWV)RU,QVWDOODWLRQ3RVLWLRQ
,QVWDOOLQWKHIROORZLQJSODFHPD\FDXVHPDOIXQFWLRQ,ILWLVXQDYRLGDEOHFRQWDFWZLWK
VHUYLFHFHQWHUSOHDVH
3ODFHZKHUHVWURQJKHDWVRXUFHVYDSRUVIODPPDEOHJDVRUYRODWLOHREMeFWDUHHPLWWHG
3ODFHZKHUHKLJKIUHTXHQF\ZDYHVDUHJHQHUDWHGE\UDGLRHTXLSPHQWZHOGHUVDQG
PHGLFDOHTXLSPHQW
3ODFHZKHUHDORWRIVDOLQLWLHVVXFKDVFRDVWH[LVWV
3ODFHZKHUHWKHRLOPDFKLQHRLOLVFRQWDLQHGLQWKHDLU
3ODFHZKHUHDVXOIXUHGJDVVXFKDVWKHKRWVSULQJ]RQHVLVJHQHUDWHG
2WKHUSODFHZLWKVSHFLDOFLUFXPVWDQFH
,QGRRU8QLW,QVWDOODWLRQ3RVLWLRQ6HOHFWLRQ
7KHDLULQOHWDQGRXWOHWYHQWVKRXOGEHIDUIURPWKHREVWUXFWLRQPDNHVXUHWKDWWKHDLU
FDQEHEORZQWKURXJKWKHZKROHURRP
%HVXUHWROHDYHHQRXJKVSDFHWRDOORZDFFHVVIRUURXWLQHPDLQWHQDQFH7KHKHLJKWRIWKH
LQVWDOOHGORFDWLRQVKRXOGEH5FPRUPRUHIURPWKHIORRU
6HOHFWDSODFHDERXWPRUPRUHDZD\IURP79VHWRUDQ\RWKHUHOHFWULFDSSOLDQFHV
6HOHFWDSODFHZKHUHWKHILOWHUFDQEHHDVLO\WDNHQRXW
2XWGRRU8QLW,QVWDOODWLRQ3RVLWLRQ6HOHFWLRQ
0DNHVXUHWKDWWKHRXWGRRUXQLWLQVWDOODWLRQGLPHQVLRQVKRXOGDFFRUGZLWKLQVWDOODWLRQ
GLPHQVLRQGLDJUDPFRQYHQLHQWIRUPDLQWHQDQFHUHSDLU
7KHKHLJKWGLIIHUHQFHRIFRQQHFWLQJWKHWXELQJZLWKLQPWKHOHQJWKRIFRQQHFWLQJWKH
WXELQJZLWKLQP
6HOHFWDSODFHZKHUHLWLVRXWRIUHDFKIRUWKHFKLOGUHQ
6HOHFWDSODFHZKHUHZLOOQRWEORFNWKHSDVVDJHDQGGRQRWLQIOXHQFHWKHFLW\DSSHDUDQFH
Do not use the unit in the immediate surroundings of a laundry a bath a shower or a
swimming pool.
17
Table of contents
Other Beko Air Conditioner manuals

Beko
Beko BS 107 CN User manual

Beko
Beko BEVPA 090 User manual

Beko
Beko BEWPI 090 User manual

Beko
Beko Multi Type Air Conditioner User manual
Beko
Beko BRVPF 090 User manual

Beko
Beko BA 110 AC User manual

Beko
Beko EFE7030W User manual

Beko
Beko BBFDA 070 User manual

Beko
Beko BEVPI 120 User manual

Beko
Beko BINA 091 User manual