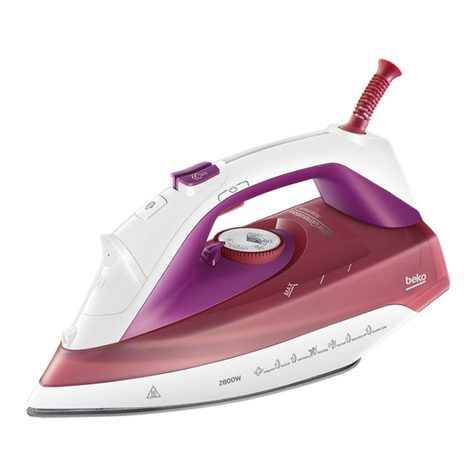
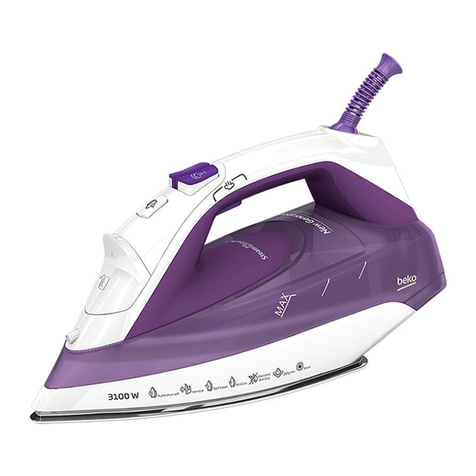
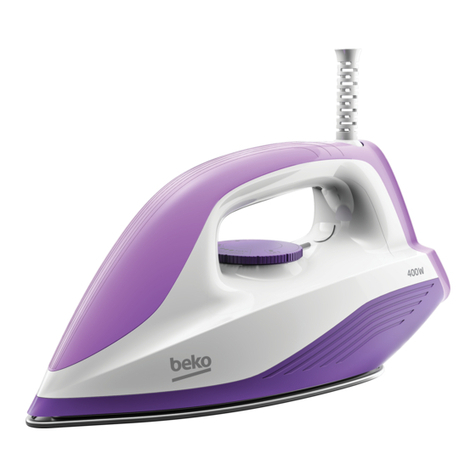
Beko BKK 2304 User manual

www.beko.com
BKK 2304
01M-8939103200-2316-01
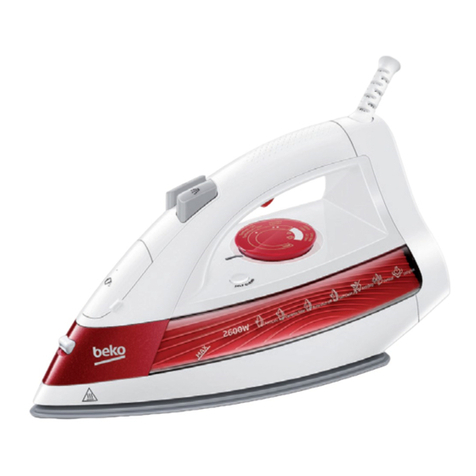
Steam Iron
User Manual
EN TR FR RU

Please read this user manual first!
Dear Customer,
Thank you for prefering a Beko product.We hope that you get the best results
from your product which has been manufactured with high quality and state-
of-the-art technology. Therefore, please read this entire user manual and all
other accompanying documents carefully before using the product and keep
it as a reference for future use. If you handover the product to someone else,
give the user manual as well. Follow all warnings and information in the user
manual.
Explanation of symbols
Throughout this user manual the following symbols are used:
CImportant information or useful hints
about usage.
AWarning for dangerous situations with
regard to life and property.
BWarning for electric shock.
Warning for hot surfaces.
This product has been produced in environmentally friendly, modern facilities
Complies with the WEEE Regulation. Does not contain PCB.

3 / 70 EN
Iron / User Manual
CONTENTS
1 Important instructions for
safety and environment 4-6
1.1 General safety . . . . . . . . . . . . . . . . . . . . . . . . 4
1.2 Compliance with the Waste Electrical and
Electronic Equipment Regulation and disposal of
the appliance. . . . . . . . . . . . . . . . . . . . . . . . . . . . 6
1.3 Packaging information . . . . . . . . . . . . . . . . . . 6
2 Your steam iron 7
2.1 Overview . . . . . . . . . . . . . . . . . . . . . . . . . . . . 7
2.1.1 Controls and parts . . . . . . . . . . . . . . . . . . . . 7
2.1.2. Technical data. . . . . . . . . . . . . . . . . . . . . . . 7
3 Preparation 8-10
3.1 Initial use . . . . . . . . . . . . . . . . . . . . . . . . . . . . 8
3.2 Energy saving . . . . . . . . . . . . . . . . . . . . . . . . 9
3.3 Ironing tips . . . . . . . . . . . . . . . . . . . . . . . . . . 9
4 Operation of the Appliance 11-13
4.1 Filling the water tank. . . . . . . . . . . . . . . . . . . 11
4.2 Setting the temperature. . . . . . . . . . . . . . . . . 11
4.3 Steam ironing. . . . . . . . . . . . . . . . . . . . . . . . 12
4.4 Dry ironing . . . . . . . . . . . . . . . . . . . . . . . . . . 12
4.5 Shock steam. . . . . . . . . . . . . . . . . . . . . . . . . 12
4.6 Water spray . . . . . . . . . . . . . . . . . . . . . . . . . 13
4.7 Vertical steam. . . . . . . . . . . . . . . . . . . . . . . . 13
5 Cleaning and maintenance 14-15
5.1 Cleaning. . . . . . . . . . . . . . . . . . . . . . . . . . . . 14
5.2 Lime removing feature (Self-Clean) . . . . . . . . 14
5.3 Lime protection system (Anti-Calc). . . . . . . . . 15
5.4 Storage . . . . . . . . . . . . . . . . . . . . . . . . . . . . 15
6 Troubleshooting 16

4 / 70 EN Iron / User Manual
This section includes safety instructions that helps you avoid
physical injuries or economic damages.
The warranty shall terminate in case of incompliance to the
instructions.
1.1 General safety
•This appliance is built in compliance with the
international safety standards.
•This appliance can be used by children aged from 8 years
and above and persons with reduced physical, sensory or
mental capabilities or lack of experience and knowledge if
they have been given supervision or instruction concerning
use of the appliance in a safe way and understand the
hazards involved. Children shall not play with the appliance.
Cleaning and user maintenance shall not be made by
children without supervision.
•Please do not leave the appliance unsupervised when
plugged in.
•Unplug the appliance before filling its water tank with
water.
•Use and keep the appliance on a stable surface.
1 Important instructions for safety and environment

5 / 70 EN
Iron / User Manual
•When placing the iron on its stand, ensure that the surface
on which the stand is placed is stable.
•Contact an authorized service if the appliance is dropped
on the floor, leaking or damaged otherwise. Do not use the
appliance until it is repaired.
•Keep children at 8 or below away from the appliance and
its power cord when used or left to cool down.
•The appliance is not intended for outdoor use.
•Use genuine parts or the parts recommended by the
Manufacturer only.
•Do not disassemble the appliance.
•The electric power supply should fit the specifications
indicated on the label.
•The mains should be equipped and protected with a
minimum 16 A fuse.
•Use the appliance on an earthed socket.
•Do not use the appliance with an external extension cord.
•Do not pull the cord to unplug the appliance.
•Unplug the appliance before cleaning.
•Do not wind the cord around appliance.
•Avoid touching the plug if your hands are moist or wet
when the appliance is plugged in.
1 Important instructions for safety and environment

6 / 70 EN Iron / User Manual
•If the cord is damaged, it must be replaced by
authorized service or similarly qualified persons in order
to avoid a hazard.
•The soleplate of the appliance may overheat. Contacting
with hot surfaces may cause burns.
•Do not use the appliance near or around explosive or
inflammable environments or materials.
•Keep packaging materials away from children.
1.2 Compliance with the Waste Electrical and Electronic
Equipment Regulation and disposal of the appliance.
This product do not include any hazardous and/or prohibited materials
defined in the Waste Electrical and Electronic Equipment Regulation
issued by the Ministry of Environment and Urban Planning. Complies
with the Waste Electrical and Electronic Equipment Regulation. This
product is manufactured with high quality components and materials
that can be recycled and reused. For this reason, do not dispose of this
product together with domestic or other wastes. Instead, leave the appliance
in a recycling collection point designed for electric and electronic equipments.
Ask the local authority about such collection points. You can contribute
protection of the environment and natural resources by delivering used
electronic products for recycling.
1.3 Packaging information
The packaging is produced from recyclable materials in accordance
with the national legislation. Do not dispose of packaging wastes
together with domestic or other type of wastes; leave them to the
packaging collection points specified by the local authority.
1 Important instructions for safety and environment

7 / 70 EN
Iron / User Manual
2.1 Overview
The values which are declared in the markings affixed on your product or the other printed documents supplied with
it represent the values which were obtained in the laboratories pursuant to the pertinent standards. These values
may vary according to the usage of the appliance and ambient conditions.
2 Your steam iron
2.1.1 Controls and parts
1- Power cord
2- Thermostat warning light
3- Temperature setting dial
4- Soleplate
5- Water spray nozzle
6- Water refill lid
7- Steam setting and self clean knob
8- Shock steam button
9- Water spray button
2.1.2 Technical data
Voltage : 220-240V~, 50/60 Hz
Power consumption: 1800-2200 W
Isolation class : I
Constant steam amount : 25 g/min
Shock steam amount : 70 g/min
Thermostat heat setting :Yes
Dry Ironing :Yes
Shock steam :Yes
Water spray :Yes
Anti-drip :Yes
Thermic fuse :Yes
Vertical steaming :Yes
Self-Clean function :Yes
Anti Calc :Yes
1
2
3
4
5
6
7
8 9

8 / 70 EN Iron / User Manual
3.1 Initial use
1.Remove all package materials,
labels and protective foil and
dispose of them in accordance
with the applicable legal
regulations.
2.Please clean the outer parts
of the appliance as described
in the section "Cleaning and
Maintenance".
3.Place the appliance on an even,
stable, dry and non-slip surface.
C
In the first use, a light
odor may arise from
the iron. This condition
will turn to be normal
after a couple of uses.
A
WARNING: When
your iron is filled with
excessive water, it may
overflow. To avoid this,
make sure that the
level of water in the
appliance does not ex-
ceed the MAX. line.
C
In order to generate
steam, the soleplate (4)
has to rise to a certain
level of temperature. By
means of the ‘anti-drip’
feature of your iron,
water dripping from the
soleplate of the iron
shall be prevented until
the soleplate attains
the temperature re-
quired.
•If water runs out during ironing,
after unplugging, you can top up
water without waiting it to cool
down.
•Iron your garments which
require a low temperature first
and then those requiring high
temperatures. If the temperature
is reduced when the appliance
has a high temperature setting, it
might be necessary to wait for 3
to 4 minutes for the heat to come
down to the set level.
3 Preparation

9 / 70 EN
Iron / User Manual
3.2 Energy saving
To save energy:
•You should use an appropriate
temperature setting. If you
do not know the appropriate
temperature setting, start from
the lowest setting and increase
the temperature until the fabric is
ironed well.
•In order to perform a good ironing,
try to use the steam at intervals.
Using steam continuously will
cause more surplus humidity on
your products which may lead to
re-creasing of your fabric while
losing the extra humidity.
3.3 Ironing tips
•In order to learn the appropriate
ironing temperature to be used
for the garment, always read the
care label on your garment before
setting temperature.
•As the iron gets warmer in a
shorter time compared to the
time elapsing to cool it down,
synthetics, silks and other
fabrics alike should be ironed
at the beginning by using lower
temperature settings.
•If the garment is made of a
blend of different fabrics, always
start ironing by using the lowest
temperature setting first.
•Silk and other textiles which tend
to brighten must be ironed on the
reverse side. Velvets and other
lustrous fabrics must be ironed
under little pressure and in one
direction only. Always keep the
iron moving during ironing.
•Do not use the steam function
when ironing colored silk clothes.
This may cause stains.
3 Preparation

10 / 70 EN Iron / User Manual
•Garments made of 100% pure
wool can be ironed using steam.
Set the temperature setting dial
preferably to the MAX setting
and lay a dry towel between the
garment and the iron.
•Ironing wool garments can cause
them to ‘shine’. It is therefore
recommended to iron such
garments inside out.
A
WARNING: Never iron
on metal parts, such as
zippers, rivets, or me-
tal buttons as they co-
uld damage the solep-
late. Always iron around
these metal parts.
3 Preparation
11 / 70 EN
Iron / User Manual
4.1 Filling the water tank
•Always unplug the appliance.
Push the steam setting knob
(7) to left and bring to “0” (off)
position.
•Open the water refill lid (6) of the
iron and fill in water.
•Close the water refill lid (6).
•Even if you will iron your garments
without steam; water should be
available in the appliance in order
to use the water spray when you
need it.
•Do not fill the water reservoir with
perfume, vinegar, laundry starch,
lime removers or other products
or chemicals which shall facilitate
the ironing process.
•If your tap water is excessively
limy, we recommend to use a
mixture of tap water with purified
water.
4.2 Setting the
temperature
•After plugging in the iron, set
required ironing temperature by
turning the temperature setting
dial (3) to the appropriate position
(see the temperature and steam
settings table below).
•You can increase the tempera-
ture of your appliance by turning
the temperature setting dial (3)
clockwise.
When you are setting the tempera-
ture of your appliance, we recom-
mend to consider the following
table.
Fabric
Type
Temperature
Setting
Steam
Setting
Synthetic •Without
steam
Silk •Without
steam
Wool •• Steam
Cotton ••• Steam
Linen -
Jeans Max Steam
4 Operation of the Appliance

12 / 70 EN Iron / User Manual
•In order to learn the ironing tem-
perature to be used, check the
garment’s care label.
•When the thermostat warning
light (2) turns off, your iron will
have reached the desired tem-
perature.
•If you don’t know the fabric of
your garment, first iron an invis-
ible part of your garment and
determine a correct ironing tem-
perature for it.
•In order to prevent the bright
stains that may form on the syn-
thetic fabrics such as silk, iron on
the reverse side of the fabric. Do
not use the spray feature in order
to prevent the stain formation.
4.3 Steam ironing
•Pull the steam setting knob (7)
to the right or left and bring it to
steam level “1-2” as you desire.
4.4 Dry ironing
•In order to make dry ironing, you
should bring the steam setting
knob (7) to “0” (off) position.
Having water in the iron would
be advantageous; you may use
the water spray button (9) when
necessary.
4.5 Shock steam
•During ironing, in order to remove
the tenacious creases, you can
gain strong steam by pressing on
the shock steam button (8) for
3-4 times in 5-second intervals.
•When you start to iron, shock
steam may not emit in your first
couple of presses. In order to gain
shock steam, the temperature
setting dial (3) should be at •• or
a higher level.
•You can open the creased parts
of the garments with the steam
power which is obtained by press-
ing the shock steam button (8)
during steam ironing. However if
this process is maintained without
an interruption, water may also
come from the soleplate (4) along
with the steam.
4 Operation of the Appliance

13 / 70 EN
Iron / User Manual
4.6 Water spray
•Make sure there is sufficient
water in the water tank. Spray
function can be used in order
to remove tenacious creases by
pressing the water spray button
(9) during dry or steam ironing.
4.7 Vertical steam
•While the iron is in a vertical
position, by pressing the shock
steam button (8), you can remove
wrinkles and creases from your
curtains and your garments on
the hanger with the steam you
will get by pressing the shock
steam button.
A
WARNING: Never
direct the steam to the
clothes on the people
or the garments on
pets.
4 Operation of the Appliance

14 / 70 EN Iron / User Manual
5.1 Cleaning
1.Turn off and unplug the appliance
before each cleaning process.
2.Wait until your iron cools down
completely.
3.Use a slightly damp cloth to clean
the outer surface of the iron. Then
wait until it dries out completely.
4.Wipe the sediments and residues
on the soleplate with a slightly
damp cloth and soft, nonabrasive
liquid cleaner as necessary.
A
WARNING: When you
finished ironing, unplug
the appliance. Drain
the water in the tank.
You can drain the water
in the tank by opening
the refill lid (6) and tilt-
ing the iron to the front.
A
WARNING: Never
use gasoline, solvent
and abrasive cleaning
agents or hard brush to
clean this appliance.
5.2 Lime removing feature
(Self-Clean)
Use the self-clean feature once in
every 2 to 3 weeks. If the water of
your network is very hard (if lime
particles fall down from the base of
the appliance), we recommend you
to use the self-clean function more
frequently.
•Always unplug your iron.
•Fill in the water reservoir up to
Max. level.
•Do not add vinegar etc. and other
lime removing substances into the
water reservoir.
•Pull the steam setting knob (7)
to left and bring to the steamless
ironing “0” position.
•Plug in the appliance to a
grounded outlet and bring the
soleplate temperature to maxi-
mum.
•Hold the iron over the sink and
turn the steam setting and self-
clean knob (7) to the "Self Clean"
position.
5 Cleaning and maintenance

15 / 70 EN
Iron / User Manual
5 Cleaning and maintenance
•Keep the button on the self-clean
position. Gently shake the iron to
left and right. Continue this pro-
cess when the water in the water
tank finishes. Release the button
when the water is fully drained.
•During this process, the water
in the tank comes down into
the steam generation reservoir
quickly and is released through
the soleplate holes along with the
lime particles (if any).
•Unplug the appliance and gently
move it on an old cloth. Keep
ironing until the water and lime
stains left on the base are re-
moved. Wait until the iron cools
down before storing it.
5.3 Lime protection system
(Anti-Calc)
The lime protection system in the
water tank of your iron prevents
clogging of the steam holes. Lime
protection system is always active
and there is no need to replace it.
5.4 Storage
If you do not intend to use the steam
iron for a long time, please store it
carefully.
•Make sure that the iron is un-
plugged and cooled down com-
pletely before storing it.
•Empty the water reservoir.
•Please keep the steam iron and
its accessories in their original
packages.
•Store them in a cool and dry
place.
•Make sure that the appliance is
stored in a place out of the reach
of children.

16 / 70 EN Iron / User Manual
6 Troubleshooting
Although the iron is plugged in, its soleplate (4) does not heat up.
•The appliance may be improperly connected. >>> Check the plug and power
cord (1) of iron.
•Temperature setting dial (3) may be at the min. position. >>> Turn the tempera-
ture setting dial to the steam sign.
Iron does not generate steam.
•Water tank may not contain sufficient amount of water. >>> Fill the water reser-
voir with water up to Max. level.
•Steam setting knob (7) may be at the 0 position. >>> Take the steam setting
knob to steam position. >>> Soleplate (4) may not be hot enough. "Anti-Drip"
system which prevents water dripping may be active. Turn the iron temperature
setting dial (3) to the steam sign. Seat the iron in a vertical position and wait for
the base to heat up.
Shock Steam – Vertical Steam does not function.
•These functions may have been used too frequently in a very short period of
time. >>> Keep ironing at a horizontal position and wait for a while before using
the shock steam function again. >>> Soleplate (4) may not be hot enough. Turn
the iron temperature setting dial to the steam sign. Seat the iron in a vertical
position and wait for the base to heat up.
Water drops fall down onto the fabric during ironing.
•You may not have fully closed the water refill lid (6). >>> Close the water refill
lid (6) completely.
Sediments and particles drop off from the base during ironing.
•If the water you use for your iron is too limy, such sediments may form. >>> Use
the self-clean function for once or a few times. In your next ironing session, add
soft water into your appliance.
The appliance drops water after it cools down or stored.
•You may have left the iron on a horizontal position while there is water in its tank.
>>> Empty the water tank.
Stains on the soleplate.
•Wet garments might have been ironed and the soleplate (4) has had lime stains.
>>> After the appliance cools down to a satisfactory level, wipe the soleplate (4)
with a microfiber knitted or cotton cloth.


Lütfen önce bu kılavuzu okuyun!
Değerli Müşterimiz,
Beko ürününü tercih ettiğiniz için teşekkür ederiz.Yüksek kalite ve teknoloji ile
üretilmiş olan ürününüzün size en iyi verimi sunmasını istiyoruz. Bunun için,
bu kılavuzun tamamını ve verilen diğer belgeleri ürünü kullanmadan önce
dikkatle okuyun ve bir başvuru kaynağı olarak saklayın. Ürünü başka birisine
verirseniz, kullanma kılavuzunu da birlikte verin. Kullanma kılavuzunda
belirtilen tüm bilgi ve uyarıları dikkate alarak talimatlara uyun.
Sembollerin anlamları
Bu kullanma kılavuzunun çeşitli kısımlarında aşağıdaki semboller kullanılmıştır:
CCihazın kullanımıyla ilgili önemli bilgiler
ve faydalı tavsiyeler.
ACan ve mal güvenliğiyle ilgili tehlikeli du-
rumlar konusunda uyarılar.
BElektrik çarpması uyarısı.
Sıcak yüzeylerle ilgili uyarı.
Bu ürün, çevreye saygılı modern tesislerde doğaya zarar vermeden üretilmiştir.
PCB içermez.
AEEE Yönetmeliğine Uygundur.

19 / 70 TR
Ütü / Kullanma Kılavuzu
İÇİNDEKİLER
1 Önemli güvenlik ve
çevre talimatları 20-22
1.1 Genel güvenlik . . . . . . . . . . . . . . . . . . . . . . . 20
1.2 AEEE yönetmeliğine uyum ve
atık ürünün elden çıkarılması . . . . . . . . . . . . . . . 22
1.3 Ambalaj bilgisi . . . . . . . . . . . . . . . . . . . . . . . 22
2 Ütünüz 23
2.1 Genel bakış . . . . . . . . . . . . . . . . . . . . . . . . . 23
2.1.1. Kontroller ve parçalar . . . . . . . . . . . . . . . . 23
2.1.2. Teknik veriler. . . . . . . . . . . . . . . . . . . . . . . 23
3 Hazırlık 24-25
3.1 İlk kullanım. . . . . . . . . . . . . . . . . . . . . . . . . . 24
3.2 Enerji tasarrufu . . . . . . . . . . . . . . . . . . . . . . 25
3.3 Ütüleme ipuçları . . . . . . . . . . . . . . . . . . . . . . 25
4 Ürünün çalıştırılması 26-28
4.1 Su deposunun doldurulması. . . . . . . . . . . . . . 26
4.2 Sıcaklığın ayarlanması. . . . . . . . . . . . . . . . . . 26
4.3 Buharlı ütüleme . . . . . . . . . . . . . . . . . . . . . . 27
4.4 Kuru ütüleme . . . . . . . . . . . . . . . . . . . . . . . . 27
4.5 Şok buhar. . . . . . . . . . . . . . . . . . . . . . . . . . . 27
4.6 Su spreyi . . . . . . . . . . . . . . . . . . . . . . . . . . . 27
4.7 Dik buhar . . . . . . . . . . . . . . . . . . . . . . . . . . . 28
5 Temizlik ve bakım 29-30
5.1 Temizlik . . . . . . . . . . . . . . . . . . . . . . . . . . . . 29
5.2 Kireç temizleme özelliği (Self-Clean). . . . . . . . 29
5.3 Kireç önleme sistemi (Anti-Calc). . . . . . . . . . . 30
5.4 Saklama. . . . . . . . . . . . . . . . . . . . . . . . . . . . 30
6 Sorun giderme 31

20 / 70 TR Ütü / Kullanma Kılavuzu
Bu bölümde, yaralanma ya da maddi hasar tehlikelerini
önlemeye yardımcı olacak güvenlik talimatları yer almaktadır.
Bu talimatlara uyulmaması halinde her türlü garanti geçersiz
hale gelir.
1.1 Genel güvenlik
•Bu cihaz, uluslararası güvenlik standartlarına uygundur.
•Cihaz, 8 yaş ve üzeri çocuklar ve fiziksel, algısal ve zihinsel
yetenekleri azalmış veya tecrübe ve bilgi eksikliği olan
kişiler tarafından gözetim altında veya cihazın güvenli
bir şekilde kullanımına ve karşılaşılan ilgili tehlikelerin
anlaşılmasına dair talimat verilirse kullanılabilir. Çocuklar
cihazla oynamamalıdır. Temizlik ve kullanıcı bakım
işlemleri, başlarında bir büyük olmadığı sürece çocuklar
tarafından yapılmamalıdır.
•Cihazı elektrik fişine bağlıyken gözetimsiz bırakmayın.
•Cihazın su haznesine su doldurmadan önce fişini prizden
çekin.
•Cihazı sabit bir yüzeyde kullanın ve muhafaza edin.
•Cihaz altlığı üzerine yerleştirildiğinde, altlığın üzerine
konulduğu yüzeyin dengeli olmasını sağlayın.
•Elektrik kablosu veya cihaz hasarlıysa cihazı kullanmayın.
Yetkili servise başvurun.
1 Önemli güvenlik ve çevre talimatları
Other manuals for BKK 2304
1
Table of contents
Languages:
Other Beko Iron manuals

Beko
Beko 01M-8834133200-0317-06 User manual

Beko
Beko SIM4126B User manual

Beko
Beko SIM 3122 T User manual

Beko
Beko SGA8328D User manual

Beko
Beko SIM 3122 T User manual

Beko
Beko SIM3117 User manual

Beko
Beko SIM4118NS User manual

Beko
Beko SPA7131P User manual

Beko
Beko BKK 2141 User manual

Beko
Beko SIM7124B User manual

Beko
Beko BKK 2133 User manual

Beko
Beko BKK 2174 User manual

Beko
Beko SIM4622 User manual

Beko
Beko BKK 21233 User manual

Beko
Beko BKK 2132 K User manual

Beko
Beko BKK 2174 User manual

Beko
Beko SGA7126P User manual

Beko
Beko BKK 2174 User manual

Beko
Beko 01M-8814943200-1619-01 User manual

Beko
Beko BKK 2174 User manual