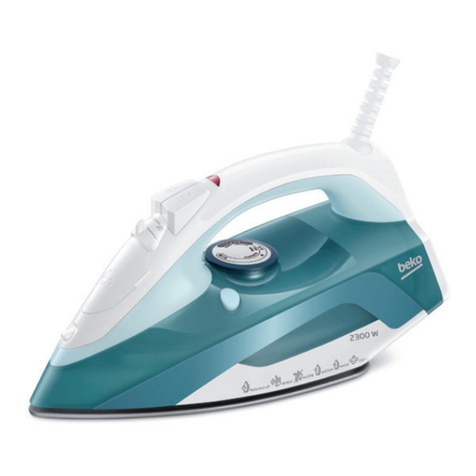
Beko SPM7128P User manual

www.beko.com
SPM7128P
01M-8832743200-0317-03
Steam Iron
User Manual
EN DE FR TR ES
PL HR RO IT TH

Please read this user manual first!
Dear Customers,
Thank you for selecting a Beko product. We hope that you get the best
results from your product which has been manufactured with high
quality and state-of-the-art technology. Therefore, please read this
entire user manual and all other accompanying documents carefully
before using the product and keep it as a reference for future use. If
you handover the product to someone else, give the user manual as
well. Follow all warnings and information in the user manual.
Meanings of the symbols
Following symbols are used in the various section of this manual:
CImportant information and useful
hints about usage.
AWARNING:
Warnings for
dangerous situations concerning
the safety of life and property.
WARNING:
Warning for hot
surfaces.
It does not contan PCB.
Made n P.R.C.
Ths product has been produced n envronmentally-frendly, state-of-the-art facltes.

3 / 39 EN
Steam Iron / User Manual
Ths secton contans safety nstructons that wll
help protect from rsk of personal njury or property
damage.
Falure to follow these nstructons nvaldates the
granted warranty.
1.1 General safety
•Ths applance comples wth the nternatonal
safety standards.
•Ths applance may be used by chldren who
are at the age of 8 or over and the people
whose physcal, perceptve or mental sklls
are mpared or who are nexperenced or not
knowledgeable about the applance as long
as they are supervsed or nformed and made
understood the safe use of the applance and
the encountered dangers. Chldren should
not play wth the applance. Cleanng and
user mantenance procedures should not
be performed by chldren unless they are
controlled by ther elders.
1Important nstructons for safety and envronment

4 / 39 EN Steam Iron / User Manual
•Do not leave the product unattended whle t s
plugged n.
•Unplug the product before fllng the water
reservor wth water.
•Operate and store the applance on a stable
surface.
•When the applance s placed on ts base plate,
ensurethatthesurfacebeneaththeplateslevel.
•Do not use the applance f the power cable
or the applance tself s damaged. Contact an
authorsed servce.
•If the applance s dropped or leaks water or has
other falures, contact the authorsed servce. Do
not use the applance untl t s repared.
•When the applance s not n use or left to cool
down keep the applance and power cable out of
reach of chldren under 8 years old.
•The applance s not sutable for usng outdoors.
•Only use the orgnal parts or parts recommended
by the manufacturer.
1Important nstructons for safety and envronment

5 / 39 EN
Steam Iron / User Manual
•Do not attempt to dsmantle the applance.
•Your mans power supply should comply wth
the nformaton suppled on the ratng plate of
the applance.
•The mans supply of the applance must be
secured wth a mnmum 16 A fuse.
•Use the applance wth a grounded outlet only.
•Do not use the applance wth an extenson cord.
•Do not pull the power cable when unpluggng
the applance.
•Unplug the applance before cleanng t.
•Do not wrap the cable around the applance.
•Do not touch the applance or ts plug wth wet
or damp hands when the applance s plugged n.
•The soleplate and ts surroundng area can be
extremely hot. Contactng hot surfaces may
cause burns. Therefore whle or just after usng
the applance, pay attenton not to touch the
hot surfaces.
1Important nstructons for safety and envronment

6 / 39 EN Steam Iron / User Manual
•Neverusetheapplancenorneartocombustble
or nflammable places and materals.
•If you keep the packagng materals, store them
out of the reach of chldren.
1.2 Complance wth WEEE Drectve and Dsposng of the
Waste Product
Ths product comples wth EU WEEE Drectve (2012/19/EU).
Ths product bears a classfcaton symbol for waste electrcal
and electronc equpment (WEEE).Ths product has been
manufactured wth hgh qualty parts and materals whch can
be reused and are sutable for recyclng. Do not dspose of the
waste product wth normal domestc and other wastes at the end of ts
servce lfe. Take t to the collecton center for the recyclng of electrcal
and electronc equpment. Please consult your local authortes to learn
about these collecton centers.
1.3 Complance wth RoHS Drectve
The product you have purchased comples wth EU RoHS Drectve
(2011/65/EU). It does not contan harmful and prohbted materals
specfed n the Drectve.
1.4 Package Informaton
Packagng materals of the product are manufactured from
recyclablemateralsnaccordancewthourNatonalEnvronment
Regulatons. Do not dspose of the packagng materals together
wth the domestc or other wastes. Take them to the packagng
materal collecton ponts desgnated by the local authortes.
1Important nstructons for safety and envronment

7 / 39 EN
Steam Iron / User Manual
2.1 Overvew
The values whch are declared n the markngs affxed on your applance or the other prnted documents suppled wth t
represent the values whch were obtaned n the laboratores pursuant to the pertnent standards. These values may vary
accordng to the usage of the applance and ambent condtons.
2Your ron
1. Power cable
2. Iron base plate
3. Temperature adjustment knob
4. Soleplate
5. Water spray nozzle
6. Water refll ld
7. Lme removal (self clean)
button
8. Water sprayng button
9. Shock steam button
10. Steam trgger
11. Thermostat ndcator and
Auto-Off lght
2.2 Techncal data
Voltage : 220-240V~ 50 Hz
Power
consumpton : 2350-2800 W
Insulaton class : I
Shock steam
amount : up to 200 g/mn
1
2
3
4
5
6
7
8
10
9
11

8 / 39 EN Steam Iron / User Manual
3.1 Intended use
Ths applance s ntended only for
household use and ronng; t s not
sutable for professonal use.
3.2 Intal use
Pror to ntal use, fll twce (see
3.3) and vaporze to remove the
manufacturng resdues (see
3.6). Meanwhle, use shock steam
button (9) frequently.
C
You can smell a
mld odour or see
whte sedments
comng out of the
soleplate (4) holes.
After performng
vaporzng process
twce, such odours
and sedments wll
dsappear. Also
water droplets may
form wthn the
water reservor; ths
s normal.
3.3 Refllng the water
reservor
1. Unplug the applance.
2. Fll the water cup provded wth
the applance.
3. Open the water refll ld (6) and
fll the applance wth water up
to MAX level.
4. Close the water refll ld (6).
C
Your applance s
desgned for use
wth tap water. If
your tap water s
excessvely hard, we
recommend you to
use a mxture of tap
water wth potable
water.
3.4 Settng the temperature
1. After the applance s plugged n,
set the temperature accordng
to the type of your fabrc by
turnng the Temperature
adjustment knob (3) n clockwse
drecton (see. 3.5).
- Thermostat ndcator lght (11)
wll lght up.
3Operaton

9 / 39 EN
Steam Iron / User Manual
2. When the applance reaches the
set temperature, thermostat
ndcator lght (11) wll turn off
and the applance s ready to use.
3.5 Temperature settngs
table
When settng the temperature
of the applance, consder the
followng table.
Fabric
Type
Temper-
ature
Setting
Steam
Setting
Synthetic •
Without
steam
Silk •
Without
steam
Woolen ••
With
steam
Cotton •••
With
steam
Linen -
Jean
Max With
steam
AWARNING:
Before ronng frst
check the label of
the garment.
C
If you don’t know
the fabrc of your
garment, frst ron
an nvsble part of
your garment and
determne a correct
ronng temperature
for t.
C
In order to prevent
the brght stans
that may form on
the synthetc fabrcs
such as slk, ron on
the reverse sde of
the fabrc. Do not use
the water sprayng
feature n order to
prevent the stan
formaton.
3.6 Steam ronng
1. Fll the water reservor (see. 3.3).
2. Set the approprate temperature
wth the temperature
adjustment knob (3) (see 3.5).
A
WARNING:
For
steam ironing tem-
perature adjustment
knob should be at “2-
3” or “max” position.
3Operaton

10 / 39 EN Steam Iron / User Manual
3. After the thermostat ndcator
lght (11) swtches off press the
steam trgger (10).
C
The product has
an electronc Ant-
Drp sensor. Steam
amount s adjusted
dependng on
the level of the
temperature. If the
temperature s not
hgh enough you
may not get enough
amount of steam
when you press the
steam trgger (10).
3.7 Shock steam
A
WARNING:
Set the
temperature adjust-
ment knob to a posi-
tion where the steam
symbol will be be-
tween the “ ” range.
1. Fll the water reservor (see. 3.3).
2. Set the temperature adjustment
knob (3) to steam range by
turnng t n the clockwse
drecton.
- Thermostat ndcator lght (11)
wll lght up.
3. When the applance reaches the
set temperature, thermostat
ndcator lght (11) wll turn off.
4. After the thermostat ndcator
lght (11) turns off, you can ron
the garments wth the powerful
steam by pressng the shock
steam button (9).
A
WARNING:
If
this process is main-
tained for a pro-
longed time water
may come through
the soleplate (4) to-
gether with steam.
A
WARNING:
In
order to use the
shock steam feature
the thermostat
ndcator lght (11)
should be turned off.
3.8 Vertcal steam
You can also use the shock steam
and contnuous steam functons n
the uprght poston (see 3.6). You
can apply steam to your curtans
and your garments on the hanger
wth the steam you wll get by
pressng the shock steam button
(7) or the steam trgger (9). Keep
the applance 15-30 cm away from
the garment and curtans.
3Operaton

11 / 39 EN
Steam Iron / User Manual
A
WARNING:
During
the ironing if the
thermostat indicator
light (11) turns on,
before proceeding
with the shock steam
process wait for the
light to turn off.
AWARNING:
Never
drect ths steam to
people or pets.
3.9 Sprayng water
1. Fll the water reservor (see. 3.3).
2. Set the temperature (see. 3.5).
3. Press the water sprayng button
(8) to spray water.
C
You can easly
remove creases
usng the water
sprayng feature.
3.10 Dry ronng
In order to be able to do dry ronng,
do not use the steam trgger (10).
C
Havng water n the
applance would be
advantageous; you
may use the water
sprayng button (8)
when necessary.
3.11 Automatc Shutdown
(Auto-Off)
•If the applance s hold
statonary for 30 seconds whle
n horzontal poston, t wll be
automatcally turned off.
•If the applance s hold statonary
for 7-10 mnutes whle n uprght
poston, t wll be automatcally
turned off.
•If the applance s hold statonary
for 30 seconds whle n a leaned
(rght or left) poston, t wll be
automatcally turned off.
C
In case of automatc
turn off the auto-off
lght (11) flashes.
•If the applance s moved n
horzontal poston t wll be
turned on.
C
It may take 60
seconds for the
soleplate (4) to reach
the prevously set
temperature.
3Operaton

12 / 39 EN Steam Iron / User Manual
4.1 Cleanng
A
WARNING:
When
you are fnshed
wth ronng, unplug
the applance. You
can dran the water
n the reservor by
openng the refll ld
(6) and tltng the
ron to the front.
1. Unplug the applance before
cleanng.
2. Wat for the applance to cool
down completely.
3. Use a slghtly damp cloth to
clean the outer surface of
the applance. Then dry t
thoroughly.
4. Wpe the sedments and
resdues on the soleplate (4)
wth a slghtly damp cloth and
soft, nonabrasve lqud cleaner
as necessary.
A
WARNING:
Do
not use gasolne,
solvent and abrasve
cleanng agents or
hard brush to clean
the applance.
4.2 Lme removal (Self-
Clean)
Lme removal functon cleans the
lme partcles accumulated n the
steam generator reservor of the
applance.
Use ths functon once n every
2 to 3 weeks. If the tap water s
very hard (f lme partcles fall
down from the soleplate (4) of the
applance), use the lme removal
functon more frequently.
1. Unplug the applance.
2. Refll the applance wth water
(see. 3.3).
3. Plug n the applance and set the
temperature adjustment knob
(3) to max. poston by turnng t
n the clockwse drecton.
4. When the thermostat ndcator
lght (11) turns off, unplug the
applance.
5. Keep the applance n a
horzontal poston over the snk
and shake the applance whle
pressng and holdng the lme
removal button (7). Contnue
untl the water n the reservor s
depleted.
4Cleanng and mantenance

13 / 39 EN
Steam Iron / User Manual
C
It may take some
tme for the water to
drp from the holes of
the soleplate.
6. After the reservor becomes
fully empty, release the lme
removal button (7).
7. If there s stll sedment, repeat
ths process.
8. Followng the lme removal
process, let the applance cool
n uprght poston. After the
applance cools down, wpe off
the soleplate (4) wth a cloth.
4.3 Storage
If you do not ntend to use the
applance for a long tme, store t
carefully.
•Before lftng the applance
unplug t and then let t cool
completely.
•Empty the water reservor.
•Keep the applance and ts
accessores n ther orgnal
packages.
•Store t n a cool, dry place.
•Always keep the applance out of
the reach of chldren.
4.4 Handlng and
transportaton
•Durng handlng and
transportaton, carry the
applance n ts orgnal
packagng. The packagng of
the applance protects t aganst
physcal damages.
•Do not place heavy loads on the
applance or the packagng. The
applance may be damaged.
•Droppng the applance wll
render t non-operatonal or
cause permanent damage.
4Cleanng and mantenance

14 / 39 EN Steam Iron / User Manual
5Troubleshootng
Although the appliance is plugged in, soleplate (4) does not heat up.
The appliance may be connected improperly.
>>> Check the plug and power
cable (1) of the appliance.
Temperature adjustment knob (3) may be at the Min. position.
>>> Turn the
temperature adjustment knob in the clockwise direction up to the steam sign.
The appliance does not generate steam.
The water reservoir may not have enough water. >>> Fill the water reservoir
with water up to Max level (see. 3.3).
Temperature can be too low and therefore Anti-Drip Sensor may have stopped
steam generation.
>>> Turn the temperature adjustment knob (3) in the
clockwise direction up to the steam sign. Wait for the soleplate (4) to get warm
and thermostat indicator (11) to turn off.
Shock Steam – Vertical Steam does not function.
These functions may have been used too frequently in a very short period of time.
>>> Keep ironing at a horizontal position and wait for a while before using the
shock steam function again. >>> Soleplate (4) may not be hot enough. Turn the
temperature adjustment knob (3) in the clockwise direction up to the steam sign.
Seat the appliance in a vertical position and wait for the soleplate to heat up.
Water drops fall down onto the fabric during ironing.
You may not have securely closed the water refill lid (6).
>>> Close the water
refill lid securely.
You may be using the shock steam at temperature level
•
or
••
.
>>> Increase the temperature level (see. 3.7).
During ironing, sediments and residues fall down from the soleplate (4).
If the water you use for your appliance is too hard, such sediments may form.
>>>
Use the self-clean function for once or a few times (see. 4.2). For the subsequent
ironings fill the water reservoir of the appliance with a mixture of tap water and
potable water.
The appliance drops water after it cools down or stored.
You may have left the appliance on a horizontal position while there is water in its
reservoir.
>>> Empty the water reservoir.
Stains at the soleplate (4).
Wet garments might have been ironed and the soleplate (4) has had lime stains.
>>> After the appliance cools enough, wipe the soleplate with a microfiber
knitted or cotton cloth soaked in vinegar.

15 / 39 EE
Aurutriikraud / Kasutusjuhend
See peatükk ssaldab ohutusjuhsed, ms atavad
katsta kehavgastuste võ materaalsete kahjude eest.
Nende juhste mttejärgmne tühstab ettenähtud
garant.
1.1 Üldne ohutus
•Seade vastab rahvusvahelstele
ohutusstandardtele.
•Seda seadet tohvad kasutada lapsed alates 8.
eluaastastjaskud,kellelonvähenenudfüüslsed,
sensoorsedvõvamsedvõmedvõkellelpuuduvad
vastavad kogemused ja teadmsed, juhul ku ned
on seadme ohutu kasutamse osas juhendatud ja
nad mõstavad sellega seotud ohtusd. Lapsed e
toh seadmega mängda. Lapsed e toh teostada
puhastust ega hooldust lma järelevalveta.
•Ärge jätke toodet elektrvõrku ühendatuna
järelevalveta.
•Enne veepaag veega tätmst eemaldage toode
elektrvõrgust.
•Kasutage ja houndage seadet stablsel pnnal.
1Olulsed ohutus- ja keskkonnaalased juhsed

16 / 39 EE Aurutrkraud / Kasutusjuhend
•Ku seade on asetatud alusplaadle, veenduge, et
plaad all olev pnd on tasane.
•Ärge kasutage ku totejuhe võ seade se on
kahjustatud.Võtkeühendustvoltatudhooldusega.
•Ku seade maha pllatakse võ lekb vett võ
esneb tes tõrked, võtke ühendust voltatud
teenndusega. Ärge kasutage seadet enne, ku see
on parandatud.
•Ku seadet e kasutata võ see on jahtuma jäetud,
hodke seade ja totejuhe alla 8-aastaste laste
käeulatusest eemal.
•Seade e sob õues kasutamseks.
•Kasutage anult orgnaalosasd võ tootja poolt
soovtatud osasd.
•Ärge ürtage seadet koost laht võtta.
•Tee põhtoteallkas peaks vastama seadme sldl
olevale teabele.
•Seadme toteallkas peab olema katstud vähemalt
16 A katsmega.
•
1Olulsed ohutus- ja keskkonnaalased juhsed

17 / 39 EE
Aurutriikraud / Kasutusjuhend
•Kasutage seadet anult maandatud
pstkupesaga.
•Ärge kasutage seadet pkendusjuhtmega.
•Ärge tõmmake seadet laht ühendades
totejuhtmest.
•Ühendage seade enne puhastamst ja hooldust
elektrvõrgust laht.
•Ärge kerge juhet ümber seadme.
•Ärge puudutage seadet võ selle pstkut
märgade võ nskete kätega ku seade on ssse
lültatud
•Alusplaat ja seda ümbrtsev ala võb olla väga
kuum. Kokkupuude kuumade pndadega võb
tektada põletus. Seetõttu ärge puudutage
seadme kasutamse ajal võ kohe pärast seadme
kasutamst kuumasd pndasd.Ärge kasutage
seadet kunag süttvate võ kergest põlevate
kohtade ja materjalde läheduses.
•Ku hoate pakkematerjald alles, hodke need
laste käeulatuset eemal.
1Important nstructons for safety and envronment

18 / 39 EE Aurutrkraud / Kasutusjuhend
1.2 Vastavus WEEE drektvle ja toote jääkde
kõrvaldamse drektvdele
See toode e ssalda keskkonna- ja lnnaplaneermse
mnsteerumpooltväljaantud„Elektr-jaelektroonkajäätmete
järelevalve eeskrjas“ ära toodud kahjulkke ja keelatud
materjale. Vastavuses WEEE drektvga. See seade on tehtud
kõrge kvalteedga osadest ja materjaldest, mda saab
taaskasutada ja ms on sobvad ümbertöötlemseks Seetõttu ärge vsake
toote jääke selle kasutusea lõppedes ära koos tavalste olme- ja muude
jäätmetega. Vge need elektr- ja elektroonkajäätmete
kogumskeskusesse. Palun pöörduge nende kogumskeskuste kohta
teabe saamseks kohalke ametvõmude poole. Adake katsta keskkonda
ja loodusvarasd, töödeldes kasutatud tooted ümber.
1.3 Pakend teave
Seadme jaoks kasutatud pakend on tehtud taaskasutatavatest
materjaldest. Palun veenduge, et pakkematerjald kõrvaldatakse
vastavalt kohaldatavatele kohalkele reegltele, et materjald
oleksd keskkonnakatse tagamseks kaasatud
ümbertöötlemsprotsess.
1Important nstructons for safety and envronment

19 / 39 EE
Aurutriikraud / Kasutusjuhend
2.1 Üldne krjeldus
Antud seadmele võ sellega koos tarntud trüktud materjaldele märgtud väärtused on saadud labortngmustes
ja kooskõlas kehtvate standardtega. Väärtused võvad erneda sõltuvalt seadme kasutamsest ja selle ümbruses
valtsevatest tngmustest.
2Trkraud
1. Totejuhe
2. Trkraua alus
3. Temperatuur reguleermse
nupp
4. Trkmstald
5. Pserdusotsk
6. Veepaag kaas
7. Katlakv eemaldamse
(sepuhastumse) nupp
8. Veepserdamse nupp
9. Auruvoo nupp
10. Auru päästk
11. Termostaad nädk ja
automaatse väljalültuse
märgutul
2.2 Tehnlsed andmed
Pnge
: 220–240 V, ~50 Hz
Energakulu : 2350-2800 W
Isolatsoonklass : I
Aurupahvaku
tugevus : kun 200 g/mn
Seade on vastavuses
järgmste EL drektvdega:
2004/108/EÜ, 2006/95/ EÜ,
2009/125/EÜ ja 2011/65/EL.
1
2
3
4
5
6
7
8
10
9
11

20 / 39 EE Aurutriikraud / Kasutusjuhend
3.1 Kasutusalad
Seade on mõeldud kasutamseks
ja trkmseks kodumajapdamses.
Seda e toh kasutada ärotstarbel.
3.2 Esmakordne
kasutamne
Enne seadme esmakordset
kasutamst tuleb veepaak täta ja
laste veel aurustuda kahel korral
(vt punkt 3.3), et eemaldada
tootmsprotsess jäägd (vt punkt
3.6). Sellel ajal tuleb auruvoo
nuppu (9) tht kasutada.
C
Trkmstalla (4)
avadest ertub
ved lõhna võ on
näha valget setet.
Lõhn ja sete kaovad
pärast trkraua
aurustamsprotsess
teostamst kahel
korral. Veepaak
võvad koguneda ka
veepsad — see on
loomulk nähtus.
3.3 Vee lsamne veepaak
1. Võtke totejuhtme pstk
senakontaktst.
2. Tätke seadmega komplekts
tarntud veetätenõu veega.
3. Avage veepaag kaas (6) ja tätke
paak tasemen MAX.
4. Sulgege veepaag kaas (6).
C
Seadmega võb
kasutada kraanvett.
Ku kraanves on lga
kare, on soovtatav
kasutada kraanvee
ja töödeldud vee
segu.
3.4 Temperatuur
seadstamne
1. Pärast seadme ühendamst
senakontakt seadstage antud
kangale sobv temperatuur,
pöörates temperatuur seadstuse
nuppu (3) paremale (vt punkt 3.5).
- Süttb termostaad märgutul
(11).
2. Ku seade saavutab seadstatud
temperatuur, termostaad (11)
märgutul kustub ja seade on
kasutusvalms.
3.5 Temperatuur
3Kasutamne
Other manuals for SPM7128P
2
Table of contents
Languages:
Other Beko Iron manuals

Beko
Beko SGA6124D User manual

Beko
Beko SIM4126B User manual

Beko
Beko SIM 3122 T User manual
Beko
Beko SIM3117 User manual

Beko
Beko BKK 2130 User manual

Beko
Beko SIM 3122 T User manual

Beko
Beko BKK 21233 User manual

Beko
Beko BKK 2174 User manual

Beko
Beko SIM 3124 D User manual

Beko
Beko 01M-8816573200-2519-01 User manual

Beko
Beko 01M-8816423200-0619-01 User manual

Beko
Beko 01M-8814943200-1619-01 User manual

Beko
Beko SIM7124B User manual

Beko
Beko BKK 2304 User manual

Beko
Beko SIM4118NS User manual

Beko
Beko SIM 3122 T User manual

Beko
Beko SGA8328D User manual

Beko
Beko SIM7124B User manual

Beko
Beko BKK 2311 User manual

Beko
Beko BKK 2141 User manual