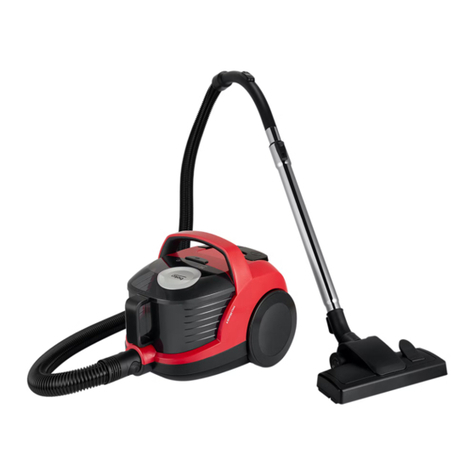
Beko BKS 2226 User manual

Vacuum Cleaner
User Manual
BKS 2226
01M-8833063200-2216-05
EN TR TM KK RU
BS MK SQ SR TH

Please read this user manual first!
Dear Customer,
Thank you for prefering a Beko product. We hope that you get the best results from
your product which has been manufactured with high quality and state-of-the-art
technology. Therefore, please read this entire user manual and all other accompanying
documents carefully before using the product and keep it as a reference for future use.
If you handover the product to someone else, give the user manual as well. Follow all
warnings and information in the user manual.
Explanation of symbols
Throughout this user manual the following symbols are used:
C
Important information or useful hints
about usage.
A
Warning for hazardous situations
with regard to life and property.
Protection class for electric shock.
Made in P.R.C.
This product has been produced in environmentally friendly, modern facilities.
Complies with the WEEE Regulation. Does not contain PCB.

Vacuum cleaner / User manual
3 / 85 EN
CONTENTS
1 Important nstructons for
safety and envronment 4-5
1.1 General safety . . . . . . . . . . . . . . . . . . . . . . . . . . . . . . 4
1.2 Complance wth the WEEE Drectve and
dsposal of waste products . . . . . . . . . . . . . . . . . . . . 5
1.3 Package nformaton . . . . . . . . . . . . . . . . . . . . . . . 5
2 Your vacuum cleaner 6
2.1 Overvew . . . . . . . . . . . . . . . . . . . . . . . . . . . . . . . . . . . 6
2.2 Techncal data. . . . . . . . . . . . . . . . . . . . . . . . . . . . . . 6
3 Use 7-8
3.1 Intended use . . . . . . . . . . . . . . . . . . . . . . . . . . . . . . . .7
3.2 Attachng/removng the hose. . . . . . . . . . . . . . .7
3.3 Attachng/removng the telescopc tube . . .7
3.4 Attachng/removng the parquet/
carpet brush . . . . . . . . . . . . . . . . . . . . . . . . . . . . . . . . . . . .7
3.5 Adjustng the parquet/carpet brush . . . . . . . .7
3.6 Operaton . . . . . . . . . . . . . . . . . . . . . . . . . . . . . . . . . . .7
3.6.1 Adjustng the sucton power . . . . . . . . . . . . . .7
3.6.2 Dust ndcator . . . . . . . . . . . . . . . . . . . . . . . . . . . . .7
3.7 Accessores. . . . . . . . . . . . . . . . . . . . . . . . . . . . . . . . . 8
3.8 Swtchng off and parkng the vacuum cleaner
4 Cleanng and mantenance 8-9
4.1 Replacng the dust bag. . . . . . . . . . . . . . . . . . . . . 8
4.2 Cleanng the flters. . . . . . . . . . . . . . . . . . . . . . . . . 9
4.2.1 Motor protecton flter . . . . . . . . . . . . . . . . . . . 9
4.2.2 Foam flter . . . . . . . . . . . . . . . . . . . . . . . . . . . . . . . 9
4.3 Storage. . . . . . . . . . . . . . . . . . . . . . . . . . . . . . . . . . . . . 9

4 / 85 EN
Vacuum cleaner / User manual
Ths secton contans safety
nstructons that wll help protect
from rsk of personal njury or
property damage.
Falure to follow these
nstructons nvaldates the
granted warranty.
1.1 General safety
•Ths applance comples wth
the nternatonal securty
standards.
•Ths applance can be used by
chldren aged from 8 years and
above andpersons wthreduced
physcal, sensory or mental
capabltes or lack of experence
and knowledge f they have
been gven supervson or
nstructon concernng use of
the applance n a safe way
and understand the hazards
nvolved. Chldren shall not play
wth the applance. Cleanng
and user mantenance shall not
be made by chldren wthout
supervson.
•Donotusetfthepowercableor
the applance tself s damaged.
Contact an authorzed servce.
•Your mans power supply should
comply wth the nformaton
suppled on the ratng plate of
the applance.
•The mans supply of the
applance must be secured wth
a mnmum 16 A fuse.
•Do not use the applance wth
an extenson cord.
•In order to prevent the power
cable from gettng damaged,
make sure that t doesn't get
stuck, twsted or rub aganst
sharp surfaces.
•Do not touch the applance or ts
plug when t s plugged f your
hands are damp or wet.
•Do not pull the power cable
when unpluggng the applance.
•Do not vacuum flammable
materals and when vacuumng
cgarette ashes make sure that
t got cold.
•Do not vacuum water or other
lqud materals.
•Protect the applance from ran,
humdty and heat sources.
1Important nstructons for safety and envronment

Vacuum cleaner / User manual
5 / 85 EN
•Never use the applance
n or near to combustble
or nflammable places and
materals.
•Unplug the applance before
cleanng and mantenance.
•Do not dp the applance or ts
cable n water to clean t.
•Check the hose of the applance
regularly. Do not use f t s
damaged and contact an
authorzed servce.
•Do not attempt to dsmantle the
applance.
•Only use the orgnal parts or
parts recommended by the
manufacturer.
•If heavly used for cleanng dust
such as cement or grout the
dust ndcator wll lt earler then
expected, n such case replace
the dust bag even t s empty.
•Do not use the applance
wthout flters; otherwse t can
get damaged.
•When vacuumng the stars,
the applance should be located
below the user.
•If your store the package
materal, keep t out of the
reach of chldren.
1.2 Complance wth the WEEE
Drectve and dsposal of
waste products
Ths product does not nclude harmful and
prohbted materals specfed n the
“Regulaton for Supervson of the Waste
Electrc and Electronc Applances” ssued
by the Mnstry of Envronment and Urban
Plannng. Ths applance conforms to the WEEE
regulaton. Ths product has been manufactured
wth hgh qualty parts and materals whch can be
reused and are sutable for recyclng. Therefore,
do not dspose the product wth normal domestc
waste at the end of ts servce lfe. Take t to a
collecton pont for the recyclng of electrcal and
electronc equpment. Ask the local authorty n
your area for these collecton ponts. Contrbute to
the preservaton of envronment and natural
sources by takng the used products to the
recyclng ponts.
1.3 Package nformaton
Package of the product s made of
recyclable materals n accordance wth
our Natonal Legslaton. Do not dspose
of the packagng materals together wth
the domestc or other wastes. Take them to the
packagng materal collecton ponts desgnated
by the local authortes.
1Important nstructons for safety and envronment

6 / 85 EN
Vacuum cleaner / User manual
2.1 Overvew
2Your vacuum cleaner
1. Power cable wndng button
2. Plug
3. Park channel
4. Sucton power adjustment knob
5. On/Off button
6. Ld release button
7. Carryng handle
8. Sucton nozzle
9. Dust ndcator
10. Handle
11. Hose
12. Hose cap
13. Telescopc tube
14. Parquet/carpet brush
15. Telescopc tube adjustment latch
16. Narrow crevce tool
17. Wde-mouth nozzle
2.2 Techncal data
Nom. power :
2000 W
Max power :
2600 W
Net weight :
5 kg
Supply voltage :
220-240 V~, 50 Hz
Dust Volume :
3 L
Power cord length :
6 m
Rghts to make techncal and desgn changes are
reserved.
1110
14
13
12
16 17
15
1
4
2
3
5
6
7
8
9

Vacuum cleaner / User manual
7 / 85 EN
3 Use
3.1 Intended use
The applance was desgned to be used n houses,
and s not ft for ndustral use.
3.2 Attachng/removng the
hose
1. To attach the hose (11) push the hose cap (12)
to match t wth the sucton nozzle.
•The tabs on the hose cap (12) must be seated
correctly.
2. To remove the hose (11) press on the tabs on
the hose cap (12) and pull t.
3.3 Attachng/removng the
telescopc tube
1. Attach the telescopc tube (13) to the handle
(10).
2. Pull the telescopc tube from the handle (10) to
remove t.
3. Push the telescopc tube adjustment latch (15)
n the arrow drecton and pull the telescopc
tube (13) to adjust ts length.
3.4 Attachng/removng the
parquet/carpet brush
You can nstall/remove the telescopc tube (13)
from/to the parquet carpet brush (14).
3.5 Adjustng the parquet/
carpet brush
By pressng the adjustment latch (14) located on
the parquet carpet brush;
•Use “ ” poston for hard surfaces and
parquet.
•Use “ ” for carpets.
3.6 Operaton
1. Plug the applance after pullng the power plug
located at the back of the applance.
2. Press on/off button (5) to swtch on your
applance.
3.6.1 Adjustng the sucton
power
You can adjust the sucton power of the applance
by turnng the sucton power button (4) located on
the body of the devce clockwse accordng to the
type of the surface to be cleaned. To decrease the
sucton power turn the button counterclockwse.
3.6.2 Dust ndcator
When the dust bag s full the dust ndcator (9) on
the body wll lght n red. Replace the dust bag (see
4.1).

8 / 85 EN
Vacuum cleaner / User manual
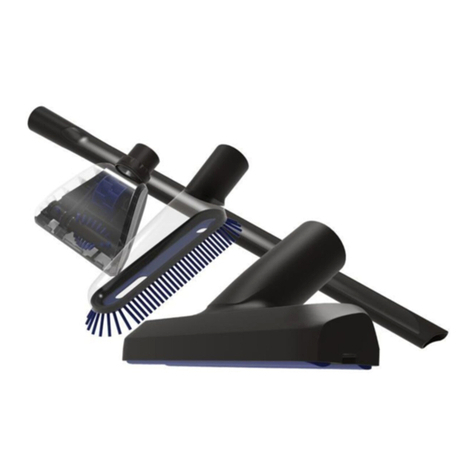
3.7 Accessores
Crevice tool
Sutable for the cleanng of the
surfaces whch are dffcult to
clean, such as the areas remanng
under the sofas and furnture.
Wide-mouth nozzle
Sutable for the cleanng of the
floorngs, star steps, nsde of the
cars, sofas, armchars etc.
AWARNING:
Do not make cleanng
by usng the handle's (10) end part.
Swtch off and unplug the applance before
cleanng t.
AWARNING:
Never use gasolne,
solvent, abrasve cleanng agents,
metal objects or hard brushes to
clean the applance.
4.1 Replacng the dust bag
When the dust ndcator (9) on the body turn to
red replace the dust bag.
1. Open the top ld pressng the button (6) for
openng the dust contaner.
2. Lft the dust bag upwards and remove t from
the bag holder.
3. Remove the dust bag from ts gude pullng t
from ts clps.
4. Close the cover of the full dust bag and dspose
t.
5. Holdng ts clps, push the new dust bag nto the
bag holder. Ensure that t s fully seated.
6. Close the applance's upper cover.
AWARNING:
Do not forcethe top
ld to close t, otherwse the plastc
sectons can be damaged.
A
WARNING:
Dust bags provded
from locatons other than the
authorzed dealers and servces are
not orgnal. Such dust bags have a
lesser qualty and they become torn
n a shorter perod and render your
applance unoperatonal. Faults
caused by usng unauthentc dust
bags are not covered by the scope
of the warranty.
3.8 Swtchng off and parkng
the vacuum cleaner
1. Swtch off the applance wth the on/off button
(5) and unplug t.
2. Wnd the electrc cable by pressng the power
cable wndng button (1).
Vertical parking feature
Insert the hook of the parquet/carpet brush nto
the parkng channel located at the bottom secton
of the applance.
Horizontal parking feature
Insert the hook of the parquet/carpet brush nto
the parkng channel located at the rear secton of
the applance.
4Cleanng and mantenance
3 Use

Vacuum cleaner / User manual
9 / 85 EN
4Cleanng and mantenance
AWARNING:
Do not wash the dust
bag.
4.2 Cleanng the flters
Foam flter
Motor
protecton flter Mcro flter
After each 5 dust bag replacement (may vary
dependng on the frequency and area of usage)
clean the flters.
AWARNING:
Do not use applances
producng hot ar such as har dryer
or heater to dry the flters.
A
WARNING:
Do not nstall the
flters wthout completely dryng
them; otherwse smell of mosture
may occur durng the use, water can
leak from the back of the applance
or the flters may get damaged.
AWARNING:
When the flters dry,
replace them nto ther postons.
4.2.1 Motor protecton flter
1. Open the top ld pressng the button (6) for
openng the ld.
2. Remove the foam flter from the grd nsde.
3. Wash t under runnng water after shakng t
off.
4. After washng the foam, gently wrng t and
leave t to dry.
4.2.2 Foam flter
1. Open the rear cover.
2. Remove the foam flter behnd the cover and
wash t.
3. After washng the foam, gently wrng t and
leave t to dry.
4.3 Storage
•If you do not ntend to use the applance for a
long tme, store t carefully.
•Pull the applance's plug out.
•Keep the applance out of the reach of chldren.

Lütfen önce bu kılavuzu okuyun!
Değerli Müşterimiz,
Beko ürününü tercih ettiğiniz için teşekkür ederiz. Yüksek kalite ve teknoloji ile üretilmiş
olan ürününüzün size en iyi verimi sunmasını istiyoruz. Bunun için, bu kılavuzun
tamamını ve verilen diğer belgeleri ürünü kullanmadan önce dikkatle okuyun ve bir
başvuru kaynağı olarak saklayın. Ürünü başka birisine verirseniz, kullanma kılavuzunu
da birlikte verin. Kullanma kılavuzunda belirtilen tüm bilgi ve uyarıları dikkate alarak
talimatlara uyun.
Sembollerin anlamları
Bu kullanma kılavuzunun çeşitli kısımlarında aşağıdaki semboller kullanılmıştır:
C
Cihazın kullanımıyla ilgili önemli bilg-
iler ve faydalı tavsiyeler.
A
Can ve mal güvenliğiyle ilgili tehlikeli
durumlar konusunda uyarılar.
Elektrik çarpmasına karşı koruma
sınıfı.
Bu ürün çevreye saygılı modern tesislerde doğaya zarar vermeden üretilmiştir.
AEEE Yönetmeliğine Uygundur. PCB içermez.
Menşei P.R.C.

Elektrikli Süpürge / Kullanma Kılavuzu
11 / 85 TR
1 Öneml güvenlk ve
çevre talmatları 12-13
1.1 Genel güvenlk . . . . . . . . . . . . . . . . . . . . . . . . . . . . . 12
1.2 AEEE yönetmelğne uyum ve atık ürünün
elden çıkarılması . . . . . . . . . . . . . . . . . . . . . . . . . . . . . . 13
1.3 Ambalaj blgs . . . . . . . . . . . . . . . . . . . . . . . . . . . . . 13
2 Elektrkl süpürgenz 14
2.1 Genel bakış . . . . . . . . . . . . . . . . . . . . . . . . . . . . . . . . 14
2.2 Teknk verler. . . . . . . . . . . . . . . . . . . . . . . . . . . . . . 14
3 Kullanım 15-16
3.1 Kullanım amacı . . . . . . . . . . . . . . . . . . . . . . . . . . . . 15
3.2 Hortumu takma/çıkarma . . . . . . . . . . . . . . . . . . 15
3.3 Teleskobk boruyu takma/çıkarma . . . . . . . . 15
3.4 Parke halı fırçasını takma/çıkarma . . . . . . . . 15
3.5 Parke halı fırçasını ayarlama. . . . . . . . . . . . . . . 15
3.6 Çalıştırma. . . . . . . . . . . . . . . . . . . . . . . . . . . . . . . . . . 15
3.6.1 Emş gücünün ayarlanması. . . . . . . . . . . . . . 15
3.6.2 Toz gösterges . . . . . . . . . . . . . . . . . . . . . . . . . . 15
3.7 Aksesuarlar. . . . . . . . . . . . . . . . . . . . . . . . . . . . . . . . 15
3.8 Süpürgenn kapatılması ve park özellğ. . . 16
4Temzlk ve bakım 17-18
4.1 Toz torbasının değştrlmes . . . . . . . . . . . . . . 17
4.2 Fltrelern temzlenmes. . . . . . . . . . . . . . . . . . . 17
4.2.1 Motor koruma fltres. . . . . . . . . . . . . . . . . . . . 17
4.2.2 Sünger fltre. . . . . . . . . . . . . . . . . . . . . . . . . . . . . 17
4.3 Saklama . . . . . . . . . . . . . . . . . . . . . . . . . . . . . . . . . . . 18

12 /85 TR
Elektrikli Süpürge / Kullanma Kılavuzu
Bu bölümde, yaralanma ya
da madd hasar tehlkelern
önlemeye yardımcı olacak
güvenlk talmatları yer
almaktadır.
Bu talmatlara uyulmaması
halnde her türlü garant geçersz
hale gelr.
1.1 Genel güvenlk
•Bu chaz, uluslararası güvenlk
standartlarına uygundur.
•Bu chaz, chazın güvenl br
şeklde kullanımıyla lgl olarak
gözetm altında tutulmaları veya
kendlerne talmat verlmes
ve chazın kullanımıyla lgl
tehlkeler anlamaları koşuluyla
8 yaş ve üzer çocuklar le
kısıtlı fzksel, duyusal veya
zhnsel kapasteye sahp olan
ya da blg ve deneym olmayan
kşlerce kullanılablr. Çocuklar
chazla oynamamalıdır. Temzlk
ve kullanıcı bakım şlemler,
başlarında br büyük olmadığı
sürece çocuklar tarafından
yapılmamalıdır.
•Elektrk kablosu veya chaz
hasarlıysa kullanmayın. Yetkl
servse başvurun.
•Şebeke güç kaynağınız chazın
tp etketnde belrtlen blglere
uygun olmalıdır.
•Chazı kullanacağınız şebeke
en az 16 A’lık br sgorta le
emnyete alınmış olmalıdır.
•Chazı uzatma kablosuyla
kullanmayın.
•Elektrk kablosunun hasar
görmesn önlemek çn
sıkışmasını, kıvrılmasını veya
keskn kenarlara sürtünmesn
engelleyn.
•Chaz elektrğe bağlıyken
ellernz neml veya ıslaksa,
chazın fşne dokunmayın.
•Chazın fşn przden çıkartırken
kablosundan çekmeyn.
•Yanıcı maddeler süpürmeyn
ve sgara külünü süpürürken
soğumuş olmasına dkkat edn.
•Su veya dğer sıvı maddeler
süpürmeyn.
•Chazı yağış, nem ve ısı
kaynaklarından koruyun.
1Öneml güvenlk ve çevre talmatları

Elektrikli Süpürge / Kullanma Kılavuzu
13 / 85 TR
•Chazı patlayıcı veya yanıcı
ortamların ve maddelern
bulunduğu yerdeveya yakınında
kullanmayın.
•Temzlk ve bakım önces chazın
fşn przden çekn.
•Chazı veya elektrk kablosunu
temzlemek çn suya
daldırmayın.
•Chazın hortumunu düzenl
olarak kontrol edn. Hasar
durumunda kullanmayın, yetkl
servse başvurun.
•Chazı parçalarına ayırmayın.
•Sadece orjnal parçaları veya
üretc tarafından tavsye edlen
parçaları kullanın.
•Çmento, sıva gb nce tozlu
temzlklerde yoğun kullanımda
toz torbası dolum lambası erken
yanacaktır, bu durumda toz
torbası boş olsa dah değştrn.
•Chazı fltreler olmadan
kullanmayın, zarar göreblr.
•Merdvenler süpürürken
chaz kullanıcının aşağısında
bulunmalıdır.
•Ambalaj malzemelern
saklıyorsanız çocukların
ulaşamayacağı br yerde
muhafaza edn.
1.2 AEEE yönetmelğne uyum ve
atık ürünün elden çıkarılması
Bu ürün, T.C. Çevre ve Şehrclk Bakanlığı
tarafından yayımlanan “Atık Elektrkl ve
Elektronk Eşyaların Kontrolü
Yönetmelğ”nde belrtlen zararlı ve
yasaklı maddeler çermez. AEEE Yönetmelğne
uygundur. Bu ürün, ger dönüşümlü ve tekrar
kullanılablr ntelktek yüksek kaltel parça ve
malzemelerden üretlmştr. Bu nedenle, ürünü,
hzmet ömrünün sonunda evsel veya dğer
atıklarla brlkte atmayın. Elektrkl ve elektronk
chazların ger dönüşümü çn br toplama
noktasına götürün. Bu toplama noktalarını
bölgenzdek yerel yönetme sorun. Kullanılmış
ürünler ger kazanıma vererek çevrenn ve doğal
kaynakların korunmasına yardımcı olun.
1.3 Ambalaj blgs
Ürünün ambalajı, Ulusal Mevzuatımız
gereğ ger dönüştürüleblr
malzemelerden üretlmştr. Ambalaj
atığını evsel veya dğer atıklarla brlkte
atmayın, yerel otortenn belrttğ ambalaj
toplama noktalarına atın.
1Öneml güvenlk ve çevre talmatları

14 / 85 TR
Elektrikli Süpürge / Kullanma Kılavuzu
2.1 Genel bakış
2Elektrkl süpürgenz
1. Kablo sarma düğmesi
2. Fiş
3. Park kanalı
4. Emiş gücü ayar düğmesi
5. Açma/Kapama düğmesi
6. Kapak açma düğmesi
7. Taşıma sapı
8. Emiş ağzı
9. Toz göstergesi
10. Tutma sapı
11. Hortum
12. Hortum başlığı
13. Teleskobik boru
14. Parke halı fırçası
15. Teleskobik boru ayar mandalı
16. Dar ağızlı uç
17. Geniş ağızlı uç
2.2 Teknk verler
Nom güç :
2000 W
Max güç :
2600 W
Net ağırlık :
5 kg
Besleme gerilimi:
220-240 V~, 50 Hz
Toz hacmi :
3 L
Kablo boyu :
6 m
Teknik ve tasarım değişiklikleri yapma hakkı
saklıdır.
1110
14
13
12
16 17
15
1
4
2
3
5
6
7
8
9

Elektrikli Süpürge / Kullanma Kılavuzu
15 / 85 TR
3Kullanım
3.1 Kullanım amacı
Chaz ev tp kullanım çn tasarlanmıştır, sanay tp
kullanım çn uygun değldr.
3.2 Hortumu takma/çıkarma
1. Hortumu (11) takmak çn hortum başlığını (12)
emş ağzına gelecek şeklde tn.
•Hortum başlığı (12) üzerndek tırnaklar yerne
oturmalıdır.
2. Hortumu (11) çıkarmak çn hortum başlığı (12)
üzerndek tırnaklara bastırarak çekn.
3.3 Teleskobk boruyu takma/
çıkarma
1. Teleskobk boruyu (13) tutma sapına (10) takın.
2. Teleskobk boruyu çıkarmak çn tutma sapından
(10) teleskobk boruyu çekn.
3. Teleskobk borunun (13) uzunluğunu ayarlamak
çn teleskobk boru ayar mandalını (15 ok
yönünde tn ve ucundan çekn.
3.4 Parke halı fırçasını takma/
çıkarma
Teleskobk boruyu (13) parke halı fırçasına (14)
takıp, çıkartablrsnz.
3.5 Parke halı fırçasını
ayarlama
Parke halı fırçasının (14) üzernde bulunan ayar
mandalını;
•Sert zemn ve parke çn “” konumuna
getrn.
•Halı ve klmler çn “ ” konumuna getrn.
3.6 Çalıştırma
1. Chazın arka kısmında yer alan fş çekerek prze
takın.
2. Chazınızı çalıştırmak çn açma/kapama
düğmesne (5) basın.
3.6.1 Emş gücünün ayarlanması
Chazın emş gücünü, temzlenecek yüzey
cnsne göre gövde üzernde bulunan emş gücü
ayar düğmesn (4) saat yönünde çevrerek
artırablrsnz. Emş gücünü azaltmak çn se saat
yönünün tersne çevrn.
3.6.2 Toz gösterges
Toz torbanız dolduğunda gövde üzerndek
toz gösterges (9) kırmızı renkte görünür. Toz
torbasını değştrn (bkz. 4.1).
3.7 Aksesuarlar
Dar ağızlı uç
Koltuk ve moblya araları gb, ula-
şılması zor bölgelern süpürülmes
çn uygundur.
Geniş ağızlı uç
Döşemelern, merdven basamak-
larının, otomobl çnn, kanepele-
rn, koltukların vb. süpürülmes çn
uygundur.

16 / 85 TR
Elektrikli Süpürge / Kullanma Kılavuzu
AUYARI:
Tutma sapının (10) uç
kısmınıkullanaraktemzlkyapmayın.
3.8 Süpürgenn kapatılması ve
park özellğ
1. Açma/kapama düğmesnden (5) chazı kapatın
ve fşn przden çekn.
2. Kablo sarma düğmesne (1) basarak kablonun
toplanmasını sağlayın.
Dikey park özelliği
Chazın alt kısmında bulunan park kanalına, parke
halı fırçasının kancasını takın.
Yatay park özelliği
Chazın arka kısmında bulunan park kanalına, parke
halı fırçasının kancasını takın.
3Kullanım

Elektrikli Süpürge / Kullanma Kılavuzu
17 / 85 TR
4Temzlk ve bakım
Temzlk yapmadan önce chazı kapatın ve fşn
przden çekn.
AUYARI:
Chazı temzlemek çn
kesnlkle benzn, solvent, aşındırıcı
temzleycler, metal nesneler veya
sert fırçalar kullanmayın.
4.1 Toz torbasının
değştrlmes
Gövde üzerndek toz gösterges (9) kırmızı renkte
görüldüğünde toz torbasını değştrn.
1. Toz haznes açma düğmesne (6) basarak üst
kapağı açın.
2. Toz torbasını yukarıya doğru kaldırarak torba
tutucudan çıkarın.
3. Toz torbasını klpsnden çekerek bulunduğu
kızaktan çıkarın.
4. Dolu toz torbasının kapağını kapatıp çöpe atın.
5. Yen toz torbasını klpslernden tutarak
torba tutucusunun çne tn. Tam yerne
yerleştğnden emn olun.
6. Chazın üst kapağını kapatın.
AUYARI:
Üst kapağın kapanması
çn zorlamayın, aks takdrde plastk
aksam zarar göreblr.
A
UYARI:
Bay ve servs dışında satın
alınan toz torbaları orjnal değldr.
Orjnal olmayan toz torbaları
kaltesz olup çok kısa sürede
yırtılmakta ve chazınızı kullanılamaz
hale getrmektedr. Sahte torba
kullanımı sonucu oluşan arızalarda
garant dışı şlem yapılmaktadır.
AUYARI:
Toz torbasını yıkamayın.
4.2 Fltrelern temzlenmes
Sünger fltre
Motor koruma
fltres Mkro fltre
Her 5 toz torbası değşmnden sonra (kullanım
sıklığı ve alanına göre farklılık göstereblr),
fltreler temzleyn.
AUYARI:
Fltreler kurutmak çn saç
kurutma maknes, soba vb. sıcak
hava veren chazlar kullanmayın.
A
UYARI:
Fltreler tam olarak
kurumadan yerne takmayın, aks
haldekullanım esnasındaetrafa nem
kokusu yayılablr, arka kısmından su
sıçrayablr ve fltreler zarar göreblr.
AUYARI:
Fltreler kuruduktan sonra
yerlerne yerleştrn.
4.2.1 Motor koruma fltres
1. Kapak açma düğmesne (6) basarak üst kapağı
açın.
2. İçersnde bulunan kafesten sünger çıkarın.
3. Slkeledkten sonra akan suyun altında tutarak
yıkayın.
4. Yıkadıktan sonra sünger haffçe sıkıp kurumaya
bırakın.
4.2.2 Sünger fltre
1. Arka kapağı açın.
2. Açılan kapağın arkasında bulunan sünger çıkarıp,
yıkayın.
3. Yıkadıktan sonra sünger haffçe sıkıp kurumaya
bırakın.

18 / 85 TR
Elektrikli Süpürge / Kullanma Kılavuzu
4.3 Saklama
•Chazı uzun süre kullanmayı düşünmüyorsanız,
dkkatl br şeklde saklayın.
•Chazın fşn çekn.
•Chazı, çocukların ulaşamayacağı br yerde
muhafaza edn.
4Temzlk ve bakım

Başda şu ulanyjy kitapçasyny okamagyňyzy haıyşt
edıäris!
Gadyrly alyjy,
Beko önümini saılap alanyňyz üçin sag boluň. İokary hil we sungat tehnologiıasy bilen
öndürilen harydyňyzdan iň gowy netije almagyňyzy umyt edıäris. Şu tutuş ulanyjy
kitapçasyny we ıanyndaky resminamalary harydy ulanmagyňyzdan öň seresaply okaň
we geljekde ulanmak üçin saklaň. Eger siz şu harydy birine berseňiz,ulanyjy kitapçasyny
hem beriň. Ulanyjy kitapçasyndaky hemme duıduryş we maglumatlara görä hereket
ediň.
Simwollaryň manylary
Simwollar şu kitapçanyň dürli bölümlerinde ulanylıarlar:
C
Ulanyş hakynda möhüm we peıdaly
maglumat.
A
Jan we emläk howpsuzlygyna degişli
duıduryşlar.
Elektrik togunyň urmasyndan goraýyş
derejesi”
Şu haryt tebigata zelel ıetirilmän, daş töwerege dostlukly häzirki zaman fabrikalarda öndürilendir.
Gelip çykyş ýurdy: P.R.C.

20 / 85 TM
Tozan soryjy / Ulanyjy kitapçasy
1 Möhüm daş töwerek we
howpsuzlyk nstruksýalary 21
1.1 Umumy howpsuzlyk . . . . . . . . . . . . . . . . . . . . . . . 21
1.2 WEEE gönükdrmeler blen razylyk we zaıala-
nan önümlerň taşlanylyşy . . . . . . . . . . . . . . . . . . . 22
1.3 Gap maglumaty . . . . . . . . . . . . . . . . . . . . . . . . . . . 22
2 Szň tozan sorujyňyz 23
2.1 Umumy syn. . . . . . . . . . . . . . . . . . . . . . . . . . . . . . . . 23
2.2 Tehnk maglumat . . . . . . . . . . . . . . . . . . . . . . . . . 23
3 Ulanylyş 24-25
3.1 Nıetlenen ulanylyş . . . . . . . . . . . . . . . . . . . . . . . . 24
3.2 Şlangy dakmak/aıyrmak. . . . . . . . . . . . . . . . . . . 24
3.3 Teleskopk turbany dakmak/aıyrmak . . . . . 24
3.4 Parket/haly sübsesn dakmak/aıyrmak. . . 24
3.5 Parket/haly sübsesn sazlamak. . . . . . . . . . . 24
3.6 Işledş . . . . . . . . . . . . . . . . . . . . . . . . . . . . . . . . . . . . . 24
3.6.1 Soruş kuwwatynyň sazlanylyşy . . . . . . . . . 24
3.6.2 Tozan görkezgj. . . . . . . . . . . . . . . . . . . . . . . . . 24
3.7 Degşl enjamlar . . . . . . . . . . . . . . . . . . . . . . . . . . . 24
3.8 Tozan sorujyny öçürmek we br
ıere goımak. . . . . . . . . . . . . . . . . . . . . . . . . . . . . . . . . . . . 25
4Tämzlemek we saklamak25-26
4.1 Tozan gabynyň ýern çalyşmak . . . . . . . . . . . 25
4.2 Süzgüçler tämzlemek . . . . . . . . . . . . . . . . . . . . 26
4.2.1 Motory goraýyş süzgüj. . . . . . . . . . . . . . . . . . 26
4.2.2 Köpük sügüj . . . . . . . . . . . . . . . . . . . . . . . . . . . . 26
4.3 Saklanylyş. . . . . . . . . . . . . . . . . . . . . . . . . . . . . . . . . 26
Table of contents
Languages:
Other Beko Vacuum Cleaner manuals

Beko
Beko VRT 82821 BV User manual

Beko
Beko VRR 60110 VW User manual

Beko
Beko 9320 User manual

Beko
Beko BKS 1352 User manual

Beko
Beko VCO32818WR User manual

Beko
Beko VCO 32801 AF User manual

Beko
Beko 01M-8816523200-4720-03 User manual

Beko
Beko RS 8034 HM User manual

Beko
Beko VCO 6325 AB User manual

Beko
Beko VRT 94928 VW User manual

Beko
Beko BKS 9316 User manual

Beko
Beko 01M-8834453200-2117-06 User manual

Beko
Beko VCC 44821 AR User manual

Beko
Beko VCO32802AD User manual

Beko
Beko BKS 1210 User manual

Beko
Beko VCC34118WD User manual

Beko
Beko VCC 6480 T User manual

Beko
Beko VCC 44821 AB User manual

Beko
Beko VRX 221 DR User manual

Beko
Beko BKS 1230 User manual