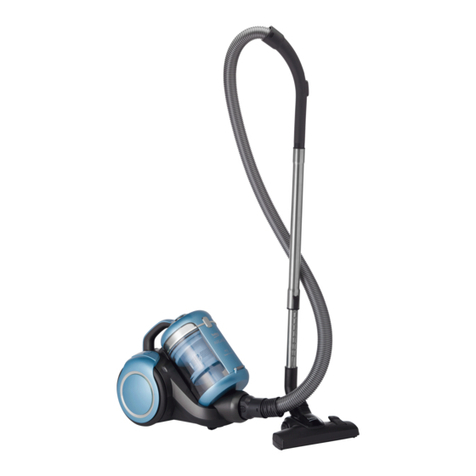
Beko VCO 6325 FD User manual

VCO 6325 FD
Vacuum Cleaner
User Manual
01M-8834433200-2216-02
EN TR RU
BS MK SR

Please read this user manual first!
Dear Customer,
Thank you for preferring a Beko product. We hope that you get the best results from
your product which has been manufactured with high quality and state-of-the-art
technology. Therefore, please read this entire user manual and all other accompanying
documents carefully before using the product and keep it as a reference for future use.
If you handover the product to someone else, give the user manual as well. Follow all
warnings and information in the user manual.
Meanings of the symbols
Following symbols are used in the various section of this manual:
C
Important information or useful hints
about usage.
A
Warning for hazardous situations
with regard to life and property.
Protection class for electric shock.
This product has been produced in environmentally friendly, modern facilities
Complies with the WEEE Regulation. Does not contain PCB.
Made in P.R.C.

Vacuum cleaner / User manual
3 / 57 EN
CONTENTS
1 Important safety and
envronmental nstructons 4-5
1.1 General safety . . . . . . . . . . . . . . . . . . . . . . . . . . . . . . 4
1.2 Complance wth the WEEE Drectve and
dsposal of waste products . . . . . . . . . . . . . . . . . . . . 5
1.3 Package nformaton . . . . . . . . . . . . . . . . . . . . . . . 5
2 Your vacuum cleaner 6
2.1 Overvew . . . . . . . . . . . . . . . . . . . . . . . . . . . . . . . . . . . 6
2.2 Techncal data. . . . . . . . . . . . . . . . . . . . . . . . . . . . . . 6
3 Operaton 7-8
3.1 Intended use . . . . . . . . . . . . . . . . . . . . . . . . . . . . . . . .7
3.2 Attachng/removng the hose. . . . . . . . . . . . . . .7
3.3 Attachng/removng the telescopc tube . . .7
3.4 Attachng/removng the parquet/carpet
brush. . . . . . . . . . . . . . . . . . . . . . . . . . . . . . . . . . . . . . . . . . . .7
3.5 Adjustng the parquet/carpet brush . . . . . . . 8
3.6 Operaton . . . . . . . . . . . . . . . . . . . . . . . . . . . . . . . . . . 8
3.7 Adjustng the sucton power . . . . . . . . . . . . . . . 8
3.8 Accessores . . . . . . . . . . . . . . . . . . . . . . . . . . . . . . . . 8
3.9 Swtchng off the vacuum cleaner
and parkng feature. . . . . . . . . . . . . . . . . . . . . . . . . . . . 8
4Cleanng and care 9-10
4.1 Emptyng the dust contaner. . . . . . . . . . . . . . . 9
4.3 Cleanng the flters. . . . . . . . . . . . . . . . . . . . . . . . . 9
4.3.1 Motor protecton flter and HEPA flter. . . 9
4.3.2 HEPA flter . . . . . . . . . . . . . . . . . . . . . . . . . . . . . . 10
4.4 Storage . . . . . . . . . . . . . . . . . . . . . . . . . . . . . . . . . . . 10
4.5 Handlng and transportaton . . . . . . . . . . . . . 10

4 / 57 EN
Vacuum cleaner / User manual
Ths secton contans safety
nstructons that wll help protect
from rsk of personal njury or
property damage.
Falure to follow these
nstructons nvaldates the
granted warranty.
1.1 General safety
•Ths applance comples wth
the nternatonal securty
standards.
•Ths applance can be used by
chldren aged from 8 years and
above andpersons wthreduced
physcal, sensory or mental
capabltes or lack of experence
and knowledge f they have
been gven supervson or
nstructon concernng use of
the applance n a safe way
and understand the hazards
nvolved. Chldren shall not play
wth the applance. Cleanng
and user mantenance shall not
be made by chldren wthout
supervson.
•Donotusetfthepowercableor
the applance tself s damaged.
Contact an authorzed servce.
•Your mans power supply should
comply wth the nformaton
suppled on the ratng plate of
the applance.
•The mans supply of the
applance must be secured wth
a mnmum 16 A fuse.
•Do not use the applance wth
an extenson cord.
•In order to prevent the power
cable from gettng damaged,
make sure that t doesn't get
stuck, twsted or rub aganst
sharp surfaces.
•Do not touch the applance or ts
plug when t s plugged f your
hands are damp or wet.
•Do not pull the power cable
when unpluggng the applance.
•Do not vacuum flammable
materals and when vacuumng
cgarette ashes make sure that
t got cold.
•Do not vacuum water or other
lqud materals.
•Protect the applance from ran,
humdty and heat sources.
1Important safety and envronmental nstructons

Vacuum cleaner / User manual
5 / 57 EN
1Important safety and envronmental nstructons
•Never use the applance
n or near to combustble
or nflammable places and
materals.
•Unplug the applance before
cleanng and mantenance.
•Do not dp the applance or ts
cable n water to clean t.
•Check the hose of the applance
regularly. Do not use f t s
damaged and contact an
authorzed servce.
•Do not attempt to dsmantle the
applance.
•Only use the orgnal parts or
parts recommended by the
manufacturer.
•Do not use the applance
wthout flters; otherwse t can
get damaged.
•When vacuumng the stars,
the applance should be located
below the user.
•If your store the package
materal, keep t out of the
reach of chldren.
1.2 Complance wth the WEEE
Drectve and dsposal of
waste products
Ths product does not nclude harmful and
prohbted materals specfed n the
“Regulaton for Supervson of the Waste
Electrc and Electronc Applances” ssued
by the Mnstry of Envronment and Urban
Plannng. Ths applance conforms to the WEEE
regulaton. Ths product has been manufactured
wth hgh qualty parts and materals whch can be
reused and are sutable for recyclng. Therefore,
do not dspose the product wth normal domestc
waste at the end of ts servce lfe. Take t to a
collecton pont for the recyclng of electrcal and
electronc equpment. Ask the local authorty n
your area for these collecton ponts. Contrbute to
the preservaton of envronment and natural
sources by takng the used products to the
recyclng ponts.
1.3 Package nformaton
Package of the product s made of
recyclable materals n accordance wth
our Natonal Legslaton. Do not dspose
of the packagng materals together wth
the domestc or other wastes. Take them to the
packagng materal collecton ponts desgnated
by the local authortes.

6 / 57 EN
Vacuum cleaner / User manual
2.1 Overvew
2Your vacuum cleaner
1. On/Off button
2. Dust contaner
3. Sucton nozzle
4. Hose cap
5. Hose
6. Dust contaner removal button
7. Parquet/carpet brush parkng hook
8. Brush adjustment latch
9. Hgh performance parquet/carpet brush
10. Telescopc tube adjustment latch
11. Telescopc tube
12. Vacuum control
13. Handle
2.2 Techncal data
Supply voltage :
220-240 V~, 50/60 Hz
Power :
1550 W Nom
:
1800 W Max
Power cable
length :
7 m
Techncal and desgn modfcaton rghts are
reserved.
1
54
6
2
3
10
11
12
13
98
7
The values whch are declared n the markngs affxed on your applance or other prnted documents
suppled wth t represent the values whch were obtaned n the laboratores pursuant to the pertnent
standards. These values may vary accordng to the usage of the applance and ambent condtons.

Vacuum cleaner / User manual
7 / 57 EN
3Operaton
3.1 Intended use
The applance was desgned to be used n houses,
and s not ft for ndustral use.
3.2 Attachng/removng the
hose
1. To attach the hose (5) push the hose cap (4) n
the drecton of arrow untl t s algned wth the
housng (you wll hear a clck).
•Projectng parts on the hose cap should be
algned correspondngly.
2. To remove the hose (5), press the unlockng
buttons on the sdes of the hose cap (4) and
pull the hose.
3.3 Attachng/removng the
telescopc tube
1. Attach the telescopc tube (11) to the handle
(13).
2. Pull the telescopc tube (11) from the handle
(13) to remove t.
3. You can extend or shorten the telescopc tube
(11) by sldng the telescopc tube adjustment
latch (10) back and forth.
3.4 Attachng/removng the
parquet/carpet brush
1. Attach the telescopc tube (11) to the parquet/
carpet brush (9) n the arrow drecton.
2. You can remove the telescopc tube (11) from
the parquet carpet brush (9) by pullng t.

8 / 57 EN
Vacuum cleaner / User manual
3.5 Adjustng the parquet/
carpet brush
Perform the followng actons on the adjustment
latch (10) located on the parquet/carpet brush (9);
•Vacuum on frm ground and parquet; extend the
brush before vacuumng.
•Vacuum on carpets and rugs; retract the brush
before vacuumng.
3.6 Operaton
1. Plug n the applance after pullng the power
plug located at the back of the applance.
A
WARNING:
Stop pullng the
applance cable when t comes to
the yellow mark located on t. After
the yellow mark the red mark comes.
Do not pull any more after reachng
the red mark.
2. Press on/off button (1) to swtch on your
applance.
3.7 Adjustng the sucton power
You can ncrease the sucton power of the
applance by turnng the sucton power
adjustment knob located on the body of the
applance clockwse accordng to the type of the
surface to be cleaned. To decrease the sucton
power, turn the sucton power adjustment knob
counter-clockwse.
3.8 Accessores
Upholstery tool
Sutable for the cleanng of the
floorngs, star steps, nsde of the
cars, sofas, armchars etc.
Dust brush
Sutable for the cleanng of curtans,
and senstve and fragle objects.
Crevce tool
Sutable for the cleanng of the
surfaces whch are dffcult to
clean, such as the areas remanng
under sofas and furnture.
AWARNING:
Do not make cleanng
by usng the handle's (13) end part.
3.9 Swtchng off the vacuum
cleaner and parkng feature
1. Swtch off the applance wth the on/off button
(1) and unplug t.
2. Insert the parkng hook (7) of the parquet/
carpet brush nto the parkng groove located at
the rear secton of the applance.
3Operaton

Vacuum cleaner / User manual
9 / 57 EN
4Cleanng and care
Swtch off and unplug the applance before
cleanng t.
AWARNING:
Never use gasolne,
solvent, abrasve cleanng agents,
metal objects or hard brushes to
clean the applance.
4.1 Emptyng the dust
contaner
1. Press the dust contaner removal button (6) to
remove the dust contaner (2) and remove the
dust contaner n the drecton of the arrow
by holdng from the dust contaner carryng
handle.
2. Uncap the dust contaner (2) and empty t.
3. When you have empted dust, close the dust
contaner cap (2); a clck sound wll be heard.
4. Insert the dust contaner (2) nto ts place by
holdng t from the handle.
4.3 Cleanng the flters
AWARNING:
Do not use applances
producng hot ar such as har dryer
or heater to dry the flters.
A
WARNING:
Do not nstall the
flters wthout completely dryng
them; otherwse smell of mosture
may occur durng the use, water can
leak from the back of the applance
or the flters may get damaged.
AWARNING:
Attach the flters nto
ther places after they are dred.
4.3.1 Motor protecton flter and
HEPA flter
Ths flters are located under the dust contaner
(2) compartment.
1. Press the dust contaner removal button (6) to
remove the dust contaner (2) and remove the
dust contaner.
2. Remove the HEPA flter and motor protecton
flter found at the back of the dust contaner (2).
3. After washng the sponge protecton flter
under runnng water, wrng t out slghtly and
leave t to dry (24 hours mnmum).
4. Shake off the HEPA nlet flter to elmnate
the dusts on t. After that, you can wash t by
holdng ts clean sde under runnng cool water.
5. If you wash the HEPA flter, dry t n the room
temperature (24 hours mnmum). Do not use t
before ensurng that t s completely dry.

10 / 57 EN
Vacuum cleaner / User manual
4.3.2 HEPA flter
HEPA outlet flter s located on the rear sde of the
applance.
1. Remove the HEPA flter by pullng t from ts
handle.
2. Shake off the HEPA outlet flter to elmnate
the dusts on t. After that, you can wash t by
holdng ts clean sde under runnng cool water.
3. If you wash the HEPA flter, dry t n the room
temperature (24 hours mnmum). Do not use t
before ensurng that t s completely dry.
4.4 Storage
•If you do not ntend to use the applance for a
long tme, store t carefully.
•Unplug the applance.
•Keep the applance out of the reach of chldren.
4.5 Handlng and
transportaton
•Durng handlng and transportaton, carry
the applance n ts orgnal packagng. The
packagng of the applance protects t aganst
physcal damages.
•Do not place heavy loads on the applance or on
the packagng. The applance may get damaged.
•Droppng the applance may render t non-
operatonal or cause permanent damage.
4Cleanng and care

Lütfen önce bu kılavuzu okuyun!
Değerli Müşterimiz,
Beko ürününü tercih ettiğiniz için teşekkür ederiz. Yüksek kalite ve teknoloji ile üretilmiş
olan ürününüzün size en iyi verimi sunmasını istiyoruz. Bunun için, bu kılavuzun
tamamını ve verilen diğer belgeleri ürünü kullanmadan önce dikkatle okuyun ve bir
başvuru kaynağı olarak saklayın. Ürünü başka birisine verirseniz, kullanma kılavuzunu
da birlikte verin. Kullanma kılavuzunda belirtilen tüm bilgi ve uyarıları dikkate alarak
talimatlara uyun.
Sembollerin anlamları
Bu kullanma kılavuzunun çeşitli kısımlarında aşağıdaki semboller kullanılmıştır:
C
Cihazın kullanımıyla ilgili önemli
bilgiler ve faydalı tavsiyeler.
AUYARI:
Can ve mal güvenliğiyle ilgili
tehlikeli durumlar konusunda uyarılar.
Elektrik çarpmasına karşı koruma
sınıfı.
Bu ürün çevreye saygılı modern tesislerde doğaya zarar vermeden üretilmiştir.
AEEE Yönetmelğne Uygundur. PCB çermez.
Menşe P.R.C.

12 / 57 TR
Elektrikli Süpürge / Kullanma Kılavuzu
1 Öneml güvenlk ve
çevre talmatları 13-14
1.1 Genel güvenlk . . . . . . . . . . . . . . . . . . . . . . . . . . . . . 13
1.2 AEEE yönetmelğne uyum ve atık ürünün
elden çıkarılması . . . . . . . . . . . . . . . . . . . . . . . . . . . . . . 14
1.3 Ürünün ambalajı . . . . . . . . . . . . . . . . . . . . . . . . . . 14
2 Elektrkl süpürgenz 15
2.1 Genel bakış . . . . . . . . . . . . . . . . . . . . . . . . . . . . . . . . 15
2.2 Teknk verler. . . . . . . . . . . . . . . . . . . . . . . . . . . . . . 15
3 Kullanım 16-17
3.1 Kullanım amacı . . . . . . . . . . . . . . . . . . . . . . . . . . . . 16
3.2 Hortumu takma/çıkarma . . . . . . . . . . . . . . . . . . 16
3.3 Teleskobk boruyu takma/çıkarma . . . . . . . . 16
3.4 Parke halı fırçasını takma/çıkarma . . . . . . . . 16
3.5 Parke halı fırçasını ayarlama. . . . . . . . . . . . . . . 17
3.6 Çalıştırma. . . . . . . . . . . . . . . . . . . . . . . . . . . . . . . . . . 17
3.7 Emş gücünün ayarlanması. . . . . . . . . . . . . . . . 17
3.8 Aksesuarlar . . . . . . . . . . . . . . . . . . . . . . . . . . . . . . . 17
3.9 Süpürgenn kapatılması ve park özellğ. . . 17
4Temzlk ve bakım 18-19
4.1 Toz haznesnn boşaltılması. . . . . . . . . . . . . . . 18
4.3 Fltrelern temzlenmes. . . . . . . . . . . . . . . . . . . 18
4.3.1 Motor koruma fltres ve HEPA fltre. . . . . 18
4.3.2 HEPA fltre . . . . . . . . . . . . . . . . . . . . . . . . . . . . . . 19
4.4 Saklama . . . . . . . . . . . . . . . . . . . . . . . . . . . . . . . . . . . 19
4.5 Taşıma ve naklye . . . . . . . . . . . . . . . . . . . . . . . . . 19

Elektrikli Süpürge / Kullanma Kılavuzu
13 / 57 TR
Bu bölümde, yaralanma ya da
madd hasar tehlkelern önleme-
ye yardımcı olacak güvenlk tal-
matları yer almaktadır.
Bu talmatlara uyulmaması haln-
de her türlü garant geçersz hale
gelr.
1.1 Genel güvenlk
•Bu chaz, uluslararası güvenlk
standartlarına uygundur.
•Chaz, 8 yaş ve üzer çocuklar
ve fzksel, algısal ve zhnsel
yetenekler azalmış veya
tecrübe ve blg eksklğ olan
kşler tarafından gözetm
altında veya chazın güvenl
br şeklde kullanımına ve
karşılaşılan lgl tehlkelern
anlaşılmasına dar talmat
verlrse kullanılablr. Çocuklar
chazla oynamamalıdır. Temzlk
ve kullanıcı bakım şlemler,
başlarında br büyük olmadığı
sürece çocuklar tarafından
yapılmamalıdır.
•Elektrk kablosu veya chaz
hasarlıysa kullanmayın. Yetkl
servse başvurun.
•Şebeke güç kaynağınız chazın
tp etketnde belrtlen blglere
uygun olmalıdır.
•Chazı kullanacağınız şebeke
en az 16 A’lık br sgorta le
emnyete alınmış olmalıdır.
•Chazı uzatma kablosuyla
kullanmayın.
•Elektrk kablosunun hasar
görmesn önlemek çn
sıkışmasını, kıvrılmasını veya
keskn kenarlara sürtünmesn
engelleyn.
•Chaz elektrğe bağlıyken
ellernz neml veya ıslaksa,
chazın fşne dokunmayın.
•Chazın fşn przden çıkartırken
kablosundan çekmeyn.
•Yanıcı maddeler süpürmeyn
ve sgara külünü süpürürken
soğumuş olmasına dkkat edn.
•Su veya dğer sıvı maddeler
süpürmeyn.
•Chazı yağış, nem ve ısı
kaynaklarından koruyun.
•Chazı patlayıcı veya yanıcı
ortamların ve maddelern
bulunduğu yerdeveya yakınında
kullanmayın.
1Öneml güvenlk ve çevre talmatları

14 / 57 TR
Elektrikli Süpürge / Kullanma Kılavuzu
•Temzlk ve bakım önces chazın
fşn przden çekn.
•Chazı veya elektrk kablosunu
temzlemek çn suya
daldırmayın.
•Chazın hortumunu düzenl
olarak kontrol edn. Hasar
durumunda kullanmayın, yetkl
servse başvurun.
•Chazı parçalarına ayırmayın.
•Sadece orjnal parçaları veya
üretc tarafından tavsye edlen
parçaları kullanın.
•Chazı fltreler olmadan
kullanmayın, zarar göreblr.
•Merdvenler süpürürken
chaz kullanıcının aşağısında
bulunmalıdır.
•Ambalaj malzemelern
saklıyorsanız çocukların
ulaşamayacağı br yerde
muhafaza edn.
1Öneml güvenlk ve çevre talmatları
1.2 AEEE yönetmelğne
uyum ve atık ürünün elden
çıkarılması
Bu ürün, T.C. Çevre ve Şehrclk Bakanlığı
tarafından yayımlanan “Atık Elektrkl ve
Elektronk Eşyaların Kontrolü
Yönetmelğ”nde belrtlen zararlı ve
yasaklı maddeler çermez. AEEE Yönetmelğne
uygundur. Bu ürün, ger dönüşümlü ve tekrar
kullanılablr ntelktek yüksek kaltel parça ve
malzemelerden üretlmştr. Bu nedenle, ürünü,
hzmet ömrünün sonunda evsel veya dğer
atıklarla brlkte atmayın. Elektrkl ve elektronk
chazların ger dönüşümü çn br toplama
noktasına götürün. Bu toplama noktalarını
bölgenzdek yerel yönetme sorun. Kullanılmış
ürünler ger kazanıma vererek çevrenn ve doğal
kaynakların korunmasına yardımcı olun.
1.3 Ürünün ambalajı
Ürününüzde kullanılan ambalajlar ger
dönüşümü mümkün ambalajlardır.
Ürününüzün ambalajlarının çevresel
açıdan ger dönüşüm sürecne katılmasını
sağlamanız çn yerel resm makamların kurallarına
uygunolarakambalajlarınayrıatılmasınısağlayınız.

Elektrikli Süpürge / Kullanma Kılavuzu
15 / 57 TR
2.1 Genel bakış
2Elektrkl süpürgenz
1. Açma/Kapama düğmes
2. Toz haznes
3. Emş ağzı
4. Hortum başlığı
5. Hortum
6. Toz haznes çıkarma düğmes
7. Parke halı fırçası park kancası
8. Fırça ayar mandalı
9. Yüksek performanslı parke halı fırçası
10. Teleskobk boru ayar mandalı
11. Teleskobk boru
12. Vakum ayar sürgüsü
13. Tutma sapı
2.2 Teknk verler
Besleme gerlm :
220-240 V~, 50/60 Hz
Güç :
1550 W Nom
:
1800 W Max
Kablo uzunluğu :
7 m
Teknk ve tasarım değşklkler yapma hakkı
saklıdır.
1
54
6
2
3
10
11
12
13
98
7
Ürününüz üzernde bulunan şaretlemelerde veya ürünle brlkte verlen dğer basılı dökümanlarda beyan edlen değerler, lgl
.standartlara göre laboratuvar ortamında elde edlen değerlerdr. Bu değerler, ürünün kullanım ve ortam şartlarına göre değşeblr

16 / 57 TR
Elektrikli Süpürge / Kullanma Kılavuzu
3Kullanım
3.1 Kullanım amacı
Chaz ev tp kullanım çn tasarlanmıştır, sanay tp
kullanım çn uygun değldr.
3.2 Hortumu takma/çıkarma
1. Hortumu (5) takmak çn hortum başlığını (4)
yuvaya denk gelecek şeklde ok yönünde tn
(“klk” ses duyulur).
•Hortum başlığı üzerndek çıkıntılı parçalar
karşılıklı hzalanmalıdır.
2. Hortumu (5) çıkarmak çn hortum başlığının (4)
yan tarafında bulunan klt açma düğmelerne
basın ve hortumu çekn.
3.3 Teleskobk boruyu takma/
çıkarma
1. Teleskobk boruyu (11) tutma sapına (13) takın.
2. Teleskobk boruyu (11) çıkarmak çn tutma
sapından (13) teleskobk boruyu çekn.
3. Teleskobk borunun (11) uzunluğunu ayarlamak
çn teleskobk boru ayar mandalını (10) ler ger
kaydırarak uzatıp kısaltablrsnz.
3.4 Parke halı fırçasını takma/
çıkarma
1. Teleskobk boruyu (11) parke halı fırçasına (9) ok
yönünde takın.
2. Parke halı fırçasından (9) teleskobk boruyu (11)
çekerek çıkarablrsnz.

Elektrikli Süpürge / Kullanma Kılavuzu
17 / 57 TR
3.5 Parke halı fırçasını
ayarlama
Parke halı fırçasının (9) üzernde bulunan ayar
mandalına (10 ) basarak;
•Sert zemn ve parke çn kıl fırçalar üzernde
temzlk yapın.
•Halı ve klmler çn kıl fırçalar gzl konumda
temzlk yapın.
3.6 Çalıştırma
1. Chazın arka kısmında yer alan fş çekerek prze
takın.
A
UYARI:
Chazın kablosunu
üzernde bulunan sarı şarete
geldğnde çekmey durdurun,
sarı şaretten sonra kırmızı şaret
gelecektr, kırmızı şaretten daha
fazla çekmeyn.
2. Chazınızı çalıştırmak çn açma/kapama
düğmesne (1) basın.
3.7 Emş gücünün ayarlanması
Chazın emş gücünü, temzlenecek yüzey cnsne
göre gövde üzernde bulunan emş gücü ayar
düğmesn saat yönünde çevrerek artırablrsnz.
Emş gücünü azaltmak çn se saat yönünün
tersne çevrn.
3.8 Aksesuarlar
Genş ağızlı uç
Döşemelern, merdven
basamaklarının, otomobl çnn,
kanepelern, koltukların vb.
süpürülmes çn uygundur.
Toz fırçası
Perde, hassas ve kırılablr csmlern
süpürülmes çn uygundur.
Dar ağızlı uç
Koltuk ve moblya araları gb,
ulaşılması zor bölgelern
süpürülmes çn uygundur.
AUYARI:
Tutma sapının (13) uç
kısmınıkullanaraktemzlkyapmayın.
3.9 Süpürgenn kapatılması ve
park özellğ
1. Açma/kapama düğmesnden (1) chazı kapatın
ve fşn przden çekn.
2. Chazın arka kısmında bulunan park kanalına,
parke halı fırçasının parka kancasını (7) takın.
3Kullanım

18 / 57 TR
Elektrikli Süpürge / Kullanma Kılavuzu
4Temzlk ve bakım
Temzlk yapmadan önce chazı kapatın ve fşn
przden çekn.
AUYARI:
Chazı temzlemek çn
kesnlkle benzn, solvent, aşındırıcı
temzleycler, metal nesneler veya
sert fırçalar kullanmayın.
4.1 Toz haznesnn
boşaltılması
1. Toz haznesn (2) çıkarmak çn toz haznes
çıkarma düğmesne (6) basın ve toz haznes
taşıma sapından tutarak ok yönünde çıkartın.
2. Toz haznesnn (2) kapağını açın ve boşaltın.
3. Toz boşaldığında, toz haznes (2) kapağını
kapatın, tık ses duyulur.
4. Toz haznes tutma sapından tutarak toz
haznesn (2) yerne yerleştrn.
4.3 Fltrelern temzlenmes
AUYARI:
Fltreler kurutmak çn saç
kurutma maknes, soba vb. sıcak
hava veren chazlar kullanmayın.
A
UYARI:
Fltreler tam olarak
kurumadan yerne takmayın, aks
haldekullanım esnasında etrafa nem
kokusu yayılablr, arka kısmından su
sıçrayablr ve fltreler zarar göreblr.
AUYARI:
Fltreler kuruduktan sonra
yerlerne yerleştrn.
4.3.1 Motor koruma fltres ve
HEPA fltre
Bu fltreler toz haznes (2) bölmesnn alt kısmında
yer alır.
1. Toz haznes çıkarma düğmesne (6) basın ve toz
haznesn (2) çıkarın.
2. Toz haznesnn (2) arkasında bulunan HEPA
fltre ve motor koruma fltresn çıkartın.
3. Sünger koruma fltresn suyun altında
yıkadıktan sonra haffçe sıkıp kurumaya bırakın
(en az 24 saat).
4. HEPA grş fltresnn tozunu slkeleyerek dökün.
Daha sonra temz tarafını akan soğuk suyun
altına tutarak yıkayablrsnz.
5. Yıkamanız halnde HEPA fltrey oda sıcaklığında
kurutun (en az 24 saat). Tamamen kuru
olduğundan emn olmadan kullanmayın.

Elektrikli Süpürge / Kullanma Kılavuzu
19 / 57 TR
4.3.2 HEPA fltre
HEPA çıkış fltres, chazın arka tarafındadır.
1. HEPA çıkış fltresn tutma yernden çekerek
çıkartın.
2. HEPA çıkış fltresnn tozunu slkeleyerek dökün.
Daha sonra temz tarafını akan soğuk suyun
altına tutarak yıkayablrsnz.
3. Yıkamanız halnde HEPA fltrey oda sıcaklığında
kurutun (en az 24 saat). Tamamen kuru
olduğundan emn olmadan kullanmayın.
4.4 Saklama
•Chazı uzun süre kullanmayı düşünmüyorsanız,
dkkatl br şeklde saklayın.
•Chazın fşn çekn.
•Chazı, çocukların ulaşamayacağı br yerde
muhafaza edn.
4.5 Taşıma ve naklye
•Taşıma ve naklye sırasında chazı orjnal
ambalajı le brlkte taşıyın. Chazın ambalajı,
chazı fzksel hasarlara karşı koruyacaktır.
•Chazın veya ambalajının üzerne ağır csmler
koymayın. Chaz zarar göreblr.
•Chazın düşürülmes durumunda chaz
çalışmayablr veya kalıcı hasar oluşablr.
4Temzlk ve bakım

C
A
-
Это изделие изготовлено на современном оборудовании, не загрязняющем окружающую среду.
Данное устройство удовлетворяет требованиям
Директивы ЕС об отходах электрического и
электронного оборудования (WEEE).
Устройство не содержит ПХБ.
сделано в P.R.C
Table of contents
Languages:
Other Beko Vacuum Cleaner manuals

Beko
Beko 9320 User manual

Beko
Beko VCO 62602 AB User manual

Beko
Beko VRT 94929 VI User manual

Beko
Beko BKK 1180 P User manual

Beko
Beko BKS 1511 A User manual

Beko
Beko VCC 4520 WR User manual

Beko
Beko 01M-8838073200-3019-06 User manual

Beko
Beko VRT 94129 VI User manual

Beko
Beko BKS 1248 User manual

Beko
Beko 01M-8833043200-2517-05 User manual

Beko
Beko VRT 61814 VB User manual

Beko
Beko VCO32803AF User manual

Beko
Beko 01M-8834203200-1117-01 User manual

Beko
Beko 01M-8912603200-2322-01 User manual

Beko
Beko VRR 60314 VW User manual

Beko
Beko VRT 82821 BV User manual

Beko
Beko SD 8161 User manual

Beko
Beko VCC 6480 T User manual

Beko
Beko VCC34802AB User manual

Beko
Beko VCC 5325 AR User manual