BELINEA 10 30 55 User manual

MAXDATA Computer GmbH & Co. KG
Elbestraße 12-16 · D-45768 Marl
Telefon +49 2365 952-0
www.maxdata.com
MAXDATA Computer AG
Haldenstraße 5 · CH-6340 Baar
Telefon +41 41 76632-32
www.maxdata.com
MAXDATA Computer GmbH
Ignaz-Köck-Straße 9 · A-1210 Wien
Telefon +43 1 27789-0
www.maxdata.com
MAXDATA Benelux B.V.
Hogehilweg 8 · NL-1101 CC Amsterdam Zuid-Oost
Telefon +31 20 311-3232
De Vunt 17 · B-3220 Holsbeek
Telefon +32 16 269-720
www.maxdata.com
MAXDATA UK Limited
The MAXDATA Center
Downmill Road
GB-Bracknell Berkshire · RG12 1QS
Telefon +44 1 344 7889-00
www.maxdata.co.uk
MAXDATA S.A.R.L.
1, rue du Gevaudan · SILIC 1726
F-91017 EVRY Cedex
Telefon +33 1 691129-90
www.maxdata.com
Art. No.: 12 17 12
USER MANUAL
CRT-Monitor
Belinea 10 30 55

Country Phone number Additional swap out service
Land Telefonnummer Zusätzlicher Austausch-Service
Pays Numéro de téléphone Service supplémentaire d’échange sur site
Belgie/Belgique 0900 10630 (0,45 €/min) 3 year on-site warranty (swap out)
Deutschland 02365 952 1010 3 Jahre Garantie-Austausch-Service
España 090 21 96 497 3 años de garantia con intercambio a domicilio
Ελλαδα 01 02 40 91 50 Εγγυηση 3 χρονια επιτοπου αντικατασταση
France 0820 091820 3 ans de garantie avec échange standard sur site
Italia 02 38 20 20 79 3 anni di Garanza di sostituzione a domicilio
Ireland 00 353 12861343 3 year on-site warranty (swap out)
Luxemburg/Luxembourg 0900 74235 (0,45 €/min) 3 year on-site warranty (swap out)
Magyarország 01 340 99 51/53 3 év helyi szerviz
Nederland 0900 BELINEA (02354632) 3 year on-site warranty (swap out)
(0,70€/Gesprek)
Österreich 01 277 89 88 3 Jahre Vor-Ort-Austausch-Garantie
Polska 071 337 19 55 / 022 863 27 77 3 lata gwarancji (door to door).
Portugal 0 21 771 36 00 3 Anos de Troca em Garantia On-Site
Россия +49 (0) 180 5 62 94 68 Трехлетняя гарантия сзаменой на рабочем месте.
Schweiz 0900 575 111 (2,13 CHF/min) 3 Jahre Vor-Ort-Austausch-Service
United Kingdom 01344 788920 3 year on-site swap out warranty
(UK mainland only)
Français
BELINEA PREMIUM SERVICE
The three-year return to base warranty for your Belinea monitor includes all parts and labour. In addition
many countries offer a free of charge swap out warranty programme. This does not affect your Statutory
Rights. Please visit http://www.belinea.com or call the numbers below for further warranty or service
information.
Please have the serial and model number ready when calling.
Die Garantie für Ihren Belinea Monitor beträgt drei Jahre und umfasst alle Bauteile. Darüber hinaus
bieten wir in vielen Ländern einen zusätzlichen, kostenlosen Austausch-Service an. Von dieser o. g.
Garantie bleiben etwaige gesetzliche Gewährleistungsrechte unberührt. Nähere Informationen zu
Garantie- und Servicefragen erhalten Sie im Internet unter http://www.belinea.com sowie unter den u. g.
Rufnummern.
Bitte halten Sie für Ihren Anruf Serien- und Modellnummer bereit.
La garantie internationale de trois ans sur les écrans Belinea s’entend pièces et main d’œuvre. Pour
obtenir plus d’informations sur la garantie et le service après-vente contactez-nous sur Internet http://
www.belinea.com ou aux numéros de téléphone ci-dessous. Vous pouvez obtenir également plus de
détails sur les possibilités d’échange gratuit, service offert dans de nombreux pays.
Pour votre appel, tenez les numéros de série et d’article à portée de main.
All other countries
Alle anderen Länder
Les autres pays
English
Deutsch
+49 (0) 180 5 62 94 68

Belinea 10 30 55
DEUTSCH 2 ~ 8
ENGLISH 9 ~ 14
FRANÇAIS 15~ 20
Revision 1.0

2 - Belinea 10 30 55
DEUTSCH
WILLKOMMEN BEI BELINEA
Herzlichen Glückwunsch zu Ihrem neuen Belinea-Monitor. Sie haben sich für einen innovativen Hersteller entschieden,
der High-Tech-Monitore mit sehr hohem Qualitätsniveau fertigt. Wir sind sicher, dass dieser Monitor Ihre Erwartungen
erfüllt und dass Sie mit ihm einen zuverlässigen Partner gewinnen.
Computer und Monitore sind aus dem heutigen Alltag kaum mehr wegzudenken. Als Schnittstelle zwischen Mensch und
Technik kommt dabei dem Monitor eine besondere Bedeutung zu. Dessen sind wir uns bewusst und setzen dies konse-
quent in den Grundwerten unserer Produktphilosophie um:
Qualität
Die hohe Qualität unserer Monitore wird von uns ständig überprüft. Sie ist nicht einfach nur ein Versprechen,
sondern wird durch umfangreiche Spezifikationen und zahlreiche Zertifizierungen bestätigt. Das Ergebnis ist
eine hervorragende Bildqualität und Farbbrillanz bei allen Belinea-Modellen.
Zuverlässigkeit
Die bei Belinea-Monitoren eingesetzten Technologien bringen Qualität und Aktualität miteinander in Einklang.
Eine umfangreiche Prüfung der Geräte sorgt dafür, dass nur ausgereifte Technologien ins Programm genom-
men werden. Das führt zu äußerst geringen Ausfallraten und besonders langlebigen Produkten.
Ergonomie
Bei all unseren Entwicklungen steht immer eines im Vordergrund: Der Mensch, der am Monitor arbeitet. Unse-
re Arbeit soll ihm seine leichter machen. Daher sind Belinea Monitore fast ausschließlich nach den strengsten
Ergonomie-Normen wie z. B. TCO und TÜV Ergonomie zertifiziert und sorgen so für ein durch und durch
angenehmes Arbeiten.
Service
Ob man bei der Wahl des Monitors die richtige Entscheidung getroffen hat, weiß man spätestens, wenn man
den Service benötigt. Deshalb bieten wir in vielen europäischen Ländern einen umfassenden
Garantie-Austausch-Service an, der sowohl die Bildröhre als auch das Panel und Backlight umfasst.

Bedienungsanleitung - 3
DEUTSCH
EINLEITUNG
Dieses Handbuch wird Sie mit der Installation und der
Bedienung des Belinea Monitors vertraut machen. Se-
hen Sie diese Anleitung auch dann kurz durch, wenn Ih-
nen die Bedienung eines Monitors bereits vertraut ist.
Wir haben alle Sorgfalt walten lassen, um in diesem Hand-
buch korrekte und akkurate Informationen zu geben. Für
möglicherweise vorhandene Fehler kann jedoch keine
Haftung übernommen werden. Weiterhin übernehmen wir
keine Garantie dafür, dass die Hardware den von Ihnen
gewünschten Zweck erfüllt. Für Hinweise auf vorhande-
ne Fehler, Ihre Verbesserungsvorschläge und Kritik sind
wir stets dankbar.
© Copyright 2003
MAXDATA Systeme GmbH
45768 Marl, Deutschland
www.maxdata.com
Alle Rechte vorbehalten. Kein Teil dieses Handbuchs darf in
irgendeiner Form (Druck, Fotokopie, Mikrofilm oder andere Ver-
fahren) ohne vorherige schriftliche Genehmigung des Herstel-
lers reproduziert oder unter Verwendung elektronischer Syste-
me verarbeitet, vervielfältigt oder verbreitet werden.
Änderungen, die dem technischen Fortschritt dienen, bleiben
vorbehalten. Belinea ist ein international eingetragenes
Warenzeichen. Andere Markennamen können eingetragene
Warenzeichen sein und müssen als solche behandelt werden.
Umweltschutz ist auch unsere Aufgabe: Dieses Handbuch wurde von der ersten bis zur letzten
Seite auf einem Papier gedruckt, bei dessen Herstellung keinerlei Chlor mehr verwendet wird.
INHALTSVERZEICHNIS
Verwendung von Symbolen
In diesem Handbuch wurden folgende Symbole ver-
wandt, um auf eine mögliche Personengefährdung,
Sachschäden bzw. nützliche Informationen hinzuwei-
sen:
GEFAHR! Bezeichnet eine mögliche Gefährdung
des Anwenders. Bei Nichtbeachtung können Tod
oder schwerste Verletzungen die Folge sein.
ACHTUNG! Weist auf mögliche Sachschäden
hin. Bei Nichtbeachtung können Geräte ernst-
haft beschädigt werden.
WICHTIG! Bezeichnet Anwendungstipps und
andere besonders nützliche Informationen.
WILLKOMMEN BEI BELINEA .................................... 2
EINLEITUNG ............................................................. 3
WICHTIGE HINWEISE .............................................. 4
WARTUNG UND PFLEGE ........................................ 4
AUSPACKEN ............................................................. 5
ANSCHLIESSEN ....................................................... 5
EINSCHALTEN .......................................................... 5
KONFIGURIEREN ..................................................... 6
GRUNDLEGENDE EINSTELLUNGEN ..................... 6
BILDEINSTELLUNG ÜBER DAS OSD-MENÜ .......... 6
FUNKTIONEN DES OSD-MENÜS ............................ 7
PROBLEMLÖSUNGEN ............................................. 8
TECHNISCHE DATEN ............................................... 8
Information zur umwelt-
gerechten Entsorgung
Belinea Monitore sind für ein umweltgerechtes Recycling
gemäß TCO konzipiert. Bei allen Fragen rund um die
Entsorgung Ihres Monitores wenden Sie sich bitte an
unseren europaweit tätigen Entsorgungspartner:
Hellmann Process Management
GmbH & Co. KG
Adolf-Köhne-Straße 11
49090 Osnabrück
Tel.: +49 (0) 541 605 1585
Weitere Informationen zum Recycling von Monitoren fin-
den Sie unter:
http://195.60.99.33/monitor-recycling

4 - Belinea 10 30 55
DEUTSCH
WARTUNG UND PFLEGE
• Lösen Sie zuerst das Netzkabel von der Strom-
versorgung, indem Sie den Stecker aus der
Steckdose ziehen.
• Wenn der Monitor stark verschmutzt ist, reinigen
Sie ihn mit einem angefeuchteten Tuch. Verwen-
den Sie nur warmes Wasser, und reiben Sie den
Monitor danach trocken. Durch Lösungsmittel
bzw. scharfe Reinigungsmittel kann die Gehäu-
seoberfläche beschädigt werden. Reinigen Sie
die Bildröhre nur mit einem weichen Tuch, da an-
sonsten die Bildröhrenbeschichtung Schaden
nehmen kann.
• Reinigen Sie den Monitor bei leichter Verschmut-
zung nur mit einem trockenen, weichen und anti-
statischen Tuch.
• Die Kathodenstrahlröhre verfügt über eine spezi-
elle Beschichtung, mit der die Monitorstrahlung
verringert wird. Diese Beschichtung ist gegenüber
Kratzern empfindlicher als einfachere Monitore
ohne diese Funktion. Berühren Sie den Bildschirm
niemals mit einem Stift. Achten Sie darauf, dass
keine Uhren, Ringe, Knöpfe u. ä. mit dem Bild-
schirm in Berührung kommen (eine häufige Ursa-
che für Kratzer sind Krawattennadeln, die beim
Umstellen des Monitors den Bildschirm berühren).
Sicherheitshinweise zum Betrieb
Das Netzkabel darf nicht beschädigt werden. Stel-
len Sie keine Gegenstände auf das Netzkabel, und
sorgen Sie dafür, dass keine Knoten am Kabel
auftreten. Um das Kabel zu lösen, ziehen Sie stets
am Stecker und nie am Kabel selbst. Ein beschä-
digtes Netzkabel kann zu Brand oder Stromschlä-
gen führen.
• Achten Sie darauf, dass die Lüftungsschlitze nicht
verdeckt werden. Die Luftzirkulation im Monitor
ist erforderlich, um eine Überhitzung zu vermei-
den. Wird sie beeinträchtigt, können Brand oder
ein Ausfall des Monitors die Folge sein.
• Verwenden Sie zum Reinigen des Monitors keine
Lösungsmittel, da andernfalls die Gehäuseober-
fläche beschädigt werden kann. Weitere Hinwei-
se zur Pflege des Geräts finden Sie im Abschnitt
„Wartung und Pflege“.
Öffnen Sie den Monitor niemals eigenständig.
Andernfalls besteht die Gefahr eines Strom-
schlags oder anderer Personenschäden. Der
Monitor darf nur von Fachpersonal geöffnet und
gewartet werden.
Hinweise zur Ergonomie
Um Ihre Augen, Nacken- und Schultermuskula-
tur bei der Arbeit am Bildschirm zu schonen, emp-
fehlen wir, einen Augenabstand von 50 bis
75 cm zum Monitor einzuhalten. Darüber hinaus
können die Augen durch regelmäßiges Fixieren
eines Gegenstandes in etwa 6 m Entfernung ent-
spannt werden. Sie erreichen eine ergonomische
Sitzhaltung, wenn Ellbogen, Becken, Knie und
Fußgelenke jeweils einen rechten Winkel bilden.
WICHTIGE HINWEISE
Hinweise zum Aufstellungsort
• Der Aufstellungsort darf weder extrem heiß oder
kalt noch feucht oder staubig sein. Hitze und Käl-
te können die Funktionsfähigkeit des Monitors
beeinträchtigen. Feuchtigkeit und Staub können
zu einem Ausfall des Monitors führen.
• Stellen Sie den Monitor nicht in unmittelbarer Nähe
von Wärmequellen wie Heizkörpern oder Radia-
toren auf. Das Gerät darf zudem keinen mecha-
nischen Vibrationen oder Stößen ausgesetzt sein.
• Stellen Sie den Monitor so auf, dass kein direktes
Licht oder Sonneneinstrahlung auf die Bildschirm-
oberfläche fällt. Andernfalls können Spiegelungen
entstehen, so dass die Bildbrillanz beeinträchtigt
wird.
Hinweise zum Netzanschluss
Verwenden Sie ausschließlich das für Ihr Land
geeignete Netzkabel.
• Warten Sie nach dem Ausschalten des Monitors
mindestens 30 Sekunden, bevor Sie das Netzka-
bel ziehen. Diese Zeit ist erforderlich, damit sich
die statische Elektrizität der Bildschirmoberfläche
entladen kann.
Die Netzsteckdose sollte sich in direkter Nähe
befinden und leicht zugänglich sein. Der Monitor
kann nur durch Ziehen des Netzsteckers aus der
Steckdose ganz vom Netz getrennt werden.
• Dieser Monitor ist ENERGY STAR®-kompatibel.
MAXDATA versichert als ENERGY STAR®-Part-
ner, dass dieses Gerät den ENERGY STAR®-
Richtlinien zur Optimierung des Stromverbrauchs
entspricht.

Bedienungsanleitung - 5
DEUTSCH
ANSCHLIESSEN
Abbildung 2. Monitor an den PC anschließen
➧Schließen Sie den Monitor an den PC an ..............
1. Stellen Sie sicher, dass Ihr PC und der Monitor vom
Netz getrennt sind.
2. Schließen Sie das 15polige Signalkabel des Monitors
an den PC an (siehe Abbildung 2).
Abbildung 3. Stromversorgung anschließen
EINSCHALTEN
Signalkabel
Netzkabel
Abbildung 1. Monitor mit Dreh-/Schwenkfuß
Heben Sie den Monitor vorsichtig aus der Verpackung,
und überprüfen Sie das Zubehör auf Vollständigkeit (siehe
Abbildung 1).
Montieren Sie den Dreh-/Schwenkfuß des Monitors (sie-
he nächsten Absatz).
Bewahren Sie den Originalkarton und das Verpackungs-
material für den Fall auf, dass Sie den Monitor einschi-
cken oder anderweitig transportieren müssen.
➧➧
➧➧
➧Monitorfuß anbringen ..............................................
1. Legen Sie den Monitor mit der Kopfseite nach unten auf
eine gut gepolsterte Unterlage (Kissen, Decke o. ä.).
2. Richten Sie die Arretierhaken des Monitorfußes an
den Öffnungen auf der Unterseite des Monitorgehäu-
ses aus, und schieben Sie den Monitorfuß nach vor-
ne, bis er mit einem Klicken einrastet.
➧Schließen Sie die Stromversorgung an .................
Schließen Sie das separate Netzkabel an den Monitor
und eine Schuko-Steckdose an (siehe Abbildung 3).
3. Wird auf dem Monitor kein Bild angezeigt, lesen Sie
die Informationen im Abschnitt „Problemlösungen“.
➧➧
➧➧
➧Monitorfuß abnehmen ..............................................
Drücken Sie die Arretierlasche an der hinteren Seite des
Monitorfußes herunter, und ziehen Sie gleichzeitig den
Fuß nach hinten (in Richtung der Monitorrückseite). Da-
nach läßt sich der Fuß leicht vom Monitor lösen.
AUSPACKEN
Signalkabel
1. Schalten Sie zuerst den PC und anschließend den
Belinea-Monitor ein. Die Betriebsanzeige (siehe!in
Abbildung 4) leuchtet grün auf.
2. Stellen Sie das Bild gemäß Ihren Anforderungen ein (sie-
he die nachstehenden Abschnitte „Bildeinstellung über
das OSD-Menü“ und „Funktionen des OSD-Menüs“).

6 - Belinea 10 30 55
DEUTSCH
KONFIGURIEREN
Abbildung 4. Bedienelemente des Monitors
Das OSD-Menü ist ein Fenster am Bildschirm, mit dem
Sie die Einstellungen für die Bilddarstellung auswählen
können.
➧➧
➧➧
➧So rufen Sie das OSD-Hauptmenü auf ...................
1. Drücken Sie die Taste MENU ("in Abb. 4). Das
OSD-Menü erscheint am Bildschirm.
2. Es gibt insgesamt 10 verschiedene, nach Kategorien
gegliederte OSD-Untermenüs. Wählen Sie mit den
Tasten - und+(#und$%
in Abb. 4) das gewünsch-
te Funktionssymbol (siehe nächsten Abschnitt „Funk-
tionen des OSD-Menüs“).
3. Drücken Sie die Taste MENU ("in Abb. 4), um die
Funktion zu aktivieren.
4. Stellen Sie mit den Tasten -oder +(#und $in
Abb. 4) den gewünschten Wert ein.
5. Drücken Sie nochmals die Taste MENU, um den Wert
abzuspeichern. Wiederholen Sie ggf. die Schritte 2-
4, um weitere Einstellungen vorzunehmen.
6. Das OSD-Menü verschwindet von selbst, nachdem
ca. 15 Sekunden lang keine Bedienung erfolgt ist. Da-
bei werden die aktuellen Einstellungen gespeichert.
Sie können es aber auch manuell ausblenden, indem
Sie die Taste (&%in Abb. 4) drücken.
BILDEINSTELLUNG ÜBER DAS OSD-MENÜ
➧ Monitor unter Windows®9x/ME/2000 und XP konfi-
gurieren:
Um den Monitor unter Windows®9x/ME/2000 und XPin
Betrieb zu nehmen, wird dringend empfohlen, die Beli-
nea-Einstellungsdatei zu installieren. Sie können diese
über Ihren Belinea-Händler beziehen oder vom MAXDATA
FTP-Server ftp.maxdata.com laden. Wählen Sie hier die
Rubrik„Belinea_Treiber_Driver“, und laden Sie die Dateien
Belinea.inf und README_Belinea.TXT herunter. Befolgen
Sie die Installationsanweisungen in der Datei
README_Belinea.TXT.
➧ ➧
➧ ➧
➧ Monitor unter Windows®NT 4.0 konfigurieren:
Unter Windows®NT 4.0 benötigen Sie keine separate
Einstellungsdatei. Wählen Sie die Bildwiederholfrequenz
und Anzahl der Farben direkt unter den Menüpunkten
'„Einstellungen“ '„Systemsteuerung“ '„Anzeige“'
„Einstellungen“ aus.
GRUNDLEGENDE EINSTELLUNGEN
➧➧
➧➧
➧Kontrast und Helligkeit direkt einstellen...................................................................................................................
Sie können den Kontrast und die Helligkeit direkt einstel-
len, indem Sie Tasten -oder +(#und $in Abb. 4)
drücken, während das OSD-Menü nicht angezeigt wird.
Drücken Sie die Taste -für die Direkteinstellung der Hel-
ligkeit oder die Taste +für die Kontrastdirekteinstellung.
Nachdem das entsprechende OSD-Menü angezeigt wird,
drücken Sie die Taste
$, um die Helligkeit oder den Kon-
trast zu erhöhen, oder die Taste
#, um sie zu reduzieren.
Mit der Taste (&in Abb. 4) können Sie das jeweilige
Menü beenden.

Bedienungsanleitung - 7
DEUTSCH
FUNKTIONEN DES OSD-MENÜS
Regelt die horizontale und vertikale Größe des Bildes.
Wählen Sie die Ausrichtung über die Taste MENU.
Größe
Wählen Sie die folgenden Untermenüs über die Tasten
#%und%$:
Drehung: Korrigiert eine Schräglage (Drehung).
Kissenausgleich:Korrigiert die vertikalen Bild-
kanten, wenn sie nach links oder rechts gebo-
gen sind.
Trapez: Stellt die vertikalen Bildkanten
so ein, dass sie parallel erscheinen.
Parallelogramm: Korrigiert die vertikalen
Bildkanten, wenn sie nach links oder rechts
geneigt sind.
Kissenverzerrung:Regelt die Geradlinigkeit
der vertikalen Kanten.
Wahl der Sprache des OSD-Menüs: Englisch, Deutsch,
Französisch, Spanisch, Portugiesisch und Italienisch.
OSD Lage
Regelt die Lage des OSD-Menüs.
Entmagnetisierung
Korrigiert Farbfehler des Monitorbildes. Die Farbfehler
können durch Interferenzen mit dem Erdmagnetfeld auf-
treten, z.B. wenn Sie den Monitor drehen oder transpor-
tieren. Diese Funktion wird direkt nach Anwählen des
Funktionssymbols und Drücken der OSD-Taste MENU
ausgelöst.
Zoom
Vergrößert oder verkleinert das Gesamtbild.
Regelt die horizontale und vertikale Position des Bildes.
Wählen Sie die Ausrichtung über die Taste MENU.
Lage
Moiré Steuerung
Korrigiert unerwünschte Bildmuster. Moiré ist eine Inter-
ferrenz, bei der wellenlinige Muster erscheinen. Norma-
lerweise kann diese Interferenz beseitigt, in Ausnahme-
fällen jedoch nur korrigiert werden.
Farbe
Wählen Sie mit den OSD-Tasten -oder +(#und $
in Abb. 4) eine voreingestellte Farbtemperatur (9300 K,
6500 K oderUSER). Bei Auswahl von9300 K und6500 K
werden die Auswirkungen der von Ihnen gewählten Farb-
temperatur sofort am Bildschirm sichtbar.
Wenn Sie eine benutzerdefinierte Einstellung der RGB-
Farbanteile vornehmen möchten (USER), aktivieren Sie
die Option mitMENU.Danach können Sie die Einstellun-
gen für R, G oder B vornehmen (RB, GB, BB, RG, GG
oder BG). Wählen Sie mit der Taste
-oder+die Farban-
teile, die Sie ändern möchten. MitMENU wird die Einstel-
lungsoption aktiviert, mit den Tasten -oder +wird der
Wert eingestellt. Drücken SieMENU erneut, um Ihre Ein-
stellungen zu speichern.
Grundeinstellung
Stellt die werkseitigen Bildeinstellungen wieder her.
Sprache
Geometrie
TASTE MENU BETÄTIGEN

8 - Belinea 10 30 55
DEUTSCH
TECHNISCHE DATEN
Bildröhre 17 Zoll Bilddiagonale (40,31 cm sichtbar)
Lochmaskenabstand diagonal/horizontal: 0,27/0,23 mm
antistatische und Antireflexbeschichtung; strahlungsarm nach TCO '03, Phosphortyp P22
Eingangssignal Video: RGB analog, 15 Pin-Stecker (D-SUB)
Bildschirmfarben unbegrenztes Farbspektrum
Synchronisierung 30 – 72 kHz horizontal, 50 – 160 Hz vertikal
Videobandbreite 110 MHz
Auflösung maximale Auflösung 1280× 1024, ergonomische Auflösung 1024×768 (85 Hz)
Stromversorgung 100 – 240 V~, 50/60 Hz, 1,7 A
Leistungsaufnahme ON-Status: max. 75 W; Farbe der Betriebsanzeige: grün;
SLEEP-Status: < 3 W; Farbe der Betriebsanzeige: blinkt grün;
Stromsparfunktionen nach EPA
Abmessungen/Gewicht Breite 397 mm, Höhe 410 mm, Tiefe 417 mm, 14,6 kg (nur Monitor)
Umgebungsbedingungen Betrieb: 0 – +35 °C, Rel. Luftfeuchtigkeit: 10 bis 90 % (nicht kondensierend)
Lagerung: -25 – +60 °C, Rel. Luftfeuchtigkeit 10 bis 90 % (nicht kondensierend)
PROBLEMLÖSUNGEN
Kein Bild
Netzanzeige leuchtet nicht
- Prüfen Sie, ob das Netzkabel richtig angeschlossen ist (siehe Abschnitt „Anschließen“).
- Stellen Sie sicher, dass der Monitor mit dem Netzschalter eingeschaltet wurde (siehe Abschnitt „Einschalten“).
Netzanzeige blinkt grün
- Befindet sich der Monitor im Stromsparmodus?
- Ist der PC eingeschaltet (siehe Abschnitt „Einschalten“)?
Netzanzeige leuchtet grün
- Evtl. ist ein Bildschirmschoner auf Ihrem PC installiert und wurde nach einer bestimmten Zeit der Inaktivität eingeschaltet.
Drücken Sie eine Taste auf der Tastatur, oder bewegen Sie die Maus.
Meldung „Kein Signal“
- Überprüfen Sie, ob das Signalkabel an die VGA-Buchse des PC angeschlossen ist (s. Abschnitt „Anschließen“).
Fehler der Bilddarstellung
Bild ist nach links/rechts oder oben/unten verschoben
- Wenn das Bild zwar normal, aber nicht zentriert erscheint, können Sie dies mit den OSD-Funktionen justieren. Weitere Infor-
mationen hierzu finden Sie im Abschnitt „Funktionen des OSD-Menüs“ unter der Funktion „Lage“.
Bild flimmert oder zittert
- Wenn das Bild normal dargestellt wird, aber unruhig erscheint, kann dies an einer zu geringen Bildwiederholfrequenz liegen.
Wählen Sie eine höhere Bildwiederholfrequenz. Weitere Informationen hierzu finden Sie in der Dokumentation zu Ihrem PC,
zur Grafikkarte bzw. zum Betriebssystem.
- Möglicherweise ist nicht die richtige Einstellungsdatei für den Monitor ausgewählt. Informationen zum Einrichten des Monitors
unter Windows®9x/ME/2000 und XP finden Sie im Abschnitt „Konfigurieren“.
Bild ist verschwommen oder unscharf
- Überprüfen Sie die Helligkeits- und Kontrasteinstellung (siehe Abschnitt „Grundlegende Einstellungen“).
- Bei hohen Auflösungen und Bildwiederholfrequenzen erscheint die Bilddarstellung etwas unschärfer. Wählen Sie ggf. eine
geringere Frequenz aus.
Farbdarstellung ungenügend
- Wenn einzelne Bildbereiche Farbverfälschungen aufweisen, sollte der Monitor entmagnetisiert werden (siehe Funktion
„Entmagnetisierung“ im Abschnitt „Funktionen des OSD-Menüs“).
- Wenn die Farben etwas anders aussehen, als sie eigentlich sollten (z. B. weiß nicht richtig weiß ist), sollten Sie die Farbtemperatur
nachregeln (siehe Funktion „Farbe“ im Abschnitt „Funktionen des OSD-Menüs“).
- Geräte, die Magnetfelder erzeugen, z. B. Laserdrucker, Lautsprecherboxen u.a., sollten nicht in unmittelbarer Nähe des Moni-
tors aufgestellt werden. Andernfalls kann die Bildqualität beeinträchtigt werden.
Bildränder verzerrt
- Wenn die Bildränder leicht verzerrt, gebogen oder geneigt erscheinen oder das gesamte Bild nicht waagerecht liegt, können
Sie dies über die Funktion des OSD-Menü nachregeln (siehe Funktionen „Geometrie“ im Abschnitt „Funktionen des OSD-
Menüs“).

Operating Instructions - 9
ENGLISH
INTRODUCTION
This manual will familiarize you with the installation and
use of your Belinea Monitor. Please take the time to
look through these instructions even if you are familiar
with monitors.
We have taken all possible care to ensure that this
manual contains correct, accurate information.
However, the manufacturer cannot assume liability for
any possible errors. In addition, the manufacturer cannot
guarantee that the hardware will meet the purpose you
require. We appreciate reports of any errors,
suggestions or criticism.
© Copyright 2003
MAXDATA Systeme GmbH
45768 Marl, Germany
www.maxdata.com
All rights reserved. No part of this manual may be reproduced,
processed or distributed in any form (print, photocopy,
microfilm or any other process) or processed by an electronic
system without prior written permission from the manufacturer.
We reserve the right to make changes according to technical
progress. Belinea is an internationally registered trademark.
Other brand names may be registered trademarks and must
be treated as such.
We are all responsible for the environment: this manual was printed from front to back on
paper that was produced without chlorine.
TABLE OF CONTENTS
Guide to symbols
The symbols below are used in this manual to indicate
where there is risk of injury or damaging devices or to
indicate especially useful information:
DANGER! Indicates risk of injury. When not
following instructions, severe injury or death
may result.
ATTENTION! Indicates possible damage to
devices. When not following instructions,
devices may be heavily damaged.
IMPORTANT! Indicates hints on operation and
other useful information.
Important Safety Instructions
Some Belinea monitor models come with 2 power cords.
Please ensure you use the UK plug (3 pin) in the UK and
not the European plug (2 pin).
Do not place the monitor in very hot or cold, nor damp or
dusty surroundings. Do not put vases etc. on the monitor,
water may cause short circuits. Do not block or cover the
ventilating openings. All products that produce magnetic
fields, i.e. laser printers, loud-speakers etc., must not be
placed close to the monitor. Do not install this monitor in
areas where too much light or sunshine might directly hit
the screen, otherwise the brightness of the picture will be
poor due to reflections. Refer all servicing and maintenance
to authorised service personnel only!
CAUTION
Do not remove the cover!
Serious electrical shock hazards exist inside this
monitor.
NOTE
Removal of cover invalidates your warranty.
INTRODUCTION........................................................ 9
TABLE OF CONTENTS ............................................. 9
IMPORTANT INFORMATION .................................. 10
CARING FOR YOUR MONITOR ............................. 10
UNPACKING ............................................................ 11
CONNECTING ......................................................... 11
STARTUP ................................................................ 11
CONFIGURATION ................................................... 12
BASIC SETUP...........................................................12
IMAGE SETTINGS USING THE OSD MENU .......... 12
OSD MENU FUNCTIONS ........................................ 13
TROUBLESHOOTING ............................................. 14
TECHNICAL SPECIFICATIONS .............................. 14
Information about Environ-
mentally Sound Waste Mana-
gement
Belinea monitors are designed to be environmentally
sound according to TCO guidelines. Please direct any
questions you may have regarding the disposal of your
monitor to our European waste management affiliate:
Hellmann Process Management GmbH & Co. KG
Adolf-Köhne-Str. 11
49090 Osnabrück
Tel: +49 (0) 541 605 1585
For further information on recycling your monitor plea-
se visit: http://195.60.99.33/monitor-recycling

10 - Belinea 10 30 55
ENGLISH
• First, unplug the power cord from the wall socket.
• If the monitor is extremely dirty, clean it with a
moist cloth. Use only warm water and then wipe
the monitor dry. Solvents or harsh cleaners can
damage the housing. Clean the picture tube only
with a soft cloth, otherwise you may damage the
picture tube coating.
• If the monitor is only slightly dirty, clean it using
a soft, dry and antistatic cloth.
• The monitor’s cathode ray tube is covered with
a special coating for reduced emissions. This
coating is more susceptible to scratches and
marking than lower performance displays lacking
this feature. Do not touch the screen with pens
and pencils. Do not allow watches, rings, but-
tons and other clothing accessories to brush
against the screen (a common cause of scrat-
ches are tie pins when moving the display).
CARING FOR YOUR MONITOR
IMPORTANT INFORMATION
Safety instructions for operation
The power cord must not be damaged. Do not
place any objects on the power cord and make
sure it does not have any knots. To unplug the
cord, always pull on the plug and not on the ca-
ble itself.
• Avoid covering the ventilation slots. Air circula-
tion is necessary to prevent the monitor from
overheating. If the air circulation is restricted it
could cause fire or damage the monitor.
• Do not use any solvents to clean the monitor, as
the housing could be damaged. For more infor-
mation about cleaning the monitor, please see
“Caring for Your Monitor”.
Never open the monitor housing yourself. There
is a danger of electric shock and other hazards.
The monitor may only be opened and serviced
by qualified professionals.
Notes on ergonomics
To protect your eyes, neck and shoulder muscles
when working with a computer, we recommend
that you maintain a viewing distance of between
50 and 75 cm from the monitor. Furthermore,
you should regularly focus on an object around
6 m away from you to help your eyes relax. Er-
gonomically, your posture is best when elbows,
pelvis, knees and ankles are all at right angles.
Note on monitor placement
• The setup location must not be extremely hot,
cold, humid or dusty. Heat and cold can impair
the functionality of the monitor. Humidity and dust
can cause the monitor to fail.
• Don’t place the monitor near heaters such as
radiators or the like. Don’t expose the monitor to
mechanical vibrations or jarring.
• Position the monitor so that no direct light or sun
strikes the screen, which could cause reflections
that reduce the quality of the image.
Notes on power connection
Only use the power cord designated for use in
your country.
• After turning off the monitor wait for 30 seconds
before disconnecting the power cord. This time
is needed for the static electricity on the screen
to dissipate.
The wall outlet should be within easy reach.
Pulling the power plug is the only way to discon-
nect the monitor from the power source.
• This monitor is ENERGY STAR®-compatible.
MAXDATA is an ENERGY STAR®partner and
guarantees that this device complies with the
ENERGY STAR®guidelines for optimizing po-
wer consumption.

Operating Instructions - 11
ENGLISH
Signal cable
CONNECTING
Figure 2. Connecting the monitor to the PC
➧To connect the monitor to your PC ......................
1. Make sure that the PC and monitor are unplugged.
2. Connect the 15-pin signal cable to the monitor (see
figure 2).
➧To connect the monitor to the power source ......
1. Connect the separate power cable to the monitor
and a grounded outlet (see figure 3).
1. First, turn on your PC, and then turn on your Belinea
monitor. The status indicator (see !in figure 4)
should light up green.
2. Adjust the image to meet your requirements (see
the following sections “Image settings using the OSD
menu” and “OSD Menu Functions”).
Figure 1. Monitor with Tilt/Swivel Base
Carefully lift the monitor out of the packaging and make
sure that all components are included (see figure 1).
Assemble the tilt/swivel base to the monitor (see the
next section).
Save the original box and packing material in case you
have to ship or transport the monitor.
➧ ➧
➧ ➧
➧ Assembling the tilt/swivel base .............................
1. Place the monitor screen down on a soft surface
(pillow, blanket or similar object).
2. Align the latches of the tilt/swivel base with the
openings on the bottom of the monitor and push the
base forward until it locks into place.
UNPACKING
STARTUP
3. If there is no image displayed on the monitor,
consult the section “Troubleshooting”.
Power Cord
Signal Cable
Figure 3. Connecting the monitor to the power source
➧➧
➧➧
➧Disassembling the tilt/swivel base ........................
1. Push the locking tabs at the back of the base inward
while pulling the base backward (toward the
monitor’s back). Now the base should come off
easily.

12 - Belinea 10 30 55
ENGLISH
Figure 4. Monitor features
BASIC SETUP
The OSD menu appears in a window on your screen. It
allows you to select the image settings you want to
change.
➧➧
➧➧
➧How to open the OSD menu ...................................
1. Press the button MENU ("in figure 4) to display
the OSD menu on the screen.
2. There are a total of 10 OSD submenus divided by
categories. Select the desired function icon using
the buttons -and +(#and $in figure 4, see the
following section “OSD Menu Functions”).
3. Press the button MENU ("in figure 4) to activate
the function.
4. Enter the desired value by using the buttons -and
+(#and $%in figure 4 ).
5. To store the setting, press the button MENU again.
Repeat steps 2-4 to make further adjustments as
needed.
6. The OSD menu will automatically disappear if no
changes are made for more than 10 seconds. The
current settings will be saved. You can also close it
manually by pressing the button (&in figure 4 ).
IMAGE SETTINGS USING THE OSD MENU
➧Monitor setup under Windows®9x/ME/2000 and
XP:
If using the monitor under Windows®9x/ME/2000 or XP
we strongly recommend installing the Belinea settings
file. You can get this file from your Belinea dealer or
download it from the MAXDATA FTP server at
ftp.maxdata.com. Here, click the
“Belinea_Treiber_Driver” directory and download the
Belinea.inf and README_Belinea.TXT files. Follow the
installation instructions in the README_Belinea.TXT
file.
CONFIGURATION
➧➧
➧➧
➧Monitor setup under Windows®NT 4.0:
Under Windows®NT 4.0 no separate setup file is requi-
red. Select the vertical frequency and the number of
colors directly from within the <Settings> '<Control
Panel> '<Display> '<Settings> menu.
➧➧
➧➧
➧Shortcut for adjusting contrast and brightness .....................................................................................................
You can adjust the contrast and brightness directly by
pressing the - or +buttons (#%and $in fig. 4) while
the OSD menu is not displayed. To adjust the bright-
ness directly, press the -button. To adjust the contrast
directly, press the +button. After the corresponding
OSD menu is displayed, press the $button to increa-
se the brightness or contrast, or press the #button to
reduce it. Press button (&in figure 4) to close the
corresponding menu.

Operating Instructions - 13
ENGLISH
OSD MENU FUNCTIONS
Controls the picture’s horizontal and vertical size. You
can select the alignment via the MENU button.
SIZE
You can select the following submenus using the #
and $buttons:
Rotation: Corrects tilted image.
Pin balance: Corrects parallel distortion of ed-
ges.
Trapezoid: Corrects inward/outward slanted
edges.
Parallelogram: Corrects parallel slanted ed-
ges.
Pincushion: Corrects pincushion distortion.
Selection of the OSD menu language: English, German,
French, Spanish Portuguese or Italian.
OSD POSITION
Controls the position of the OSD menu.
Controls the picture’s horizontal and vertical position.
You can select the alignment via the MENU button.
POSITION
MOIRE CONTROL
Corrects moiré patterns. Moiré patterns are interference
patterns that appear as wave lattices (especially prone
to appear in black-white alternating dot patterns).
Usually, this interference can be removed; however, it
can sometimes only be reduced.
COLOR-TEMP
LANGUAGE
GEOMETRY
Using the OSD buttons - or +(#and $%in fig. 4),
you can select a preset color temperature (9300K,
6500K or USER). When selecting 9300K and 6500K,
the color temperature setting is immediate applied to
the screen.
If you want to define the RGB values yourself (USER),
you can activate this option by selecting MENU. You
can then define the R, G and B settings (RB, GB, BB,
RG, GG or BG). Use the -or +buttons to select the
color value you want to change. Pressing MENU acti-
vates the settings option. You can then set the value
using the -or +buttons. Press the MENU button again
to save your settings.
DEGAUSS
Corrects image color distortions. The color distortion
may be due to interference from the earth’s magnetic
field, e.g. when the monitor is rotated or moved. This
function is triggered by selecting the function symbol
and pressing the OSD button MENU.
ZOOM
Increases or decreases the size of the overall picture.
RECALL
Recalls factory settings of the image parameters.

14 - Belinea 10 30 55
ENGLISH
TROUBLESHOOTING
Blank Screen
Power indicator is off
-Check if the power cable is connected properly (see section “Connecting”).
- Make sure that the monitor was turned on using the power switch (see section “Startup”).
Power indicator flashes green
- Perhaps a power saving mode is active?
- Is the PC turned on (see section “Startup”)?
Power indicator lights green
- A screen saver may have been activated automatically after a certain period of inactivity. Press any key on your keyboard
or move the mouse.
“No signal” message
- Make sure the signal cable is connected to the PC’s VGA connector (see section “Connecting”).
Display Problems
Image is displaced to the left/right or to the top/bottom
-If the image is displayed normally but not centered correctly, you can adjust its position using the OSD functions. For more
information on this topic consult the functions “OSD-Menu Functions” in the “Position” section.
Image flickers or is shaky
-If the image is displayed normally but appears slightly shaky, the vertical frequency might be too low. Select a higher
frequency. For more information on this topic consult the user’s guide of your PC, graphics card or operating system.
- Perhaps the setup file chosen for the monitor is incorrect. For information on monitor setup under Windows 95/98/ME/
2000/XP consult the “Configuration” section.
Image is blurred
-Check brightness and contrast settings (see section “Basic Setup”).
- If the vertical frequency is too high, the image might be slightly blurred. In this case lower the frequency.
Color problems
- If the colors are distorted in some areas, you should demagnetize your monitor (see “Degauss” function in section “OSD
Menu Functions”).
- If the colors are off (e.g. white is not really displayed as white etc), you should adjust the color temperature (see “Color-
Temp” function in section “OSD Menu Functions”).
- Devices generating magnetic fields, such as laser printers and loudspeakers, shouldn’t be placed near the monitor since
they might affect image quality.
Image edges distorted
- If the image is slightly distorted, bent or tilted at the edges or the entire image is not aligned horizontally, you can correct
this using the OSD menu functions (see section "Geometry" in function “OSD Menu Functions”).
TECHNICAL SPECIFICATIONS
Picture tube 17 inches diagonal size (40,31 cm visible),
dot pitch diagonal/horizontal: 0.27mm/0.23mm
glare-free coating; low emissions according to TCO '03, phosphorus type P22
Input signal Video: RGB analog, 15-pin plug (D-SUB)
Display colors unlimited colors
Synchronization
110MHz
Resolution maximum resolution: 1280 ×1024, ergonomic resolution: 1024 ×768 (85Hz)
Power supply 100 – 240V~, 50/60Hz, 1.7A
Power consumption ON status: max. 75 Watts; power indicator color: green;
SLEEP status: < 3 Watts; power indicator color: flashes green;
Power saving functions conforming with EPA
Dimensions, Weight width: 397mm, height: 410mm, depth: 417mm, 14.6kg (monitor only)
Environmental conditions Operation: 0 – +35°C, rel. humidity: 10 to 90% (non-condensing)
Storage: -25 – +60°C, rel. humidity: 10 to 90% (non-condensing)
Video Bandwidth
30 – 72kHz horizontal, 50 – 160Hz vertical

Mode d'emploi - 15
FRANÇAIS
INTRODUCTION
Ce manuel est destiné à vous familiariser avec l’installation
et l’utilisation de votre moniteur Belinea. Veuillez prendre
le temps de lire ces instructions, même si vous êtes familier
de l’usage des moniteurs en informatique.
Le constructeur a fait tout son possible pour que ce
manuel ne contienne que des informations précises et
correctes, mais il ne saurait être tenu responsable des
possibles erreurs. En outre, le constructeur ne peut
garantir que ce matériel est adapté à l’usage que vous
souhaitez en faire. Nous vous remercions par avance
pour toute remarque d’erreur, suggestion ou critique.
© Copyright 2003
MAXDATA Systeme GmbH
45768 Marl, Allemagne
www.maxdata.com
Tous droits réservés. Aucune partie de ce manuel ne peut
être reproduite, adaptée ou distribuée sous quelque forme
que ce soit (imprimerie, photocopie, microfilm ou tout autre
procédé) ou traités sous forme électronique sans l’autorisation
écrite préalable du fabricant.
Nous nous réservons le droit d’apporter des modifications
motivées par le progrès technique. Belinea est une marque
internationalement déposée. Les autres marques et noms de
produits mentionnés dans ce document peuvent être des
marques commerciales ou des marques déposées et sont à
considérer comme telles.
Nous sommes tous responsables de l’environnement : ce manuel a été entièrement imprimé
sur du papier exempt de chlore.
TABLE DES MATIÈRES
Guide des symboles
Les symboles illustrés ci-dessous sont utilisés dans ce
manuel pour indiquer un risque de se blesser ou
d’endommager les périphériques, ou encore pour
signaler une information particulièrement utile:
DANGER ! Indique un risque de blessure. Si
vous ne respectez pas les instructions, vous
risquez un accident grave ou potentiellement
mortel.
ATTENTION ! Indique un risque d’endommager
les périphériques. Si vous ne respectez pas
les instructions, les périphériques peuvent être
endommagés.
IMPORTANT ! Indique un conseil d’utilisation
ou une autre information utile.
INTRODUCTION...................................................... 21
INFORMATIONS IMPORTANTES ........................... 22
ENTRETIEN DE VOTRE MONITEUR ..................... 22
DÉBALLAGE ............................................................ 23
RACCORDEMENT .................................................. 23
MISE EN ROUTE ..................................................... 23
CONFIGURATION ................................................... 24
CONFIGURATION DE BASE .................................. 24
RÉGLAGE DE L’IMAGE DANS LE MENU OSD ...... 24
FONCTIONS DU MENU OSD ................................. 25
RÉSOLUTION DES PROBLÈMES .......................... 26
SPÉCIFICATIONS TECHNIQUES ........................... 26
Gestion des déchets dans le
respect de l’environnement
Les moniteurs Belinea sont conçus pour respecter
l’environnement selon les directives TCO. Pour toute
question concernant la mise au rebut de ce moniteur,
consultez notre partenaire chargé de la gestion des
déchets pour l’Europe :
Hellmann Process Management
GmbH & Co. KG
Adolf-Köhne-Str. 11
49090 Osnabrück
Tél. : +49 (0) 541 605 1585
http://195.60.99.33/monitor-recycling

16 - Belinea 10 30 55
FRANÇAIS
ENTRETIEN DE VOTRE MONITEUR
•Commencez toujours par débrancher le câble
d’alimentation de la prise électrique.
•Si le moniteur est extrêmement sale, utilisez un
chiffon humidifié à l’eau chaude, et essuyez ensuite
le moniteur. Les solvants et autres produits
nettoyants pourraient endommager le boîtier. Ne
nettoyez l’écran qu’à l’aide d’un chiffon très doux,
faute de quoi vous pourriez endommager son
revêtement anti-reflets.
•Si le moniteur n’est pas très sale, nettoyez-le à l’aide
d’un chiffon doux, sec et antistatique.
•Le tube cathodique de ce moniteur est doté d’un
revêtement spécial destiné à réduire les émissions
électromagnétiques. Ce revêtement est beaucoup plus
sensible aux éraflures et marques que
les revêtements des moniteurs de moindres
performances. Ne touchez pas la surface de l’écran
avec un crayon ou un stylo. Ne laissez pas une montre,
une bague, un bouton, une épingle de cravate ou tout
autre accessoire vestimentaire venir en contact avec
la surface de l’écran (c’est une cause courante
d’éraflure lorsque l’écran est déplacé).
INFORMATIONS IMPORTANTES
Précautions d’emploi
Le câble d’alimentation secteur ne doit pas être
endommagé. Ne placez aucun objet sur ce câ-
ble, et évitez qu’il ne s’emmêle. Pour débran-
cher ce cordon, tirez toujours sur la prise, et non
sur le câble lui-même. Un câble électrique en-
dommagé pourrait provoquer un incendie ou une
électrocution.
• Évitez de recouvrir les orifices de ventilation. Une
circulation d’air constante est nécessaire pour
empêcher le moniteur de trop chauffer. Si l’air
ne peut plus circuler, le moniteur peut être gra-
vement endommagé.
• N’utilisez pas de solvants pour nettoyer le mo-
niteur, cela pourrait endommager le boîtier. Pour
plus d’informations sur le nettoyage du moniteur,
consultez le paragraphe « Entretien de votre
moniteur ».
N’ouvrez jamais vous-même le moniteur, vous
pourriez être électrocuté. Ce moniteur ne doit
être ouvert et réparé que par des professionnels
qualifiés.
Remarques sur l’ergonomie
Pour soulager vos yeux et les muscles de votre
nuque et de vos épaules lorsque vous travaillez
sur un ordinateur, nous vous recommandons de
maintenir une distance d’observation de 50 à 75
cm du moniteur. De plus, concentrez-vous ré-
gulièrement sur un objet situé à environ 6 m de
vous pour permettre à vos yeux de se reposer.
D’un point de vue ergonomique, vous adoptez
la posture la mieux adaptée lorsque les épau-
les, le bassin, les genoux et les chevilles sont à
angle droit.
Note sur la mise en place du moniteur
• L’emplacement choisi pour l’installation ne doit
être ni trop chaud, ni trop froid, ni humide ou
poussiéreux. La chaleur et le froid peuvent alté-
rer les fonctionnalités du moniteur. L’humidité
et la poussière peuvent le mettre hors service.
• Ne placez pas le moniteur à proximité d’une
source de chauffage, par exemple un radiateur.
N’exposez pas le moniteur à des vibrations mé-
caniques ou à des secousses.
• Positionnez le moniteur de façon à protéger
l’écran de la lumière directe ou du soleil : la lu-
mière directe peut provoquer des réflexions nu-
isibles à la qualité de l’image.
Notes sur le raccordement à l’alimentation
électrique
N’utilisez que le type de cordon secteur destiné
à être utilisé dans votre pays.
• Après avoir éteint le moniteur, attendez une tren-
taine de secondes avant de débrancher le
cordon secteur. Ce délai est nécessaire pour
permettre à l’électricité statique de se dissiper.
La prise d’alimentation murale doit être aisément
accessible. La seule façon de débrancher le mo-
niteur de la source d’alimentation électrique con-
siste à débrancher le cordon secteur.
• Ce moniteur est compatible ENERGY STAR®.
MAXDATA est partenaire du programme ENER-
GY STAR®et garantit que cet appareil est con-
forme aux recommandations ENERGY STAR®
pour l’optimisation de la consommation élec-
trique.

Mode d'emploi - 17
FRANÇAIS
Figure 2. Raccordement du moniteur au PC
➧Pour raccorder le moniteur à votre PC ................
1. Vérifiez que le PC et le moniteur sont débranchés.
2. Connectez le câble à 15 broches du signal vidéo
au PC (voir figure 2).
➧Pour raccorder le moniteur à la source
d’alimentation électrique...........................................
Connectez le câble d’alimentation électrique au
moniteur d’une part, et à une prise électrique murale
avec mise à la terre d’autre part (voir figure 3).
Figure 3. Raccordement du moniteur à la source d’alimentation
électrique
1. Mettez d’abord votre PC sous tension, puis allumez
votre moniteur Belinea à l’aide de son interrupteur.
L’indicateur d’état (voir!à la figure 4) doit s’allumer
en vert.
2. Ajustez l’image selon vos goûts (voir ci-dessous les
sections « Réglage de l’image dans le menu OSD »
et « Fonctions de l’OSD »).
Câble du signal
(incorporé)
Câble d’alimentation
Figure 1. Le moniteur avec sa base
inclinable et pivotante
Soulevez avec douceur le moniteur de son emballage,
et vérifiez que tous les accessoires sont présents (voir
figure 1).
Assemblage de la base pivotante et basculante sous
le moniteur (voir la section suivante).
Conservez le carton original et les matériaux d’emballage,
au cas où vous devriez expédier ou transporter le moniteur.
➧ ➧
➧ ➧
➧ Mise en place de la base inclinable et orientable
1. Retournez le moniteur en plaçant l’écran sur une
surface absorbante (oreiller, couverture, etc.).
2. Alignez les loquets de la base inclinable et orientable
face aux ouvertures qui se trouvent sur la partie
inférieure du moniteur, et poussez la base vers
l’avant jusqu’à ce qu’elle se verrouille en place.
DÉBALLAGE
MISE EN ROUTE
3. Si aucune image n’apparaît sur le moniteur, consultez
la section « Résolution des problèmes ».
Câble du signal
RACCORDEMENT
➧➧
➧➧
➧Désassemblage de la base inclinable et
orientable.....................................................................
Poussez les onglets de verrouillage (à la partie
inférieure de la base) vers l’intérieur, tout en tirant la
base vers l’arrière du moniteur. La base se dégage sans
effort excessif.

18 - Belinea 10 30 55
FRANÇAIS
Figure 4. Contrôles de la face avant
CONFIGURATION DE BASE
Le menu OSD apparaît sur votre écran dans une
fenêtre. Il vous permet de sélectionner le paramètre
d’image que vous désirez modifier.
➧➧
➧➧
➧Comment ouvrir le menu OSD ............................
1. Appuyez sur le bouton MENU ("dans la figure 4)
pour afficher le menu OSD.
2. Sélectionnez l’icône de fonction souhaitée à l’aide
des boutons -et +(#et
$dans la figure 4, con-
sultez la section suivante « Foncions du menu
OSD »).
3. Appuyez sur le bouton MENU ("dans la figure 4)
pour activer la fonction.
4. Entrez la valeur souhaitée en utilisant les boutons -
et +(#et $%dans la figure 4).
5. Pour enregistrer le réglage, appuyez à nouveau sur
le bouton MENU. Répétez les étapes 2 à 4 pour
effectuer d’autres réglages.
6. Le menu OSD disparaîtra automatiquement si au-
cun changement n’est effectué après 45 secondes.
Les réglages actuels seront enregistrés. Vous pou-
vez également le fermer manuellement en appuyant
sur le bouton (&dans la figure 4).
RÉGLAGE DE L’IMAGE DANS LE MENU OSD
➧➧
➧➧
➧Installation du moniteur sous Windows®9x, ME,
2000 et XP :
Pour utiliser le moniteur avec Windows®9x/ME/2000 ou
XP, il est fortement recommandé d’installer le fichier de
configuration de Belinea. Vous pouvez l’obtenir de votre
revendeur Belinea ou le télécharger sur le site FTP de
MAXDATA à l’adresse ftp.maxdata.com.
Cliquez sur le répertoire « Belinea_Treiber_Driver » et
téléchargez les fichiers Belinea.inf et
README_Belinea.TXT. Suivez les instructions
d’installation du fichier README_Belinea.TXT.
CONFIGURATION
➧➧
➧➧
➧Installation du moniteur sous Windows®4.0:
Sous Windows®NT 4.0, il n’est pas nécessaire d’utiliser
un fichier d’installation séparé. Sélectionnez la fréquence
verticale et le nombre de couleurs d’affichage, en cliquant
tour à tour sur le menu « Paramètres » '« Panneau de
configuration » '« Affichage » '« Paramètres ».
➧➧
➧➧
➧Raccourci pour le réglage du contraste et de la luminosité .................................................................................
Vous pouvez régler directement le contraste et la lumi-
nosité à l’aide des boutons -ou +(#et $dans la fig.
4) lorsque le menu OSD n’est pas affiché. Pour régler
directement la luminosité, appuyez sur le bouton-. Pour
régler directement le contraste, appuyez sur le bouton
+. Lorsque le menu OSD s’affiche à l’écran, appuyez
sur le bouton $pour augmenter la luminosité ou le
contraste, ou appuyez sur le bouton #pour le réduire.
Appuyez sur le bouton (&dans la fig. 4) pour fer-
mer le menu.
Table of contents
Languages:
Other BELINEA Monitor manuals
BELINEA
BELINEA 101901 User manual
BELINEA
BELINEA 101735 User manual
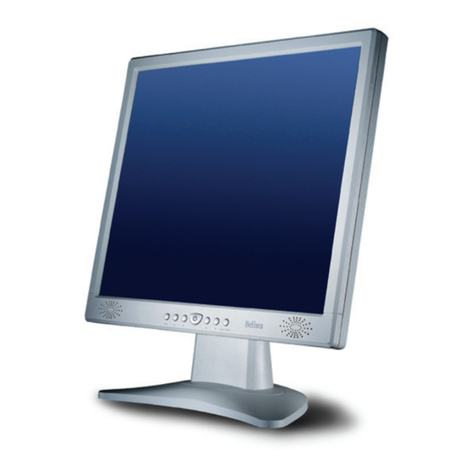
BELINEA
BELINEA 10 17 15 User manual
BELINEA
BELINEA 101911 User manual
BELINEA
BELINEA 10 60 65 User manual

BELINEA
BELINEA 101927 User manual
BELINEA
BELINEA 2225 S1W User manual

BELINEA
BELINEA 10 80 35 User manual
BELINEA
BELINEA 10 User manual
BELINEA
BELINEA 101730 User manual
BELINEA
BELINEA 101935 User manual
BELINEA
BELINEA 10 60 75 User manual
BELINEA
BELINEA 1705 S1 User manual
BELINEA
BELINEA 101710 User manual
BELINEA
BELINEA 102015 User manual
BELINEA
BELINEA 101930 User manual
BELINEA
BELINEA Belinea 2025 S1W User manual
BELINEA
BELINEA 101830 User manual
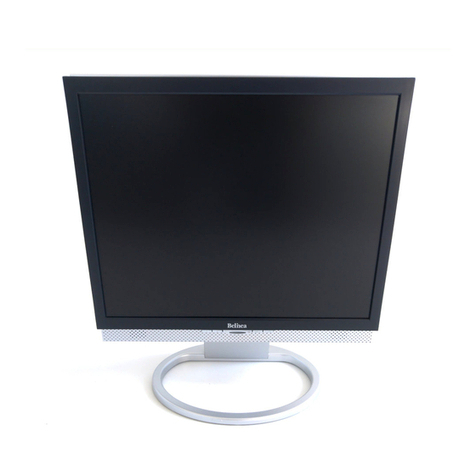
BELINEA
BELINEA 101720 User manual

BELINEA
BELINEA 101750 User manual
