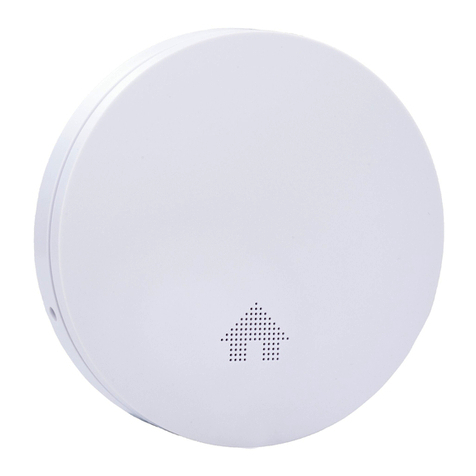
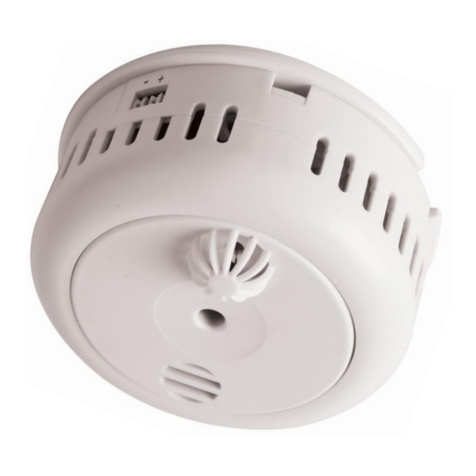
Bellman & Symfon BE1481 User manual

BE1481

4443
Overview
Read this rst. Read and retain this booklet for as long as the product is being used. It contains vital
information on the operation and installation of your smoke alarm. If you are just installing the unit, the
booklet must be given to the householder. A smoke alarm is an early warning device. Used correctly it can
give you and your family valuable extra time to escape. When the alarm sounds, immediately evacuate
the premises before beginning any investigation.
Installation 45
Signal pattern 46
Using broadcast 46
Changing the radio key 47
Location and positioning 49
Testing and maintenance 53
Fire safety advice 55
Alarm limitations 58
Technical specications 60
Troubleshooting 61
Service and support 62
Contents
Please note: This smoke alarm is equipped with a radiomodule that transmits
radio signalsto one orseveralsupplementary Visit receivers. AVisit receiver will
help to ensure thatthe alarm is noticed throughout the property.The alert and
signal pattern for the Visit receiver is explained in the product’s user manual.
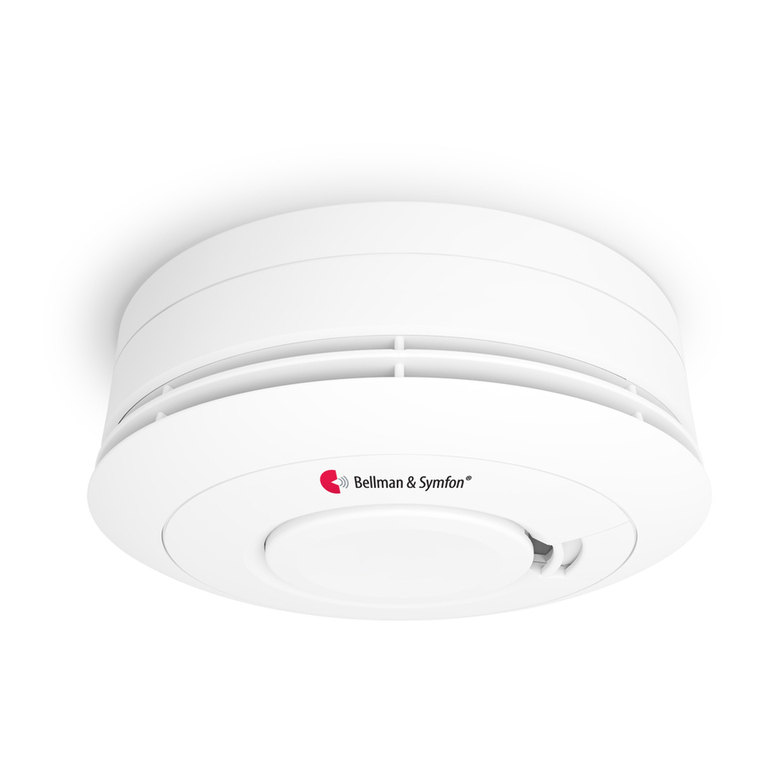
Alarm signal output
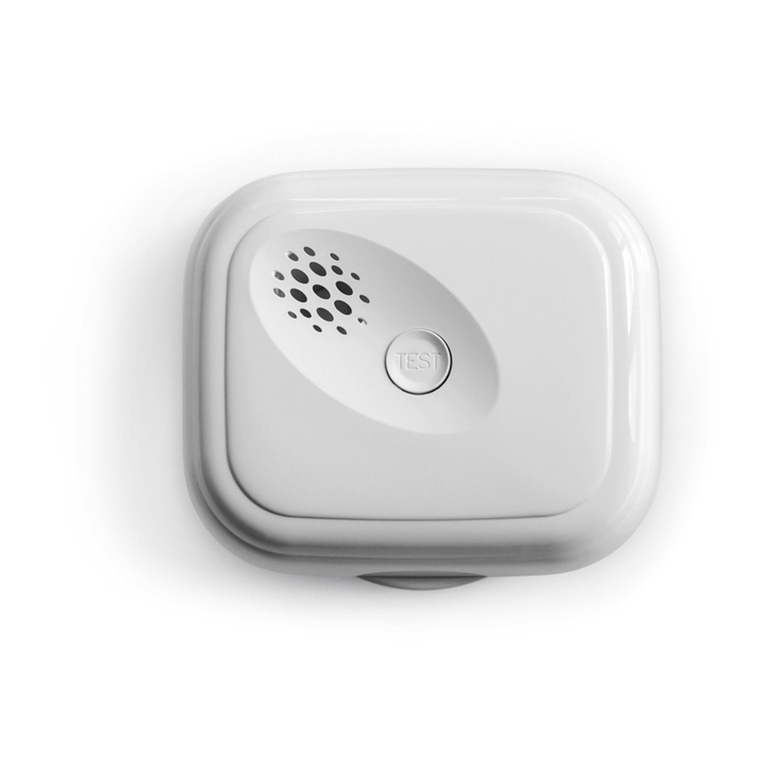
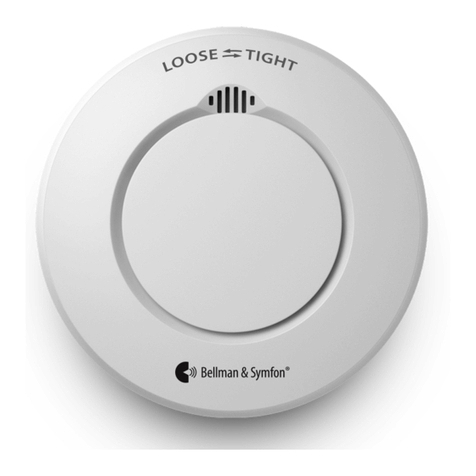
Test button Status indicator
Mounting bracket
2 x 1.5V AA batteries
EN

4645
Signal pattern
The smoke alarm status indicator blinks in red once every 50 s to show that it is working
correctly. Depending on the cause of the alarm, the signal patterns are as follows:
Cause Sound Status indicator Visit receiver
Activated by smoke Rapid ashing Fire alarm
Activated by heat Rapid ashing Fire alarm
Low battery Chirp every 50 s Blink every 50 s Blinking red LED
Faulty unit Chirp every 50 s Blink every 50 s
(Between the chirp)
Note: When the low battery warning occurs for the rst time, you have at least 30 days to replace it.
You can press the test button to temporarily hush the low battery warning for 10 hours.
Using broadcast
If you want the smoke alarm signal to be transmitted to all Visit receivers within radio range,
you can activate broadcast mode. This will override the radio key settings.
To activate broadcast:
Press the smoke alarm test button three times in quick succession. The smoke alarm
chirps and blinks three times to show that broadcast mode is activated.
Note: Low battery warning and alarm test by pressing the test button, will only be transmitted to
receivers with the same radio key.
To disable broadcast:
Press the smoke alarm test button three times in quick succession. The smoke alarm
emits a steady sound and light for 2 seconds. The smoke alarm has now returned to the
latest stored radio key.
Installation
Setting up the smoke alarm
1Remove the mounting bracket from the smoke alarm by turning it counter-clockwise.
Insert the supplied batteries to start the unit.
2Fix the mounting bracket to the ceiling using the screws and plugs. Make sure it’s located
at least 50 cm, (20”) from walls and other obstructions, see Location and positioning.
3Fit the smoke alarm to the bracket by turning it clockwise until is snaps into place.
Testing the connection
1Press and hold the smoke alarm test button
until the alarm sounds and the status
indicator starts to blink. The smoke alarm
transmits a radio signal to the receiver.
2The red Visit LED on the receiver lights up
to show that the signal was received. In
addition, it starts to sound, ash or vibrate
depending on the receiver.
Note: The smoke alarm will stop sounding
shortly after the button is released and the Visit
receiver will time out in less than a minute.
1 2
1 2 3
EN

4847
Changing the radio key
If your Visit system is activated for no reason, there is probably a nearby system that triggers
yours. In order to avoid radio interference, you need to change the radio key on all units.
Systems with dierent types of transmitters
First, change the radio key on all other transmitters in the system by moving any of the radio
key switches, see the corresponding transmitter user manual. Note that all transmitters
must be set to the same radio key to operate as a group
Step 1: Change the radio key on the BE1481 Smoke alarm
1 Remove one of the batteries to turn o the smoke alarm and wait at least 30 s. Press and
hold the test button as you insert the battery again. Continue pressing the test button
until the status indicator starts to ash. Now, release the button. The status indicator will
ash rapidly to show that the smoke alarm is ready to receive the new radio key.
2 Press the test button on any other transmitter within 25 s to transmit the new radio key.
3 The smoke alarm status indicator emits a steady light to show that the radio key has been
changed. Press the test button on the smoke alarm to save the new radio key and exit the
pairing mode.
Step 2: Change the radio key on the receiver
1 Press and hold the test/function button on the receiver until the green and yellow Visit
LEDs blink alternately. Release the button.
2 Press the test button on any transmitter within 25 s to transmit the new radio key.
3 All Visit LEDs on the receiver blink 5 times to show that the radio key has been changed.
Systems with only BE1481 Smoke alarms
If your Visit system is activated for no apparent reason, there is probably a nearby system that
triggers yours. To avoid radio interference, you need to change the radio key on all units.
Step 1: Change the radio key on the BE1481 Smoke alarm
1Remove one of the batteries to turn o the smoke alarm and wait at least 30 s. Press and
hold the test button as you insert the battery again and continue holding it until the LED
starts to ash rapidly. Release the button to enter the programming mode. The default radio
key is 0 and the LED lights up for 4 s to conrm.
2Within these 4 s, press and hold the test button until the LED switches o to select the next
radio key. Radio key 1 is now selected and the LED lights up for 4 s to conrm. Following
this process, you can advance to the next radio key. There are 9 radio keys available. If you
continue beyond radio key 9, the unit will reset to radio key 0.
3After 4 s, the smoke alarm will automatically exit the programming mode and the LED
will switch o to conrm.
Follow the above steps to change the radio key on all smoke alarms in your system. Note
that all Visit units must be set to the radio key to operate as a group.
Step 2: Change the radio key on the receiver
1Press and hold the test/function button on the receiver until the green and yellow Visit
LEDs blink alternately. Release the button.
2Press the test button on any of the smoke alarms within 25 s to transmit the new radio key.
3All Visit LEDs on the receiver blink 5 times to show that the radio key has been changed.
1 2 3
EN

5049
Location and positioning
Sucient smoke must enter your smoke alarm before it will respond. Your smoke alarm
needs to be within 7.5 meters (25 ft.) of the re to respond quickly. Your smoke alarms also
need to be in positions where they can be heard throughout the property, so they can wake
you and your family in time for everyone to escape. A single smoke alarm will give some
protection if it is properly installed, but most homes will require two or more to ensure that
a reliable early warning is given. For recommended protection you should put individual
smoke alarms in all rooms where re is most likely to break out (apart from the kitchen and
bathroom).
Your rst smoke alarm should be located between the sleeping area and the most likely
sources of re (living room for example), but it should not be more than 7.5 meters (25 ft.)
from the door to any room where a re may start and block your escape from the house.
Single storey dwelling
If your home is on one level, you should put your rst smoke alarm in a corridor or hallway
between the sleeping and living areas. Place it as near to the living area as possible, but
make sure you can hear it loudly enough to wake you in the bedroom, see Figure 1.
Preferably the smoke alarms should be connected to a Visit receiver so as to give an addi-
tional warning throughout the property.
If your home is very large and the corridor or hallway is more than say 15 metres (50 ft.)
long, one smoke alarm will not be sucient. This is because no matter where it is located it
will be more than 7.5 metres (25 ft.) from potential res.
Minimum protection level
On each storey
In each sleeping area
Every 7.5 metres of hallways & rooms
Within 3 metres of all bedroom doors
In houses with more than one sleeping area, smoke alarms should be placed between each
sleeping area and the living area, see Figure 2.
Recommended protection level
In addition:
In every room, except
bathrooms and kitchens
Multi Storey Dwellings
If your home has more than one oor, at least one smoke alarm should be tted on each
level, see Figure 3.
Connecting the smoke alarms to one or several Visit receivers will help to ensure that the
alarm is noticed throughout the property.
Recommended Protection
Fire authorities recommend you put individual smoke alarms in or near all the rooms where
re is most likely to break out (apart from the locations to avoid, mentioned below). The liv-
ing room is the most likely place for a re to start at night, followed by the kitchen and then
Figure 1 Single storey dwelling
Figure 2 Single storey dwelling
with separate sleeping areas
Bedroom Bath
room Kitchen
Dining room
Bedroom Bedroom
Bedroom
Bedroom
Bath
room Kitchen
Dining room
Living room
Bedroom
Figure 3 Multi storey dwelling
EN

5251
the dining room. You should also consider putting smoke alarms in any bedrooms where
res might occur, for instance, where there is an electrical appliance such as an electric
blanket or heater, or where the occupant is a smoker. You could also consider putting smoke
alarms in any rooms where the occupant is unable to respond very well to a re starting in
the room, such as an elderly or sick person or a very young child.
Checking alarms can be heard
With the alarms sounding in their intended locations check that the alarm can be heard
in each bedroom with the door closed, above the sound of any TV/audio systems. The TV/
audio systems should be set to a reasonably loud conversation level. If you cannot hear the
alarm over the sound of the TV/audio system, the chances are it would not wake you. Con-
necting the smoke alarms to one or several Visit receivers will help to ensure that the alarm
is noticed throughout the property.
Positioning
On a ceiling
Hot smoke rises and spreads out, so a central ceiling position is the recommended location.
The air is“dead” and does not move in corners, therefore smoke alarms must be mounted
away from corners. Place the unit at least 0.5 m from any light tting or decorative object
which might obstruct smoke entering the smoke alarm. Keep at least 0.5 m away from walls
and corners, see Figure 4.
On a sloping ceiling
In areas with sloping or peaked ceilings install your smoke alarm 0.9 m from the highest
point measured horizontally, because “dead air”at the apex may prevent smoke from reach-
ing the unit, see Figure 5.
Locations to avoid
Don’t place your smoke alarm in any of the following areas:
Bathrooms, kitchen, shower rooms, garages or other rooms where the smoke alarm may
be triggered by steam, condensation, normal smoke or fumes.
Attics (uninsulated) or other places where extremes of temperature may occur (below
4°C or above 40°C).
Near a decorative object, door, light tting, window molding etc., that may prevent
smoke from entering the Smoke Alarm.
Surfaces that are normally warmer or colder than the rest of the room (for example attic
hatches, uninsulated exterior walls etc). Temperature dierences might stop smoke from
reaching the unit.
Next to or directly above heaters or air conditioning vents, windows, wall vents etc. that
can change the direction of airow.
In very high or awkward areas where it may be dicult to reach the alarm for testing or
battery replacement.
Locate unit at least 1.5 m away from uorescent light ttings as electrical“noise”and/or
Figure 4 Figure 5
0.9 m
3'
Dead air spaces
Never within 0.5 m (20")
of any corner
Ideal in the centre of the ceiling Apex
EN

5453
ickering may aect the unit.
Locate away from very dusty or dirty areas as dust build-up in the chamber can make unit
too sensitive and prone to alarm. It can also block the insect screen mesh and prevent
smoke from entering the chamber.
Do not locate in insect infested areas. Small insects getting in to the chamber can
cause intermittent alarms.
Testing and maintenance
Your smoke alarm is a life saving device and should be checked periodically. Regularly check
that the status indicator on the smoke alarms ashes once a minute to show the units are
powered. Replace the battery if the blinking stops.
Manually testing your smoke alarm
It is recommended that you test your smoke alarms after installation and then at least week-
ly to ensure the units are working. It will also help you and your family to become familiar
with the sound of the alarms.
Press and hold the test button until the alarm sounds, see Installation. The alarm will
stop sounding shortly after the button is released.
If you are using a supplementary Visit receiver, check that the red Visit LED on the receiver
lights up and that it starts to sound, ash or vibrate depending on the receiver.
See Installation and the corresponding Visit receiver user manual.
The receiver will time out within 40 seconds.
Repeat this procedure for all other smoke alarms in the system.
Warning: Do not test with ame.
This can set re to the smoke alarm and damage the house. We do not recommend testing
with smoke as the results can be misleading unless special apparatus is used.
When you press the test button it simulates the eect of smoke in a smoke alarm which
it could experience in a real re. So, there is no need to test smoke alarms with smoke or
ame.
Nuisance alarms
If, when the alarm goes o, there is no sign of smoke, heat or noise to indicate that there is a
re, you should rst get your family into a safe place, before you start investigating.
Check the house carefully in case there is a small re smouldering somewhere.
Check whether there is some source of smoke or fumes, for example cooking fumes
being drawn past the smoke alarm by an extractor. If so, simply fan the smoke away with
a newspaper or similar.
If the cause of the alarm is not clear, it should be assumed that it is due to an actual re
and the dwelling should be evacuated immediately.
Please note: If there are frequent nuisance/false alarms it may be necessary to re-locate the
smoke alarm away from the source of the fumes. We recommend the use of a heat alarm in the
kitchen area to avoid such nuisance alarms.
Cleaning your smoke alarm
Clean your smoke alarm regularly. Use a soft bristle brush or the brush attachment of your
vacuum cleaner to remove dust and cobwebs from the sides and cover slots where the
smoke enters. Keep cover closed while cleaning. Do not vacuum or brush inside the smoke
alarm.
Warning: Do not paint your smoke alarm.
Other than the maintenance and cleaning described in this leaet, no other customer
servicing of this product is required. Repairs, when needed, must be performed by the
manufacturer.
Dust & insect contamination
All smoke alarms are prone to dust and insect ingress which can cause false alarms. The lat-
est design, materials and manufacturing techniques have been used in the construction of
our alarms to minimise the eects of contamination. However, it is impossible to completely
eliminate the eect of dust and insect contamination, and therefore, to prolong the life of
the smoke alarm you must ensure that it is kept clean so that excess dust does not build up.
Any insects or cobwebs in the vicinity of the smoke alarm should be promptly removed. In
certain circumstances even with regular cleaning, contamination can build up in the smoke
sensing chamber causing the alarm to sound. If this happens the alarm must be returned
for servicing or replacement. Contamination is beyond our control, it is totally unpredictable
EN

5655
and is considered normal wear and tear. For this reason, contamination is not covered by
the guarantee and a charge is made for all such servicing work.
Replacing the Batteries
Fresh Lithium batteries should last for over ve years. When the battery power is low and
replacement is necessary, the alarm will chirp and the red light will ash every 50s for at
least 30 days. The batteries must then be replaced. Also, replace the batteries if the alarm
does not sound when the test button is pressed.
For maximum reliability, check the battery at least once a year. When you replace the bat-
tery you must press the test button to check that the alarm is functioning properly.
Only use the brand and type of battery specied in the instructions. Using another battery
could result in re or personal injury.
Do not put the battery into a re.
The battery should be disposed of in a safe and environmentally sound manner at your local
recycle centre. Contact your local authority for further advice.
End of life
The entire smoke alarm must be replaced if:
The unit was installed more than 10 years ago (check the“replace by” date marked on the
side of the unit).
Do not put the smoke alarm into a re
The smoke alarm should be disposed in a safe and environmentally sound manner at your
local recycle centre. Contact your local authority for further advice.
Fire safety advice
When using household protective devices, basic safety precautions should always be
followed, including those listed below.
Please read all instructions.
Rehearse emergency escape plans so everyone at home knows what to do in case the
alarm sounds.
Use the smoke alarm test button to familiarize your family with the alarm sound and to
practice re drills regularly with all family members. Draw up a oor plan that will show
each member at least 2 escape routes from each room in the house. Children tend to
hide when they don’t know what to do. Teach children how to escape, open windows,
and use roll up re ladders and stools without adult help. Make sure they know what to
do if the alarm goes o.
Constant exposures to high or low temperatures or high humidity may reduce battery life.
Nuisance alarms can be quickly silenced by fanning vigorously with a newspaper or
similar to remove the smoke or press the test button.
Do not attempt to remove, recharge or burn the battery, as it may explode.
If it is necessary to remove the battery for separate disposal, handle carefully to avoid
possible eye damage or skin irritation if battery has leaked or corroded.
Do not tamper with the chamber. You may safely change the battery and clean the
smoke alarm following the instructions in this leaet.
To maintain sensitivity to smoke, do not paint or cover the smoke alarm in any manner;
do not permit any accumulation of cobwebs, dust or grease.
If the smoke alarm has been damaged in any way or does not function properly, do not
attempt a repair. Get your smoke alarm serviced, see the Service and support section.
This appliance is intended ONLY for premises having a residential type environment.
This is not a portable product. It must be mounted following the instructions in this leaet.
Smoke alarms are not a substitute for insurance. The supplier or manufacturer is not your
insurer.
Fire safety hints
Store petrol and other ammable materials in proper containers.
Discard oily or ammable rags.
Always use a metal replace screen and have chimneys cleaned regularly.
Replace worn or damaged sockets, switches, home wiring and cracked or frayed electri-
cal cords and plugs.
Do not overload electrical circuits.
EN

5857
Keep matches away from children.
Never smoke in bed. In rooms where you do smoke, always check under cushions for
smoldering cigarettes and ashes.
Service central heating systems regularly.
Be sure all electrical appliances and tools have a recog-
nized approval label.
This device cannot protect all persons at all times. It may not
protect against the three most common causes of fatal res:
Smoking in bed.
Leaving children at home alone.
Cleaning with ammable liquids, such as petrol.
Further information can be obtained from the Fire and
Rescue Services.
Planning your escape route
1Check room doors for heat or smoke. Do not open a hot
door. Use an alternate escape route. Close doors behind
you as you leave.
2If smoke is heavy, crawl out, staying close to oor. Take
short breaths, if possible, through a wet cloth or hold
your breath. More people die from smoke inhalation than
from ames.
3Get out as fast as you can. Do not stop for packing. Have
a prearranged meeting place outside for all family mem-
bers. Check everybody is there.
4Call the Fire and Rescue Services from a neighbour’s house
or mobile phone. Remember to give your name and
address.
5 NEVER re-enter a burning house.
1
2
3
4
5
NEVER
Alarm limitations
Limitations of smoke alarms
Smoke alarms have signicantly helped to reduce the number of re fatalities in countries
where they are widely installed. However independent authorities have stated that they
may be ineective in some circumstances. There are a number of reasons for this:
Smoke alarms will not work if the batteries are depleted or if they are not connected. Test
regularly and replace the entire smoke alarm when it fails to operate.
Smoke alarms will not detect re if sucient smoke does not reach the smoke alarm.
Smoke may be prevented from reaching the smoke alarm if the re is too far away, for
example, if the re is on another oor, behind a closed door, in a chimney, in a wall cavity,
or if the prevailing air draughts carry the smoke or heat away. Installing smoke alarms on
both sides of closed doors and installing more than one smoke alarm as recommended
in this leaet very signicantly improve the probability of early detection.
The smoke alarms may not be heard.
The radio link to the supplementary Visit receivers may not work due to interference or
due to the signal being blocked by furniture, renovations etc.
A smoke alarm may not wake a person who has taken drugs or alcohol.
The smoke alarms may not detect every type of re to give sucient early warning. They
are particularly ineective with: res caused by smoking in bed, escaping gas, violent
explosions, poor storage of ammable rags and/or liquids, (for example petrol, paint,
spirits etc.), overloaded electrical circuits, arson, children playing with matches.
Smoke alarms don’t last indenitely. We recommend replacement after 10 years as a
precaution.
Limitations of radio signals
The BE1481 Smoke alarm from Bellman & Symfon is very reliable and is tested to high
standards. However, due to its relatively low transmitting power and limited radio range
(required by regulatory bodies) there are some limitations to be considered:
Receivers may be blocked by radio signals occurring on or near their operating frequen-
cies, regardless of the radio settings.
EN
6059
Radio transceiver equipment should be tested regularly, at least weekly. This is to deter-
mine, whether there are sources of interference preventing communication, that the ra-
dio paths have not been disrupted by moving furniture or renovations, and so generally
protect against these and other faults.
This equipment generates, uses and can radiate radio frequency energy and, if not
installed and used in accordance with the instructions, may cause harmful interference to
radio and television reception. However, there is no guarantee that interference will not
occur in a particular installation. If this device does cause such interference, which can be
veried by turning the device on and o (by removing the battery) the user is encour-
aged to eliminate the interference by one or more of the following measures:
Re-orientate or re-locate the unit.
Increase the distance between the smoke alarm and the device being aected.
Consult the supplier or an experienced radio/television technician.
Technical specications
Features
Sensor type Optical smoke detection and thermal detection
Smoke sensitivity 0.115 – 0.168 dB/m
Meets requirements for EN 14604:2005+AC:2008
Heat sensitivity 62°C (+/- 8°C)
Audible alarm Min 85 dB(A) @ 3m (10'), Frequency: 3.2 kHz
Radio connection Features a separate radio module inside the smoke detector
Low battery warning Relays the alarm signal to all Visit receivers with same radio key
within radio range.
Broadcast function Transmits the smoke and heat alarm to all other Visit receivers
within range, overriding the radio key settings.
Power supply
Battery power Lithium: 2 x 1.5V AA Energizer Lithium L91
Power consumption Idle < 15 A, Active < 75 mA
Operation time Lithium batteries: 5 years
Radio function
Radio frequency 868.30 MHz
Coverage Up to 200 m (218 yd.), clear line of sight.
The range is reduced by walls, large objects and other radio
transmitters such as televisions and mobile phones.
Activation Via smoke and/or heat and via the test button
Environmental For indoor use only
requirements Operating temperature: 4° to 40° C (39° to 104° F)
Transport & storage temperature: -10°C to 50°C (14°F to 122°F)
Humidity range: 15% to 95% RH (non-condensing)
Size and weight Dimensions: Ø 120 x 37 mm (Ø 4.7" x 1.5")
Weight: 150 g (5.27 oz.), including batteries
EN

6261
Troubleshooting Service and support
If the product appears to be damaged or doesn’t function properly, follow the instruc-
tions in this user guide If the product still doesn’t function as intended, contact your local
dealer for information on service and warranty.
Warranty conditions
Bellman & Symfon guarantees this smoke alarm (excluding the battery) for two years from
date of purchase against any defects that are due to faulty materials or workmanship. This
guarantee only applies to normal conditions of use and service, and does not include damage
resulting from accident, neglect, misuse, unauthorized dismantling, or contamination howso-
ever caused. This guarantee excludes incidental and consequential damage.This guarantee
does not cover costs associated with the removal and/or installation of alarms.
Do not interfere with the smoke alarm or attempt to tamper with it. This will invalidate the
guarantee, but more importantly may expose the user to shock or re hazards.
This guarantee is in addition to your statutory rights as a consumer.
Model, type and classication
The information is available at the back of the smoke alarm.
Product disposal and recycling information
The symbol to the left means that according to local laws and regulations your
product should be disposed of separately from household waste. When this product
reaches its end of life, take it to a collection point designated by local authorities.
Battery disposal information
This symbol indicates that the product contains batteries that according to local
laws and regulations must be disposed of separately from household waste. Take
used batteries to a collection point designated by local authorities.
The European Union - declaration of conformity
Hereby, Bellman & Symfon AB, declares that this product has been tested and
approved to the requirements set out in the following standards:
EN14604 and RED 2014/53/EU.
The declaration of performance may be consulted at www.bellman.com.
If Try this
Nothing happens when I press
the smoke alarm test button.
Check that the batteries are rmly connected.
Replace the smoke alarm batteries. Only use AA
Energizer Lithium L91.
Check the age of the smoke alarm, see the“replace
by” label on the unit.
The smoke alarm beeps when
I press the test button but the
Visit receiver is not responding.
Check the receiver batteries and connections.
Move the receiver closer to the smoke alarm to make
sure it’s within radio range.
Check that the units are set to the same radio key, see
Changing the radio key.
The Visit receiver is activated for
no apparent reason.
Check for fumes, steam, etc. from the kitchen or
bathroom. Paint and other fumes can cause nuisance
alarms.
Change the smoke alarm battery if the red Visit LED
on the receiver blinks every 400 s, see Signal pattern.
If the problem persists, there is probably another Visit
system nearby that triggers yours. Change the radio
key on all units, see Changing the radio key.
The smoke alarm beeps and
chirps for no apparent reason.
Check for any sign of contamination such as cobwebs
or dust. If necessary, clean the alarm, see Cleaning
your smoke alarm.
If the problem persists, the smoke alarm is defective
and needs to be replaced.
EN

DESIGN FOR EARS™
BE1481_012MAN005
Version: D Date: 2019.01.24
Other manuals for BE1481
1
Table of contents
Other Bellman & Symfon Smoke Alarm manuals

Bellman & Symfon
Bellman & Symfon BE1481 User manual

Bellman & Symfon
Bellman & Symfon VISIT BE1551 User manual

Bellman & Symfon
Bellman & Symfon BE1289 User manual

Bellman & Symfon
Bellman & Symfon BE1284 User manual

Bellman & Symfon
Bellman & Symfon BE1281 User manual

Bellman & Symfon
Bellman & Symfon BE1287 User manual

Bellman & Symfon
Bellman & Symfon BE1480 User manual

Bellman & Symfon
Bellman & Symfon BE1480 User manual

Bellman & Symfon
Bellman & Symfon BE1281 User manual

Bellman & Symfon
Bellman & Symfon VISIT BE1551 User manual