Benchmark 1258-500 User manual

READ ALL INSTRUCTIONS BEFORE FIRST USE.
KEEP THIS MANUAL FOR FUTURE REFERENCE.
KEEP AWAY FROM CHILDREN.
WEAR CSA APPROVED
EYE PROTECTION
WEAR EAR
PROTECTION
WEAR A
FACE MASK
4006139
HDA802
120V 60Hz 6.5Amp
5 year limited warranty on tool

1
PRODUCT SPECIFICATIONS
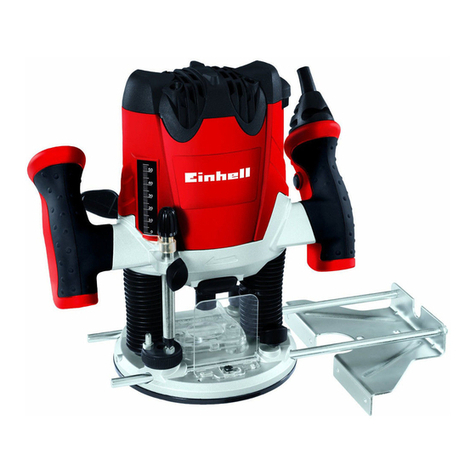
6.5A VARIABLE SPEED COMPACT ROUTER
Voltage 120V~ 60Hz
Rated Power 6.5 Amp 1-1/4" HP
Collet capacity 1/4”
6 adjustable speeds from 10,000-30,000 RPM
No-load speed
4.18LBS
Weight
NEED ASSISTANCE?
Call us on our toll- free customer support line:
1-866-349-8665 (Monday through Friday 9am – 5pm Eastern Standard Time)
• Technical questions
• Replacement parts
• Parts missing from package

1258-500
1.25HP COMPACT ROUTER
2
TABLE OF CONTENTS
Product Specifications .................................................................................. 1
Table of Contents .......................................................................................... 2
General Safety Warnings ............................................................................... 3
General Power Tool Safety Warnings............................................................... 5
Work Area Safety ........................................................................................... 5
Electrical Safety............................................................................................. 5
Personal Safety ............................................................................................. 5
Safety Symbols ............................................................................................. 8
Know Your 6.5A Variable Speed Compact Router............................................ 9
Assembly .................................................................................................... 10
Operation .................................................................................................... 12
Maintenance ............................................................................................... 13
Troubleshooting........................................................................................... 14
Exploded View ............................................................................................ 15
Parts List .................................................................................................... 16
Warranty ..................................................................................................... 18

3
GENERAL SAFETY WARNINGS
IMPORTANT SAFETY INSTRUCTIONS
Read and understand all safety and operational instructions. Failure to follow the
safety rules listed below and other basic safety precautions may result in serious
personal injury. Keep this manual, sales receipts and applicable warranty forms
for future reference.
SAFETY SYMBOLS
The purpose of safety symbols is to alert you of the potential safety RISKS.
Recognize and understand them. Follow the instructions provided.
SYMBOL MEANING
Failure to obey a DANGER safety alert WILL result in serious personal
injury or death to you or to others. Always obey all messages following
this symbol to reduce the risk of serious personal injury or death.
Failure to obey a WARNING safety alert MAY result in serious personal
injury or death to you or to others. Always obey all messages following
this symbol to reduce the risk of potential serious personal injury or
death.
Failure to obey a CAUTION safety alert MAY result in personal injury
or property damage to you or to others. Always obey all messages
following this symbol to reduce the risk of personal injury or
property damage.
Failure to obey a NOTICE or a CAUTION (without a safety alert)
MAY result in property damage to you or to others. Always obey all
messages following this symbol to reduce the risk of property damage.
ALWAYS WEAR EYE PROTECTION THAT CONFORMS WITH CSA
Z94.3 or ANSI SAFETY STANDARD Z87.1
FLYING DEBRIS can cause permanent eye damage. Prescription
eyeglasses ARE NOT a replacement for proper eye protection. The
usage of a safety standard compliant face shield placed over proper
safety glasses or goggles can reduce the risk of facial injury.
Non-compliant eyewear can cause serious injury if broken during
the operation of a power tool.
Use hearing protection, particularly during extended periods of
operation of the tool, or if the operation is noisy.
WEAR A DUST MASK THAT IS DESIGNED TO BE USED WHEN
OPERATING A POWER TOOL IN A DUSTY ENVIRONMENT.
Refer to Page 7 of the manual for California Prop 65 warnings relating
to hazardous dust particles.

1258-500
1.25HP COMPACT ROUTER
4
Always wear non-slip gloves that fit properly to protect your hands
and to help you grip the tool.
Always wear sturdy clothing with long sleeves and long pants.
Never operate the tool while wearing shorts, short sleeve shirt or
while shirtless.
Always wear non-slip safety boots to prevent foot injuries and slipping
that could cause loss of control of the tool.
To avoid electrical hazards, fire hazards or damage to the tool,
use proper circuit protection.
This tool is wired at the factory for 120 V AC operations.
It must be connected to a 120 V AC, 15 A circuit that is protected by
a time-delayed fuse or circuit breaker. To avoid shock or fire, replace
power cord immediately if it is worn, cut or damaged in any way.
WARNING: Ventilation openings in batteries and chargers must
always be open to allow cooling air to circulate freely. Air vents that
are blocked, restricted or covered may result in the battery or charger
overheating. Overheating may lead to damage to the tool or cause a
fire, resulting in possible serious injury.

5
GENERAL POWER TOOL SAFETY WARNINGS
Read all safety warnings and all instructions. Failure to follow the warnings and
instructions may result in electric shock, fire and/or serious injury.
Save all warnings and instructions for future reference. The term “power tool” in
the warnings refers to your mains operated (corded) power tool or battery-operated
(cordless) power tool.
WORK AREA SAFETY
• Keep work area clean and well lit. Cluttered or dark areas invite accidents.
• Do not operate power tools in explosive atmospheres, such as in the presence of
flammable liquids, gases or dust. Power tools create sparks which may ignite the
dust or fumes.
• Keep children and bystanders away while operating a power tool. Distractions
can cause you to lose control.
ELECTRICAL SAFETY
• Power tool plugs must match the outlet. Never modify the plug in any way. Do
not use any adapter plugs with earthed (grounded) power tools. Unmodified
plugs and matching outlets will reduce risk of electric shock.
• Avoid body contact with earthed or grounded surfaces, such as pipes, radiators,
ranges and refrigerator. There is an increased risk of electric shock if your body
is earthed or grounded.
• Do not expose power tools to rain or wet conditions. Water entering a power tool
will increase the risk of electric shock.
• Do not abuse the cord. Never use the cord for carrying,pulling or unplugging
the power tool. Keep cord away from heat, oil, sharp edges and moving parts.
Damaged or entangled cords increase the risk of electric shock.
• When operating a power tool outdoors, use an extension cord suitable for
outdoor use. Use of a cord suitable for outdoor use reduces the risk of electric
shock.
• If operating a power tool in a damp location is unavoidable, use a residual current
device (RCD) protected supply. Use of an RCD reduces the risk ofelectric shock.
PERSONAL SAFETY
• Stay alert, watch what you are doing and use common sense when operating
a power tool. Do not use a power tool while you are tired or under the influence
of drugs, alcohol or medication. A moment of inattention while operating power
tools may result in serious personal injury.
• Use personal protective equipment. Always wear eye protection. Protective
equipment such as dust mask, non-skid safety shoes, hard hat, or hearing
protection used for appropriate conditions will reduce personal injuries.
•
connecting to power source and/or battery pack, picking up or carrying the tool.
Carrying power tools with your finger on the switch or energising power tools
that have the switch on invites accidents.

1258-500
1.25HP COMPACT ROUTER
6
• Remove any adjusting key or wrench before turning the power tool on.
A wrench or a key left attached to a rotating part of the power tool may result
in personal injury.
• Do not overreach. Keep proper footing and balance at all times. This enables
better control of the power tool in unexpected situations.
• Dress properly. Do not wear loose clothing or jewellery. Keep your hair, clothing
and gloves away from moving parts. Loose clothes, jewellery or long hair can be
caught in moving parts.
• If devices are provided for the connection of dust extraction and collection
facilities, ensure these are connected and properly used. Use of dust collection
can reduce dust-related hazards.
POWER TOOL USE AND CARE
• Do not force the power tool. Use the correct power tool for your application.
The correct power tool will do the job better and safer at the rate for which
it was designed.
•
that cannot be controlled with the switch is dangerous and must be repaired.
• Disconnect the plug from the power source and/or the battery pack from the
power tool before making any adjustments, changing accessories, or storing
power tools. Such preventive safety measures reduce the risk of starting the
power tool accidentally.
• Store idle power tools out of the reach of children and do not allow persons
unfamiliar with the power tool or these instructions to operate the power tool.
Power tools are dangerous in the hands of untrained users.
• Maintain power tools. Check for misalignment or binding of moving parts,
operation. If damaged, have the power tool repaired before use. Many accidents
are caused by poorly maintained power tools.
• Keep cutting tools sharp and clean. Properly maintained cutting tools with sharp
cutting edges are less likely to bind and are easier to control.
• Use the power tool, accessories and tool bits etc. in accordance with these
instructions, taking into account the working conditions and the work to be
could result in a hazardous situation.
SERVICE
• Have your power tool serviced by a qualified repair person using only
identical replacement parts. This will ensure that the safety of the power
tool is maintained.
ROUTER AND TRIMMER SAFETY WARNINGS
1. Hold power tool by insulated gripping surfaces, because the cutter may
contact its own cord. Cutting a “live” wire may make exposed metal parts of
the power tool “live” and shock the operator.
2. Use clamps or another practical way to secure and support the workpiece to a
stable platform. Holding the work by hand or against your body leaves it unstable
and may lead to loss of control.

7
3. Let bit cool before touching, changing or adjusting it.
Bits heat up dramatically while in use, and can burn you.
4. DO NOT OPERATE WITH THE BASE OR ANY OTHER GUARD DISABLED,
DAMAGED, OR REMOVED.
Any moving guards must move freely and close instantly.
5. Maintain labels and nameplates on the tool. These carry important
safety information. If unreadable or missing, contact Benchmark tool
for a replacement.
6. Avoid unintentional starting. Prepare to begin work before turning on the tool.
7. Do not lay the tool down until it has come to a complete stop. Moving parts can
grab the surface and pull the tool out of your control.
8. When using a handheld power tool, maintain a firm grip on the tool with both
9. Do not depress the spindle lock when starting or during operation.
10. Do not leave the tool unattended when it is plugged into an electrical outlet.
11.This product is not a toy. Keep it out of reach of children.
12.People with pacemakers should consult their physician(s) before use.
Electromagnetic fields in close proximity to heart pacemaker could cause
pacemaker interference or pacemaker failure. In addition, people with
pacemakers should:
• Avoid operating alone.
• Do not use with Power Switch locked on.
• Properly maintain and inspect to avoid electrical shock.
• Properly ground power cord. Ground Fault Circuit Interrupter
(GFCI) should also be implemented – it prevents sustained electrical shock.
13.The warnings, precautions, and instructions discussed in this instruction
manual cannot cover all possible conditions and situations that may occur.
It must be understood by the operator that common sense and caution are
factors which cannot be built into this product, but must be supplied by
the operator.
SAVE THIS USER MANUAL
WARNING
MISUSE or failure to follow the safety rules stated in this instruction manual may
cause serious personal injury.
MINIMUM GAUGE (AWG) EXTENSION CORD (120 V use only)
Amperage rate Total length
More than Not more than 25' (7.5 m) 50' (15 m) 100' (30 m) 150' (45m)
0 6 18 16 16 14
6 10 18 16 14 12
10 12 16 16 14 12
12 16 14 12 Not Applicable

1258-500
1.25HP COMPACT ROUTER
8
SAFETY SYMBOLS
The rating plate on your tool may show symbols. These represent important
information about the product or instructions on its use.
WARNING: Please read all of the safety and operating instructions
carefully before using this tool. Please pay particular attention to all
sections of this User Guide that carry warning symbols and notices. Some
of the following symbols may be used on this tool.
Observe caution and safety notes.
To reduce the risk of injury, user must read and understand User Guide
before using this tool.
Wear ear protection.
Wear protective helmet and eye protection.
maintenance.
Do not use in the rain or leave outdoors while it is raining.
Keep bystanders away.
Don’t touch the inlet and outlet when the vacuum cover is opened or the
tube is removed.
Double insulation.
Remove plug from the power source immediately if the power cord is
damaged or cut.
This symbol designates that this tool is listed with Canadian and U.S.
requirements by ETL Testing Laboratories, Inc.
Conforms to UL Std. 60745-1 and 60745-2-17
Certified to the CAN/CSA Std. C22.2 No. 60745-1 and 60745-2-17
4006139
HDA802

9
KNOW YOUR VARIABLE SPEED
COMPACT ROUTER
ATTENTION
adjustments to the tool.
FUNCTIONS
1. Variable Speed Control Dial 2.
3. Depth Adjustment Screw 4. Locking Lever
5. Depth Scale 6. Attachment Knob
7. Base 8. Power Cord
9. Spindle Lock 10. Fence
11. Wing Nut 12. Fence Bracket

1258-500
1.25HP COMPACT ROUTER
10
ASSEMBLY
ATTENTION:
Read the entire Important Safety Information section at the beginning of this
manual Including all text under subheadings before set up or use of this product.
TOOL SET UP
ATTENTION:
To prevent serious injury from accidental operation: make sure that the power
performing any procedure in this section.
CAUTION:
• Do not tighten the collet nut without inserting a bit, or the collet cone will break.
• Use only the wrenches provided with the tool.
Insert the bit all the way into the collet cone and tighten the collet nut securely
by pressing the shaft lock and using the provided wrench.
To remove the bit, follow the installation procedure in reverse.
INSTALLING THE ROUTER BIT
1. Unplug the router from the electrical outlet.
2. Release the locking lever and use the depth adjustment screw to move the
base down to expose the collet nut.
3. Press the spindle lock in to keep the spindle from turning.
4. Using the large wrench included, loosen the collet nut, but do not remove.
5. If there is already a bit in the collet cone, remove it.
6. Push the shank end of the new bit (sold separately) into the opening in the collet
nut. There may be some resistance, so make sure that it goes in all the way.
7. While holding in the spindle lock, tighten the collet nut with the large wrench.
ADJUSTING CUTTING DEPTH
Set the depth of cut using the scale marked on the side of the Router.
1. Install the router bit as previously described.
2. Release the locking lever and use the Depth Adjustment Screw to move the Base
down so the router bit is retracted within the Base.
3. Place the Base on a flat surface, and slide the Router down in the Base until the
tip of the bit contacts the work surface. Tighten the Locking Lever.
4. The depth scale on the Housing now shows the starting position. This starting
position will vary depending on the bit used.
5. Add the desired depth of cut to the starting position. For example, if the starting
position is 1/2" and the desired depth of cut is 1/4", the correct adjustment on
the scale is 3/4".
6. Release the Locking Lever, and use the Depth Adjustment Screw to move the
Housing up until the scale shows the correct reading; in this example 3/4".
Tighten the Locking Lever.

11
7. Make a test cut on a piece of scrap material to ensure that the
adjustment is correct.
INSTALLING THE FENCE
Use the Fence to make cuts parallel to the edge
of a workpiece, or following a guide clamped onto
the workpiece.
1. Install the fence bracket with the fence facing
Inward, and the flanges down.
2. Using the attachment knob, attach the fence
Assembly to the router, as shown in Figure A.
3. After measuring the proper distance from the
Router bit to the fence, tighten the fence using
The wing nut.
4. Adjust the cutting depth as described in
Adjusting cutting depth on page 10.
5. Make a test cut on a piece of scrap material to
Ensure that the adjustment is correct.
SETTING UP A TEMPORARY GUIDE
Clamp a temporary guide to the workpiece to
make a straight cut which does not parallel the
edge of the workpiece.
1. Clamp a suitable straight board across the
workpiece parallel to the desired location of
the cut.
2. Install the fence assembly with the fence
facing Outward and up, as shown in Figure B.
3. After measuring the proper distance from
the Router bit to the temporary guide, tighten
the Fence using the attachment knob and
wing nut.
4. Make a test cut on a piece of scrap material
to ensure that the adjustment is correct.
CIRCLE CUTTING
Use the center hole in the Fence as a pivot point
when cutting circles.
1. Install the fence as shown in Figure c.
2. Set the distance from the center hole in the
Fence to the far edge of the router bit equal to
the radius of the circle. Lock the fence in place
with the attachment knob and wing nut.
3. Align the centre hole in the fence with the center point of the circle.
4. Drive a nail through the centre hole to secure. The fence in place.
Attachment
knob
Attachment
knob
Fence
Fence
Fence
Bracket
Wing
nut
Wing
nut
Fig. a: Installing the Fence
Fig. b: Fence installation for
use with temporary Guide
Fig. c: Fence installation
for circle cutting

1258-500
1.25HP COMPACT ROUTER
12
WORKPIECE AND WORK AREA SET UP
1. Designate a work area that is clean and well lit. The work area must not allow
access by children or pets to prevent distraction and injury.
2. Route the power cord along a safe route to reach the work area without creating
a tripping hazard or exposing the power cord to possible damage. The power
cord must reach the work area with enough extra length to allow free movement
while working.
3. Secure loose workpieces using a vise or clamps (not included) to prevent
movement while working.
4. There must not be objects, such as utility lines, nearby that will present a hazard
while working.
OPERATION
ROCKER “ON/OFF” SWITCH
The compact router motor is turned “ON” and “OFF” with the rocker switch located
on the top cap of the motor housing. The left side of the rocker switch (as you face
To turn the motor “ON”: Push the rocker switch to the left side marked “I”. To turn
the motor “OFF”: Push the rocker switch to the right side marked “O”.
1. Always hold the router and cutting bit away from the workpiece when turning
the switch “ON.”
2. Contact the workpiece with the router and cutting bit only after the router
has fully reached the selected speed.
3. Remove the router and cutting bit from the workpiece only after turning the
router motor “OFF” and after the cutting bit has come to a complete stop.
SOFT START & CONSTANT POWER FEATURES
Soft Start Feature
The soft start feature minimizes torque twist by limiting the speed at which
the motor starts. This increases the motor’s life.
Constant Power feature
This tool features constant response circuitry to maintain speed under load.
VARIABLE SPEED CONTROL DIAL
The variable speed control feature allows the user to set the motor speed to
the cutting bit size and the workpiece-material hardness for an improved finish
and extended bit life.
The tool speed can be changed by turning the speed adjusting dial to a given
number setting from 1 to 6. Higher speed is obtained when the dial is turned in
the direction of number 6. And lower speed is obtained when it is turned in the
direction of number 1. This allows the ideal speed to be selected for optimum
material processing, i.e. the speed can be correctly adjusted to suit the material
and bit diameter.

13
GENERAL OPERATING INSTRUCTIONS
1.
2. Adjust the router speed to suit the working material and bit diameter. to adjust
speed, turn the speed control knob from 1 (the slowest speed) to 6 (the fastest
speed). Determine the optimum speed by testing on a scrap piece of material.
3. Turn the power switch on and run the tool for about 10 seconds before routing to
ensure that all moving parts are running smoothly, and there are no loose parts,
rattles, or sparking that would indicate damage.
4. When using the fence: cut parallel to the edge of the workpiece with the fence
following the edge.
5. When using a temporary guide: cut with the fence following the edge of the
temporary guide.
6. When making a circle cut: with the nail in place through the center hole of the
fence, plunge the router bit into the workpiece and rotate the router in a circle
around the nail.
NOTE: The router bit rotates clockwise. Adjust for this while cutting:
a. For most materials it is best to move the router from left to right as
facing the workpiece.
b. When cutting outside edges, move the router counterclockwise.
When cutting inside edges, move the router clockwise.
7.
the tool indoors out of children’s reach.
MAINTENANCE
ATTENTION: To prevent serious injury from accidental operation: make sure
outlet before performing any procedure in this section.
To prevent serious injury from tool failure: do not use damaged equipment. If
abnormal noise or vibration occurs, have the problem corrected before further use.
CLEANING, MAINTENANCE, AND LUBRICATION
1. Before each use, inspect the general condition of the tool. Check for:
• loose hardware
• misalignment or binding of moving parts
• damaged cord/electrical wiring
• cracked or broken parts
2. After use, wipe external surfaces of the tool with clean cloth.
3. Periodically, wear ANSI-approved safety goggles and NIOSH-approved
breathing protection and blow dust out of the motor vents using dry
compressed air.
4. Periodically wipe the Collet, Collet Cone, and router bits with a light oil
to prevent rust.

1258-500
1.25HP COMPACT ROUTER
14
5. Over time, if the performance of the tool diminishes, or it stops working
completely, it may be necessary to replace the Carbon Brushes.
This procedure must be completed by a qualified technician.
6. ATTENTION: If the supply cord of this power tool is damaged, it must
be replaced only by a qualified service technician.
TROUBLESHOOTING
Problem Possible Causes Likely Solutions
Tool wil not start 1. Cord not connected.
2. No power at outlet.
3. Tool's thermal reset breaker
tripped (if equipped)
4. Internal damage or wear. Carbon
brushes or Power Switch, for
example.)
1. Check that cord is plugged in.
2. Check power at outlet. If outlet is
breaker. If breaker is tripped, make sure
circuit is right capacity for tool and circuit
has no other loads.
button on tool
4. Have technician service tool.
Tool operates
slowly
1. Forcing tool to work too fast.
2. Extension cord too long or cord
diameter too small.
1. Allow tool to work at its own rate.
2. Eliminate use of extension cord. If an
extension cord is needed, use one with the
proper diameter for its length and load.
See Extension Cords in Grounding section
on page 6.
Performance
decreases over
time
1. Carbon brushes worn or
damaged.
2. Router bit dull or damaged.
1. Have qualified technician replace brushes.
2. Use sharp bits. Replace as needed.
Excessive noise
or rattling
Internal damage or wear (Carbon
brushes or bearings, for example)
Have technician service tool.
Overheating 1. Forcing tool to work too fast.
2. Accessory misaligned.
3. Router bit dull or damaged.
4. Blocked motor housing vents.
5. Motor being strained by long or
small diameter extension cord.
1. Allow tool to work at its own rate.
2. Check and correct accessory to fence and/
or table alignment.
3. Use sharp bits. Replace as needed.
4. Wear ANSI-approved safety goggles and
NIOSH-approved dust mask/respirator
while blowing dust out of motor using
compressed air.
5. Eliminate use of extension cord. If an
extension cord is needed, use one with the
proper diameter for its length and load.
See Extension Cords in Grounding section
of page 6.
Follow all safety precautions whenever diagnosing or servicing the tool.
Disconnect power supply before service.

15
EXPLODED VIEW

1258-500
1.25HP COMPACT ROUTER
16
PARTS LIST
WARNING: When servicing, use only original equipment replacement parts.
The use of any other parts may create a safety hazard or cause damage to the
variable speed compact router.
Any attempt to repair or replace electrical parts on this power washer may
create a safety hazard unless repairs are performed by a qualified technician.
For more information, call the Toll-free Helpline, at 1-866-349-8665;
Monday - Friday: 9am to 5pm Eastern Standard Time.
Always order by key number.
Key# Part # Part Name Qty
1 1258-500-001 RATING PLATE 1
2 1258-500-002 BACK COVER 1
3 1258-500-003 CONSTANT POWER VARIABLE SPEED 1
4 1258-500-004 JUNCTION BLOCK 1
5 1258-500-005 ON-OFF SWITCH 1
6 1258-500-006 TAPPING SCREW ST4.2X13 2
7 1258-500-007 CABLE CLAMP 1
8 1258-500-008 CORD STRAIN RELIEF 1
9 1258-500-009 CABLE & PLUG 1
10 1258-500-010 BRUSH HOLDER SPRING 2
11 1258-500-011 CARBON BRUSH HOLDER 2
12 1258-500-012 CARBON BRUSH ASS. 2
13 1258-500-013 CARBON BRUSH CAP 2
14 1258-500-014 HOUSING 1
15 1258-500-015 STATOR 1
16 1258-500-016 CIRCLIP 4 1
17 1258-500-017 MAGNETIC RING 1
18 1258-500-018 WASHER 5 2
19 1258-500-019 BEARING SLEEVE 1
20 1258-500-020 BEARING 627-2RZ 1
21 1258-500-021 DUST EXCLUDING RING 1
22 1258-500-022 ARMATURE 1
23 1258-500-023 RETAINING RING A TYPE 17 1
24 1258-500-024 BEARING 6003-2RZ 1
25 1258-500-025 WASHER 1
26 1258-500-026 ISOLATION SLEEVE 1
27 1258-500-027 BUSHING 1

17
Key# Part # Part Name Qty
28 1258-500-028 ALU HOUSING 1
29 1258-500-029 TAPPING SCREW ST4.2X32 4
30 1258-500-030 ADJUSTABLE HOLDER RUBBER 1
31 1258-500-031 HEX NUT M5 1
32 1258-500-032 LOCKING LEVER FOR DEPTH ADJUSTMENT 1
33 1258-500-033 LEVER COVERING 1
34 1258-500-034 ATTACHMENT LOCKING SCREW 1
35 1258-500-035 WASHER 6 2
36 1258-500-036 ADJUSTABLE HOLDER 1
37 1258-500-037 BASE PLATE 1
38 1258-500-038 SCREW M4X10 1
39 1258-500-039 DEPTH ADJUSTMENT KNOB 1
40 1258-500-040 LOCKING PAD 1
41 1258-500-041 GEAR 1
42 1258-500-042 PIN 4X4 1
43 1258-500-043 COLLET NUT 1
44 1258-500-044 ELASTIC COLLET 1
45 1258-500-045 SELF-LOCKING CAP 1
46 1258-500-046 SPRING 1
47 1258-500-047 SPINDLE LOCK 1
501 1258-500-048 STRAIGHT LINE GUIDE RULER 1
501-1 1258-500-049 HEAD NECK BOLTM6X10 1
501-2 1258-500-050 FIXED BOARD 1
501-3 1258-500-051 STRAIGHT LINE GUIDE 1
501-4 1258-500-052 LOCKING NUT 1
502 1258-500-053 WRENCH 13 1
503 1258-500-054 WRENCH 22 1

1258-500
1.25HP COMPACT ROUTER
18
WARRANTY
BENCHMARK COMPACT ROUTER
If this Benchmark tool fails due to a defect in material or workmanship within five
years from the date of purchase, return it to any Home Hardware store with the
original bill of sale for exchange. 3-year warranty for the battery and charger. This
warranty does not include expendable parts including but not limited to blades,
brushes, belts, light bulbs.
This warranty covers defects in material or workmanship only. It does not cover
normal wear and tear, failure due to abuse/misuse, or defects caused by careless or
accidental mishandling. If this Benchmark product is used for commercial or rental
purposes, this warranty does not apply.

19
Table of contents
