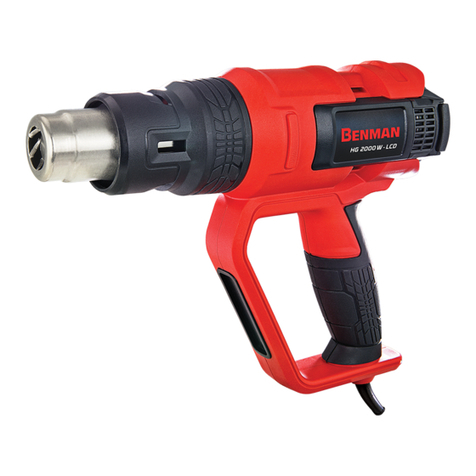
Benman HG 2000 W User manual

HG 2000 W LCD
ORIGINAL INSTRUCTIONS
NOTICE ORIGINALE
ISTRUZIONI ORIGINALI
ORIGINALNO UPUTSTVO ZA RAD
EN
IT
EL
SR
RO
BG

2
EN
IT
EL
SR
RO
BG
Heat Gun......................................................... 04
Décapeur Thermique.................................... 09
Pistola Termica.............................................. 14
Πιστόλι Θερμού Αέρα................................ 20
Pištolj Za Vreo Vazduh................................ 25
Suflantă De Aer Cald................................ 30
Tермопистолет......................................... 35
1
2

www.benman-tools.com
3
4
5
6
7
8
9
10
3

| English4
1. APPLICATION
Your heat gun has been designed for stripping
paint, soldering pipes, shrinking PVC, welding and
bending plastic as well as general drying and thaw-
ing purposes.
WARNING! Read this manual and gener-
al safety instructions carefully before
using the appliance, for your own safety.
Your power tool should only be passed
on together with these instructions.
2. DESCRIPTION
1. Nozzle
2. Ventilation slots
3.
4. LCD Digital Display
5.
6.
7.
8.
9.
3. PACKAGE CONTENT LIST
• Remove all packing materials
• Remove remaining packaging and transit supports
• Check the completeness of the packing content.
• Check the appliance, the power cord, the power
plug and all accessories for transportation damages.
• Keep the packaging materials as far as possible till
the end of the warranty period. Dispose it into your
local waste disposal system afterwards.
WARNING! Packing materials are no
toys! Children must not play with plastic
1 Heat gun
When parts are missing or damaged,
please contact your dealer.
-
INGS
Read all safety warnings and all instructions. Failure
to follow all warnings and instructions may result
warnings and instructions for future reference. The
term “power tool” in the warnings refers to your
-
English 4.1 Work area
• Keep work area clean and well lit. Cluttered and
dark areas invite accidents.
• -
liquids, gases or dust. Power tools create sparks
which may ignite the dust or fumes.
• Keep children and bystanders away while oper-
ating a power tool. Distractions can cause you to
lose control.
4.2 Electrical safety
• Power tool plugs must match the outlet. Never
modify the plug in any way. Do not use any adapt-
-
risk of electric shock.
• Avoid body contract with earthed or grounded
surfaces such as pipes, radiators, ranges and re-
frigerators. There is an increased risk of electric
shock if your body is earthed or grounded.
• -
tions. Water entering a power tool will increase
the risk of electric shock.
• Do not abuse the cord. Never use the cord for car-
rying, pulling or unplugging the power tool. Keep
cord away from heat, oil, sharp edges or moving
parts. Damaged or entangled cords increase the
risk of electric shock.
• When operating a power tool outdoors, use an
cord suitable for outdoor use reduces the risk of
electric shock.
•
of electric shock.
4.3 Personal safety
• -
mon sense when operating a power tool. Do not
use a power tool while you are tried or under the
-
ment of inattention while operating power tools
may result in serious personal injury.
• -
skid safety shoes, hand hat, or hearing protection
used whenever conditions require will reduce per-
sonal injuries.
• Avoid accidental starting. Ensure the switch is in
-
in power tools that have the switch on invites ac-
cidents.
• Remove any adjusting key or wrench before turn-
ing the power tool on. A wrench or a key left at-
tached to a rotating part of the power tool may
result in personal injury.
• Do not overreach. Keep proper footing and bal-
ance at all times. This enables better control of
• Dress properly. Do not wear loose clothing or
jewelry. Keep your hair, clothing and gloves away
from moving parts. Loose clothes, jewelry or long

www.benman-tools.com
English | 5
hair can be caught in moving parts.
•
devices can reduce dust related hazards.
4.4 Power tool use and care
• -
er tool for your application. The correct power
tool will do the job better and safer at the rate of
which it was designed.
• Do not use the power tool if the switch does not
controlled with the switch is dangerous and must
be repaired.
• Disconnect the plug from the power source be-
fore making any adjustments, changing accesso-
-
ty measures reduce the risk of starting the power
tool accidentally.
•
and do not allow persons unfamiliar with the pow-
er tool of these instructions to operate the power
tool. Power tools are dangerous in the hands of
untrained users.
• Maintain power tools. Check for misalignment or
sticking of moving parts, breakage of parts and
-
paired before use. Many accidents are caused by
poorly maintained power tools.
• Keep cutting tools sharp and clean. Properly main-
tained cutting tools with cutting edges are less
likely to stick and are easier to control.
•
in accordance with these instructions and in the
manner intended for the particular type of power
tool, taking into account the working conditions
lead to a hazardous situation.
4.5 Service
•
person using only identical replacement parts.
This will ensure that the safety of the power tool
is maintained.
HEAT GUNS
• Do not place your hand over the air vents or block
the vents in any way.
• -
tremely hot during use. Let these parts cool down
before touching.
•
• Do not leave the tool unattended while it is
switched on.
•
care.
• Heat may be conducted to combustible materials
that are out of sight. Do not use in a damp atmo-
near combustible materials.
• Allow the tool to cool fully before storing.
•
be produced.
• Do not use as a hairdryer.
• Do not obstruct either the air intake or nozzle
resulting in damage to the tool.
• Do not direct the hot air blast at other people.
• Do not touch the metal nozzle as it becomes very
-
utes after use.
• Do not place the nozzle against anything while us-
ing or immediately after use.
• Do not poke anything down the nozzle as it could
give you an electric shock. Do not look down the
nozzle while the unit is working because of the
high temperature being produced.
• Do not allow paint to adhere to the nozzle or
scraper as it could ignite after some time.
6 REMOVING PAINT
• Do not use this tool to remove paint containing
lead. The peelings, residue and vapors of paint
may contain lead, which is poisonous. Any pre-
with paint containing lead and covered with addi-
tional layers of paint. Once deposited on surfaces,
hand to mouth contact can result in the ingestion
cause irreversible damage to the brain and ner-
vous system. Young and unborn children are par-
ticularly vulnerable.
• When removing paint, ensue that the work area is
enclosed. Preferably wear a dust mask.
•
the nozzle at leaf 25 mm away from the painted
surface. When working in a vertical direction, work
downwards to prevent paint from falling into the
tool and burning.
• Dispose of all paint debris safely and ensure that
the work area is thoroughly cleaned after com-
pleting the work.
7 ASSEMBLY AND ADJUSTMENT
Prior to assembly and adjustment al-
ways unplug the tool
The air temperature can be adjusted to suit a wide
range of applications. The table below suggests
Setting Applications
I
Drying paint, varnish color shade
-
struction joints and stucco forms.
Removing stickers

| English6
If you are not sure about the correct
setting, start with a low temperature
setting and gradually increase the tem-
perature until you achieve optimum re-
sults
7.1 Mounting the correct accessory
•
and the nozzle has cooled down.
•
-
ly and secure on the unit.
• Touching a hot nozzle can lead to se-
rious burns. Before attaching or re-
placing a nozzle, allow the unit to cool
down completely or use a suitable tool.
•
proof surfaces.
• An incorrect or defective nozzle can
lead to heat accumulation and damage
the unit. Use only original nozzles ac-
cording to the table that are suitable
for your unit.
I
Joining adhesives-Large-surface
gluing with contact adhesives,
activation of pressure-sensitive
adhesives, acceleration of bond-
ing processes, releasing of bond-
ing points as well as releasing or
bonding of edge band or veneer.
insulation tubes
Defrosting of icy stairs and steps,
door locks, trunk lids, car doors
or water pipes, as well as for
defrosting refrigerators and ice
II
Welding of thermoplastic poly-
and linoleum, PVC-coated fabric,
tarpaulins and foils.
-
ments, cable lugs.
Loosening rusted or tightly
fastened nuts and bolts.
Removing old and even thick
coatings of oil paint, lacquer,
varnish and synthetic plaster.
Disinfection-With hot air of
oC, you can quickly rid
animal sties/stables of bacteria.
Woodworm infestation can be
Icon Description Purpose
Glass
protection
nozzle
Protection
windows when
stripping frames
nozzle
Cone nozzle
Welding, shrink
concentrated
Fish tail surface
nozzle
Drying, thawing
and varnish
4. LCD Digital Display
4.1 Preset input
4.2 Flasher
4.3 Preset mode
indicator
4.4 Temperature
indicator

www.benman-tools.com
English | 7
• Always observe the safety instructions and appli-
cable regulations.
•
your other hand over the air vents.
• Mount the correct accessory for the application.
•
•
switching on; this does not indicate a problem.
• -
-
storing it.
•
start to buzz.
•
oC.
temperature reaches the setting temperature.
•
oC for cooling down.
8.3 Preset mode selection
• 4 preset modes are available for quick selection
-
• -
8.4 Preset mode input
click
click
click
clickclick
•
•
• -
-
stored into the preset mode for quick selection.
8.5 Stripping paint
• Mount an appropriate accessory.
•
•
• Direct the hot air onto the paint to be removed.
• When the paint softens, scrape the paint away us-
ing a hand scraper.
• Do not strip metal window frames, as
the heat may be conducted onto the
glass and crack it. When stripping oth-
er window frames, use the glass pro-
tection nozzle.
• Do not keep the tool directed at one
spot too long to prevent igniting the
surface.
• Avoid collecting paint on the scraper
accessory, as it may ignite. If necessary,
carefully remove paint debris from the
scraper accessory using a knife.
8.6 Stationary use
This tool can also be used in stationary mode.
• Place the tool onto the workbench.
•
the workbench.
• Carefully switch the tool on.
Make sure that the nozzle always points
away from you and any bystanders.
Make sure not to drop anything into the
nozzle.
8.7 Cooling down
The nozzle and accessory become very hot during use.
Let them cool down before attempting to move or
store the tool.
• To reduce the cooling time, switch the tool to po-
minutes.
•
9 MAINTENANCE AND CLEANING
Attention! Before performing any work
on the equipment, pull the power plug.
9.1 Maintenance
Your Power Tool has been designed to operate
over a long period of time with a minimum of main-
tenance. Continuous satisfactory operation de-
pends upon proper tool care and regular cleaning.

| English8
9.2 Lubrication
Your power tool requires no additional lubrication.
9.3 Cleaning
Keep the ventilation slots clear and regularly clean
the housing with a soft cloth.
9.4 Cleaning
• Keep the ventilation slots of the machine clean to
prevent overheating of the engine.
• Regularly clean the machine housing with a soft
cloth, preferably after each use.
• Keep the ventilation slots free from dust and dirt.
•
moistened with soapy water.
Never use solvents such as petrol, alco-
hol, ammonia water, etc. These solvents
may damage the plastic parts.
10 TECHNICAL DATA
11 WARRANTY
• This product is warranted in accordance with the
• This warranty covers all material or production
to normal wear & tear, such as bearings, brushes,
cables, plugs or accessories such as drills, drill bits,
saw blades etc.; damage or defects resulting from
abuse, accidents or alterations; nor the costs for
transport.
• We reserve the right to reject any claim where the
the product has not been properly maintained.
• Your purchase receipt must be kept as proof of
date of purchase.
• Your appliance must be returned un-dismantled
to your dealer in an acceptably clean state, accom-
panied by your proof of purchase.
12 ENVIRONMENT
Should your appliance need replace-
ment after extended use, do not dis-
card it with the household rubbish but
dispose of it in an environmentally safe
way. Waste produced by electrical ma-
chine items should not be handled like
normal household rubbish. Please re-
cycle where facilities exist. Check with
your Local Authority or retailer for recy-
cling advice.
Article number
Voltage
Power supply
Air
temperature /
o
o
• We declare under our sole responsibility that this
product is in conformity with the following stan-
•
Loudovikos Tsirigiotis
Operations & Engineering

www.benman-tools.com
Français | 9
1. UTILISATION
Votre décapeur thermique a été conçu pour décol-
souder et plier les plastiques ainsi que pour tous
MISE EN GARDE! Pour votre propre sécu-
rité, lisez préalablement ce manuel d’utili-
sation avant d’utiliser la machine. Si vous
cédez votre appareil, joignez-y toujours ce
mode d'emploi.
N’utilisez pas l’outil dans un environne-
ment contenant des liquides, gaz ou pous-
produisent des étincelles qui peuvent en-
2. DESCRIPTION
1. Nozzle
2.
3.
4. LCD Digital Display
5.
6.
7.
8.
9.
3. LISTE DES PIÈCES CONTENUES DANS
L'EMBALLAGE
•
•
•
•
-
transport.
• -
-
système de mise au rebut des déchets.
-
ballage ne sont pas des jouets! Les en-
fants ne doivent pas jouer avec des
sacs en plastique! Il existe un risque de
1 décapeur thermique
En cas de pièces manquantes ou endom-
magées, contactez votre revendeur.
4. AVERTISSEMENTS DE SÉCURITÉ GÉNÉ
RAUX POUR L’OUTIL
Lire tous les avertissements de sécurité et toutes
les instructions. Ne pas suivre les avertissements et
un incendie et/ou une blessure sérieuse.
Conserver tous les avertissements et toutes les ins-
Le terme «outil» dans les avertissements fait réfé-
-
4.1 Sécurité de la zone de travail
• Conserver la zone de travail propre et bien éclai-
rée. Les zones en désordre ou sombres sont pro-
• Ne pas faire fonctionner les outils électriques en
Les outils électriques produisent des étincelles qui
• Maintenir les enfants et les personnes présentes
-
tractions peuvent vous faire perdre le contrôle de
4.2 Sécurité électrique
•
-
réduiront le risque de choc électrique.
• Éviter tout contact du corps avec des surfaces re-
risque accru de choc électrique si votre corps est
• -
-
trique.
• Ne pas maltraiter le cordon. Ne jamais utiliser le
-
-
tent le risque de choc électrique.
•
-
térieure réduit le risque de choc électrique.
•
est inévitable, utiliser une alimentation protégée
électrique.
4.3 Sécurité des personnes
•
-
-
-

| Français
des blessures graves des personnes.
• -
de sécurité tels que les masques contre les pous-
sières, les chaussures de sécurité antidérapantes,
les casques ou les protections acoustiques utilisés
pour les conditions appropriées réduiront les bles-
sures des personnes.
•
-
de le ramasser ou de le porter. Porter les outils en
• -
-
sures de personnes.
• Ne pas se précipiter. Garder une position et un
inattendues.
•
-
dans des parties en mouvement.
• -
-
collecteurs de poussière peut réduire les risques
4.4 Utilisation et entretien de l’outil
•
-
vail et de manière plus sûre au régime pour lequel
il a été construit.
•
réparer.
•
préventives réduisent le risque de démarrage ac-
•
-
tions de le faire fonctionner. Les outils sont dan-
•
des parties mobiles, des pièces cassées ou toute
-
• Garder affûtés et propres les outils permettant
-
tement entretenus avec des pièces coupantes
tranchantes sont moins susceptibles de bloquer
•
4.5 Maintenance et entretien
•
utilisant uniquement des pièces de rechange iden-
maintenue.
5. CONSIGNES DE SECURITE SUPPLEMEN-
TAIRE POUR LES DECAPEURS THER-
MIQUES
•
ventilation pour ne pas les obturer.
• La buse et les accessoires de cet outil peuvent
utilisation.
• Laissez-les refroidir avant de les toucher.
• -
poser.
•
alluré.
•
• -
bustibles hors du champ de vision.
• -
• -
ger.
• Prenez soin de bien aérer correctement la zone
de travail pour éviter fa formation de vapeurs
•
•
ni la bouche de la buse car ceci pourrait provoquer
•
personnes.
• Ne touchez pas la buse en métal; elle atteint en
-
environ après utilisation.
• Ne laissez pas reposer la buse contre un support
-
ment après.
•
électrocution. Ne regardez pas dans la buse
-
ratures très élevées produites lors du fonctionne-
ment.
•
-

www.benman-tools.com
Français | 11
6. DECOLLER LA PEINTURE
•
de la peinture au plomb. Les écailles, les résidus
et les vapeurs de peinture peuvent contenir du
-
couches de peinture. En présence de ces peintures
en surface, évitez tout contact avec la bouche qui
-
enfants et les femmes enceintes sont particulière-
ment vulnérables.
• Lors du décollement de la peinture, assurez-vous
-
lé de porter un masque anti-poussière.
•
de la surface peinte. Lors du travail vertical, tra-
vaillez du haut vers le bas pour éviter que la pein-
• Déposez tous les débris de peinture dans un en-
droit sûr et assurez-vous que la surface de travail
est bien correctement nettoyée lorsque le travail
est terminé.
7. MONTAGE ET RÉGLAGE
avant de procéder à l'assemblage ou au
réglage.
-
tion des nombreuses applications possibles. Vous
trouverez dans le tableau ci-dessous des conseils
de réglage pour plusieurs applications.
Si vous n' étés pas sûr du niveau de
température correct à appliquer,
commencez avec une température
faible et augmentez-la progressive-
ment jusqu'à ce que vous obteniez les
résultats souhaites.
7.1 Monter l'accessoire adapté
Réglage Applications
teintes de vernis, enduits, adhésifs,
joints de construction et stucs
colmatage
Enlever les autocollants
Coller de grandes surfaces adhésives,
pression, accélération des processus
de collage, libération des points de
collage ainsi que libération ou collage
des bandes sur les bords ou des
placages.
Modelage de la cire et retrait de la
cire
-
verglacés, de serrures de porte, de
dégivrage de réfrigérateurs et de
glacières
-
et linoléum, de tissus enduits de PVC,
de bâches et de feuilles
plastique
Desserrer les écrous et les boulons
rouillés ou trop serrés
de vernis et de plâtre synthétique
o C,
vous pouvez rapidement vous débar-
rasser des bactéries des porcheries
Symbole Description Application
vitre
Protection des
décapage de
cadres
-
leur concentrée
sur une petite
-
repartie sur une
surface plus

| Français12
• Assurez-vous que I ‘outil est éteint et que
la buse est refroidie.
• La buse de descente peut mettre un objet
en feu. Les buses doivent être solidement
• Touchage d'une buse chaude peut entraî-
de remplacer une buse, laissez-la refroidir
complètement ou utilisez un outil appro-
prié.
• Une buse chaude peut Incendier une sur-
face. Placez les buses chaudes unique-
ment sur des surfaces ignifuges.
• Une buse Incorrecte ou défectueuse peut
entraîner une accumulation de chaleur
et endommager I ‘appareil. N'utiliser que
des buses d'origine selon le tableau qui
conviennent à votre appareil.
8. MODE D’ EMPLOI
• Toujours respecter les consignes de sécurité et les
règles en vigueur.
• -
• -
cation souhaitée.
•
8.1 Mise en marche et arrêt
• -
• -
-
8.2 Réglages de la température et du débit
d'air.
•
-
donner.
•
- Augmenter ou diminuer la température de
sortie en appuyant sur les boutons 7 ou 8.
oC.
la température choisie.
-
•
oC pour le refroidisse-
ment.
• -
tion rapide du réglage de la température et du dé-
et les plus précises.
•
•
•
• Ensuite maintenir le bouton de mémorisation 5
-
raisse. Le nouveau réglage de la température et
-
ni pour pouvoir le sélectionner rapidement.
Grattoir
Écaillage de la
peinture et du
vernis
température
click
click
click
clickclick

www.benman-tools.com
Français | 13
8.5 Écailler de la peinture
•
•
•
•
• -
• N'écaillez pas la peinture sur les cadres
de fenêtre métalliques, car la chaleur
peut se propager sur la vitre et la bri-
ser.
• Ne maintenez pas l’outil dirige sur un
seul point pendant trop longtemps
surface.
• Évitez toute accumulation de peinture
sur le grattoir, pour ne pas risquer de
soigneusement le grattoir des débris
de peinture à l'aide d'un couteau.
•
• Coincez le câble électrique pour ne pas risquer de
•
Assurez-vous que la buse n'est pas diri-
gée contre vous ou contre d'autres per-
sonnes présentes dans la pièce. Veillez
à ne rien laisser tomber dans la buse.
8.7 Refroidissement
-
• Pour réduire le temps de refroidissement, réglez
et laissez-le fonctionner pendant quelques mi-
nutes.
•
9. NETTOYAGE ET ENTRETIEN
Attention! Avant toute intervention
secteur.
9.1 Entretien
Votre outil électrique a été conçu pour fonctionner
sur une longue période de temps avec un minimum
-
et du nettoyage régulier.
9.3 Nettoyage
9.4 Nettoyage
•
• Nettoyer régulièrement le bâti de la machine avec
-
lisation.
•
poussière et de saleté.
•
N’utilisez jamais de solvants comme
l’essence, l’alcool, l’ammoniaque, etc.
Ces solvants peuvent endommager les
pièces en plastique.
10. DONNÉES TECHNIQUES
11. GARANTIE
• -
• Cette garantie couvre toutes les défaillances ma-
-
tels que les foreuses, forets, lames de scie, etc.;
-
ni ne couvre les frais de transport.
• Nous nous réservons le droit de rejeter toute ré-
-
-
•
•
revendeur dans un état de propreté acceptable,
12. ENVIRONNEMENT
Si, après un certain temps, vous décidez
de remplacer votre machine, ne vous en
débarrassez pas avec les ordures ména-
gères mais destinez-la à un traitement
respectueux de l'environnement.
Les déchets électriques ne peuvent
être traités de la même manière que
les ordures ménagères ordinaires. Pro-
N° d’ article
Tension
Puissance
absorbée
Température
de l’air/
Courant d’air
o
o

| Italiano14
1. APPLICAZIONE
La pistola termica e stata progettata eliminare ver-
nici, saldature di tubi, sbavature su materiali in PVC,
saldatura e piegatura di materiali plastici nonché di
asciugatura generale e scongelamento.
AVVERTENZA! Per la vostra incolumità,
si consiglia di leggere attentamente il
presente manuale prima di utilizzare la
macchina. Consegnare l’elettroutensile
solo accompagnato da queste istruzioni.
2. DESCRIZIONE
1.
2. Condotti di ventilazione
3.
4.
5. Tasto memorizzazione
6.
7. Regolatore di temperatura -
8.
9.
3. DISTINTA DEI COMPONENTI
•
•
•
• -
tazione, la spina e tutti gli accessori non abbiano
riportato danni durante il trasporto.
• -
-
cessivamente, smaltirlo presso il sistema locale di
-
riale di imballaggio non sono giocattoli!
I bambini non devono giocare con i sac-
-
mento!
1 pistola termica
-
1 manuale di istruzioni
Se alcuni componenti risultano danneg-
giati o mancanti, rivolgersi al rivenditore.
4. AVVERTENZE GENERALI DI PERICOLO
PER ELETTROUTENSILI
Leggere tutte le avvertenze di pericolo e le istru-
avvertenze di pericolo e delle istruzioni operative si
Italiano
cédez à leur recyclage, là où il existe
des installations adéquates. Rensei-
gnez-vous à propos des procédés de
collecte et de traitement auprès des
autorités locales compétentes ou de
votre revendeur.
• Nous déclarons sous notre propre responsabilité
que ce produit est en conformité avec les normes
-
•
Loudovikos Tsirigiotis
Operations & Engineering

www.benman-tools.com
Italiano | 15
e/o incidenti gravi.
Conservare tutte le avvertenze di pericolo e le istru-
zioni operative per ogni esigenza futura..
-
tenze di pericolo si riferisce ad utensili elettrici ali-
4.1 Sicurezza dell' area di lavoro
• Tenere la postazione di lavoro sempre pulita e ben
-
ne di lavoro non illuminate possono essere causa
di incidenti.
•
soggetti al rischio di esplosioni nei quali si abbia
elettroutensili producono scintille che possono
• Tenere lontani i bambini ed altre persone durante
-
ni potranno comportare la perdita del controllo
4.2 Sicurezza elettrica
• -
tensile deve essere adatta alla presa. Evitare asso-
impiegare spine adattatrici assieme ad elettrou-
tensili dotati di collegamento a terra. Le spine non
rischio di scosse elettriche.
•
terra, come tubi, riscaldamenti, cucine elettriche
elettriche nel momento in cui il corpo è messo a
massa.
•
-
troutensile aumenta il rischio di una scossa elettrica.
• Non usare il cavo per scopi diversi da quelli previsti
ed, in particolare, non usarlo per trasportare o per
la spina dalla presa di corrente. Non avvicinare il
cavo a fonti di calore, olio, spigoli taglienti e nep-
pure a parti della macchina che siano in movimen-
•
impiegare solo ed esclusivamente cavi di prolun-
elettriche.
• Qualora non fosse possibile evitare di utilizzare
di sicurezza riduce il rischio di una scossa elettrica.
4.3 Sicurezza delle persone
• È importante concentrarsi su ciò che si sta facendo
-
-
troutensile in caso di stanchezza oppure quando
-
incidenti.
•
abbigliamento di protezione personale come la
maschera per polveri, scarpe di sicurezza che non
scivolino, elmetto di protezione oppure protezio-
• -
sile. Prima di collegarlo alla rete di alimentazione
elettrica e/o alla batteria ricaricabile, prima di
prenderlo oppure prima di iniziare a trasportarlo,
-
-
vengono a creare situazioni pericolose in cui pos-
• -
-
sorio oppure una chiave che si trovi in una parte ro-
tante della macchina può provocare seri incidenti.
• Evitare una posizione anomala del corpo. Avere
cura di mettersi in posizione sicura e di mantene-
caso di situazioni inaspettate.
•
larghi, né portare bracciali e catenine. Tenere i
capelli, i vestiti ed i guanti lontani da pezzi in movi-
mento. Vestiti lenti, gioielli o capelli lunghi potran-
no impigliarsi in pezzi in movimento.
•
di aspirazione della polvere e di raccolta, assicu-
rarsi che gli stessi siano collegati e che vengano
-
ne polvere può ridurre lo svilupparsi di situazioni
pericolose dovute alla polvere.
4.4 Trattamento accurato ed uso corretto
degli elettroutensili
• Non sottoporre la macchina a sovraccarico. Per
-
troutensile esplicitamente previsto per il caso.
Con un elettroutensile adatto si lavora in modo
di prestazione.
• Non utilizzare mai elettroutensili con interruttori
-
to è pericoloso e deve essere aggiustato.
• Prima di procedere ad operazioni di regolazione
sulla macchina, prima di sostituire parti accesso-
rie oppure prima di posare la macchina al termine
di un lavoro, estrarre sempre la spina dalla presa
della corrente e/o estrarre la batteria ricaricabile.
-
sa essere messo in funzione involontariamente.
• Quando gli elettroutensili non vengono utilizzati,
conservarli al di fuori del raggio di accesso di bam-
non siano abituate ad usarlo o che non abbiano
letto le presenti istruzioni. Gli elettroutensili sono

| Italiano16
macchine pericolose quando vengono utilizzati da
•
operando con la dovuta diligenza. Accertarsi che
le parti mobili della macchina funzionino perfet-
pezzi rotti o danneggiati al punto da limitare la
-
Numerosi incidenti vengono causati da elettro
accuratamente.
•
puliti. Gli utensili da taglio curati con particolare at-
frequentemente e sono più facili da condurre.
•
attenendosi alle presenti istruzioni. Così facendo,
tenere sempre presente le condizioni di lavoro e
-
luogo a situazioni di pericolo.
4.5 Assistenza
• -
mente da personale specializzato e solo impie-
-
troutensile.
5. ISTRUZIONI DI SICUREZZA SUPPLEMEN-
TARI PER PISTOLE TERMICHE
• Non tappare le aperture di ventilazione con la
mano né bloccarle in altro modo.
•
raggiungono temperature estremamente alte du-
di toccarle.
•
•
acceso.
•
può sussistere il pericolo di incendio.
•
ambienti umidi, dove possono essere presenti gas
•
prima di conservarlo.
• -
nare i fumi tossici prodotti.
• Non usare come asciugacapelli.
•
di uscita, per evitare la formazione eccessiva di ca-
• Non dirigere il getto di aria calda verso altre persone.
• Non toccare il beccuccio di metallo in quanto du-
• Non poggiare oggetti contro il beccuccio durante
• Non introdurre oggetti nel beccuccio per evitare
scosse elettriche. Non guardare nel beccuccio
-
levata temperatura.
• Non fare attaccare vernice al beccuccio o al ra-
schietto perché potrebbe prendere fuoco in un
secondo momento.
6. ELIMINAZIONE DELLA VERNICE
• Non utilizzare lo strumento per rimuovere verni-
ce contenente piombo. Le particelle, i residui e i
vapori della vernice possono contenere piombo,
-
mente con vernici al piombo, e ricoperti in segui-
-
bassi può provocare danni irreversibili al cervello e
-
larmente vulnerabili a questa sostanza.
•
di lavoro sia protetta in modo da impedire la di-
una maschera antipolvere.
•
-
ficie di lavoro è verticale, lavorare verso il basso in
modo da impedire che i residui di vernice cadano
•
7. ASSEMBLAGGIO E REGOLAZIONE
-
golazione disinserire sempre la spina dal-
la presa di alimentazione.
-
bella in basso suggerisce le impostazioni per diverse
applicazioni.
Regolazione Applicazioni
Asciugatura di vernici, campioni di
-
sivi, giunti edilizi e forme di stucco
Asciugatura di legname bagnato
prima del riempimento
Rimozione di adesivi
Applicazione di adesivi con colle
attivazione di adesivi a pressione,
accelerazione di operazioni di
-
zione di listelli o impiallacciature.
Applicazione e rimozione di cera

www.benman-tools.com
Italiano | 17
Se non si e sicuri che I' impostazione sia
corretta, iniziare con una temperatura
raggiungere la temperatura ottimale.
7.1 Montaggio dell’accessorio adeguato
• Assicurarsi che lo strumento sia spen-
• Beccucci mal inseriti possono causare
incendi. I beccucci devono essere ben
inseriti allo strumento.
• Toccare un beccuccio bollente può'
causare scottature molto gravi. Prima
di posizionare o sostituire un beccuc-
completamente o utilizzare qualcosa
di adeguato.
• Un beccuccio bollente può’ incendia-
• Un beccuccio difettoso o sbagliato può'
portare ad accumulare calore eccessi-
vo nello strumento danneggiandolo.
Utilizzare solo beccucci originali come
previsto dalla tabella per lo strumento.
8. USO
• Osservare sempre le istruzioni per la sicurezza e le
normative vigenti.
•
ventilazione.
•
desiderata.
•
8.1 Accensione/spegnimento
• -
non rappresenta un problema.
• Per spegnere lo strumento, impostare la tempe-
-
vamente posizionare il tosto di accensione in posi-
Riduzione di involucri in PVC e tubi isolanti
-
ture, coperture del vano bagagli, sportelli
sbrinamento di frigoriferi e congelatori
-
stimenti di pavimenti in PVC e linoleum,
tessuti con rivestimento in PVC, teloni e
lamine metalliche
Piegatura di tubature e lamiere di plastica
in lega di argento speciale per brasatura,
Allentamento di dadi o viti metalliche
arrugginite o bloccate
Rimozione di vecchi e spessi strati di olio,
laccatura, vernice e intonaco plastico
oC, è
possibile liberare velocemente dai batteri
stalle/scuderie. È possibile tenere sotto
-
Icona Descrizione Scopo
Proteggi vetri
Proteggere le
si rimuove la
-
laiatura
cucchiaio
concentrato su
Accessorio a
ventaglio
Asciugare, scon-
gelare a ventaglio
su una zona più
Raschietto Rimuovere pittu-
ra e vernici
4. Display digitale LCD
lampeggiante
-
temperatura

| Italiano18
8.2 Regolazione della temperatura e del
• -
• -
- Aumentare o diminuire la temperatura di uscita
premendo i tasti 7 e 8. La temperatura può esse-
o
impostata.
•
oC.
•
selezione rapida delle impostazioni di temperatu-
e comuni.
•
•
• -
• Tenere premuto per 2 secondi il tasto di memo-
-
selezione rapida.
8.5 Sverniciatura
• Montare un accessorio appropriato.
•
•
•
rimuovere
• Quando la vernice si ammorbidisce, eliminarla per
mezzo del raschietto
• -
stre poiché il calore può essere tra-
smesso al vetro frantumandolo. Per
-
zare l’ugello di sicurezza per il vetro.
• Non tenere troppo I' apparecchio suun
-
prenda fuoco.
• Evitare di raccogliere la pittura sul-
raschietto accessorio perche’ potreb-
beprendere fuoco. Se necessario,ri-
muovere con cura i residui di pittura
dalraschietto accessorio usando un
coltello.
8.6 Uso static
Questo strumento può essere utilizzato anche in mo-
• Posare lo strumento sul banco di lavoro.
• Fissare il cavo in modo da impedire di trascinare lo
strumento giù dal banco.
•
Accertarsi che l’ugello resti sempre rivol-
to in direzione opposta rispetto all’ope-
ratore e ad eventuali persone presenti.
Non far cadere niente all’interno dell’u-
gello.
•
-
peratura sul valore più basso e lasciarlo in funzio-
ne per qualche minuto.
•
9. MANUTENZIONE E PULIZIA
Attenzione! Prima di eseguire qualsiasi
intervento sull'apparecchio staccare la
spina.
9.1 Manutenzione
-
zato per un lungo periodo di tempo con un minimo
e soddisfacente dipende dalla cura e dalla pulizia
dello strumento.
9.3 Pulizia
-
golarmente con un panno morbido.
click
click
click
clickclick

www.benman-tools.com
Italiano | 19
9.4 Pulizia
• Mantenere pulite le aperture di ventilazione
-
damento del motore.
• -
parecchio con un panno morbido, preferibilmente
dopo ogni utilizzo.
• Mantenere le aperture di ventilazione libere da
polvere e sporcizia
•
morbido inumidito con acqua saponosa.
Non usare mai solventi come petrolio, al-
col, ammoniaca, ecc. Questi solventi pos-
sono danneggiare le parti di plastica.
10. INDICAZIONI TECNICHE
11. GARANZIA
•
della nazione di acquisto, garanzia valida dalla
data di acquisto.
• Questo garanzia copre ogni difetto di produzione
al normale uso e consumo, come cuscinetti, spaz-
del trasporto.
• -
-
-
lizia condotti di aerazione, spazzole regolarmente
• La ricevuta di acquisto deve essere conservata
come prova della data di acquisto.
•
al venditore in uno stato accettabile di pulizia, ac-
compagnato dalla prova di acquisto.
12. AMBIENTE
Ove la macchina, in seguito ad uso pro-
lungato, dovesse essere sostituita, non
-
sene in modo rispettoso per l'ambiente.
-
che non possono essere trattati come i
riciclo laddove esistono impianti adegua-
ti. Consultare l’ente locale o il rivenditore
per consigli su raccolta e smaltimento.
•
di tale dichiarazione, che il prodotto è conforme
•
Loudovikos Tsirigiotis
Operations & Engineering
Codice prodotto
Tensione
Potenza assor-
bita
Limiti della
temperatura
dell'aria /
Corrente d'aria
o
o

| Ελληνικά
-
-
-
-
-
-
1.
2.
3.
4.
5.
6.
7.
8.
9.
•
•
•
•
• -
-
-
-
-
-
-
-
-
•
-
• -
-
• -
-
• -
-
-
-
• -
•
-
• -
-
-
-
•
-
• -
Other manuals for HG 2000 W
1
This manual suits for next models
1
Table of contents
Languages:
Other Benman Power Tools manuals
Popular Power Tools manuals by other brands

DeWalt
DeWalt DCS353D2 Original instructions
ATD Tools
ATD Tools ATD-7454A owner's manual

Kraissmann
Kraissmann 2003HLP2 user manual
Triton
Triton SuperJaws SJA200 Operating/safety instructions

Powerfix Profi
Powerfix Profi Z16531 Operating and safety notes
Grizzly
Grizzly AGS 72 Lion-Set Translation of the original instructions for use
