manuals.online logo
Brands
  1. Home
  2. •
  3. Brands
  4. •
  5. BenQ
  6. •
  7. Projector
  8. •
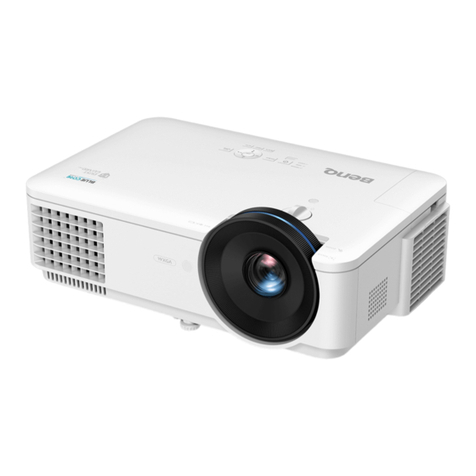
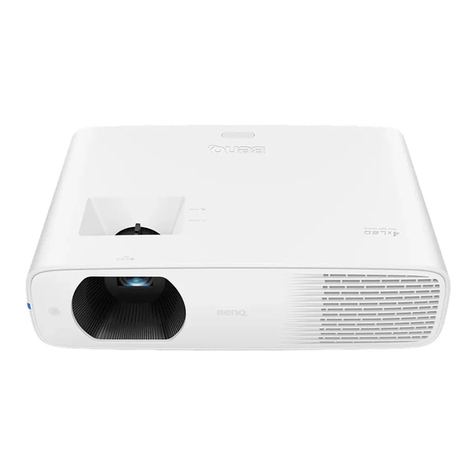
  9. BenQ Home Entertainment I Series User manual

BenQ Home Entertainment I Series User manual

This manual suits for next models

2

Other BenQ Projector manuals

BenQ SH940 User manual

BenQ

BenQ SH940 User manual

BenQ MX815ST User manual

BenQ

BenQ MX815ST User manual

BenQ CinePrime W2700 User manual

BenQ

BenQ CinePrime W2700 User manual

BenQ SH915 User manual

BenQ

BenQ SH915 User manual

BenQ Mainstream Series User manual

BenQ

BenQ Mainstream Series User manual

BenQ Portable Series User manual

BenQ

BenQ Portable Series User manual

BenQ TK860 User manual

BenQ

BenQ TK860 User manual

BenQ LU935ST User manual

BenQ

BenQ LU935ST User manual

BenQ MS500+ User manual

BenQ

BenQ MS500+ User manual

BenQ Home Entertainment PE5120 User manual

BenQ

BenQ Home Entertainment PE5120 User manual

BenQ TX762 ST User manual

BenQ

BenQ TX762 ST User manual

BenQ BH3020 User manual

BenQ

BenQ BH3020 User manual

BenQ HT8050 User manual

BenQ

BenQ HT8050 User manual

BenQ DX825ST User manual

BenQ

BenQ DX825ST User manual

BenQ CinePrime Series User manual

BenQ

BenQ CinePrime Series User manual

BenQ PB9200 - XGA LCD Projector Installation instructions manual

BenQ

BenQ PB9200 - XGA LCD Projector Installation instructions manual

BenQ W1070 User manual

BenQ

BenQ W1070 User manual

BenQ MX808STH User manual

BenQ

BenQ MX808STH User manual

BenQ 9H.J2S77.F3A - DLP Projector SVGA 2700 User manual

BenQ

BenQ 9H.J2S77.F3A - DLP Projector SVGA 2700 User manual

BenQ MH740 User manual

BenQ

BenQ MH740 User manual

BenQ Commuter Series User manual

BenQ

BenQ Commuter Series User manual

BenQ PW9500 User manual

BenQ

BenQ PW9500 User manual

BenQ MX613ST User manual

BenQ

BenQ MX613ST User manual

BenQ MX768 User manual

BenQ

BenQ MX768 User manual

Popular Projector manuals by other brands

Eiki LC-X985 Specification sheet

Eiki

Eiki LC-X985 Specification sheet

InFocus LitePro 610 quick start

InFocus

InFocus LitePro 610 quick start

Epson EH-TW5900 datasheet

Epson

Epson EH-TW5900 datasheet

FOREVER MLP-100 manual

FOREVER

FOREVER MLP-100 manual

Toshiba TDP-MT8U Specifications

Toshiba

Toshiba TDP-MT8U Specifications

Mitsubishi XD500U specification

Mitsubishi

Mitsubishi XD500U specification

Kodak Ektapro 3020 Illustrated parts list

Kodak

Kodak Ektapro 3020 Illustrated parts list

Toshiba TDP-EW25U Specifications

Toshiba

Toshiba TDP-EW25U Specifications

Barco iQ PRO G500 supplementary guide

Barco

Barco iQ PRO G500 supplementary guide

NEC Showcase Series HT1100 user manual

NEC

NEC Showcase Series HT1100 user manual

Philips LC1341 user guide

Philips

Philips LC1341 user guide

Epson PowerLite 1266 user guide

Epson

Epson PowerLite 1266 user guide

MAGINON DLP 1400S user manual

MAGINON

MAGINON DLP 1400S user manual

Toshiba TLP-380 owner's manual

Toshiba

Toshiba TLP-380 owner's manual

Philips PicoPix PPX2480/EU user manual

Philips

Philips PicoPix PPX2480/EU user manual

Hitachi CP-X605 Series Specifications

Hitachi

Hitachi CP-X605 Series Specifications

Optoma TW1692 user manual

Optoma

Optoma TW1692 user manual

Kodak EKTAPRO instruction manual

Kodak

Kodak EKTAPRO instruction manual

manuals.online logo
manuals.online logoBrands
  • About & Mission
  • Contact us
  • Privacy Policy
  • Terms and Conditions

Copyright 2025 Manuals.Online. All Rights Reserved.

Digital Projector
User Manual
Home Entertainment Series I X3000i V 1.04
2 Warranty and Copyright information
Warranty and Copyright information
Limited warranty
BenQ warrants this product against any defects in material and workmanship, under normal usage and
storage.
Proof of purchase date will be required with any warranty claim. In the event this product is found to be
defective within the warranty period, BenQ's only obligation and your exclusive remedy shall be
replacement of any defective parts (labor included). To obtain warranty service, immediately notify the
dealer from which you purchased the product of any defects.
Important: The above warranty shall be void if the customer fails to operate the product in accordance
with BenQ's written instructions, especially the ambient humidity must be in-between 10% and 90%,
temperature in-between 0°C and 35°C, altitude lower than 4920 feet, and avoiding to operate the
projector in a dusty environment. This warranty gives you specific legal rights, and you may have other
rights which vary from country to country.
For other information, please visit www.BenQ.com.
Copyright
Copyright 2023 by BenQ Corporation. All rights reserved. No part of this publication may be
reproduced, transmitted, transcribed, stored in a retrieval system or translated into any language or
computer language, in any form or by any means, electronic, mechanical, magnetic, optical, chemical,
manual or otherwise, without the prior written permission of BenQ Corporation.
Disclaimer
BenQ Corporation makes no representations or warranties, either expressed or implied, with respect
to the contents hereof and specifically disclaims any warranties, merchantability or fitness for any
particular purpose. Further, BenQ Corporation reserves the right to revise this publication and to make
changes from time to time in the contents hereof without obligation to notify any person of such
revision or changes.
*DLP, Digital Micromirror Device and DMD are trademarks of Texas Instruments. Others are
copyrights of their respective companies or organizations.
Patents
Please go to http://patmarking.benq.com/ for the details on BenQ projector patent coverage.
3Table of Contents
Table of Contents
Warranty and Copyright information ................................................................................ 2
Important safety instructions .............................................................................................. 4
Introduction .......................................................................................................................... 7
Shipping contents ....................................................................................................................................... 7
Installing the QS01 HDMI Media Streaming ........................................................................................ 8
Projector exterior view ............................................................................................................................ 9
Terminals.................................................................................................................................................... 10
Controls and functions............................................................................................................................ 11
Positioning your projector ................................................................................................. 13
Choosing a location .................................................................................................................................13
Obtaining a preferred projected image size....................................................................................... 14
Mounting the projector........................................................................................................................... 16
Adjusting the projected image............................................................................................................... 18
Connection .......................................................................................................................... 20
Operation ............................................................................................................................ 21
Starting up the projector ........................................................................................................................21
Setting up the QS01 HDMI Media Streaming .................................................................................... 23
Using the menus ....................................................................................................................................... 25
Securing the projector ............................................................................................................................ 26
Switching input signal ...............................................................................................................................27
Shutting down the projector .................................................................................................................28
Menu operation ................................................................................................................... 29
Basic menu .................................................................................................................................................29
Advanced menu ........................................................................................................................................ 30
Maintenance ........................................................................................................................ 47
Care of the projector ..............................................................................................................................47
Light source information ........................................................................................................................ 48
Troubleshooting ................................................................................................................. 50
Specifications ...................................................................................................................... 51
Projector specifications ..........................................................................................................................51
Dimensions ................................................................................................................................................ 52
Timing chart............................................................................................................................................... 53
RS232 command....................................................................................................................................... 55

4 Important safety instructions
Important safety instructions
Your projector is designed and tested to meet the latest standards for safety of information technology
equipment. However, to ensure safe use of this product, it is important that you follow the instructions
mentioned in this manual and marked on the product.
1. Please read this manual before you
operate your projector. Save it for future
reference.
5. In some countries, the line voltage is NOT
stable. This projector is designed to operate
safely within a mains voltage between 100 to
240 volts AC, but could fail if power cuts or
surges of ±10 volts occur. In areas where
the mains voltage may fluctuate or cut
out, it is recommended that you
connect your projector through a
power stabilizer, surge protector or
uninterruptible power supply (UPS).
2. Do not look straight at the projector
lens during operation. The intense light
beam may damage your eyes.
3. Refer servicing to qualified service
personnel.
6. Do not block the projection lens with any
objects when the projector is under
operation as this could cause the objects to
become heated and deformed or even cause
a fire. To temporarily turn off the light
source, press the Eco Blank button.
4. The light source becomes extremely hot
during operation.
7. Do not operate light sources beyond the
rated light source life.
5Important safety instructions
8. Do not place this product on an unstable
cart, stand, or table. The product may fall,
sustaining serious damage.
9. Do not attempt to disassemble this
projector. There are dangerous high
voltages inside which may cause death if
you should come into contact with live
parts.
Under no circumstances should you ever
undo or remove any other covers. Refer
servicing only to suitably qualified
professional service personnel.
10. Do not block the ventilation holes.
- Do not place this projector on a blanket, bedding
or any other soft surface.
- Do not cover this projector with a cloth or any
other item.
- Do not place inflammables near the projector.
If the ventilation holes are seriously
obstructed, overheating inside the
projector may result in a fire.
11. Always place the projector on a level,
horizontal surface during operation.
12. Do not stand the projector on end
vertically. Doing so may cause the projector
to fall over, causing injury or resulting in
damage to the projector.
13. Do not step on the projector or place any
objects upon it. Besides probable physical
damage to the projector, doing so may
result in accidents and possible injury.
14. When the projector is under operation,
you may sense some heated air and odor
from its ventilation grill. It is a normal
phenomenon and not a product defect.
15. Do not place liquids near or on the
projector. Liquids spilled into the projector
may cause it to fail. If the projector does
become wet, disconnect it from the power
supply's power outlet and call BenQ to
have the projector serviced.
6 Important safety instructions
16. This product is capable of displaying inverted
images for ceiling mount installation.
17. This apparatus must be earthed.
18. Do not place this projector in any of the
following environments.
- Space that is poorly ventilated or confined. Allow at
least 50 cm clearance from walls and free flow of air
around the projector.
- Locations where temperatures may become
excessively high, such as the inside of a car with all
windows rolled up.
- Locations where excessive humidity, dust, or
cigarette smoke may contaminate optical
components, shorten the projector's life span and
darken the image.
- Locations near fire alarms
- Locations with an ambient temperature above 40°C
/ 104°F
- Locations where the altitudes are higher than 3000
m (10000 feet).
Risk Group 2
1. According to the classification of
photobiological safety of light source and
light source systems, this product is Risk
Group 2, IEC 62471-5:2015.
2. Possibly hazardous optical radiation emitted
from this product.
3. Do not stare at operating light source. May
be harmful to the eyes.
4. As with any bright source, do not stare into
the direct beam.
To avoid damaging the DLP chips, never aim a high-power
laser beam into the projection lens.
3000 m
(10000 feet)
0 m
(0 feet)
7Introduction
Introduction
Shipping contents
Carefully unpack and verify that you have all of the items shown below. If any of these items are missing,
please contact your place of purchase.
Standard accessories
Optional accessory
Replacing the remote control batteries
1. Press and slide off the battery cover, as
illustrated.
2. Remove the old batteries (if applicable) and
install two AAA batteries. Make sure that the
positive and negative ends are positioned
correctly, as illustrated.
3. Slide the battery cover in until it clicks into
place.
Projector Remote control with
batteries Power cord Adjustment feet kit
Quick start guide Regulatory statements QS01 HDMI Media
Streaming Warranty card*
• The supplied accessories will be suitable for your region, and may differ from those illustrated.
• *The warranty card is only supplied in some specific regions. Please consult your dealer for detailed information.
• BenQ 3D glasses
8 Introduction
Installing the QS01 HDMI Media Streaming
The supplied QS01 HDMI Media Streaming is an Android TV (ATV) dongle to be used with the
projector. See the instructions below to install the dongle. With a successful installation, you can enjoy
more entertainment programs through this projector.
• Avoid leaving the remote control and batteries in an excessive heat or humid environment like the kitchen,
bathroom, sauna, sunroom or in a closed car.
• Replace only with the same or equivalent type recommended by the battery manufacturer.
• Dispose of the used batteries according to the manufacturer's instructions and local environment regulations for
your region.
• Never throw the batteries into a fire. There may be danger of an explosion.
• If the batteries are dead or if you will not be using the remote control for an extended period of time, remove the
batteries to avoid damage to the remote control from possible battery leakage.
1. Make sure the projector is turned off and
the power cord is disconnected.
2. Loosen the screws that secure the top of
projector cover . Slide to remove the cover
.
3. Plug the USB Micro B cable to the dongle
. Plug the dongle to the HDMI* port on
the projector .
*This HDMI port is for connecting QS01 HDMI
Media Streaming only.
4. Fit the dongle in place, replace the projector
cover, and tighten the screws.
5. Connect the power cord to the projector and
turn it on. Press to select HDMI-3 (ATV).
1
2
3
1
1
2
3
1
2
1
2
*This is used to hold the USB plug when shipped.
Do not route the cable here.
9Introduction
Projector exterior view
1. External control panel
See Controls and functions on page 11.
2. Zoom ring/Focus ring
3. Vent (air inlet)
4. LIGHT/TEMP/POWER status indicator
See Indicators on page 49.
5. Projection lens
6. IR remote sensor
7. Adjuster feet
8. Connector panel
See Terminals on page 10.
9. Speaker grill
10. AC power jack
11. Kensington anti-theft lock slot
12. Vent (air exhaust)
13. Ceiling mount holes
14. Anti-theft security bar
1
2
4
8
9
10
12
13
14
11
7
7
6
6
3
5
10 Introduction
Te r m i n a l s
1. HDMI input port (Version 2.0b)
2. HDMI input port (Version 2.0b)
3. 12V DC output terminal
Triggers external devices such as an electric
screen or light control, etc.
4. USB 2.0 Type-A port (2.5 A power supply,
Firmware upgrade)
5. SPDIF audio output port
6. RS-232 control port
7. Audio output jack
12 3 4 5 6 7