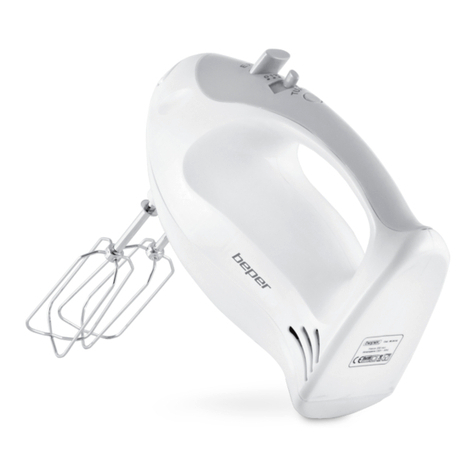
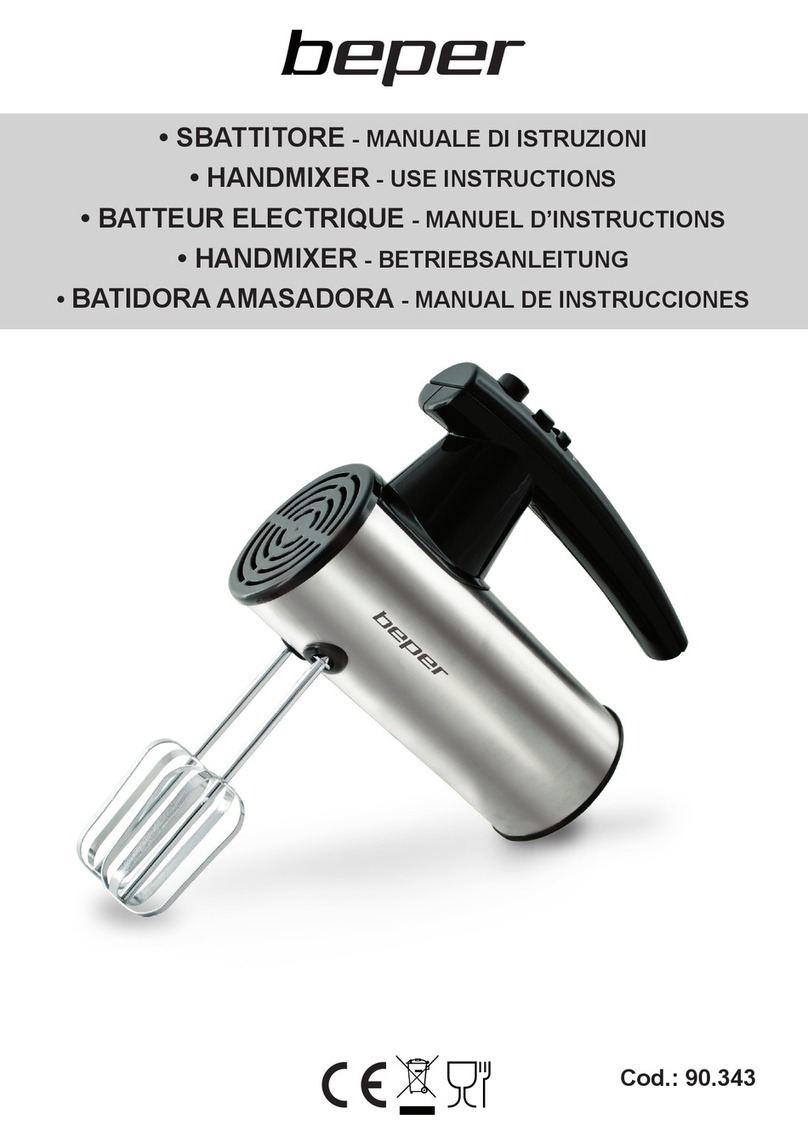
Beper 90346 Quick guide

• SBATTITORE CON CIOTOLA GIREVOLE
MANUALE DI ISTRUZIONI
• HAND MIXER WITH ROTATING BOWL - USE INSTRUCTIONS
• BATTEUR AVEC BOL ROTATIF - MANUEL D’INSTRUCTIONS
• HANDMIXER MIT EDELSTAHL RÜHRSCHÜSSEL
BETRIEBSANLEITUNG
• BATIDORA CON BOL GIRATORIO
MANUAL DE INSTRUCCIONES
R

ITALIANO
ENGLISH
FRANÇAIS
DEUTSCH
ESPAÑOL
pag. 4
pag. 10
pag. 16
pag. 22
pag. 27

33

4
Sbattitore con ciotola girevole Manuale di istruzioni
NORME DI SICUREZZA GENERALI
Prima di mettere in funzione questo apparecchio, leggere molto attentamente le istruzioni per l’u-
so e conservarle con cura unitamente al certicato di garanzia, allo scontrino e, se possibile, alla
scatola di cartone con la confezione interna. Se passate l‘apparecchio a terzi, consegnate anche le
istruzioni per l‘uso.
• Utilizzare l’apparecchio esclusivamente per scopi privati e conformemente al tipo di applicazione
previsto. Questo prodotto non è stato concepito ai ni di un impiego in ambito industriale. Non utiliz-
zarlo all’aperto. Proteggerlo dal calore, nonché dall’esposizione diretta ai raggi solari e dall’umidità
(non immergerlo mai in sostanze liquide) e tenerlo a distanza da oggetti con spigoli aflati. Non
utilizzare l’apparecchio con le mani umide. Nel caso in cui si bagni o si inumidisca l’apparecchio,
staccare immediatamente la spina.
• Disattivare l’apparecchio e staccare sempre la spina dalla relativa presa (prendendo in mano la
spina, non tirando il cavo) allorché non si utilizza l’apparecchio, quando si applicano degli accessori
oppure nel caso in cui lo si debba pulire o si siano manifestate anomalie.
• Non mettere in funzione l’ apparecchio senza sorveglianza.
Spegnere sempre l’apparecchio, se si desidera uscire dalla stanza. Estrarre la spina dalla presa.
• Controllare periodicamente l’apparecchio per vericare che non vi siano danni. Non mettere in
funzione l’apparecchio nel caso in cui sia guasto.
• Non tentare di riparare l’apparecchio, bensì rivolgersi a un tecnico autorizzato. Al ne di evitare
l’insorgere di situazioni di pericolo, si raccomanda di contattare il costruttore, il nostro servizio di
assistenza tecnica o un tecnico ugualmente qualicato per la sostituzione del cavo di alimentazione
difettoso con un cavo equivalente.
• Utilizzare esclusivamente accessori originali.
• Rispettare le seguenti “Speciali norme di sicurezza“.
Bambini e persone fragili
• Per sicurezza tenere l’imballaggio (sacchetto di plastica, scatola, polistirolo, ecc,) fuori dalla por-
tata dei bambini.
AVVISO!
Non lasciar giocare i bambini piccoli con la pellicola.
Pericolo di soffocamento!
• Per proteggere i bambini o le persone con abilità ridotte dai pericoli delle apparecchiature elettri-
che, fate in modo che questo apparecchio venga impiegato solo sotto sorveglianza.
Questo apparecchio non è un giocattolo. Non lasciate che i bambini piccoli lo usino per giocare.
Simboli per questo manuale di istruzioni per l’ uso Le indicazioni importanti per la propria sicurezza
sono indicati appropriatamente. Osservare assolutamente queste indicazioni, per evitare incidenti
e danni all’ apparecchio:
AVVISO: Previene i rischi della propria salute ed indica possibili rischi di ferite.
AVVERTENZE SPECIALI DI SICUREZZA PER QUESTO APPARECCHIO
• Non toccare mai le parti in movimento dell’apparecchio ed attendere sempre l’arresto.
• Durante il funzionamento non toccare mai i frullini rotativi o i ganci per impastare con oggetti come
p.e. cucchiaio oppure
spatola per pasta o anche con le proprie mani! Pericolo di ustioni!
• Prima di sostituire gli accessori spegnere l’apparecchio e staccare la spina!
• Usare unicamente gli accessori raccomandati dal fabbricante.
5
Sbattitore con ciotola girevole Manuale di istruzioni
L’uso di altri accessori può provocare fuoco, una scossa elettrica e/o delle ferite ad altre persone.
• Per evitare schizzi, inserire le barre completamente nell’impasto da miscelare prima di accendere
l’apparecchio.
• Usare questo apparecchio per mescolare o montare solo generi alimentari.
• Non tenere acceso l’apparecchio per più di 5 minuti! Lasciarlo raffreddare per 10 minuti ca. prima
di riaccenderlo!
• L’ apparecchio è adatto solo per piccole quantità! Riempire perciò un contenitore al massimo con
le quantità indicate nella tabella!
• Non inserire la spina dell’apparecchio nella presa senza aver prima installato tutti gli accessori
necessari.
• Non trasportare né sollevare l’apparecchio mentre è in funzione: prima spegnerlo, quindi staccare
la spina. Trasportare sempre l’apparecchio usando entrambe le mani!
ELEMENTI DI COMANDO
1. Corpo sbattitore
2. Pulsante di espulsione
3. Interruttore velocità
4. Turbo
5. Alloggiamento sbattitore
6. Pulsante ribaltamento
7. Ciotola rotante
8. Fruste e ganci per impastare
9. Base di sostegno
SBALLARE L’APPARECCHIO
• Togliere l’apparecchio e tutti gli accessori dalla scatola.
• Non buttare via subito la scatola ma conservarla con l’imballo interno e i documenti di garanzia per
tutta la durata della garanzia.
• Disporre l’apparecchio su una supercie di lavoro liscia, piana e stabile.
• Non inserire la spina dell’apparecchio nella presa senza aver prima installato tutti gli accessori
necessari.
• Per rimuovere eventuali tracce di sporco dalla produzione, lavare la ciotola e gli altri accessori
avanti il primo uso semplicemente in acqua e detergente per stoviglie.
• Dopo il lavaggio asciugare bene tutti i pezzi.

6
Sbattitore con ciotola girevole Manuale di istruzioni
INDICAZIONI PER L‘USO
Per l’uso scegliere un utensile e una velocità conformemente alla seguente tabella:
• Quando si lavorano paste consistenti, non tenere in azione l’apparecchio per più di 3 minuti e poi
lasciarlo raffreddare per altri 10 minuti.
• A seconda della consistenza, è necessario staccare l‘impasto dal bordo della ciotola e riportarlo nel
raggio di lavoro degli utensili di impasto. Per queste operazioni l‘apparecchio deve essere spento.
Staccare il gancio impastatore / la frusta
1. Per staccare le fruste a spirale/a lo mettere il selettore di funzioni su “0” e accertarsi che non ci
sia corrente.
2. Premere il tasto per staccare le fruste a spirale/a lo. Tirandoli un po’ si possono slare.
NOTA: i ganci vengono espulsi unicamente se l’ interruttore della velocità si trova in posizione „0“.
Funzionamento rapido (turbo)
Per passare in breve tempo al numero massimo di giri. Premendo a brevi intervalli potete lavorare
con il funzionamento ad impulsi.
ATTENZIONE: non utilizzate questa funzione per più di 1 minuto.
Uso dei ganci impastatori/bracci agitatori
1. Mettere il selettore di velocità su “0” e accertarsi che il frullatore sia staccato dalla rete elettrica.
2. Inserite con una leggera pressione l’estremità dei ganci impastatori ovvero dei bracci agitatori
nelle apposite aperture del frullatore, no all’incastro meccanico. Girando leggermente mentre si
preme, si facilita l’inserimento.
Prodotto/tipo di
preparazione
Quantità massima Utensile Velocità Durata
massima
Pasta pesante ( per
esempio paste per
il pane o la pizza)
500 g Gancio per l’impasto 1-4 3 min.
Pasta per dolci,
salse per insalate,
desserts
750 g Fruste 2-5 5 min.
Pasta per biscotto o
cialde, panna
750 g Fruste 2-5 5 min.
Liquidi, shake no a 1 L Frullatore ad immersione 5 oppure
turbo
1 min.

7
Sbattitore con ciotola girevole Manuale di istruzioni
NOTA: Attenzione: è possibile inserire la frusta a spirale con il dischetto sulla barretta solo sull’ap-
posito lato a sinistra dello sbattitore.
3. Inserire la spina in una presa con contatto di terra regolarmente installata da 230 V / 50 Hz.
4. Ora potete regolare sul frullatore diverse velocità avvalendovi dell’interruttore di selezione degli
stadi di commutazione.
Uso del supporto di miscelazione
Per la base scegliere una supercie piana e non scivolosa.
1. Mettere lo sbattitore sulla parte superiore della base. Controllare che lo sbattitore sia ben inserito
nei tre perni della base ribaltabile.
2. Montate i ganci come già descritto in precedenza in “Uso dei ganci impastatori/bracci agitatori”.
3. Per appoggiare il recipiente per gli alimenti, premere il pulsante di ribaltamento e ribaltare lo
sbattitore dall’altro lato.
4. Mettete la scodella di miscelazione con gli ingredienti che desiderate sull’apposito alloggiamen-
to. Rimettere a posto lo sbattitore. Fare combaciare i denti dei due ingranaggi dello ciotola e dello
sbattitore.
5. Inserire la spina in una presa con contatto di terra regolarmente installata da 230 V / 50 Hz.
6. Con l’interruttore di selezione potete ora regolare sul frullatore diverse velocità.
7. La scodella di miscelazione si gira da sola!
8. Se si desidera terminare il lavoro, mettere il selettore di velocità su “0” e staccare la corrente.
9. Poi premere di nuovo il pulsante di ribaltamento per sbloccare la parte superiore e rivoltare lo
sbattitore verso l’alto.
10. Ora potete togliere la scodella di miscelazione. Per cortesia togliete i ganci procedendo come
già descritto in „Staccare il
gancio impastatore / la frusta“.
11. Per staccare lo sbattitore dalla parte superiore, tirarlo verso l’alto.
Pulizia
• Prima di ogni operazione di pulizia staccare la spina.
• Per la pulizia esterna dell’apparecchio utilizzare solo un panno umido.
• Non immergere assolutamente l’apparecchio nell’acqua per pulirlo.
• Non usare detersivi corrosivi o abrasivi per la pulizia!
• Le parti staccabili che sono entrate in contatto con l‘impasto (ganci e ciotola) si possono lavare a
mano.
DATI TECNICI
Potenza: 250 watt
Alimentazione: 220-240V – 50Hz
In un’ottica di miglioramento continuo Beper si riserva la facoltà di apportare modi-
che e migliorie al prodotto in oggetto senza previo preavviso.

8
Sbattitore con ciotola girevole Manuale di istruzioni
TRATTAMENTO DEI RIFIUTI DELLE APPARECCHIATURE ELETTRICHE ED ELETTRONICHE
Il prodotto al termine del suo ciclo di vita deve essere smaltito seguendo le norme vigenti relative allo smaltimen-
to differenziato e non può essere trattato come un semplice riuto urbano.
Il prodotto deve essere smaltito presso i centri di raccolta dedicati o deve essere restituito al rivenditore nel caso
si voglia sostituire il prodotto con un altro equivalente nuovo.
Il costruttore si farà carico delle spese necessarie allo smaltimento del prodotto secondo quanto prescritto dalla
legge.
Il prodotto è composto da parti non biodegradabili e sostanze che possono inquinare l’ambiente circostante se
non opportunamente smaltite. Inoltre parte di questi materiali possono essere riciclati evitando l’inquinamento
dell’ambiente. E’ vostro e nostro dovere contribuire alla salute dell’ambiente.
Il simbolo indica che il prodotto risponde ai requisiti richiesti dalle nuove direttive introdotte a tutela del
l’ambiente (2002/96/EC, 2003/108/EC, 2002/95/EC) e che deve essere smaltito in modo appropriato al termine
del suo ciclo di vita.
Chiedere informazioni alle autorità locali in merito alle zone dedicate allo smaltimento dei riuti.
Chi non smaltisce il prodotto seguendo quanto indicato in questo paragrafo ne risponde secondo le norme
vigenti.

CERTIFICATO DI GARANZIA
Questo apparecchio è stato controllato in fabbrica. La garanzia di applicazione è valida
24 mesi dalla data di acquisto per difetti di materiale o di fabbricazione. Lo scontrino di
acquisto e il certicato di garanzia si devono presentare assieme nel caso di reclami.
Se l’apparecchio dovesse richiedere assistenza tecnica rivolgersi al venditore o presso
la nostra sede. Questo per conservare inalterata l’efcienza del vostro apparecchio e per
NON invalidare la garanzia. Eventuali manomissioni dell’apparecchio da parte di perso-
nale non autorizzato invalideranno automaticamente la garanzia.
Condizioni di garanzia
Se ci sono guasti a causa di difetti di materiale e/o fabbricazione durante il periodo di ga-
ranzia, garantiamo la riparazione del prodotto gratuitamente, a patto che:
- l’apparecchio sia stato usato in modo corretto ed ai ni per cui è stato costruito;
- l’apparecchio sia stato riparato da esperti, cioè da persone incaricate dal fornitore;
- venga presentato lo scontrino;
- non rientrano in garanzia le parti che dimostrano un normale logoramento.
Sono quindi escluse tutte le parti che hanno subito rotture accidentali o che sono soggette
ad usura (tra le quali lampade, batterie, resistenze) e difetti derivanti da un utilizzo non
domestico dell’apparecchio, negligenza nell’uso o nella manutenzione, danni da trasporto
e tutti quei danni non imputabili direttamente al produttore.
Se entro il periodo di garanzia emerge un difetto che non può essere riparato, l’apparec-
chio viene cambiato gratuitamente.
Assistenza tecnica
Anche dopo il periodo di garanzia prestiamo molta attenzione alle riparazioni.
Per l’assistenza tecnica e/o riparazioni fuori dal periodo di garanzia ci si può rivolgere
direttamente all’indirizzo sottostante.
BEPER SRL
Via Salieri, 30
37050 - Vallese di Oppeano - Verona
Tel. 045/7134674 – Fax 045/6984019
e-mail: assistenza@beper.com

10
Hand Mixer with Rotating Bowl Use instructions
General Safety Instructions
Read the operating instructions carefully before putting the appliance into operation and keep the
instructions including the warranty, the receipt and, if possible, the box with the internal packing. If
you give this device to other people, please also pass
on the operating instructions.
• The appliance is designed exclusively for private use and for the envisaged purpose. This applian-
ce is not t for commercial use. Do not use it outdoors. Keep it away from sources of heat, direct
sunlight, humidity (never dip it into any liquid) and sharp edges. Do not use the appliance with wet
hands.
If the appliance is humid or wet, unplug it immediately.
• When cleaning or putting it away, switch off the appliance and always pull out the plug from the
socket (pull the plug itself, not the lead) if the appliance is not being used and remove the attached
accessories.
• Do not operate the machine without supervision. If you leave the room you should always turn the
device off. Remove the plug from the socket.
• Check the appliance and the cable for damage on a regular basis. Do not use the appliance if it is
damaged.
• Do not try to repair the appliance on your own. Always contact an authorized technician. To avoid
the exposure to danger, always have a faulty cable be replaced only by the manufacturer, by our
customer service or by a qualied person and with a cable of the same type.
• Use only original spare parts.
• Pay careful attention to the following “Special Safety Instructions“.
Children and Frail Individuals
• In order to ensure your children‘s safety, please keep all packaging (plastic bags, boxes, polystyre-
ne etc.) out of their reach.
WARNING!
Caution! Do not allow small children to play with the foil as there is a danger of suffocation!
• In order to protect children or frail individuals from the hazards of electrical equipment, please
ensure that this device is only used under supervision. This device is not a toy. Do not allow small
children to play with it.
Symbols in these Instructions for Use
Important information for your safety is specially marked. It is essential to comply with these instruc-
tions in order to avoid accidents and prevent damage to the machine:
WARNING: This warns you of dangers to your health and indicates
possible injury risks.
CAUTION: This refers to possible hazards to the machine or other objects.
NOTE: This highlights tips and information.
Special Safety Instructions for this Machine
• Do not touch any moving parts of the machine and always wait for it to stop.
• During operation, objects such as spoons, dough scrapers or your hands must never touch the
rotating whisks or dough hooks! Caution - risk of injury!
• Before changing the attachments, the appliance must be disconnected from the mains!

ENGLISH
Hand Mixer with Rotating Bowl Use instructions
11
• Please use only the accessories recommended by the manufacturer. Other accessories
may result in re, electric shock and/or personal injury.
• In order to avoid splashing, always insert the rods fully into the food being mixed before
you switch the mixer on.
• Only mix or whisk food with this machine.
• Do not operate the mixer for more than 5 minutes! Then let it cool down for approximately
10 minutes before using it again!
• The device is only designed for small quantities! You should therefore only ll the maximum quan-
tities stated in the table into a container!
• Do not insert the appliance plug without installing the necessary attachments.
• Do not carry or lift the appliance during use. Always switch it off rst and pull out the plug. Carry
the appliance always with both hands!
Overview of the Components
1 Handmixer
2 Button for the releasing of the kneader hooks
3 Speed regulator (6 speeds)
4 TURBO button
5 Mobile upper part
Unpacking the appliance
• Remove the appliance from the box and all the enclosed accessories.
• Do not through the packaging away, but keep it together with the inner packing and the warranty
documents for the whole life of the warranty.
• Place the appliance on smooth, level and stable work surface.
• Do not insert the appliance plug without installing the necessary attachments.
• In order to remove any contamination from the production line please clean the mixing bowl and
other accessories before initial use in a soapy water solution.
• Dry well all the parts after washing
Turbo operation
This is for switching to maximum speed for a short time. Press at short intervals for pulsed mode
operation.
CAUTION: Do not use this function for more than one minute!
6 Clip for unlocking the upper section
7 Mixer bowl
8 Kneader hooks
9 Mixer stand

12
Hand Mixer with Rotating Bowl Use instructions
Instructions for Use
Always choose a utensil and a speed according to the following table:
• With heavy mixtures, do not operate the machine for more
than 3 minutes, and then allow it to cool down for a further 10 minutes.
• Depending on the consistency of the mixture it is necessary to remove the mixture from the edge
of the mixing bowl and place it back on the kneading attachments. The device must be turned off.
Releasing the kneading hook / beater
1. In order to release the kneading hook/whisk turn the power level selector switch to „0“ and ensure
that the mixer has been disconnected from the mains.
2. Press the button to release the kneading hook/whisk.
Remove the device by turning it slightly.
NOTE: The hooks can only be removed if the speed switch is in the „0“ position.
How to use the Kneader hooks/beater
1. Turn the power level selector switch to „0“ and ensure that the mixer has been disconnected from
the mains.
2. Press the end of the kneader hooks/beater (10) into the corresponding mixer openings until the
hooks click into place. While pressing, turn slightly in order to facilitate the whole operation.
NOTE: Please note that the kneading hook with the curved washer on the shaft can only be inserted
on the left-hand side of the mixer when viewed from the bottom.
3. Insert the mains plug into a properly installed 230V/50 Hz safety power socket.
4. The handmixer can be used at various speeds set with the speed regulator.
Product/Type of
Preparation
Max.
Quantity
Utensil Level Max
Operating
Time
Heavy dough (e.g.
yeast dough)
500 g Kneader hook 1-4 3 min.
Cake mixture, Dres-
sings, Desserts
750 g Beater 2-5 5 min.
Sponge mixture,
wafer mixture,
cream
750 g Beater 2-5 5 min.

13
Hand Mixer with Rotating Bowl Use instructions
How to use the Mixer stand
Please select a at non-slip surface for the mixer stand.
1. Place the hand mixer on the upper section of the mixer stand. Please check whether the clip of the
upper section is locked in place on the back of the mixer.
2. Mount the hooks as described above in the section “How to use the Kneader hooks/beater”.
3. In order to place the mixing bowl underneath, pull the clip to unlock the upper section of the mixer
stand and fold the mixer upwards.
4. Place the mixer bowl lled with the desired ingredients onto the revolving plate. Now fold the
mixer down again.
5. Insert the mains plug into a properly installed 230V/50 Hz safety power socket.
6. The handmixer can be used at various speeds set with the speed regulator.
7. The revolving plate turns automatically!
8. When you would like to stop mixing, turn the power level selector switch to „0“ and unplug the
device from the mains.
9. When you have nished pull the clip again to unlock the upper section of the mixer stand and
fold the mixer upwards.
10. Now the mixer bowl can be removed. Remove the hooks as described above in the section
“Releasing the kneading hook / beater”.
11. In order to separate the mixer from the upper section of the mixer stand, pull the mixer upwards.
Cleaning
• Before cleaning the equipment, always remove the mains plug from the socket.
• Only a damp cloth should be used for cleaning the outside of the machine.
• Under no circumstances should the device be immersed in water for cleaning.
• Never use abrasive detergents!
• Removable parts that have come into contact with dough (kneading attachments and mixing bowl)
can be cleaned by hand.
Technical Data
Power supply: 220-240 V, 50 Hz
Power consumption: 250 W
For any improvement reasons, Beper reserves the right to modify or improve the product
without any notice.

14
Hand Mixer with Rotating Bowl Use instructions
DISPOSAL OF OLD ELECTRICAL APPLIANCES
The European directive 2002/96/EC on Waste Electrical and Electronic Equipment (WEEE), re-
quires that old household electrical appliances must not be disposed of in the normal unsorted
municipal waste stream. Old appliances must be collected separately in order to optimize the reco-
very and recycling of the materials they contain, and reduce the impact on human health and the
environment.
The crossed out “wheeled bin” symbol on the product reminds you of your obliga
tion, that when you dispose of the appliance, it must be separately collected.

GUARANTEE CERTIFICATE
This appliance has been checked in the factory. From the date of original purchase a 24 month
guarantee applies to material and production defects. The purchase receipt and the guarantee cer-
ticate must be submitted together in case of claim to guarantee.
For any technical assistance, please contact directly the seller or our head ofce in order to preserve
the appliance’s efciency and NOT TO void the guarantee. Any intervention on this appliance by
non-authorized persons will automatically void the guarantee.
Guarantee conditions
If the appliance shows defects as a result of faulty material and/or production during the period of
guarantee, we guarantee repair free of charge on condition that:
- The appliance has been used properly and for the purpose for which it has been intended.
- Repairs are professionally carried out by qualied persons who are appointed by the supplier.
- The purchase receipt shall be presented.
- The appliance showing a fair wear and tear shall not be covered by this guarantee.
Therefore, any part that could be accidentally broken or having visible signs of use in consuma-
ble products (such as lamps, batteries, heating elements…) is excluded from the guarantee, and
any defect whatsoever resulting from non-respect of the rules for use, negligence in usage and/or
maintenance of the appliance, damage during transport and any other damage not attributable the
supplier.
For every defect that could not be repaired within the guarantee period, the appliance will be repla-
ced free of charge.
Technical assistance
Even after the guarantee period we will always pay attention to repairs for defected ap-
pliances.
For technical assistance and/or repairs after the guarantee period you can directly contact
the below address:
BEPER SRL
Via Salieri, 30
37050 - Vallese di Oppeano - Verona
Tel. 045/7134674 – Fax 045/6984019
e-mail: assistenza@beper.com

16
Batteur avec bol rotatif Manuel d’instructions
Conseils généraux de sécurité
Lisez attentivement ce mode d’emploi avant de mettre l’appareil en marche pour la première fois.
Conservez le mode d’emploi ainsi que le bon de garantie, votre ticket de caisse et si possible, le
carton avec l’emballage se trouvant à l’intérieur. Si vous remettez l‘appareil à des tiers, veuillez-le
remettre avec son mode d‘emploi.
• N’utilisez cet appareil que pour un usage privé et pour les taches auxquelles il est destiné. Cet
appareil n’est pas prévu pour une utilisation professionnelle. Ne l’utilisez pas en plein air. Protégez
le de la chaleur, des rayons directs du soleil, de l’humidité (ne le plongez en aucun cas dans l’eau)
et des objets tranchants. N’utilisez pas cet appareil avec des mains humides. S’il arrive que de l’hu-
midité ou de l’eau atteignent l’appareil, débranchez aussitôt le câble d’alimentation.
• Arrêtez l’appareil et débranchez toujours le câble d’alimentation de la prise de courant (en tirant
sur la che et non pas sur le câble) si vous n’utilisez pas l’appareil, si vous installez les accessoires,
pour le nettoyage ou en cas de panne.
• Ne laissez jamais fonctionner l’appareil sans surveillance. Lorsque vous quittez la pièce, toujours
arrêter l’appareil. Débranchez la che de la prise.
• Contrôlez régulièrement l’appareil et le câble. Ne mettez pas l’appareil en marche s’il est endom-
magé.
• Ne réparez pas l’appareil vous-même. Contactez plutôt un technicien quali é. Pour éviter toute
mise en danger, ne faites remplacer le câble défectueux que par un câble
équivalent et que par le fabricant, notre service après-vente ou toute personne de quali cation
similaire.
• N’utilisez que les accessoires d’origine.
• Respectez les „Conseils de sécurité spéci ques“ ci-dessous. Enfants et personnes fragiles
• Par mesure de sécurité vis-à-vis des enfants, ne laissez pas les emballages (sac en plastique,
carton, polystyrène) à leur portée.
DANGER!
Ne pas laisser les jeunes enfants jouer avec le lm. Il y a risque d’étouffement!
• Pour protéger les personnes fragiles et les enfants des risques des appareils électriques, veillez à
ce que cet appareil ne soit utilisé que sous surveillance. Cet appareil n’est pas un jouet. Ne laissez
pas les enfants s’amuser avec.
Conseils de sécurité spéci ques à cet appareil
• Ne touchez jamais aucun des accessoires de l’appareil lorsqu’ils sont encore en mouvement.
Attendez toujours qu’ils se soient arrêtés.
• Aucun ustensile tel que cuiller, grattoir ou vos mains ne doit jamais, pendant le fonctionnement, se
trouver à proximité des fouets ou du pétrin en rotation! Risque de blessure!
• Arrêtez et débranchez toujours l’appareil avant de changer d’accessoire!
• Utilisez exclusivement les accessoires recommandés par le fabricant. Tout autre accessoire ri-
squerait de provoquer des incendies, une électrocution et / ou des blessures de
personnes.
• Pour éviter toute éclaboussure, plongez le bras de l’appareil complètement dans les aliments
avant de mettre l’appareil en marche.
• Ne mixez ou ne mélangez avec cet appareil que des produits alimentaires.
• Ne laissez pas fonctionner l’appareil pendant plus de 5 minutes!
Laissez-le ensuite refroidir pendant env. 10 minutes
avant de recommencer!

FRANÇAIS
Bol mixeur Manuel d’instructions
• Cet appareil ne convient que pour de petites quantités! Ne versez donc dans le récipient que la
quantité maximale indiquée dans le tableau!
• Ne branchez le câble d’alimentation dans la prise de courant qu’après avoir installé tous les ac-
cessoires nécessaires.
• Ne portez ni ne soulevez jamais l’appareil pendant le fonctionnement. Arrêtez-le et débranchez-le
d’abord. Portez toujours l’appareil à deux mains!
Liste des différents éléments de commande
1 Mixeur
2 Bouton de détachement du pétrin
3 Variateur de vitesses (6 vitesses)
4 Touche TURBO
5 Partie supérieure amovible
6 Languette pour le déverrouillage
de la partie supérieure
7 Bol mixeur
8 Pétrin
9 Support à mixeur
Déballage de l’appareil
• Sortez l’appareil ainsi que tous les accessoires du carton.
• Ne jetez pas le carton d’emballage tout de suite. Conservezle avec les emballages intérieures ainsi
que les documents de garantie pendant toute la période de la garantie.
• Placez l’appareil sur une surface plane, lisse et stable.
• Ne branchez pas l’appareil tant que tous les accessoires nécessaires ne sont pas installés.
• Pour enlever les éventuelles salissures provenant de la production, veuillez nettoyer le récipient
pour le pétrissage et les autres accessoires avant la première utilisation à l’aide d’un simple bain
rinçant.
• Essuyez correctement tous les éléments après les avoir lavés.
Conseils d’utilisation
Choisissez, selon l’utilisation, l’accessoire et la vitesse adaptés d’après le tableau suivant:
Produit/mode de
préparation
Quantité max. Accesoires Position Durée
max. de
fonction-
nement
Pâte épaisse (par
ex. pâte à levain)
500 g Pétrin 1-4 3 min.
Pâte à gâteau, vi-
naigrettes, desserts
750 g Fouet mélangeur 2-5 5 min.
Pâte à biscuit, à
gaufre, Créme
fraîche
750 g Fouet mélangeur 2-5 5 min.

18
Batteur avec bol rotatif Manuel d’instructions
• Pour les pâtes plus épaisses, ne laissez pas l’appareil fonctionner plus de 3 minutes puis laissez-le
refroidir pendant 10 minutes.
• En fonction de la texture de la pâte, il peut s’avérer nécessaire de détacher la pâte du bord du
récipient pour le pétrissage et de la remettre en contact avec les outils pour le pétrissage. Travaillez
avec l’appareil arrêté.
Détacher les pétrins / fouets
1. Pour libérer le pétrin/fouet, véri ez que le sélecteur de fonctions est sur “0” et que le robot est
débranché.
2. Enfoncez le bouton pour libérer le pétrin/fouet. Vous pouvez alors légèrement tirer dessus pour
les sortir de l’ori ce.
REMARQUE: les fouets ne peuvent être éjectés que lorsque le variateur de vitesses se trouve sur
la position „0”.
Fonctionnement turbo
Pour une courte utilisation à très grande vitesse. En appuyant par à-coup, vous obtenez un fon-
ctionnement Pulse.
Utilisation du pétrin / fouet mélangeur
1. Positionnez le sélecteur de fonctions sur “0” et véri ez que le robot n’est pas branché.
2. Introduisez l’extrémité du pétrin ou du fouet mélangeur dans l’ori ce du mixeur prévue à cet
effet, en poussant jusqu’à ce qu’il s’enclenche. Le montage est d’autant plus facile si vous tournez
légèrement tout en poussant l’accessoire dans l’ori ce.
REMARQUE: Le pétrin équipé du disque ne peut être xé que sur le côté gauche du robot, vu du
dessous.
3. Branchez le câble d’alimentation dans une prise de courant de 230 V / 50 Hz en bon état de
fonctionnement.
4. Vous pouvez alors régler différentes vitesses grâce au variateur de vitesses situé sur le mixeur.
Utilisation du support à mixeur
Choisissez une surface plane et non glissante pour utiliser le robot
1. Placez le robot sur la partie supérieure du pied de l’appareil. Véri ez que la languette de la partie
supérieure est enclenchée à l’arrière de l’appareil.
2. Installez les accessoires suivant les indications précédemment données dans Utilisation du pétrin
/fouet mélangeur.
3. Pour placer le bol mixer sous l’appareil, actionnez la languette pour le déverrouillage de la partie
supérieure du robot et orientez le robot vers le haut.
4. Placez le bol mixeur préalablement rempli des ingrédients de votre choix sur le plateau tournant
prévu à cet effet.
Orientez le robot à nouveau vers le bas.
5. Branchez le câble d’alimentation dans une prise de courant de 230 V / 50 Hz en bon état de
fonctionnement.

19
Batteur avec bol rotatif Manuel d’instructions
6. Vous pouvez alors régler différentes vitesses grâce au variateur de vitesses situé sur le mixeur.
7. Le bol mixeur tourne automatiquement!
8. Si vous souhaitez arrêter l’appareil, positionnez le sélecteur de fonctions sur “0” et débranchez
l’appareil.
9. Après utilisation, actionnez à nouveau la languette de déverrouillage de la partie supérieure du
robot et orientez le robot vers le haut.
10. Vous pouvez alors enlever le bol mixeur. Détachez les accessoires suivant les indications
données dans „Détacher les pétrins / fouets“.
11. Pour séparer le robot de la partie supérieure du support de l’appareil, soulevez le robot vers le
haut.
Entretien
• Débranchez le câble d’alimentation de la prise de courant avant chaque nettoyage.
• Utilisez un torchon humide pour nettoyer l’extérieur de l’appareil.
• Ne plongez jamais l’appareil dans l’eau pour le laver.
• N’utilisez jamais de produits abrasifs ni corrosifs!
• Vous pouvez rincer à la main les parties amovibles ayant été entrées en contact avec de la pâte
(outils de pétrissage et récipient de pétrissage).
Données techniques
Alimentation: 220-240 V, 50 Hz
Consommation: 250 W
Dans une optique d’amélioration constante Beper se réserve le droit de modier ou amélio-
rer cet appareil sans préavis.

20
Batteur avec bol rotatif Manuel d’instructions
TRAITEMENT DES DECHETS DES APPAREILS ELECTRIQUES
ET ELECTRONIQUES
Le produit en n de vie doit être détruit selon les normes en vigueur relatives à l’élimination des
déchets et ne peut être traité comme simple déchet ménagé.
Le produit doit être détruit dans un centre d’élimination des déchets adapté ou être restitué au re-
vendeur dans le cas d’une substitution avec un autre produit équivalent neuf.
Le fabricant prendra à sa charge les frais occasionnés pour la destruction du produit selon les ter-
mes de la loi en vigeur.
Le produit est composé de pièces non biodégradables et substances qui peuvent polluer l’environ-
nement si détruites de façon inapropriée . Par ailleurs, certaines parties de ces matières peuvent
être recyclées évitant ainsi toute pollution pour l’environnement. Il est de votre et notre devoir de
préserver la santé de l’environnement.
Le symbole indique que le produit répond aux normes requises par les nouvelles
directives introduites en faveur de l’environnement (2002/96/EC, 2003/108/EC, 2002/95/EC) et
que le produit doit être détruit de façon appropriée au terme du cycle de vie.
Au besoin, informez-vous auprès des autorités locales compétentes en matière d’élimination des
déchets de votre commune.
Toute personne qui ne tiendra pas compte de ces règles d’élimination des déchets indiquées dans
ce paragraphe en répondra selon la loi en vigueur.
Table of contents
Languages:
Other Beper Hand Mixer manuals

Beper
Beper 90.341A Quick guide

Beper
Beper BP.305 Operating and maintenance manual

Beper
Beper BP.301 Operating and maintenance manual

Beper
Beper P102SBA007 User manual

Beper
Beper BP.350 Quick guide

Beper
Beper BP.304 Operating and maintenance manual

Beper
Beper 90.348A Quick guide

Beper
Beper P102SBA100 Quick guide

Beper
Beper 90 343 Quick guide