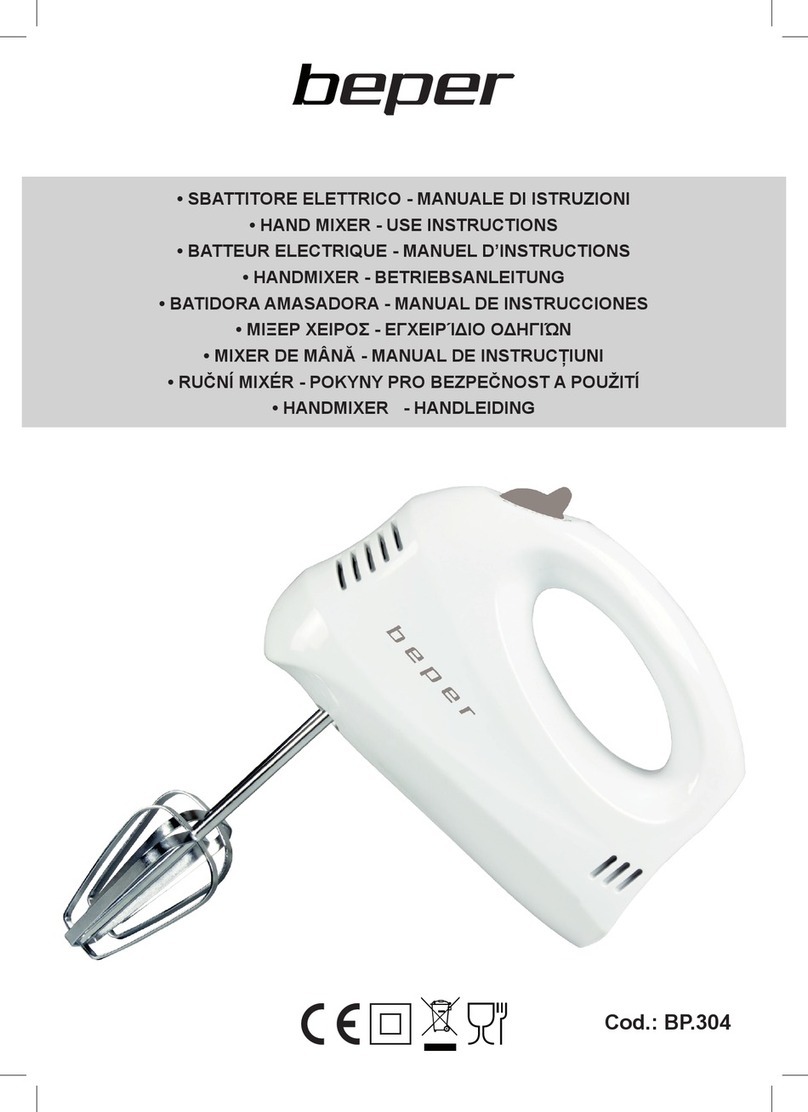
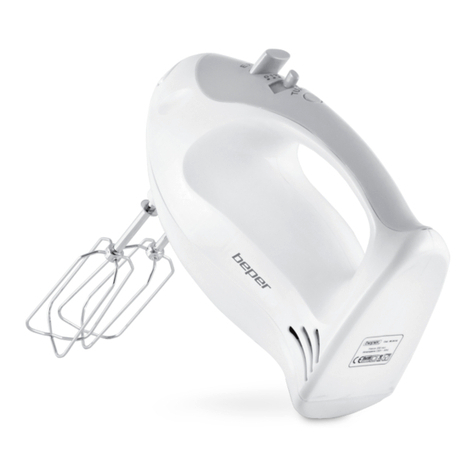
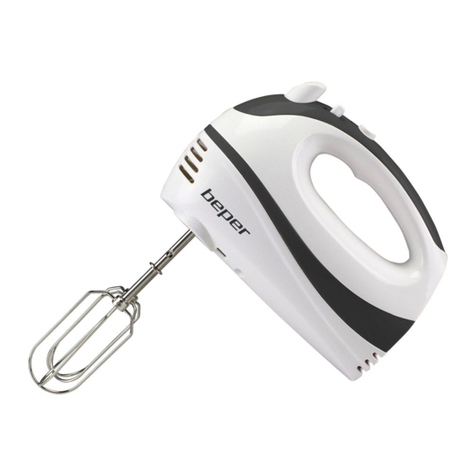
Beper BP.350 Quick guide

• SBATTITORE - MANUALE DI ISTRUZIONI
• HAND MIXER - USE INSTRUCTIONS
• BATTEUR ELECTRIQUE - MANUEL D’INSTRUCTIONS
• HANDMIXER - BETRIEBSANLEITUNG
• BATIDORA AMASADORA - MANUAL DE INSTRUCCIONES
• ΜΙΞΕΡ ΧΕΙΡΟΣ - ΕΓΧΕΙΡΊΔΙΟ ΟΔΗΓΙΏΝ
• MIXER DE MÂNĂ - MANUAL DE INSTRUCȚIUNI
Cod.: BP.350
• ΜΙΞΕΡ ΧΕΙΡΟΣ -
ΕΓΧΕΙΡΊΔΙΟ ΟΔΗΓΙΏΝ
• MIXER DE MÂNĂ - MANUAL DE INSTRUCȚIUNI

pag. 3
pag. 10
pag. 17
pag. 25
pag. 32
pag. 38
pag. 43
For further information and/or for instructions for use in other languages, please visit:
beper.com
ITALIANO
ENGLISH
FRANÇAIS
DEUTSCH
ESPAÑOL
ΕΛΛΗΝΙΚΗ
ROMÂNĂ
Fig.1

3
Sbattitore Manuale di istruzioni
IT
AVVERTENZE GENERALI
LEGGERE QUESTE ISTRUZIONI PRIMA DI USARE L’APPAREC-
CHIO.
Prima e durante l’uso dell’apparecchio è necessario seguire alcune
precauzioni elementari.
Dopo aver tolto l’imballaggio assicurarsi dell’integrità dell’apparec-
chio. In caso di dubbio non utilizzare l’apparecchio e rivolgersi a per-
sonale professionalmente qualicato. Gli elementi dell’imbal laggio
(sacchetti di plastica, polistirolo, ecc.) non devono essere lasciati alla
portata dei bambini, in quanto potenziali fonti di pericolo.
Assicurarsi sempre che la tensione di rete elettrica sia uguale a quel-
la indicata nell’etichetta dati tecnici e che l’impianto sia compatibile
con la potenza dell’apparecchio.
Non tirare mai il cavo per scollegarlo dalla presa di corrente elettrica.
Assicurarsi che il cavo non sia in contatto con superci calde o ta-
glienti.
Non utilizzare l’apparecchio con il cavo danneggiato.
Se il cavo di alimentazione è danneggiato, esso deve essere sostitu-
ito dal Costruttore o dal suo Servizio Assistenza Tecnica o comunque
da una persona con qualica similare, in modo da pre venire ogni
rischio.
Collegare l’apparecchio esclusivamente ad una presa di corrente
elettrica alternata.
In generale è sconsigliabile l’uso di adattatori, prese multiple e/o pro-
lunghe. Qualora il loro uso si rendesse indispensabile è necessario
utilizzare solamente adattatori e prolunghe conformi alle vigenti nor-
me di sicurezza.
Questo apparecchio dovrà essere destinato solo all’uso per il quale
è stato espressamente concepito. Ogni altro uso è da considerarsi
improprio e quindi pericoloso, nonché far decadere la garanzia. Il
costruttore non può essere considerato responsabile per eventuali
danni derivati da usi impropri, erronei ed irragionevoli.
Per evitare surriscaldamenti pericolosi si raccomanda di svolgere in
tutta la sua lunghezza il cavo di alimentazione.
Prima di effettuare qualsiasi operazione di cambio degli accessori o
di pulizia disinserire l’apparecchio dalla rete di alimentazione elettri-
ca.
Non lasciare esposto l’apparecchio ad agenti atmosferici (pioggia,
sole, etc.).

4
Sbattitore Manuale di istruzioni
AVVERTENZE D’USO
Prima di utilizzare lo sbattitore vericare la sua integrità e del cavo di alimentazione; controllare che
la tensione riportata corrisponda alla tensione di rete.
Non usare lo sbattitore con il cavo di alimentazione danneggiato o quando si riscontrano anomalie.
Fare attenzione che il cavo di alimentazione non sia a contatto con bordi taglienti o con superci
calde.
Non tirare il cavo di alimentazione per scollegare lo sbattitore dalla presa di corrente elettrica.
Per uso domestico.
Non utilizzare lo sbattitore vicino o sopra forni elettrici bollenti.
Rimuovere le fruste dallo sbattitore prima di procedere al lavaggio delle stesse.
L’uso di fruste non appropriate o non vendute con lo sbattitore possono essere causa di rottura o
bruciatura del medesimo. Per preservare la durata del motore non utilizzare lo sbattitore alla massi-
ma velocità per più di 3 minuti consecutivi e lasciarlo raffreddare per 5 minuti prima del successivo
utilizzo.Non utilizzare il tasto TURBO per più di 1 minuto consecutivo.
Porre molta attenzione alle parti in movimento, in particolare quando la spina è inserita nella presa
di corrente.
Tenere le mani, i capelli, i vestiti o altri utensili da cucina, lontano dalle fruste quando sono in movi-
mento per ridurre i rischi di infortunio alle persone o danneggiamento dello sbattitore.
Tenere lontano dalla portata dei bambini.
Non immergere lo sbattitore in acqua o in altri liquidi.
Non utilizzare lo sbattitore con le mani bagnate e/o i piedi nudi.
Fare attenzione a non fare impasti troppo consistenti pena il danneggiamento dello sbattitore.
Prima di inserire le fruste e/o pulire lo sbattitore staccare il cavo di alimentazione dalla presa di
corrente elettrica.
Prima di rimuovere gli ingredienti, che in fase di lavorazione si sono attaccati alle fruste, staccare il
cavo di alimentazione dalla presa di corrente elettrica.
Non tenere l’apparecchio vicino a fonti di calore (es. termosifone).
Questo apparecchio non deve essere utilizzato da persone (compre-
si i bambini) con capacità siche, sensoriali o mentali ridotte; da per-
sone che manchino di esperienza e conoscenza dell’apparecchio, a
meno che siano attentamente sorvegliate o ben istruite relativamente
all’utilizzo dell’apparecchio stesso da parte di una persona responsa-
bile della loro sicurezza.
Assicurarsi che i bambini non giochino con l’apparecchio.
Allorché si decida di smaltire come riuto questo apparecchio, si rac-
comanda di renderlo inoperante.
SI RACCOMANDA INOLTRE DI RENDERE INNOCUE
QUELLE PARTI DELL’APPARECCHIO SUSCETTIBI-
LI DI COSTITUIRE UN PERICOLO, SPECIALMEN-
TE PER I BAMBINI CHE POTREBBERO SERVIRSI
DELL’APPARECCHIO PER I PROPRI GIOCHI.

5
Sbattitore Manuale di istruzioni
IT
DESCRIZIONE DEL PRODOTTO Fig.1
1 – Tasto espulsione fruste
2 – Selettore di funzionamento e velocità
3 – Tasto TURBO
4 – Corpo motore
5 – Fruste
6 –Torciglioni
ISTRUZIONI PER L’USO
Assicurarsi che il cavo di alimentazione non sia collegato alla presa di corrente elettrica e che il
selettore di funzionamento e velocità sia posizionato su 0.
Inserire le fruste una alla volta nei due fori sottostanti lo sbattitore. Premere e girare leggermente
nché non si siano bloccate bene.
Inserire il cavo di alimentazione nella presa di corrente elettrica.
Versare il composto da lavorare in un recipiente ed azionare lo sbattitore, posizionandolo al centro
del recipiente.
Selezionare le differenti velocità mediante l’apposito selettore, iniziando con la velocità più bassa 1.
E’ possibile accelerare la velocità premendo il tasto TURBO.
Quando si inizia a sbattere il composto, prestare particolare attenzione a quando si immerge lo
sbattitore, al ne di minimizzare eventuali schizzi.
Terminato di lavorare il prodotto, spegnere lo sbattitore posizionando il selettore di funzionamento
e velocità (2) su 0, appoggiarlo sulla parte posteriore per rimuovere con maggiore facilità le fruste.
Rimuovere le fruste premendo il tasto di espulsione delle fruste.
SCELTA DELLE FRUSTE
Fruste sbattitori : sostituiscono la frusta classica utilizzata in cucina e, come questa,
servono per:
mescolare (esempio: tuorlo d’uovo + zucchero);
sbattere (esempio: frittata);
introdurre aria in un preparato (esempio: bianchi a neve, crema chantilly);
emulsionare (esempio: maionese).
Torciglioni impastatori: unicamente per paste leggere, si utilizzano per sbattere (Esempio : la purèe
spumosa) e per incorporare la farina negli impasti più solidi (Esempio : dolce savoia, dolce bulgaro).
SCELTA DELLA VELOCITA’
1 = MISCHIARE E’ la velocità adatta per ingredienti asciutti e pesanti, come farina, burro e patate
2 = MESCOLARE Migliore velocità per ingredienti liquidi per condimenti
3 = IMPASTARE Per impastare torte, biscotti e pane
4-5 = CREMA Per rendere cremosi burro e zucchero, preparare gli impasti per dessert
6 = MONTARE Per montare uova, sbattere patate, montare creme
E’ consigliabile far funzionare lo sbattitore per i primi 30 secondi alla velocità più bassa – 1 – dopo-
diché posizionarlo gradualmente su quella massima – 6 –.

6
Sbattitore Manuale di istruzioni
Il simbolo del cestino barrato riportato sull’apparecchio indica che il prodotto, alla ne
della propria vita utile, dovendo essere trattato separatamente dai riuti domestici, deve
essere conferito in un centro di raccolta differenziata per apparecchiature elettriche ed
elettroniche oppure riconsegnato al rivenditore al momento dell’acquisto di una nuova ap-
parecchiatura equivalente.
L’adeguata raccolta differenziata per l’avvio successivo dell’apparecchio al riciclaggio, al trattamen-
to e allo smaltimento ambientalmente compatibile contribuisce ad evitare possibili effetti negativi
sull’ambiente e sulla salute e favorisce il recupero dei materiali di cui è composto.
L’utente è responsabile del conferimento dell’apparecchio a ne vita alle appropriate strutture di
raccolta. Per informazioni più dettagliate inerenti i sistemi di raccolta disponibili, rivolgersi al servizio
locale di smaltimento riuti, o al negozio dove è stato effettuato l’acquisto.
Chiunque abbandona o cestina questo apparecchio e non lo riporta in un centro di raccolta differen-
ziata per riuti elettrici-elettronici è punito con la sanzione amministrativa pecuniaria prevista dalla
normativa vigente in materia di smaltimento abusivo di riuti
PULIZIA DELLO SBATTITORE
Prima di pulire lo sbattitore staccare il cavo di alimentazione dalla presa di corrente e assicurarsi che
il selettore di funzionamento e velocità sia in posizione 0.
Togliere le fruste premendo il tasto di espulsione delle fruste.
Lavare le fruste con acqua calda e detersivo.
Il corpo dello sbattitore può essere pulito con un panno morbido, inumidito con acqua calda.
Mai pulire con dei diluenti, prodotti abrasivi in genere, detersivi per plastica, vetro o simili; potrebbe-
ro danneggiare lo sbattitore.
Fare attenzione a non fare penetrare liquidi nello sbattitore.
Non immergere il corpo motore dello sbattitore in acqua o altri liquidi, non risciacquarlo sotto l’acqua.
DATI TECNICI
Potenza: 300W
Alimentazione: 230V ~ 50Hz
In un ottica di miglioramento continuo Beper si riserva la facoltà di apportare modiche e
migliorie al prodotto in oggetto senza previo preavviso.

7
Sbattitore Manuale di istruzioni
IT
CERTIFICATO DI GARANZIA
La garanzia di applicazione è valida 24 mesi dalla data di acquisto per difetti di materiale o di fab-
bricazione.
La garanzia è valida unicamente presentando il certicato di garanzia e il documento di
acquisto (scontrino scale) che certichi la data di acquisto e il nome del modello dell’appa-
recchio acquistato.
Se l’apparecchio dovesse richiedere assistenza tecnica rivolgersi al venditore o presso la nostra
sede. Questo per conservare inalterata l’efcienza del vostro apparecchio e per NON invalidare la
garanzia. Eventuali manomissioni dell’apparecchio da parte di personale non autorizzato invalide-
ranno automaticamente la garanzia.
Condizioni di garanzia
Se ci sono guasti a causa di difetti di materiale e/o fabbricazione durante il periodo di garanzia,
garantiamo la riparazione del prodotto gratuitamente.
Non sono coperte dalla garanzia tutte le parti che dovessero risultare difettose a causa di:
a. Danni da trasporto o da cadute accidentali,
b. Errata installazione o inadeguatezza impianto elettrico,
c. Riparazioni o modiche operate da personale non autorizzato,
d. Mancata o non corretta manutenzione e pulizia,
e. Prodotto e/o parti di prodotto soggette a usura e/o consumabili (es.: lampade, batterie, lame)
f. Mancata osservanza delle istruzioni per il funzionamento dell’apparecchio, negligenza
o trascuratezza nell’uso.
L’elenco di cui sopra è a titolo meramente esemplicativo e non esaustivo, in quanto la presente
garanzia è comunque esclusa per tutte quelle circostanze che non possono farsi risalire a difetti di
fabbricazione dell’apparecchio.
La garanzia è inoltre esclusa in tutti i casi di uso improprio dell’apparecchio ed in caso di uso pro-
fessionale.
Beper Srl declina ogni responsabilità per eventuali danni che possano direttamente o indirettamente
derivare a persone, cose ed animali domestici in conseguenza della mancata osservanza di tutte le
prescrizioni indicate nell’apposito “Libretto Istruzioni ed avvertenze” in tema di installazione, uso e
manutenzione dell’apparecchio.
Assistenza tecnica
Per l’assistenza tecnica e/o riparazioni fuori dal periodo di garanzia ci si può rivolgere direttamente
all’indirizzo sottostante.
BEPER SRL
Via Salieri, 30
37050 - Vallese di Oppeano - Verona
Tel. 045/7134674 – Fax 045/6984019
e-mail: assistenza@beper.com

8
Sbattitore Manuale di istruzioni
Torta tipo Kinder
Ingredienti:
250 g burro morbido
250 g zucchero a velo
150 g farina
150 g amido di mais o fecola
4 tuorli d’uovo
2 uova intere
Buccia grattugiata di due limoni
1 bustina di vanillina
1 bustina di lievito per dolci
Per farcire:
½ litro panna fresca
60/70 g miele
Preparazione:
Lavorare il burro a crema con lo sbattitore, aggiungere lo zucchero a velo e continuare a
montare nché diventa sofce, aggiungere a cucchiaiate le uova intere, prima sbattute con
una forchetta, continuando a sbattere. Aggiungere i tuorli uno per volta e i limoni grattugiati.
A questo punto mischiare la farina, la fecola, la vanillina ed il lievito ed aggiungerli al compo-
sto un po’ per volta mescolando con un cucchiaio di legno dal basso verso l’alto.
Versare il composto in una teglia imburrata e infarinata ed infornare a 180°C per circa 20/30
minuti.
Per farcire: montare la panna con il miele.
Una volta raffreddata la torta tagliarla, farcirla con la panna, ricoprirla con l’altra metà pre-
mendola in modo che aderisca bene alla panna, porla in frigo per almeno un paio di ore;
successivamente pareggiare i lati con un coltello ben aflato e cospargere di abbondante
zucchero a velo
Ricette

9
Sbattitore Manuale di istruzioni
IT
Meringhe
Ingredienti:
3 uova
180 g zucchero semolato
50 g zucchero a velo
Qualche goccia di succo di limone
Un pizzico di sale
Preparazione:
Lavare le uova con acqua fredda, separare l’albume dai tuorli, evitando che qualche goccia
di tuorlo nisca nell’albume. Mettere gli albumi in una capiente ciotola profonda, aggiungere
il pizzico di sale, con lo sbattitore lavorare l’albume a media velocità no a quando diventerò
tuta schiuma; il composto schiumoso sarà tutto compatto.
Mettere i due tipi di zucchero gradatamente mentre si continua a lavorare con lo sbattitore,
aggiungere alcune gocce di limone continuando con lo sbattitore no a quando la schiuma
sarà compatta.
Mettere la schiuma così ottenuta in una tasca per pasticciere.
Disporre nella teglia da forno uno strato completo di carta forno; premendo sulla tasta da
pasticciere mettere nella teglia la schiuma creando piccoli torciglioni.
Infornare a temperatura di 100-100 gradi, lasciare il forno aperto, cuocere per circa 1 ora.
Quando le meringhe saranno rassodate sufcientemente, estrarle dal forno; le meringhe
sono pronte.
Maionese
Ingredienti:
2 tuorli
1 tazza di olio extravergine di oliva oppure olio di girasole o di mais
Succo di mezzo limone
1 cucchiaino di aceto
Sale
Preparazione:
In una terrina mettere i tuorli, salare e mescolare con lo sbattitore sempre nello stesso verso.
Continuare a mescolare con lo sbattitore e aggiungere l’olio all’inizio a gocce e poi a lo.
Una volta che tutto l’olio è stato assorbito, aggiungere sempre a lo anche il succo di limone
e l’aceto.
Più olio si aggiunge e più soda diventa la maionese; più limone e aceto si aggiungono più si
rende uida la maionese.
Ricette

10
Hand mixer Use instructions
GENERAL SAFETY ADVICE
READ THE OPERATING INSTRUCTIONS CAREFULLY BEFORE
FIRST USE OF THE APPLIANCE.
Read the following instructions carefully, since they give you useful
safety information about installation, use and maintenance and help
you avoid mishaps and possible accidents.
Remove the packing and make sure that the appliance is intact, with
special attention to the supply cable. The elements of the packing
(plastic bags, polystyrene, etc) do not have to be accessible to the
children, in order to preserve them from danger sources.
It is recommended not to throw these packing material in the dome-
stic waste, but to deliver them to the appropriate station of collection
or destruction refusals, asking eventually information to the manager
of the Sanitation Department of your own municipality.
Before connecting the appliance make sure that the mains voltage
corresponds to the data specied on the label.
If the plug does not suit the socket, let it be replaced with another
suitable plug by qualied personnel only, which shall also ensure that
the section of the socket cables is suitable for your appliance power
absorption.
Never pull the supply cord to unplug the appliance.
Make sure that the supply cord never comes into contact with hot or
cutting surfaces
Do not use this appliance if the supply cord is damaged. In case of
damage, it must be replaced by the manufacturer, its service agent or
similarly qualied persons in order to avoid a hazard.
Only connect this appliance on alternating current
Generally, the use adaptors multiple plugs and/or extensions is not
recommended; should they be necessary, please use only simple or
multiple adaptors and extensions in compliance with the safety rules
in force, making sure that the capacity absorption limit marked on the
simple adaptors and the extensions and the maximum power limit
marked on the multiple adaptor are not exceeded.
This appliance is to be destined to its special purpose only.
Any other use is to be considered as improper and thus dangerous.
The manufacturer cannot be responsible for any damages deriving
from improper, wrong or incautious use.
To avoid any heating risk, it is recommended to unroll completely the
supply cord and to unplug the appliance, when not used.


11
Hand mixer Use instructions
EN
Before cleaning, always unplug the appliance.
To protect against electric shock, do not immerse cord, plug or any
parts of the appliance into water or other uids.
Do not hold the appliance with wet hands or feet.
Do not hold the appliance with naked feet.
Do not expose the appliance to atmospheric agents such as rain,
wind, snow, hail.
Do not use the appliance near explosives, highly ammable mate-
rials, gases, burning ames, heaters.
Do not allow children, disabled people or every people without expe-
rience or technical ability to use the appliance if they are not properly
watched over. Close supervision is necessary when any appliance
used by or near children.
Make sure that children do not play with this appliance.
If you decide not to use the appliance any longer, make it unservice-
able by simply cutting the supply cable after disconnecting the plug
from the socket.
ALSO MAKE ANY DANGEROUS PARTS UNSERVICE-
ABLE, ESPECIALLY FOR CHILDREN WHO COULD
PLAY WITH THE APPLIANCE.
USE ADVICE
Before using the hand mixer check his and cord supply integrity ; check that the main voltage corre-
spond to the one of the hand mixer.
Do not use the hand mixer if the cord supply is damaged or if there are dysfunction.
Make sure the cord supply does not touch sharp or hot surfaces.
Do not pull on the cord supply to unplug the hand mixer from the socket.
For household use only. Do not use the hand mixer near or onto hot electric oven.
Remove the whisks from the hand mixer before cleaning.
Using non original whisks may cause damages to the appliance.
To protect the motor and make last longer do not use the hand mixer to maximum power for more
than 5 minutes consecutives and make it cool for 5 minutes before use it again.
Do not use the TURBO button for more than 1 minute.
Be careful with the moving parts, especially when the appliance is plugged.
Keep your hands, hair, clothes and utensils away from the whisks when they are moving to prevent
from injuries to people and damages to the hand mixer.
Keep away from children.
Do not immerse the hand mixer into water or other liquids.
Do not use the hand mixer with wet hands or naked feet.
Before inserting the beaters and/or clean the hand mixer unplug the cord supply from the socket.
Before removing ingredients, unplug the cord supply from the socket.

12
Hand mixer Use instructions
DESCRIPTION Fig.1
1 – Eject handle
2 – Speed selector
3 – TURBO button
4 – Motor unit
5 – Whisks
6 – Dough hooks
USE INSTRUCTION
Make sure the cord supply is not plugged and the speed selector is on position 0.
Insert the whisks until they are locked into place.
Plug the cord supply into the socket.
Pour the ingredients into the container and start with the hand mixer, putting it at the centre of the
container.
Press on/off to turn on the hand mixer.
Select different speed with the selector and always start with the lower speed 1. It is possible to
accelerate speed using TURBO button.
When starting the preparation, make sure to the correct position of the hand mixer into the container,
that could cause splashes. When complete, turn off the hand mixer by pressing on/off, and put it on
his back to remove the whisks easily by pressing removing whisks button.
WHICH BEATERS
Beaters: to use instead of manual whisks to :
mix (example : egg-white + sugar) ;
beat (example : eggs to prepare on omelette);
whipping food (example white eggs, whipped cream);
emulsify (example : mayonnaise).
Dough hooks: to use only for preparation of not very consistent pastes, for example to beat creamy
mashed potatoes and to incorporate the our in other more solid ingredients (Example: cake pre-
paration).
SPEED SELECTOR
1 = MIX speed Used for dry and bulk ingredients such as our, butter and potatoes
2 = BLEND Speed used for liquids
3 = DOUGH MIXING For mixing cakes and breads
4-5 = CREAM For creaming butter and sugar, desserts
6 = BEAT For beating eggs, cooked icings, whipping potatoes, whipping cream
It is recommended to use the hand mixer for around 30 second at low speed – 1 – to gradually arrive
at max. speed – 6 –.

13
Hand mixer Use instructions
EN
CLEANING
Before cleaning the hand mixer unplug the cord supply from the socket and make sure the switch
on/off is turned off.
Remove the whisks by pressing la removing whisks button.
Wash the whisks with hot water and soap.
The motor unit may be cleaned with a soft cloth and hot water.
Do never clean with thinners, abrasive detergent, detergent for plastic, glass or other that could
damage the hand mixer.
Do not introduce liquids into the hand mixer.
Do not immerse the motor unit into water or other liquids, do not rinse with water.
TECHNICAL DATA
Power: 300W
Power supply: 230V ~ 50Hz
For any improvement reasons, Beper reserves the right to modify or improve the product
without any notice.
The European directive 2011/65/EU on Waste Electrical and Electronic Equipment (WEEE),
requires that old household electrical appliances must not be disposed of in the normal
unsorted municipal waste stream. Old appliances must be collected separately in order to
optimize the recovery and recycling of the materials they contain, and reduce the impact on
human health and the environment. The crossed out “wheeled bin” symbol on the product
reminds you of your obligation, that when you dispose of the appliance, it must be separa-
tely collected.

14
Hand mixer Use instructions
GUARANTEE CERTIFICATE
This appliance has been checked in the factory. From the date of original purchase a 24 month
guarantee applies to material and production defects. The purchase receipt and the guarantee cer-
ticate must be submitted together in case of claim to guarantee.
The guarantee is valid only with a guaranty certicate and proof of purchase (scal receipt)
indicating the date of purchase and the model of the appliance
For any technical assistance, please contact directly the seller or our head ofce in order to preserve
the appliance’s efciency and NOT TO void the guarantee. Any intervention on this appliance by
non-authorized persons will automatically void the guarantee.
GUARANTEE CONDITIONS
If the appliance shows defects as a result of faulty material and/or production during the period of
guarantee, we guarantee repair free of charge on condition that:
- The appliance has been used properly and for the purpose for which it has been intended.
- The appliance has not been tampered with, otherwise it is not maintainable.
- The purchase receipt shall be presented.
- The appliance showing a fair wear and tear shall not be covered by this guarantee.
Therefore, any part that could be accidentally broken or having visible signs of use in consumable
products (such as lamps, batteries, heating elements…) the aesthetic parts are excluded from the
guarantee, and any defect whatsoever resulting from non-respect of the rules for use, negligence in
usage and/or maintenance of the appliance, carelessness, wrong or improper installation, damage
during transport and any other damage not attributable the supplier.
For every defect that could not be repaired within the guarantee period, the appliance will be repla-
ced free of charge.
In any case, if the part to be replaced for defect, breakage or malfunction is an accessory and/or a
detachable part of the product, Beper reserves the right to replace only the very part in question and
not the entire product
TECHNICAL ASSISTANCE
Even after the guarantee period we will always pay attention to repairs for defected appliances.
For technical assistance and/or repairs after the guarantee period you can directly contact the below
address:
CONTACT YOUR DISTRIBUTOR IN YOUR COUNTRY OR ATER SALES DEPARTMENT BEPER.
E-MAIL assistenza@beper.com WHICH WILL FORWARD YOUR ENQUIRIES TO YOUR DISTRI-
BUTOR.

15
Hand mixer Use instructions
EN
“Kinder” cake
Ingrédients :
250 g of soft butter
250 g of icing sugar
150 g of our
150 g potato starch our
4 egg yolks
2 eggs
2 lemon zest
1 sachet of vanilla sugar
1 sachet of baking powder
Cream:
½ litre of cream
60/70 g of honey
Preparation:
Use the hand mixer to get the butter as a cream, add icing sugar and carry on mixing to
obtain an homogeneous mixing, then add mixing eggs and carry on mixing all. Add egg yolks
one by one and lemon zest.
Then add our, potato starch our, vanilla sugar and baking powder and mix all carefully with
a wooden spoon.
Pour the preparation into a buttered cake pan and put it into the oven for about 20/30 minu-
tes at 180°
To prepare the cream: make a whipping cream with honey.
Once the cake is cool, cut it in 2, and stuff the cake with the cream. Put the cake into the
fridge for around 2 or 3 hours; nally powder with the icing sugar.

16
Hand mixer Use instructions
Meringue cookies
Ingredients :
3 eggs
180 g of sugar
50 g of icing sugar
Lemon juice drops
Salt pinch
Cooking:
Wash eggs into cold water, break separately yolks and whites. Put the white eggs into a
salad bowl with a pinch of salt and start to mix with the hand mixer at medium speed until
the mixture becomes compact.
At this point, add the 2 sugars gradually and then mix, adding some lemon juice drops.
Put the white eggs into a pastry bag and stand meringue balls on a oiled baking tray.
Put the tray into the open oven at 100-120° for about 1 minute.
When the meringue is enough cooked, remove it from the oven.
Mayonnaise
Ingredients:
2 eggs yolks
1 cup of olive, sunower or corn oil
½ lemon juice
1 vinegar spoon
Salt
Cooking:
Put the eggs yolks into a salad bowl with salt and mix with the hand mixer always in same
direction.
Keep on mixing with the hand mixer and add the olive oil slowly.
Once oil is completely absorbed, add the lemon juice and vinegar.
The more you add oil the more the mayonnaise will be compact; the more you add lemon
juice or vinegar the more the mayonnaise will be uid.

ES
17
Batteur electrique Manuel d’instructions
ESFR
PRECAUTIONS GENERALES
LIRE ATTENTIVEMENT LES INSTRUCTIONS SUIVANTES AVANT
LA PREMIERE UTILISATION DE L’APPAREIL.
Avant et durant l’utilisation de cet appareil il est nécessaire de suivre
précautions élémentaires suivantes.
Après avoir enlever l’emballage, s’assurer de l’intégrité de l’appareil.
En cas de doute ne pas utiliser l’appareil et s’adresser à un pro-
fessionnel qualié. Les éléments d’emballage (sachets plastique,
polystyrène, etc.) ne doivent pas être laissés à la portée des enfants,
car potentiellement dangereux.
Il est recommandé de ne pas jeter les éléments d’emballage dans les
déchets ménagers, mais de les déposer dans les centres de traite-
ment des déchets appropriés, en demandant éventuellement conseil
au gérant du centre de sa commune de résidence.
Toujours s’assurer que la tension électrique soit la même que cel-
le indiquée sur l’étiquette des données techniques et que le réseau
électrique soit compatible avec la puissance de l’appareil.
En cas d’incompatibilité entre la prise électrique murale et celle de
l’appareil faire changer la prise de l’appareil par un professionnel
qualié. Ce dernier devra s’assurer que la section des câbles de la
prise soit adaptée à la puissance absorbée par l’appareil.
Ne jamais tirer sur le câble d’alimentation pour débrancher la prise
électrique.
S’assurer que le câble n’entre pas en contact avec des supercies
chaudes ou coupantes.
Ne pas utiliser l’appareil si le câble d’alimentation est abîmé.
Si le câble d’alimentation est endommagé, pour éviter tout risque, il
devra être substitué par le constructeur, par son service d’assistance
technique ou toute autre personne de même qualication.
Brancher l’appareil exclusivement sur une prise de courant alterné.
Il est en général déconseiller d’utiliser des adaptateurs, prises mul-
tiples et/ou rallonges. En cas de nécessité, utiliser seulement des
adaptateurs ou rallonges conformes aux normes de sécurité en vi-
gueur.
Cet appareil ne devra être utilisé que pour l’usage pour lequel il a été
conçu.
Tout autre usage sera considéré comme inapproprié et donc dange-
reux, et engendrera l’annulation de la garantie.

18
Batteur electrique Manuel d’instructions
Le constructeur ne peut être tenu pour responsable en cas de dom-
mages causés par une utilisation incorrecte, inappropriée et dérai-
sonnable.
Pour éviter tout risque d’échauffement il est recommandé de dérouler
entièrement le câble d’alimentation et de débrancher l’appareil de la
prise de courant en cas d’inutilisation.
Avant d’effectuer toute opération de nettoyage ou entretien, débran-
cher l’appareil de la prise de courant électrique.
Ne jamais immerger l’appareil dans l’eau ou d’autres liquides.
Ne pas toucher l’appareil avec les mains et pieds mouillés ou humi-
des.
Ne pas utiliser l’appareil si vous êtes pieds nus.
Ne pas laisser l’appareil exposé aux agents atmosphériques comme
la pluie, le soleil …
Ne pas laisser l’appareil près d’une source de chaleur (ex. Radiateur)
Ne pas laisser les enfants, les personnes avec des capacités physi-
ques, sensorielles ou mentales réduites, ou manquant d’expérience
ou de connaissance technique, utiliser cet appareil sans surveillance
S’assurer que les enfants ne jouent pas avec cet appareil.
DÈS LORS QUE L’APPAREIL DOIT ÊTRE DÉTRUIT, IL
EST RECOMMANDÉ DE COUPER LE CÂBLE D’ALI-
MENTATION, ET DE RETIRER TOUTES LES PARTIES
SUSCEPTIBLES DE PRÉSENTER UN QUELCONQUE
DANGER, EN PARTICULIER POUR LES ENFANTS
QUI POURRAIENT UTILISER CET APPAREIL COMME
UN JEU.

ES
19
Batteur electrique Manuel d’instructions
ESFR
CONSEILS D’UTILISATION
Avant d’utiliser le batteur électrique vérier son intégrité et celle du câble d’alimentation ; contrôler
que la tension corresponde à celle du réseau électrique.
Ne pas utiliser le batteur électrique si le câble d’alimentation est endommagé ou en cas d’anomalies.
Faire attention à ce que le câble d’alimentation n’entre pas en contact avec des bords coupants ou
surfaces chaudes.
Ne pas tirer sur le câble d’alimentation pour débrancher le batteur électrique de la prise de courant
électrique.
Pour usage domestique uniquement.
Ne pas utiliser le batteur électrique proche ou au-dessus de fours électriques chauds.
Retirer les fouets du batteur électrique avant de procéder à leur nettoyage.
L’utilisation de fouets non adaptés ou non vendus avec le batteur électrique peuvent causer la casse
ou surchauffe de l’appareil.
Pour préserver la durée du moteur ne pas utiliser le batteur électrique au maximum de sa puissan-
ce pendant plus de 5 minutes consécutives et le laisser refroidir pendant 5 minutes pour l’utiliser à
nouveau.
Ne pas utiliser la touche TURBO pendant plus d’une minute consécutive.
Faire très attention aux parties en mouvement, en particulier lorsque la prise est branchée.
Garder les mains, les cheveux, les vêtements ou ustensiles de cuisine loin des fouets lorsqu’ils
sont en mouvement pour réduire le risque de blessure aux personnes et dommages au batteur
électrique.
Tenir hors de portée des enfants.
Ne pas immerger le batteur électrique dans l’eau ou d’autres liquides.
Ne pas utiliser le batteur électrique avec les mains mouillées et/ou pieds nus.
Faire attention à ne pas faire de préparation trop compacte pour ne pas endommager le batteur
électrique.
Avant d’insérer les fouets et/ou nettoyer le batteur électrique débrancher le câble électrique de la
prise de courant.
Avant de retirer les ingrédients, débrancher la câble d’alimentation de la prise de courant.
DESCRIPTION DU PRODUIT Fig.1
1 – Touche expulsion des fouets
2 – Touche marche/arrêt et sélecteur de vitesse
3 – Touche TURBO
4 – Moteur
5/6 – Fouets
INSTRUCTIONS D’UTILISATION
S’assurer que le câble d’alimentation ne soit pas branché à la prise de courant électrique et que le
sélecteur de vitesse soit sur la position 0.
Insérer les fouets un à la fois dans les trous prévus à ce effet. Appuyer et tourner légèrement jusqu’à
ce qu’ils soient bien bloqués.
Brancher le câble d’alimentation sur la prise de courant électrique.
Verser les ingrédients dans un récipient et mettre en route le batteur, en le plaçant au centre du
récipient.

20
Batteur electrique Manuel d’instructions
Appuyer sur la touche marche/arrêt pour allumer le batteur électrique.
Sélectionner les différentes vitesses à l’aide du sélecteur, en commençant avec la vitesse la plus
basse 1. Il est possible d’accélérer la vitesse en appuyant sur la touche TURBO.
Dès lors que vous commencez la préparation, faire attention à la position du batteur dans le réci-
pient, il pourrait provoquer des éclaboussures.
Une fois la préparation terminée, éteindre le batteur électrique en appuyant sur la touche marche/
arrêt, et le poser sur la base postérieure pour retirer les fouets avec plus de facilité.
Retirer les fouets en appuyant sur la touche d’expulsion des fouets.
CHOIX DES FOUETS
Fouets batteurs : ils substituent le fouet traditionnel utilisé en cuisine et comme ce dernier, servent à:
Mélanger (exemple : blanc d’oeuf + sucre) ;
battre (exemple : les oeufs pour l’omelette);
Aérer une préparation (exemple blanc en neige, crème Chantilly);
Emulsionner (exemple : mayonnaise).
Fouets pour pétrir : à utiliser uniquement pour des préparations de pâtes peu consistantes, par
exemple pour battre une purée crémeuse et pour incorporer la farine à d’autres ingrédients plus
solides (Exemple : pâte à gâteau).
CHOIX DE LA VITESSE
1 = MELER Vitesse adaptée pour les ingrédients secs et lourds, comme la farine, beurre et pommes
de terre
2 = MELANGER Vitesse adaptée pour les ingrédients liquides
3 = PETRISSAGE Pour pétrir les pâtes pour tartes, biscuit set pains
4-5 = CREME Pour rendre le beurre et le sucre plus crémeux, préparer les crèmes pour dessert
6 = MONTER Pour monter les oeufs, battre les purées, monter la crème
Il est conseillé de faire fonctionner le batteur électrique pendant 30 secondes à basse vitesse – 1 –
pour le positionner graduellement à la vitesse maximum – 6 –.
NETTOYAGE DU BATTEUR ELECTRIQUE
Avant de nettoyer le batteur électrique débrancher le câble d’alimentation de la prise de courant et
s’assurer que la touche marche/arrêt soit éteinte.
Retirer les fouets en appuyant sur la touche d’extraction des fouets.
Laver les fouets à l’eau chaude et produit vaisselle.
Le corps du batteur électrique peut être nettoyé avec un chiffon doux, humidié avec de l’eau chau-
de.
Ne jamais nettoyer avec des diluants, produits abrasifs, détergents pour plastique, verre ou autre
qui pourraient endommager le batteur électrique.
Faire attention à ne pas faire pénétrer de liquides dans le batteur électrique.
Ne pas immerger le moteur du batteur électrique dans l’eau ou d’autres liquides, ne pas le rincer
sous l’eau.
Table of contents
Languages:
Other Beper Hand Mixer manuals

Beper
Beper 90346 Quick guide

Beper
Beper 90.348A Quick guide

Beper
Beper P102SBA007 User manual

Beper
Beper 90.341A Quick guide

Beper
Beper 90 343 Quick guide

Beper
Beper BP.304 Operating and maintenance manual

Beper
Beper BP.301 Operating and maintenance manual

Beper
Beper P102SBA100 Quick guide

Beper
Beper BP.305 Operating and maintenance manual