CAUTION:
Correct Installation of this unit to ensure proper
function and safety is the responsibility of the
installer. Please completely read and under-
stand this cautionary note and all installation or
maintenance instructions before proceeding with
installation.
Opening the Clario™TF Dispenser:
1. To open the Clario™TF dispenser cover, insert key
into keyway at the top of the dispenser. Turn key
clockwise to open and counterclockwise to lock
cover.
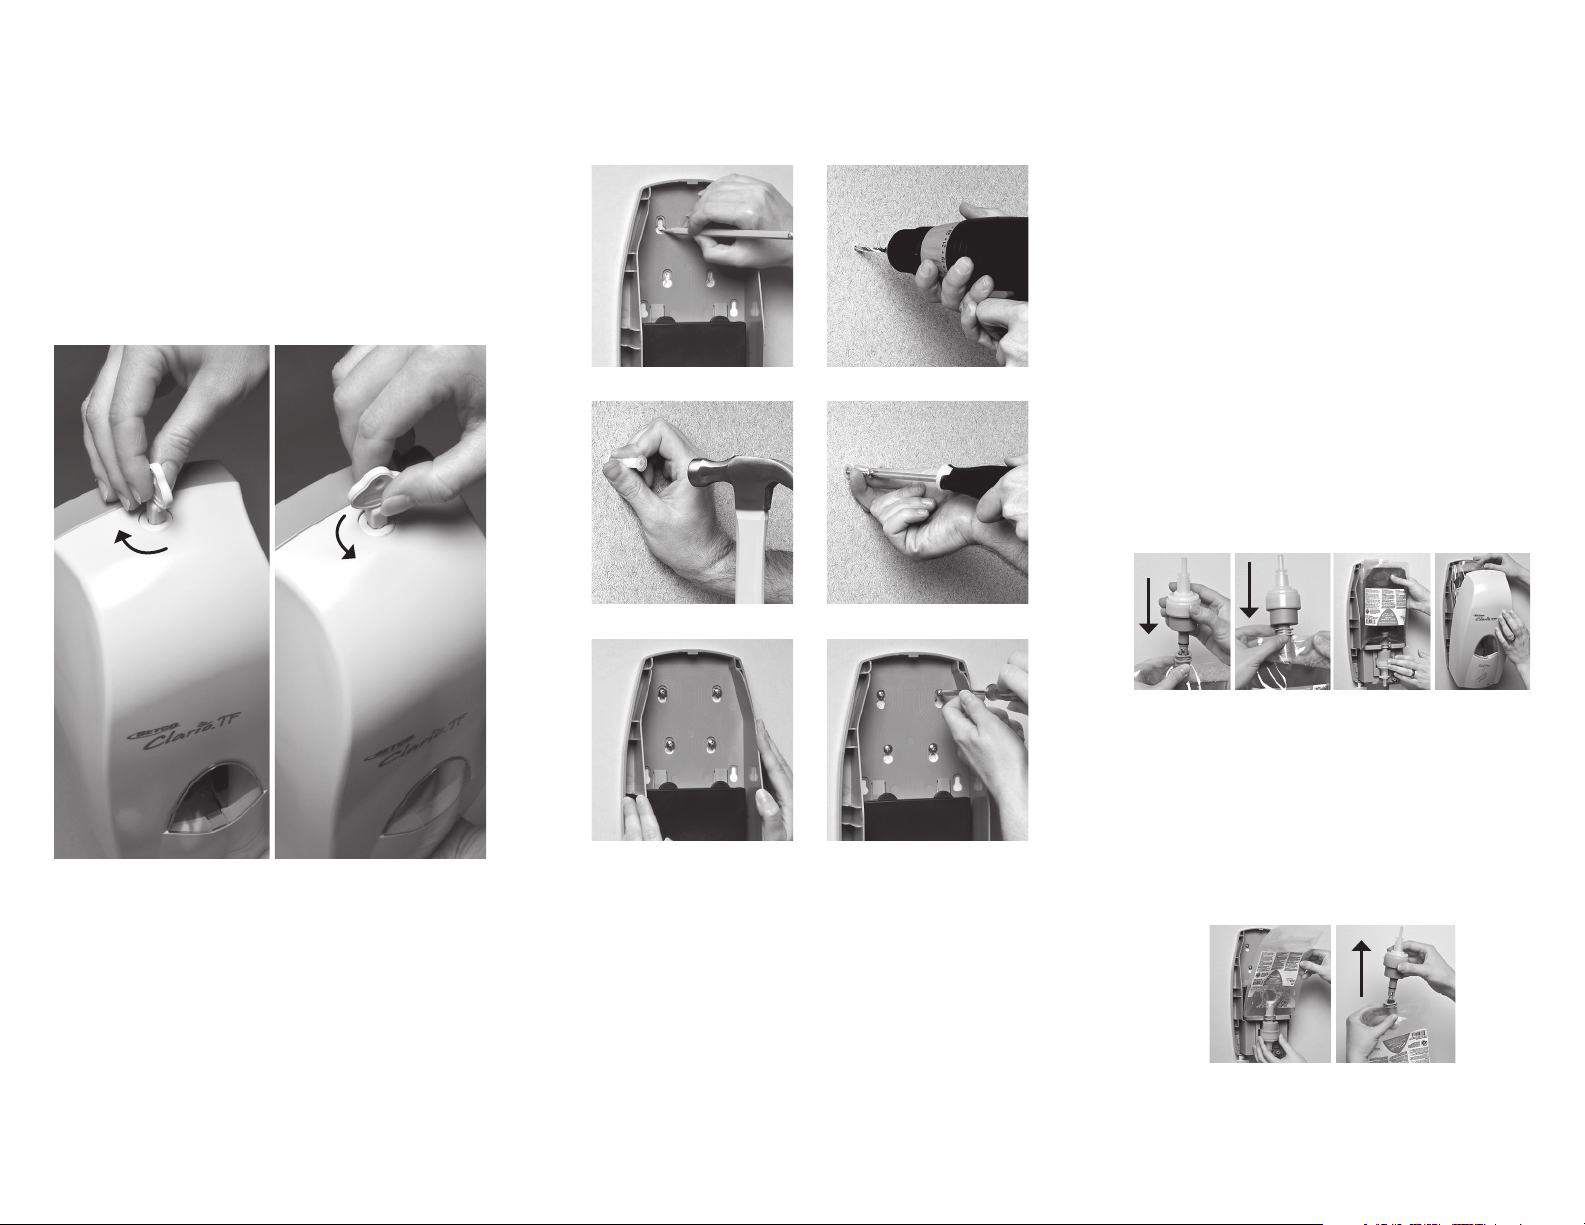
Mounting the Clario™TF Dispenser with
Anchors and Screws:
(Recommended mounting method, anchors and
screws are included.)
1 2
3 4
5 6
1. Using dispenser as a template, mark hole locations
on wall. (To be in compliance with ADA regula-
tions, the dispenser should be mounted no more
than 48” from the ground.) NOTE: Dispenser
should be installed at least 6” above countertop.
2. Drill (4) 3/16” diameter holes.
3. Tap plastic anchors provided into holes.
4. Place screws into anchors and tighten half the screw
length.
5. Hang dispenser over screws using the keyholes in the
back plate of the dispenser.
6. Tighten screws to secure the dispenser.
Mounting the Clario™TF Dispenser
with Double-Sided tape:
(Double-sided tape should only be used to se-
cure the unit to smooth, flat, dry surfaces that do
not have chemical residue or coatings on them.
Surfaces should be thoroughly clean and dry.)
1. Wipe surface with supplied alcohol wipe immedi-
ately before applying tape.
2. (To be in compliance with ADA regulations, the
dispenser should be mounted no more than 48”
from the ground.) NOTE: Dispenser should be
installed at least 6” above countertop. Peel off
paper from back of tape. Press dispenser firmly
to the wall and hold for several seconds to make
sure tape has completely adhered to the wall.
3. It is recommended that the dispenser is not filled
with soap or batteries for 24 hrs. to ensure that the
tape has completely adhered to the wall before
weight is added to the dispenser.
Install/Remove Product into Clario
™
TF
Dispenser with QCT
™
Connector:
Installing Product:
1. Turn bag upside down. Insert pump valve assem-
bly completely into valve end of bag until it clicks
and bag is fully pressed into pump.
2. Turn product and pump right-side up and insert
bag and pump into the dispenser. Ensure pump is
inserted snuggly into motor housing in dispenser.
3. If needed, gently tuck corners of bag to ensure
complete closure of dispenser cover.
Removing Product:
1. Pull bag and pump assembly out of dispenser.
2. Turn bag and pump assembly upside down to
remove pump from bag.


