BETE HR-Mini User manual
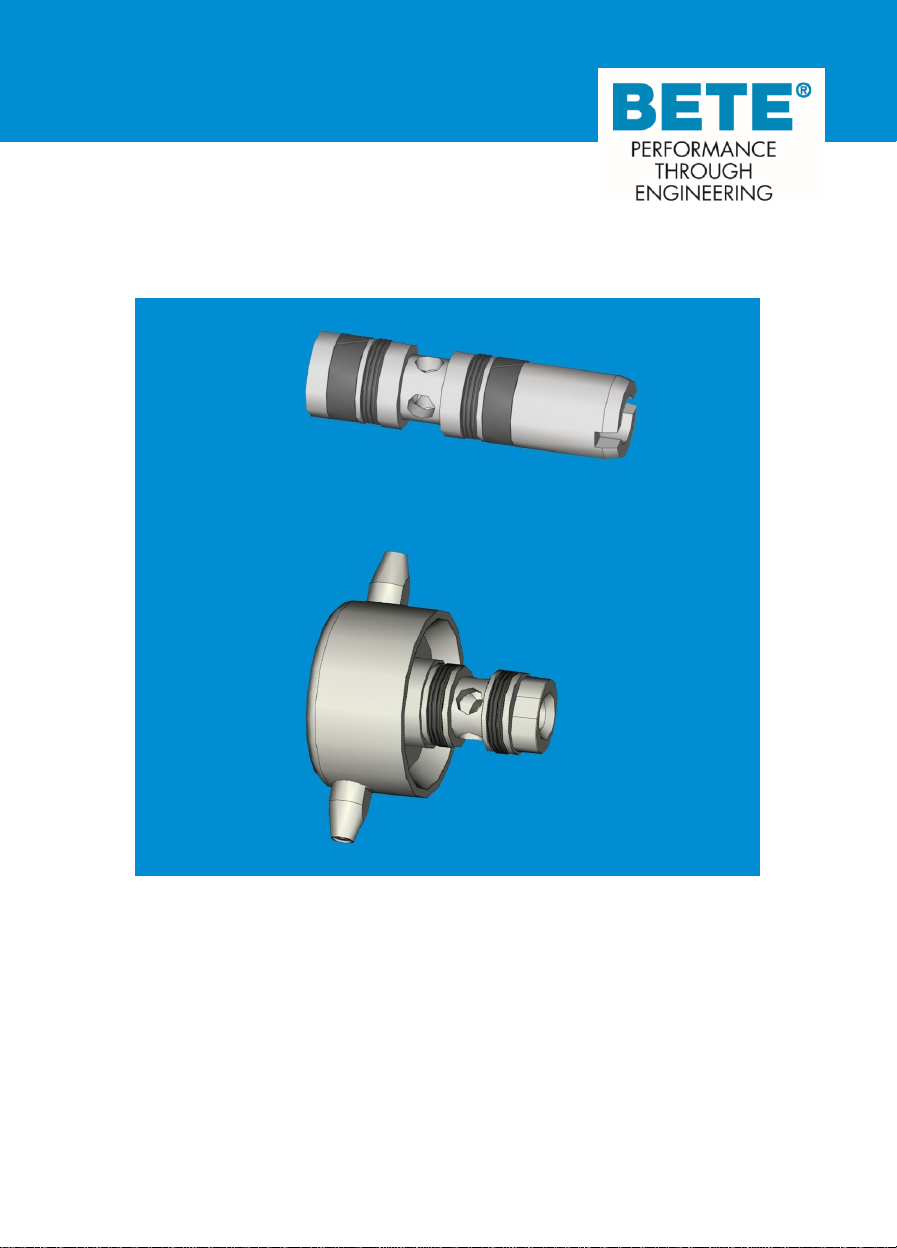
HR-Mini
Tank cleaning machine
INSTALLATION MANUAL
Replacing
Slide Seal Ring Kits and
Guide Rings
Keep for future use!

Legal notice
© BETE Deutschland GmbH
This manual and all images contained herein are copyright protected. Any use outside the
limitations of copyright law without our prior written approval is prohibited and liable to pros-
ecution. This applies especially to reproduction, translation, microfilming, saving, and edit-
ing in electronic systems.
We reserve the right to make technical alterations in the course of further development and
improvement of features.
BETE Deutschland GmbH
Dr.-C.-Otto Strasse 190
D - 44879 Bochum
Germany
+49-(0)234/936107-0
info@bete-deutschland.de
Status: 16.04.2019

HR-Mini Tank cleaning machine I
Contents
1About this installation manual.................................................................... 1
1.1 Notational conventions....................................................................................1
1.1.1 Other notational conventions .....................................................................1
1.2 Symbols used in the manual ...........................................................................2
1.2.1 Personal protective equipment ..................................................................2
2Replacing slide seal ring kits and guide rings ............................................. 3
2.1 Guide rings......................................................................................................4
2.2 Slide seal ring kits and guide rings at the shaft adapter ..................................5
2.2.1 Positions of the slide seal ring kits and guide rings on the shaft
adapter ......................................................................................................5
2.2.2 Installation of the slide seal ring kits (position 1/2) .....................................6
2.2.3 Installation of the guide rings (position 3/4) ...............................................7
2.3 Slide seal ring kits at the nozzle head..............................................................8
2.3.1 Positions of the slide seal ring kits at the nozzle head ...............................8
2.3.2 Installation of the slide seal ring kits (position 1/2) .....................................9
2.4 Service/Customer service..............................................................................10


ABOUT THIS INSTALLATION MANUAL
Notational conventions
HR-Mini Tank cleaning machine 1
1 About this installation manual
This manual (hereinafter referred to as manual) is a supplement to the operating/in-
stallation manual of the HR-Mini tank cleaning machine (hereinafter referred to as
HR-Mini) and provides all the information you require to install the seal rings at the
nozzle head and the shaft adapter of the HR-Mini in line with the safety regulations.
All persons responsible for installing the seal rings at the HR-Mini must read, un-
derstand, and heed the manual. This applies, in particular, to any safety infor-
mation.
In addition to this manual, it is necessary to comply with the general laws and other
regulations concerning accident prevention and environmental protection in the
country of use.
1.1 Notational conventions
Passages of this operating manual that require special attention or are a direct
hazard warning are shown as follows:
WARNING
Hazard which, unless avoided, may involve a moderate risk of death or
(serious) injury.
1.1.1 Other notational conventions
The info symbol provides useful information.
−Text following this mark represents an item in a list.
•Text following this mark represents instructions.
" " Text in double quotation marks refers to other chapters, sections or documents.

ABOUT THIS INSTALLATION MANUAL
Symbols used in the manual
2HR-Mini Tank cleaning machine
1.2 Symbols used in the manual
In this manual, particular hazards are identified by the following symbols:
Burn hazard due to hot surfaces
This symbol warns of a burn hazard resulting from coming into con-
tact with hot surfaces.
1.2.1 Personal protective equipment
When installing the seal rings at the nozzle head and the shaft adapter of the HR-
Mini, wear personal protective equipment according to the respective task to mini-
mise health hazards.
Safety gloves
Wear safety gloves to protect your hands against coming into di-
rect contact with the seal rings heated up in oil.
Face protection
Wear face protection to protect yourself against splashing hot oil.

REPLACING SLIDE SEAL RING KITS AND GUIDE RINGS
Symbols used in the manual
HR-Mini Tank cleaning machine 3
2 Replacing slide seal ring kits and
guide rings
WARNING
Damage, misuse or complete failure of the HR-Mini!
The functional safety of the HR-Mini is jeopardised when using incor-
rect of faulty spare, replacement, and accessory parts.
This may result in death or serious injury.
Component failure or malfunctioning of the HR-Mini may lead to ma-
terial and consequential damage.
•Only use original spare parts provided by the manufacturer.
NOTE
Damage on the HR-Mini
Incorrect replacement of spare or wear parts can cause damage to
components of the HR-Mini.
•In case of doubt, ensure spare or wear parts are only replaced by
BETE Deutschland GmbH or by a service center authorised by
BETE Deutschland GmbH.
REPLACING SLIDE SEAL RING KITS AND GUIDE RINGS
Guide rings
4HR-Mini Tank cleaning machine
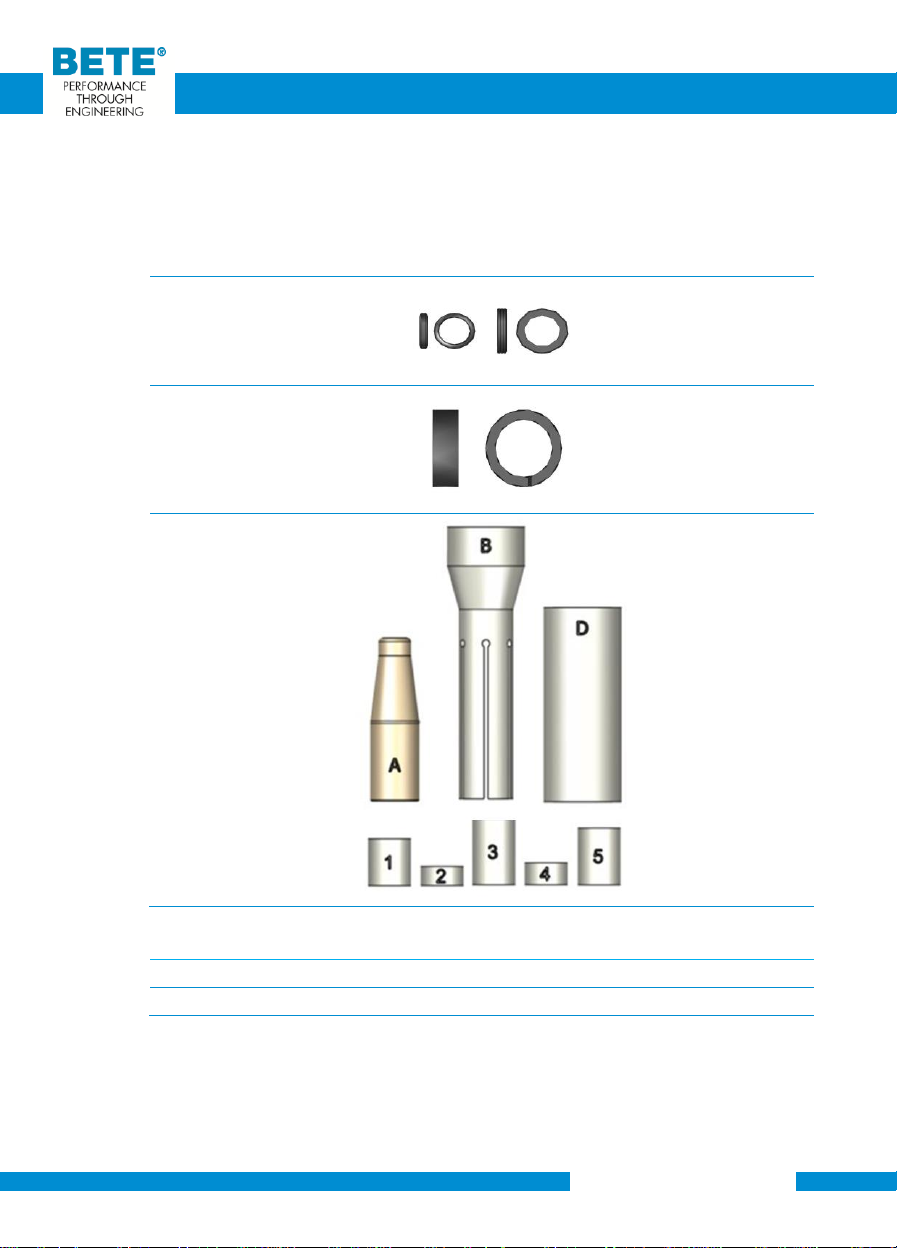
2.1 Guide rings
The following spare parts are required for replacing the seal rings at the nozzle
head and shaft adapter of the HR-Mini:
Spare part
Illustration
Article number
Slide seal ring kit
(consisting of O-ring
and slide ring)
HR-M-012
Guide rings
HR-M-011
(only for
the shaft
adapter)
Setup kit seal re-
placement
HR-M-016
You additionally require:
Super Lube long-term lubricant
Mineral oil HLP 46
REPLACING SLIDE SEAL RING KITS AND GUIDE RINGS
Slide seal ring kits and guide rings at the shaft adapter
HR-Mini Tank cleaning machine 5
2.2 Slide seal ring kits and guide rings at the
shaft adapter
Thoroughly clean the shaft adapter before commencing installation of the
rings!
Make sure all the required rings and the setup kit seal replacement are at
hand.
WARNING
Keep hot mineral oil (recommended: hydraulic oil of category HLP 46)
and the respective protective equipment at the ready.
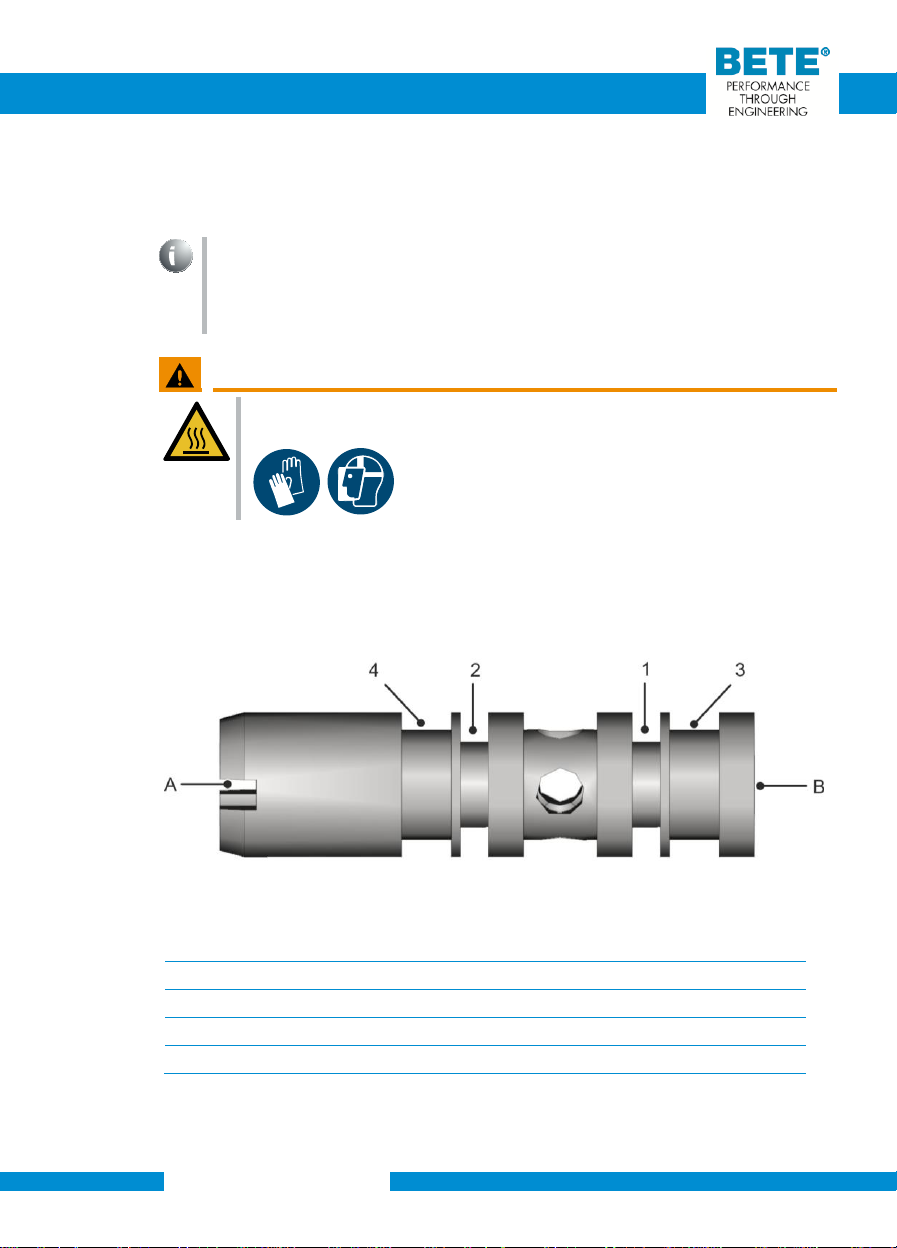
2.2.1 Positions of the slide seal ring kits and guide rings on
the shaft adapter
Pos.
Spacer expand-
ing mandrel
Installation direction
Shaft adapter
To install
1
1
Side A
Slide seal ring kit
2
–
Side B
Slide seal ring kit
3
3
Side B
Guide ring
4
2
Side A
Guide ring
Start with the position 1 and 2 at the shaft adapter (installation of the slide seal
ring kits).

REPLACING SLIDE SEAL RING KITS AND GUIDE RINGS
Slide seal ring kits and guide rings at the shaft adapter
6HR-Mini Tank cleaning machine
2.2.2 Installation of the slide seal ring kits (position 1/2)
•Insert the corresponding spacer (1 –3, see table on page 5) into the expand-
ing mandrel for the respective position at the shaft adapter.
Installing the O-ring
•Slide the expanding mandrel over
the respective end at the shaft
adapter.
•Pull the O-ring over the expanding
mandrel.
•Slide the O-ring over the expanding
mandrel to the respective position at
the shaft adapter using tool B.
•Remove tool B and the expanding
mandrel again.
Installing the slide ring
WARNING
Hot oil and hot surfaces
Risk of scalding due to hot oil and coming into contact with the
seal/guide rings heated up in the oil.
•When heating up or installing the seal/guide rings, wear thermal
gloves of category 2.
•Gently heat up the slide ring in the oil up to max. 100 degrees Celsius.
•Slide the expanding mandrel over the respective end of the shaft adapter.
•Take the slide ring out of the hot oil and pull it over the expanding mandrel.
•Slide the slide ring over the expanding mandrel to the respective position at
the shaft adapter using tool B.
REPLACING SLIDE SEAL RING KITS AND GUIDE RINGS
Slide seal ring kits and guide rings at the shaft adapter
HR-Mini Tank cleaning machine 7
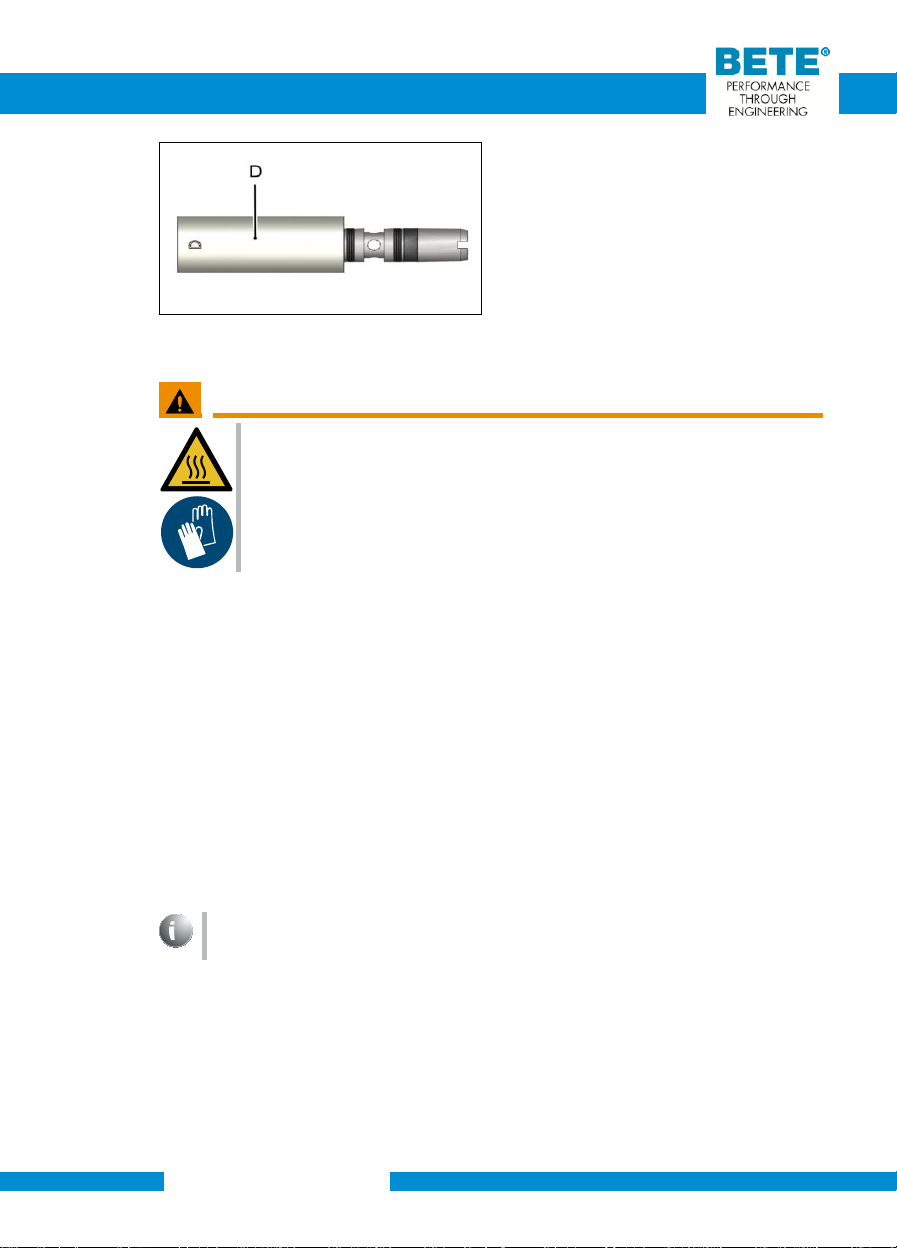
•Slide the calibration sleeve (D) over
the slide or guide ring and wait a
few minutes.
•Remove the calibration sleeve
again.
2.2.3 Installation of the guide rings (position 3/4)
WARNING
Hot oil and hot surfaces
Risk of scalding due to hot oil and coming into contact with the
seal/guide rings heated up in the oil.
•When heating up or installing the guide rings, wear thermal gloves
of category 2.
•Gently heat up the guide rings in the oil up to max. 100 degrees Celsius.
•Insert the corresponding spacer into the expanding mandrel for the respective
position at the shaft adapter.
•Slide the expanding mandrel over the respective end of the shaft adapter.
•Take the guide ring out of the hot oil and pull it over the expanding mandrel.
•Slide the guide ring over the expanding mandrel to the respective position at
the shaft adapter using tool B (also see section 2.2.2).
•Calibrate the slide ring using the calibration sleeve “D” from the respective
end of the shaft adapter (also see section 2.2.2).
Polish or roller-burnish the slide surface of the shaft adapter to ensure
smooth operation of the HR-Mini.

REPLACING SLIDE SEAL RING KITS AND GUIDE RINGS
Slide seal ring kits at the nozzle head
8HR-Mini Tank cleaning machine
2.3 Slide seal ring kits at the nozzle head
Thoroughly clean the nozzle head before commencing installation of the
rings!
Make sure all the required rings and the setup kit seal replacement are at
hand.
WARNING
Keep hot mineral oil (recommended: hydraulic oil of category HLP 46)
and the respective protective equipment at the ready.
2.3.1 Positions of the slide seal ring kits at the nozzle head
Pos.
Spacer ex-
panding
mandrel
To install
1
4
Slide seal ring kit
2
5
Slide seal ring kit
(Ill. without nozzles)
REPLACING SLIDE SEAL RING KITS AND GUIDE RINGS
Slide seal ring kits at the nozzle head
HR-Mini Tank cleaning machine 9
2.3.2 Installation of the slide seal ring kits (position 1/2)
O-ring
•Insert the corresponding spacer into the expanding mandrel for the respective
position at the nozzle head.
•Slide the expanding mandrel over the end of the nozzle head.
•Slide the O-ring over the expanding mandrel to the respective position at the
nozzle head using tool B (analog to section 2.2.2).
Slide ring
WARNING
Hot oil and hot surfaces
Risk of scalding due to hot oil and coming into contact with the
seal/guide rings heated up in the oil.
•When heating up or installing the slide rings,
wear thermal gloves of category 2.
•Gently heat up the slide rings in the oil up to max. 100 degrees Celsius.
•Slide the expanding mandrel over the end of the nozzle head.
•Take the slide ring out of the hot oil and pull it over the expanding mandrel.
•Slide the slide ring over the expanding mandrel to the respective position at
the nozzle head using tool B (analog to section 2.2.2).
•Calibrate the slide ring using the calibration sleeve “D” (analogue to sec-
tion 2.2.2).
Polish or roller-burnish the slide surface of the nozzle head to ensure
smooth operation of the HR-Mini.

REPLACING SLIDE SEAL RING KITS AND GUIDE RINGS
Service/Customer service
10 HR-Mini Tank cleaning machine
2.4 Service/Customer service
Our service hotline is at your disposal for any technical queries you
may have.
Phone: +49 (0) 234 93 61 07 0
E-Mail: info@bete-deutschland.de
In addition, our employees are consistently interested in new infor-
mation and experiences resulting from the application that may be
of value in improving our products.

REPLACING SLIDE SEAL RING KITS AND GUIDE RINGS
Notes
HR-Mini Tank cleaning machine 11
Notes
BETE Deutschland GmbH
Dr.-C.-Otto Strasse 190
D - 44879 Bochum
Germany
+49-(0)234/936107-0
info@bete-deutschland.de
Other manuals for HR-Mini
1
Table of contents
Other BETE Cleaning Equipment manuals

Popular Cleaning Equipment manuals by other brands


Mako
Mako StyliCleaner Getting started

Clean Logix
Clean Logix BLX-1000-GEN2 user manual

Ro.Bia.Plast
Ro.Bia.Plast pulizia & stiro MultiEnergy Vap Instruction book

Avantco
Avantco 600 Series Operator's manual for Attachment

Good Way
Good Way GDS-15-PH Operating and maintenance instructions

Alfalaval
Alfalaval Emmie instruction manual