Bettio SCENIKIT SCENICA Operating instructions

Montage-, Benutzungs- und Wartungshandbuch
Manuale di installazione, uso e manutenzione
Manuel de montage, utilisation et maintenance
Installation, user and maintenance manual

GRAZIE per aver scelto SCENIKIT ® e BETTIO.
Incoraggiati dall’entusiasmo della clientela per il modello Scenica®, Bettio ha messo a punto Scenikit®, una versione preconfenzionata per il montaggio di serie. Scenikit® è disponi-
bile nelle misure standard 1500x2500 mm. e 2000x2500 mm. in 4 colori sempre a magazzino ed è inoltre munita di un pratico spazzolino antivento.
Ogni kit può essere utilizzato per la produzione di zanzariere ad uno o due battenti. Entrambe le misure sono infatti predisposte per la realizzazione di laterali singole o doppie,
semplicemente abbinando due kit della stessa misura o di misure differenti.
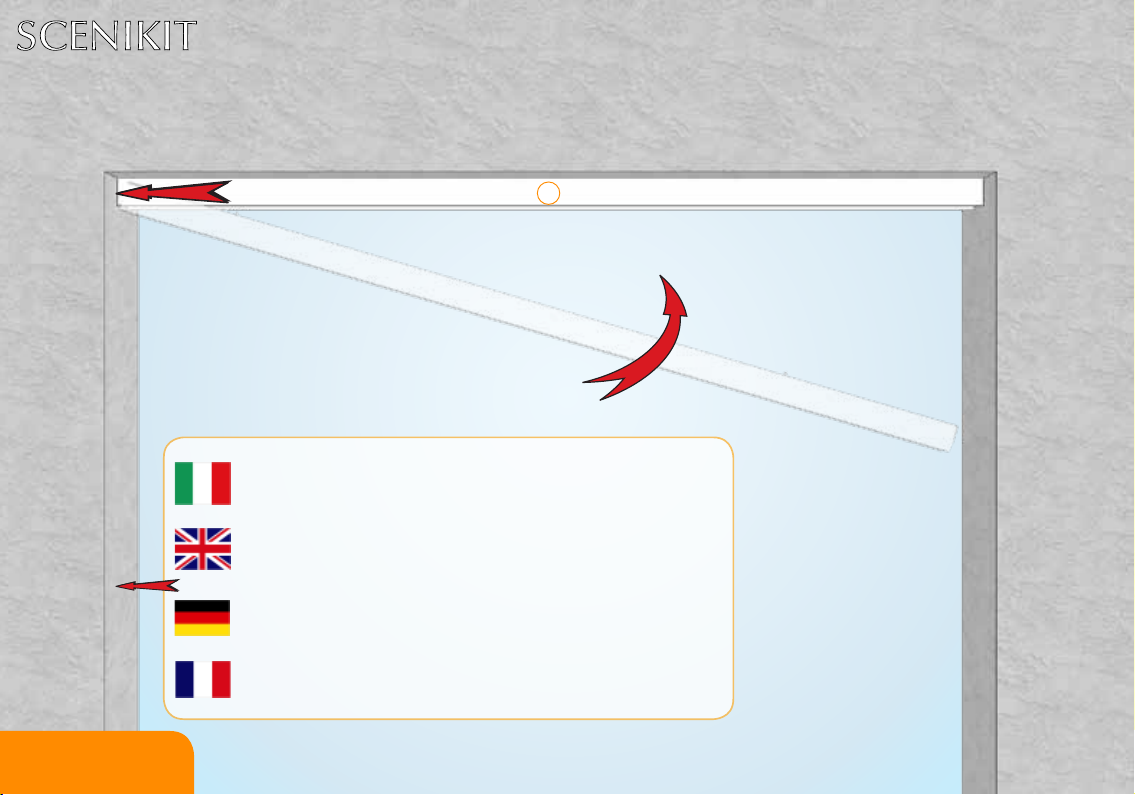
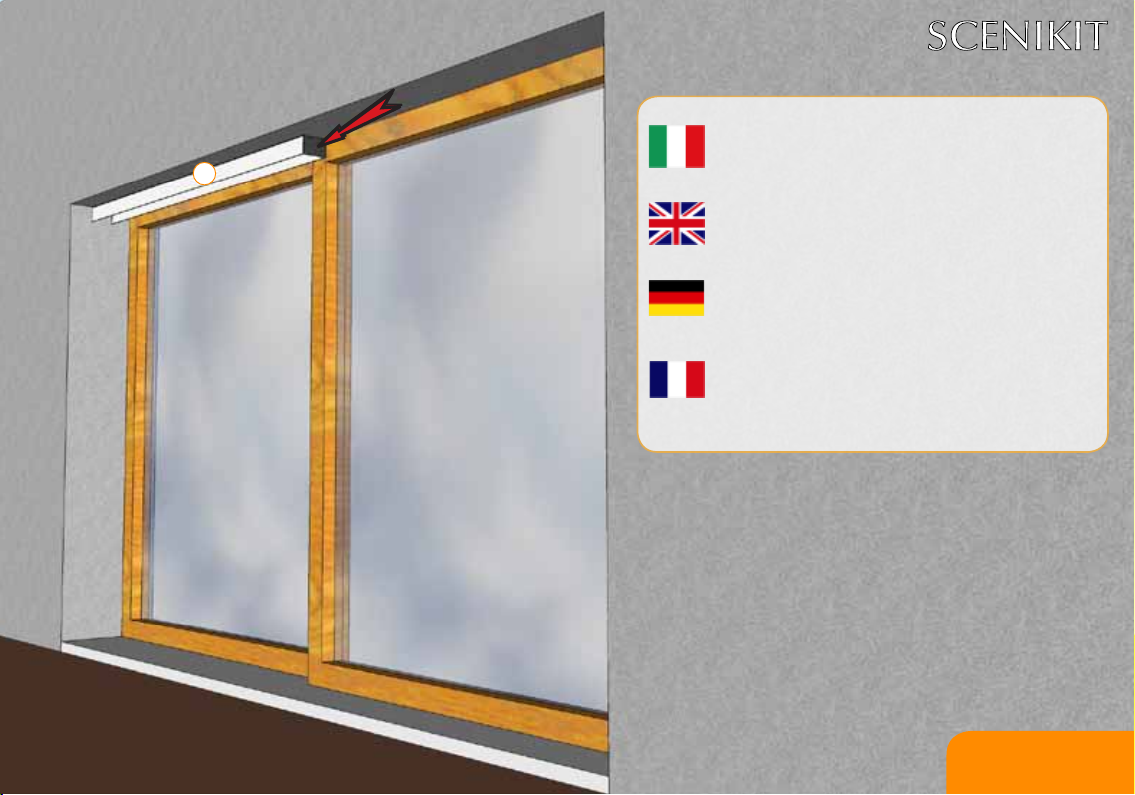
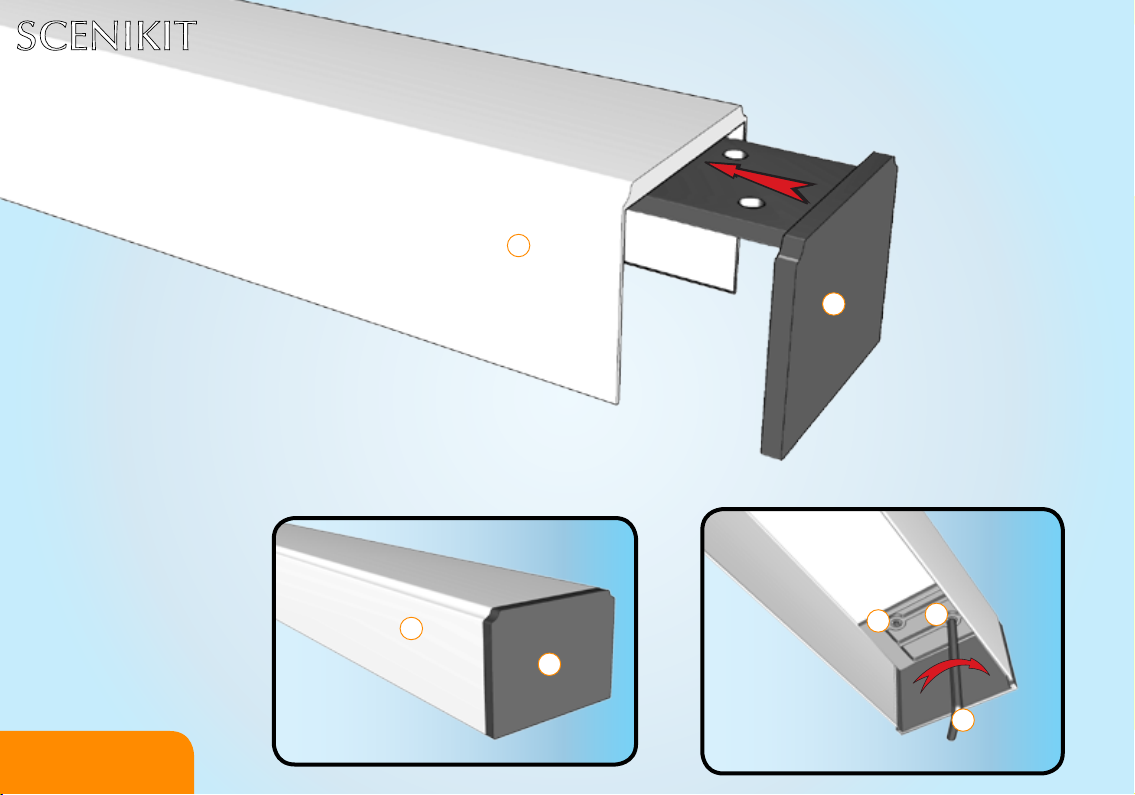
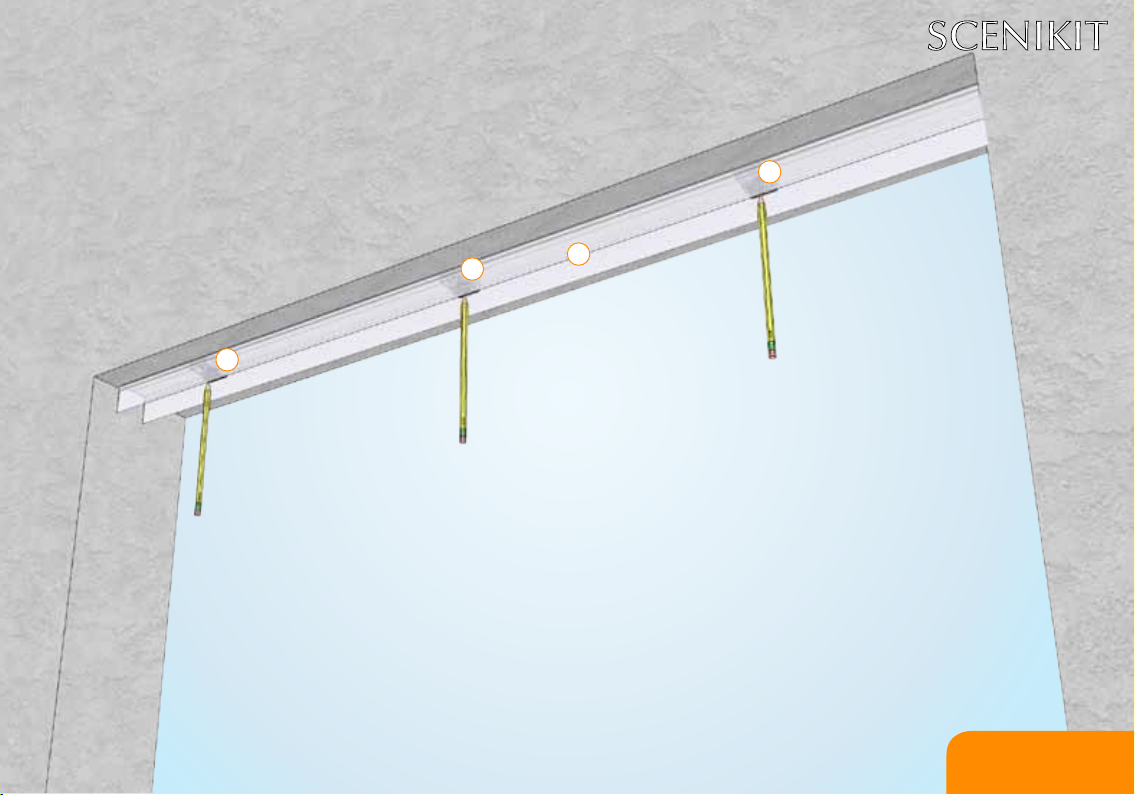
Scenikit® occupa solo due lati del vano e su ciascuno è sufciente uno spazio di 43 mm. per installarla. Se si utilizza la cufa della guida sul lato superiore opposto al cassonetto,
l’ingombro totale è di 46 mm. Permangono tutte le caratteristiche che hanno fatto di Scenica® un prodotto vincente: la possibilità di bloccare il telo in qualsiasi posizione mantenen-
dolo perfettamente teso, le dimensioni elevate dell’anta e soprattutto l’assenza di guide di scorrimento a pavimento e di contro proli laterali di chiusura.
THANK YOU for your choice of SCENIKIT ® and BETTIO.
Encouraged by the enthusistic feed back of our customers for model Scenica®, BETTIO set up SCENIKIT®, a DIY kit version aimed at the serial installation and available in 2
standard sizes: 1500x2500mm and 2000x2500mm. It’s manufactured in 4 colors always stocked and carries a handy anti-wind brush. You can use each DIY kit to manufacture
a single or double door screen. In fact, both available sizes are set to cut lateral sliding screens, single or double leafed. You have only to couple two kits, apart from their size. In
order to install SCENIKIT® you need only two sides of the frame and 43mm of room per each side. If you want to use also the side cap on the upper track (opposite to the box), the
total required room is 46mm. SCENIKIT® keeps all the features that have made of Scenica® a winning item: the chance to stop the screen in any desired position while keeping it
perfectly tense; the big size of a single leaf; and most of all, the total absence of bottom rail and adjusting prole.
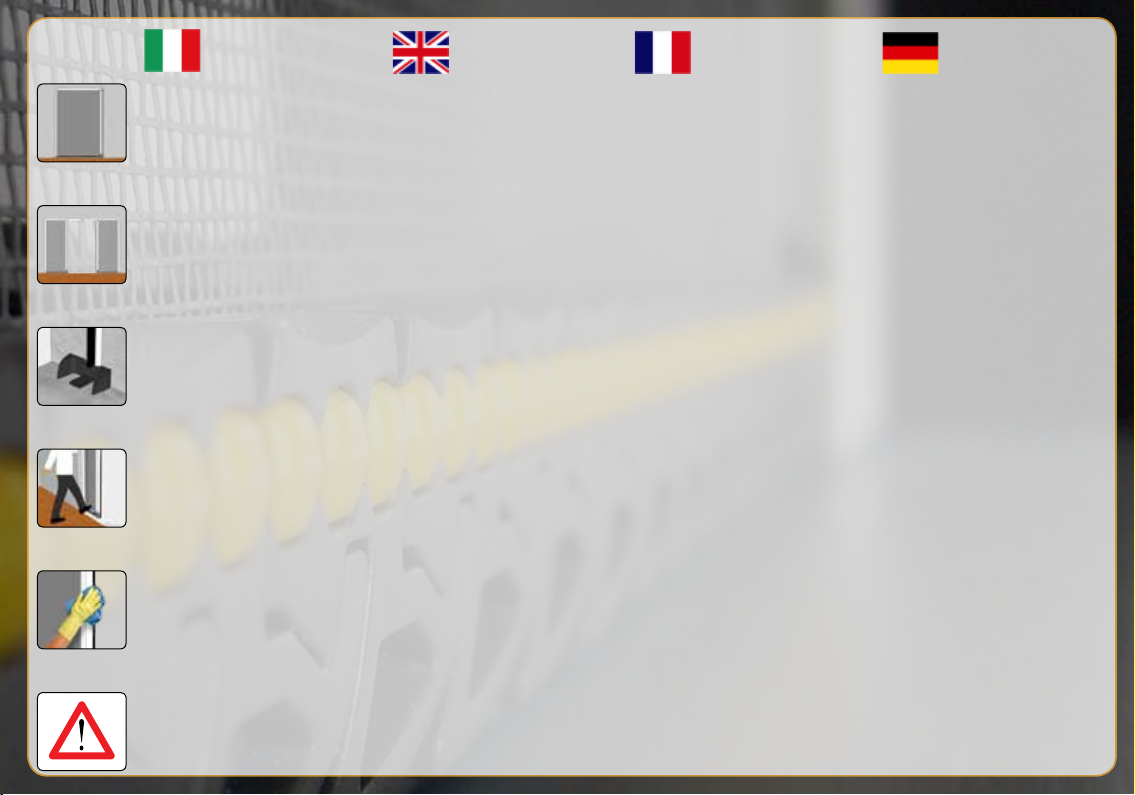
your KIT
ta KIT
Merci pour avoir choisi SCENIKIT ® et BETTIO.
Encouragé par l’enthousiasme de la clientèle pour le modèle Scenica®, Bettio a mis au point Scenikit®, une version confectionnée pour l’assemblage de série. Scenikit® est dis-
ponible dans les mesures standard 1500x2500 mm. et 2000x2500 mm. en 4 couleurs toujours au magasin et est fournie d’une pratique brosse antivent.
Chaque kit peut être utilisé pour la production de moustiquaires à un ou deux battants. Les deux mesures sont en effet prédisposées pour la réalisation de latéraux uniques ou
doubles, simplement en assortissant deux kit de la même mesure ou de mesures différentes. Scenikit® occupe seul deux côtés du vain et sur chaque il est sufsant une place de
43 mm. pour l’installer. Si on utilise la coiffe de la guide sur le côté supérieur opposé au caisson, le totale encombrement est de 46 mm.
Ils restent toutes les caractéristiques qui ont fait de Scenica® un produit gagnant: la possibilité de bloquer la toile en n’importe quel position en la maintenant parfaitement tendue,
les dimensions élevées de la porte et surtout l’absence de guides en bas et de prols latéraux de fermeture.
Danke für Ihre Auswahl von SCENIKIT ® und BETTIO.
Die Begeisterung der Kundschaft für das Modell Scenica® hat Bettio ermutigt SCENIKIT® eine Fertigausführung für die Serienmontage einzustellen. Scenikit ist in Standardmaße
1500x2500 mm. und 2000x2500 mm. in 4 Farben immer im Lager lieferbar und ist schon mit einem praktischen Antiwindbürste hergestellt.
Jedes Rollo kann für die Produktion von Fliegengittern zu 1 oder 2 Flügeln benutzt werden. Die beide Maße werden tatsächlich für die Herstellung von Einzeln- oder Doppeltüre
vorbereitet; ist es möglich zwei gleiche oder verschiedene Maße zusammenzustellen.
Scenikit® nimmt nur zwei Seiten des Raumes ein, und man braucht nur 43mm. auf jeder Seite zum installieren. Wenn man die Führungshaube auf die obere Seite, gegenüber des
Kastens setzt, ist der Raumbedarf 46mm. Dieses sind die Eigenschaften des sieghaften Produkt SCENICA®: Möglichkeit die Bahn in jeder Lager spannt zu
blockieren so wie die Größe des Flügels und vor allem die Abwesenheit von der Führungsschiene am Boden und von den Gegenseitenschlußprolen.
Deine im Bausatz

Scenikit® one leaf
pg. 4-28
Scenikit® two leaves
pg. 29-35
Problems and solutions
pg. 42-51
Maintenance
pg. 52-54
Safety and CE rules
pg. 55-64
Optional installations
pg. 36-41
Scenikit® 1 battant
pg. 4-28
Scenikit® 2 battants
pg. 29-35
Problèmes et solutions
pg. 42-51
Maintenance
pg. 52-54
Sécurité et normes
pg. 55-64
Installation à discrétion
pg. 36-41
Scenikit® 1 Flügel
pg. 4-28
Scenikit® 2 Flügel
pg. 29-35
Probleme und Lösungen
pg. 42-51
Wartung
pg. 52-54
Sicherheit und Vorschriften
pg. 55-64
Wahlfreie Installation
pg. 36-41
INDICE CONTENTS INDEX INDEX
Scenikit® ad 1 battente
pg. 4-28
Scenikit® a 2 battenti
pg. 29-35
Problemi e soluzioni
pg. 42-51
Manutenzione
pg. 52-54
Sicurezza e normative
pg. 55-64
Installazioni opzionali
pg. 36-41

19
26
31
27
10
42
32
33
30 44
14
15
21
17
16
10. Prolo compensatore
14. Piastrina di ssaggio KIT1806/77
15. Compensatori KIT1801/77
16. Cufa per guida KIT1812/77
17. Blocco basso KIT1815/77
19. Tappi coprivite per prolo di riscontro
21. Tappo compensatore KIT1814/77
26. Viti STEI M 5x6 KIT636
27. Viti HILO 4x16 e 4x19,3 KIT1842
30. Chiave esagonale KIT635
31. Viti STEI M 12x12 KIT1748
32. Prolo di riscontro
33. Prolo di scorrimento
42. Zanzariera
44. Chiave Torx T15
10. Adjuster prole
14. Fixing plate KIT1806/77
15. Adjusters KIT1801/77
16. End cap KIT1812/77
17. Lower block KIT1815/77
19. Hole caps for side prole
21. Adjuster end cap KIT1814/77
26. STEI M 5x6 screws KIT636
27. HILO 4x16 and 4x19,3
screws KIT1842
30. Allen wrench KIT635
31. STEI M 12x12 screws KIT1748
32. Side prole
33. Sliding prole
42. Flyscreen
44. Torx T15 key
10. Ausgleichsprol
14. Befestigungsplatte KIT1806/77
15. Ausgleicher KIT1801/77
16. Haube KIT1812/77
17. Untere Sperre KIT1815/77
19. Bohrungsabdeckstöpsel für Seitlichprol
21. Ausgleichsstöpsel KIT1814/77
26. Gewindestift 5x6 KIT636
27. HILO Schraube 4x16 und 4x19,3
KIT1842
30. Sechskantschlüssel KIT635
31. Gewindestift 12x12 KIT1748
32. Seitlichprol
33. Laufprol
42. Insektenschutz
44. Torx 15 Schlüssel
10. Prol adaptateur
14. Plaque de xage KIT1806/77
15. Régulateurs KIT1801/77
16. Coiffe KIT1812/77
17. Blocage inférieur KIT1815/77
19. Bouchon couvre-trou pour prol latéral
21. Bouchon compensateur KIT1814/77
26. Vis sans tête 5x6 KIT636
27. Vis HILO 4x16 et 4x19,3 KIT1842
30. Clé hexagonale KIT635
31. Vis sans tête 12x12 KIT1748
32. Prol latéral
33. Prol de coulissement
42. Moustiquaire
44. Clé Torx T15
®

15
31
15
10
Towards
box side
Verso il lato
cassonetto
Richtung
Kastenseite
Vers le caisson
5
Installazione 1 battente
1 leaf installation
Installation 1 battant
1 Flügel Installation
®

10
Lean against the box side.
Appoggiare sul lato di montaggio del cassonetto.
Lehnen an die Kastenmontageseite.
Appuyer à la côte de montage du caisson.
6
Installazione 1 battente
1 leaf installation
Installation 1 battant
1 Flügel Installation
®

If you can’t lean the proles against
the wall, please use the adjuster caps
In assenza di appoggio alla parete
utilizzare il tappo compensatore
Falls kein Stützpunkt an der Wand ist,
benutzen Sie den Abdeckstöpsel
Sans appui au mur utiliser le bouchon
adaptateur
10
7
Installazione 1 battente
1 leaf installation
Installation 1 battant
1 Flügel Installation
®

21
10
30
26 26
21
10
8
Installazione 1 battente
1 leaf installation
Installation 1 battant
1 Flügel Installation
®

15
15
15
10
9
Installazione 1 battente
1 leaf installation
Installation 1 battant
1 Flügel Installation
®

10
Installazione 1 battente
1 leaf installation
Installation 1 battant
1 Flügel Installation
®

14
11
Installazione 1 battente
1 leaf installation
Installation 1 battant
1 Flügel Installation
®

14
12
Installazione 1 battente
1 leaf installation
Installation 1 battant
1 Flügel Installation
®

22
23
Please, retain pcs. n.22 and 23 in case you have
to package again the product.
Conservare i pezzi n. 22 e 23 in caso il prodotto
debba essere imballato nuovamente.
Behalten die Stücke nr.22 und nr.23, wenn der
Produkt ein anderes Mal verpacken werden wird.
Conserver les pièces nr.22 et nr.23, si le produit
doit être emballer une autre fois.
13
Installazione 1 battente
1 leaf installation
Installation 1 battant
1 Flügel Installation
®

STOP!
Inserire la guida facendo
passare la ruota nera
nell’apposita sede.
Insert the guide by making
the black wheel pass inside
its own housing.
Einfügen die Führungss-
chiene durch den Eintritt
des Rads in ihrer Stelle.
Insérer le guide en faisant
passer la roue noire dans
la siège correspondante.
14
Installazione 1 battente
1 leaf installation
Installation 1 battant
1 Flügel Installation
®

Assicurarsi che il cordino
superiore sia libero di
muoversi.
Make sure that the upper
cord is free to move.
Versichern sich, daß die
obere Kordel frei zu bewe-
gen ist.
S’assurer que la corde
supérieure est libre de
glisser.
15
Installazione 1 battente
1 leaf installation
Installation 1 battant
1 Flügel Installation
®

Assicurarsi che il cordi-
no grosso sia inserito
correttamente nella gola
della puleggia.
Make sure that the thick
cord is in the groove of
the pulley.
Versichern sich, daß die
große Kordel richtig in
der Scheibennut einge-
fügt ist.
S’assurer que la corde
grosse est insérée cor-
rectement dans le col de
la poulie.
16
Installazione 1 battente
1 leaf installation
Installation 1 battant
1 Flügel Installation
®

44
17
Installazione 1 battente
1 leaf installation
Installation 1 battant
1 Flügel Installation
®

min
5cm
Lasciare almeno 5 cm di cordino in
eccesso per eventuali regolazioni.
Please, leave at least 5cm of exceeding
wire for eventual, further regulations
Falls eventuelle Regulierungen lassen
wenigstens 5cm der Kordel im Überschuss.
Laisser au moins 5 cm de corde en plus
pour réglages éventuels.
18
Installazione 1 battente
1 leaf installation
Installation 1 battant
1 Flügel Installation
®

ok!
NO
Accompagnare sem-
pre la guida durante
l’installazione!
Caution: hold the rail
during the installation!
Führen immer die Füh-
rungsschiene während
der Installation!
Accompagner la guide
pendant l’installation!
19
Installazione 1 battente
1 leaf installation
Installation 1 battant
1 Flügel Installation
®

14
10
42
2
1
20
Installazione 1 battente
1 leaf installation
Installation 1 battant
1 Flügel Installation
®
Table of contents
Other Bettio Indoor Furnishing manuals
Popular Indoor Furnishing manuals by other brands

West Elm
West Elm jay desk Assembly instructions

mlmeble
mlmeble ADAGIO 04 Assembling Instruction

Polywood
Polywood Plaza 1100 Assembly instructions

QU-AX
QU-AX Yume 76 16 NM04 Series Assembly instructions

Jason.L
Jason.L Quadro Wood A leg Counter table Radius... Assembly instructions

HAMPTON BAY
HAMPTON BAY Crestridge Padded Sling Lounge Chair Conley Denim 2-Pack... Use and care guide

Herman Miller
Herman Miller Renew Installation

HOMEDEPOT
HOMEDEPOT BURK BED Assembly instructions

Happy Beds
Happy Beds homely Malmo Recliner and Stool Assembly instructions

Lovencare
Lovencare Charnwood AU-LUCCA LUC2125 instructions

Fromm&Starck
Fromm&Starck STAR PS 01 user manual

Omnimount
Omnimount MWFS instruction manual