7
•
Um das
Nachttischlicht
einzuschalten, kurz die Sen-
sorfläche (Lautsprecherfläche auf der Oberseite des
Geräts) antippen.
•
Um die Helligkeitsstufe des Lichts zu verstellen, erneut
die Sensorfläche (Lautsprecherfläche auf der Oberseite
des Geräts) antippen.
•
Um das
Nachttischlicht wieder auszuschalten,
die Sen-
sorfläche (Lautsprecherfläche auf der Oberseite des
Geräts) lange drücken (ca. 2 Sekunden).
7.5 Stimmungslicht
Sie können den Lichtwecker auch als Stimmungslicht
verwenden. Das Stimmungslicht gibt es in folgenden
Farbtönen:
Weiß (3 Helligkeitsstufen) -> Gelb -> Blau -> Grün -> Rot ->
Stimmungslicht mit Farbwechsel -> Aus
1.
Um das Stimmungslicht am Lichtwecker einzuschal-
ten, kurz die Sensorfläche (Lautsprecherfläche auf der
Oberseite des Geräts) antippen.
2.
Um zwischen den verschiedenen Stimmungslichtern zu
wechseln, erneut die Sensorfläche (Lautsprecherfläche
auf der Oberseite des Geräts) antippen.
3.
Um das
Stimmungslicht wieder auszuschalten,
die Sen-
sorfläche (Lautsprecherfläche auf der Oberseite des
Geräts) lange drücken (ca. 2 Sekunden).
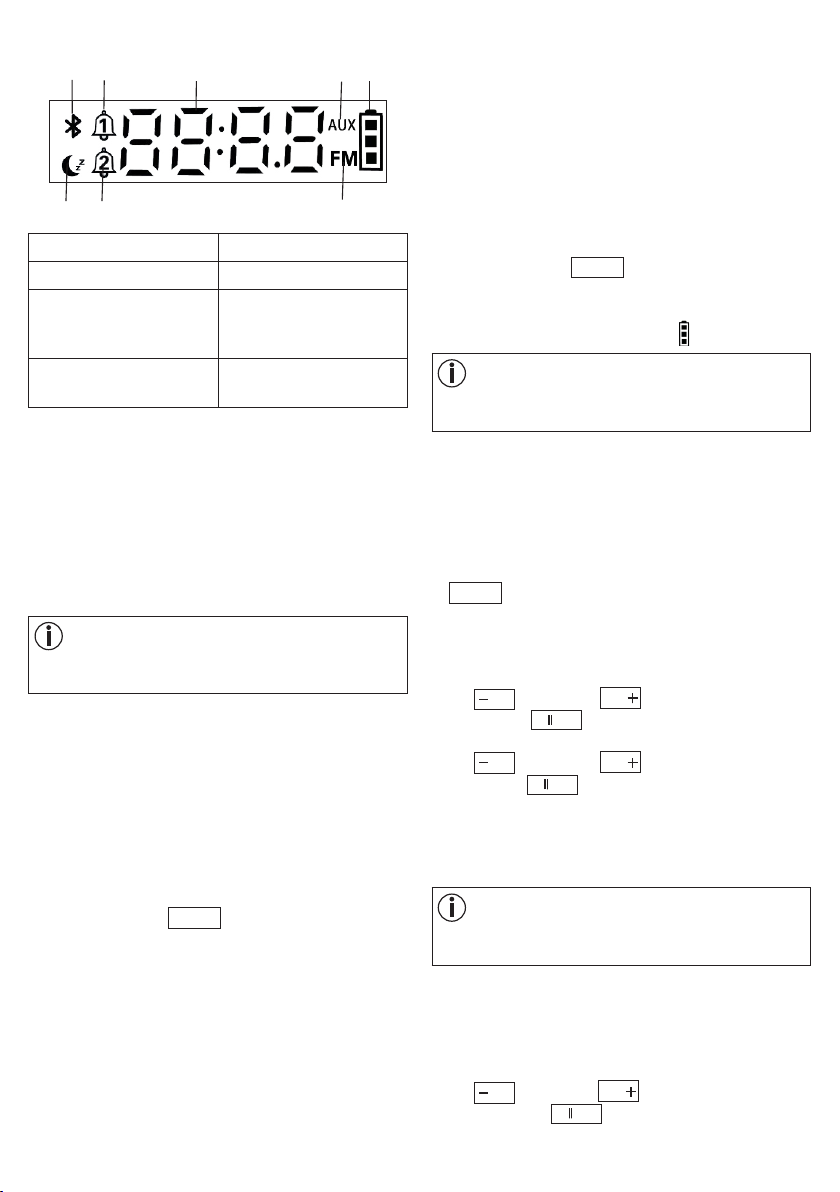
7.6 Radio
Das Gerät besitzt max. 30 Speicherplätze für Radiosen-
der.
1.
Um das Radio einzuschalten, Mode-Taste 2x drücken.
Im Display erscheint die aktuelle Radiofrequenz.
2.
Um automatischen Sendersuchlauf zu startenoder
stoppen,
OK
▲
-Taste drücken. Gefundene Sender
werden automatisch gespeichert.
3. Um zwischen den einzelnen gespeicherten Sendern zu
wechseln,
▲
▲
-Taste bzw.
▲
▲
-Taste kurz drücken.
4.
Um die Lautstärke einzustellen,
▲
▲
-Taste bzw.
▲
▲
-Taste lange gedrückt halten.
5. Um das Radio auszuschalten,
Mode-Taste so oft drü-
cken, bis im Display die Uhrzeit erscheint.
Hinweis
Um den Empfang zu verbessern, stecken Sie das
AUX-Kabel in den AUX-Anschluss auf der Geräte-
rückseite. Das AUX-Kabel fungiert als Antenne.
7.7 Displayhelligkeit einstellen
Das Gerät besitzt drei Displayhelligkeits-Stufen.
•
Um die Displayhelligkeit zu verstellen, Display-Taste
drücken.
100% -> 50% -> Display aus
7.8 Bluetooth®aktivieren/deaktiveren
Um eigene Musik über Bluetooth
®
am Lichtwecker ab-
zuspielen, müssen Sie zunächst Bluetooth
®
aktivieren.
Um Bluetooth®am Lichtwecker zu aktivieren, gehen Sie
wie folgt vor:
1. Mode-Taste drücken.
Im Display erscheint BLUE und beginnt zu blinken.
2. Der Lichtwecker kann nun über Bluetooth® mit ande-
ren Geräten (z.B. Smartphone) verbunden werden.
Sobald ein Gerät über Bluetooth® mit dem Lichtwe-
cker verbunden ist, ertönt am Lichtwecker ein Signal-
ton und das Bluetooth® -Symbol beginnt zu leuch-
ten. Wenn die Bluetooth® -Verbindung unterbunden
wird, ertönt erneut ein Signalton am Lichtwecker und
das Bluetooth® -Symbol erlischt.
3. Um Bluetooth®am Lichtwecker zu deaktivieren, Mo-
de-Taste so oft drücken, bis im Display die Uhrzeit
erscheint. Das Bluetooth® -Symbol erlischt.
4. Um am Lichtwecker zwischen den einzelnen Liedern
des gekoppelten Geräts zu wechseln,
▲
▲
-Taste
bzw.
▲
▲
-Taste kurz drücken.
5.
Um die Lautstärke am Lichtwecker einzustellen,
▲
▲
-Taste bzw.
▲
▲
-Taste lange gedrückt halten.
6.
Um den Bluetooth
®
-Modus wieder zu verlassen,
Mode-Taste drücken.
7.9 AUX-Anschluss
Sie können eine externe Audioquelle (z.B. MP3-Player,
Smartphone oder CD-Player) über den AUX-Eingang mit
dem Lichtwecker verbinden.
1.
Mitgelieferte AUX-Kabel an Audioquelle (z.B Smart-
phone) anschließen.
2.
Anderes Ende des AUX-Kabels in den AUX-Eingang auf
der Rückseite des Lichtweckers stecken.
3.
Dreimal Mode-Taste drücken. Im Display erscheint
AUX. Externe Audioquelle ist nun mit Lichtwecker ver-
bunden.
4.
Liedereinstellungen sind nur am gekoppelten Gerät
möglich, nicht am Lichtwecker selbst. Lautstärkeein-
stellung ist auch am Lichtwecker möglich.
5.
Um den AUX-Modus wieder zu verlassen, Mode-Taste
drücken.
7.10 Lichtwecker ausschalten
Hinweis
Wenn Sie den Lichtwecker ausschalten, gehen alle ge-
speicherten Daten verloren.
•
Um den Lichtwecker auszuschalten, schieben Sie auf
der Rückseite den
On |O
-Schalter in Richtung „O“.