Beyerdynamic WA-CDb User manual

WA-CD
LADEGERÄT
CHARGER
CHARGEUR
Bedienungsanleitung
Operating Instructions
Mode d’emploi

WA-CD – Charging Unit 9
english
Contents
1. Safety information. . . . . . . . . . . . . . . . . . . . . . . . . . . . . . . . . . . . . . . . . . . 10
2. Disposal . . . . . . . . . . . . . . . . . . . . . . . . . . . . . . . . . . . . . . . . . . . . . . . . . . 10
3. Functions . . . . . . . . . . . . . . . . . . . . . . . . . . . . . . . . . . . . . . . . . . . . . . . . . 11
4. Application . . . . . . . . . . . . . . . . . . . . . . . . . . . . . . . . . . . . . . . . . . . . . . . . 11
5. Controls and indicators . . . . . . . . . . . . . . . . . . . . . . . . . . . . . . . . . . . . . . . 11
6. Power connection . . . . . . . . . . . . . . . . . . . . . . . . . . . . . . . . . . . . . . . . . . . 12
7. How to charge the transmitter. . . . . . . . . . . . . . . . . . . . . . . . . . . . . . . . . . . 12
8. Charging indicators . . . . . . . . . . . . . . . . . . . . . . . . . . . . . . . . . . . . . . . . . . 13
9. Network connection / reset IP address . . . . . . . . . . . . . . . . . . . . . . . . . . . . . 13
10. Firmware update . . . . . . . . . . . . . . . . . . . . . . . . . . . . . . . . . . . . . . . . . . . . 13
11. Maintenance. . . . . . . . . . . . . . . . . . . . . . . . . . . . . . . . . . . . . . . . . . . . . . . 13
12. Service. . . . . . . . . . . . . . . . . . . . . . . . . . . . . . . . . . . . . . . . . . . . . . . . . . . 13
13. Technical specifications . . . . . . . . . . . . . . . . . . . . . . . . . . . . . . . . . . . . . . . 13

WA-CD – Charging Unit 10
Thank you for selecting the WA-CD charger from beyerdynamic. Please take some time to read through this manual
carefully before using this product.
1. Safety information
General
• READ these instructions.
• KEEP these instructions.
• HEED all warnings and follow all instructions.
Exemption from liability
• beyerdynamic GmbH & Co. KG will not be liable if any damage, injury or accident occurs due to negligent,
incorrect or inappropriate operation of the product.
Humidity / heat sources
• Never expose the equipment to rain or a high level of humidity. For this reason do not install it in the immediate
vicinity of swimming pools, showers, damp basement rooms or other areas with unusually high atmospheric
humidity.
• Never place objects containing liquid (e.g. vases or drinking glasses) on the equipment. Liquids in the equipment
could cause a short circuit.
• Do not install near any heat sources such as radiators, heat registers, stoves or other apparatus (including
amplifiers) that produce heat.
Connection
• Protect the power cord from being walked on or pinched particularly at plugs, convenience receptacles, and the
point where they exit from the apparatus.
• Unplug the device during lightning storms or when unused for long periods of time.
• Only use attachments/accessories specified by the manufacturer.
• Do not use the equipment if the power cable is damaged.
Charging
•Never charge the handheld and beltpack transmitter with a normal battery! Damages caused by charging a
transmitter with normal batteries will invalidate the guarantee.
• A completely new rechargeable battery must be charged several times to achieve its full capacity.
• Rechargeable batteries loose 20% of their capacity within one month. If the transmitter is not used for some time,
recharging the battery is recommended.
• Avoid recharging the batteries inside the transmitters several times in a quick succession. This could create an
error while charging or damage the rechargeable battery.
• Do not throw used batteries into the domestic rubbish, but hand them in to local collection points.
• High ambient temperatures during charging (> +40 °C) affect the efficiency of the charging process and the
battery lifetime.
Maintenance
• Only clean the equipment with a dry cloth.
Trouble shooting and servicing
• Do not open the equipment without authorisation. You could receive an electric shock. No user serviceable parts
inside.
• Refer all servicing to qualified service personnel.
2. Disposal
• This symbol on the product, in the instructions or on the packaging means that your electrical and
electronic equipment should be disposed at the end of its life separately from your household waste.
There are separate collection systems for recycling in the EU. For more information, please contact
the local authority or your retailer where you purchased the product.

WA-CD – Charging Unit 11
english
3. Functions
• Separate charging of each rechargable transmitter.
• Transmitters with a NiMH battery as well as 2 x2 NiMH batteries in the beltpack transmitter compartments can
be recharged.
• The charging status before start of charging is irrelevant. The batteries , however, that are charged in the same
charging compartment should have the same capacity and the same charging state, because otherwise the battery
that is higher discharged will not be recharged completely which can result in a deep discharge of the battery when
the transmitter is in use again.
• A microcontroller monitors the battery voltage during the complete charging time.
• Significance levels are integrated such as dU-recognition and safety timer.
• Charging time depending on capacity: 2 to 3 hours.
• Status lights with each charging compartement display the appropriate charging state.
4. Application
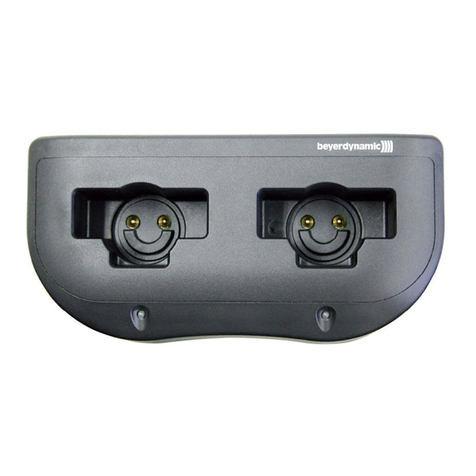
The WA-CD charger provides four charging compartments for charging the rechargeable batteries inside the TG 1000
Beltpack, TG 1000 Handheld and Quinta TH transmitters. The rechargeable batteries remain inside the transmitters
while charging. Furthermore the charging compartments for the beltpack transmitter provide options for charging
2 x2 NiMH batteries.
Note: NiMH batteries require approx. 3 to 8 charging/discharging cycles until they reach their maximum capacity.
5. Controls and indicators
Charging compartment for handheld transmitter
Charging light
Combined charging compartment for beltpack transmitter and individual NiMH batteries
Charging light
DC power connection
Ethernet connection for the communication with media control systems (TCP-IP based protocol)
IP reset button (reset of the standard IP address)
Top view Rear view

WA-CD – Charging Unit 12
6. Power connection
• Mount the appropriate power plug to the power adaptor.
• Connect the power adaptor to the charger and to the mains.
• The charger provides no separate on/off switch and will start up automatically.
• The charging lights of the battery compartments will illuminate white to indicate the ready operating status of
the device.
7. How to charge the transmitter
• Put the handheld or beltpack transmitter or the NiMH batteries in the charging compartments as indicated in the
drawing. If the transmitter is turned on, it will be turned off automatically.
Make sure to insert the NiMH batteries into the charging compartments as indicated by the +/- marks.
Important: Before charging please make sure that there are not non-rechargeable alkaline batteries in the
transmitter. The simultaneous of different batteries (alkaline and NiMH) in one transmitter is not suitable for
operating the transmitter, furthermore these transmitters should not be charged, because transmitter and charger
could be damaged. In this case the guarantee will be invalidated.
• Before charging the device performs a so-called cell type detection. Even after the start of charging another
security mechanism checks the first minute of charging, if the transmitter is equipped with rechargeable batteries.
If there are no rechargeable batteries inside the transmitter, the charging process is not started or interrupted and
the error is displayed by flashing red.
Handheld transmitter
(with NiMH batteries)
NiMH batteries
Beltpack transmitter
(with NiMH batteries)
WA-CD charger
Note: In the picture you can see the Quinta TH handheld transmitter and the TG 1000 Beltpack transmitter.
Instead of the Quinta TH you can also recharge the TG 1000 handheld transmitter.

WA-CD – Charging Unit 13
english
8. Charging indicators
Each charging compartment is controlled separately. The appropriate indicators display the charging process.
Indicator illuminates white . . . . . . . . . . The charging compartment is ready for operation. Insert the transmitter.
Indicator illuminates red . . . . . . . . . . . . The battery cells are checked.
Indicator is flashing green . . . . . . . . . . . The batteries are being charged.
Indicator illuminates green . . . . . . . . . . The batteries are fully charged.
Indicator is flashing red . . . . . . . . . . . . Error. The charging process is not started or interrupted.
All indicators are flashing rapidly red . . . Severe error. Do not use the charger!
Note:
• If an indicator is flashing red, remove the appropriate transmitter from the charging compartment and check, if
there are alkaline batteries inside the transmitter or if the NiMH have been inserted incorrectly. Should the
flashing persist even when using NiMH batteries, please check if the batteries are already fully charged. If not,
the batteries are defective and must be replaced.
• Should all the indicators flash rapidly red, no matter if there are transmitters in the charging compartments or
not, there is a severe error. Disconnect the charger from the mains and check if there is a metallic object in the
charging compartment. If yes, remove the object and connect the charger to the mains again. Should the
indicators still flash rapidly, there is a defect, which the user cannot fix. In this case, please contact an authorised
beyerdynamic dealer.
9. Network connection / reset IP address
• If required, connect the Ethernet port to a media control system.
• The default IP address is: 192.168.0.100
• The IP address can be adapted to the existing network with appropriate commands.
• If necessary, you can reset the IP address to the default address again by using the IP reset button.
• You will find detailed information on the reset of the IP address in the separate manual about the communication
with media control system (remote communication). Refer also to: www.beyerdynamic.com
10. Firmware update
• The Ethernet port is also used for a firmware update of the WA-CD charger. You will find all the information you need
at: www.beyerdynamic.com
11. Maintenance
• For cleaning use a dry cloth only.
• In order to ensure a proper function of the charger, keep the charging contact clean. Use a lint-free soft cloth
moistened with alcohol or spirits to clean the charging contacts from time to time.
12. Service
Servicing must be carried out by qualified service personnel only. Dismantling the charger yourself will invalidate the
guarantee.
13. Technical specifications
WA-CD charger
Charging current . . . . . . . . . . . . . . max. 1240 mA
Time of charge. . . . . . . . . . . . . . . . 2 to 3 hrs. (depending on the charging state of the battery)
Dimensions (W x D x H) . . . . . . . . . approx. 175 x 139 x 70 mm
Weight (without power adaptor) . . . . approx. 1125 g
Ambient temperature . . . . . . . . . . . 0 to +40 °C
CA2458 power adaptor
Output voltage. . . . . . . . . . . . . . . . 15 V DC
Current . . . . . . . . . . . . . . . . . . . . . 1600 mA
Input voltage. . . . . . . . . . . . . . . . . 100 - 240 V AC 50 / 60 Hz


DEF 1/BA WA.CD (04.15)/651.613 • Abbildungen nicht vertragsbindend. Änderungen und Irrtümer vorbehalten • Non-contractual illustrations. Subject to change without notice. •
Illustrations non contractuelles.
Sous réserve de modifications.
beyerdynamic GmbH & Co. KG
Theresienstr. 8 | 74072 Heilbronn – Germany
Tel. +49 (0) 7131 / 617 - 0 | Fax +49 (0) 7131 / 617 - 204
Weitere Vertriebspartner weltweit finden Sie unter www.beyerdynamic.com
For further distributors worldwide, please go to www.beyerdynamic.com
Table of contents
Other Beyerdynamic Batteries Charger manuals

Beyerdynamic
Beyerdynamic UNITE CC Series User manual
Beyerdynamic
Beyerdynamic LG 30 User manual
Beyerdynamic
Beyerdynamic SLG 300 H User manual
Beyerdynamic
Beyerdynamic Unite CC-24P User manual

Beyerdynamic
Beyerdynamic UNITE CDD-8/4 User manual
Beyerdynamic
Beyerdynamic Synexis SG 24 Configuration guide
Beyerdynamic
Beyerdynamic Synexis C30 User manual
Beyerdynamic
Beyerdynamic SLG 900 User manual

