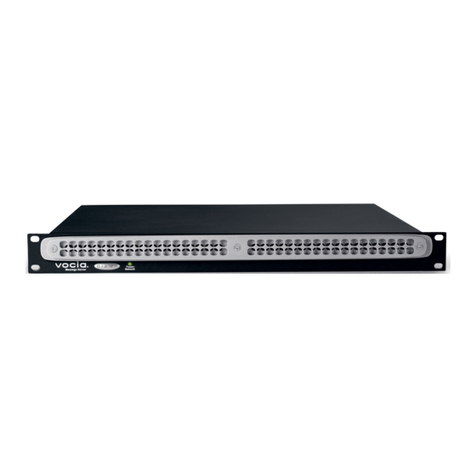
Biamp TesiraFORTE User manual

BIAMP SYSTEMS 9300 SW GEMINI DRIVE, BEAVERTON, OREGON 97008 U.S.A. 503.641.7287 BIAMP.COM
TesiraFORTÉ®
!
OPERATION MANUAL
585-0393-90C
January 2016


TesiraFORTÉ FIXED I/O SERVER DEVICES PRODUCT DESCRIPTION
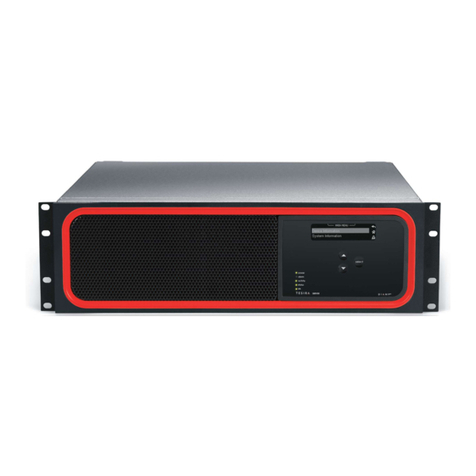
The TesiraFORTÉ products are server-class devices that are designed to operate as standalone processing devices, with
Tesira expanders and controllers, or as part of a full set of Tesira devices. All TesiraFORTÉ models feature 12 analog
mic/line level inputs and 8 analog mic/line level outputs in a fixed configuration. All models also include configurable USB
audio, 4 GPIO connections, RS-232 serial port, Ethernet control port and an internal power supply with a standard IEC
three-conductor removable power cord. The front panel of each TesiraFORTÉ server features an OLED display for
system and unit information including the device IP address. The display is navigated with capacitive touch buttons.
The TesiraFORTÉ line is separated into AVB-equipped and non-AVB equipped devices. The four models with AVB (Audio
Video Bridging) have an RJ-45 Ethernet AVB connector for connecting with other Tesira audio devices through the use of
AVB switches. The TesiraFORTÉ servers have a capacity of 128 channels of audio in and 128 channels of audio out over
AVB. The non-AVB TesiraFORTÉ servers have the same features and processing functionality as the AVB-equipped
servers, but without the ability to make a digital audio connection to other Tesira audio devices.
Описание продукт
TesiraFORTÉ AI/CI/TI/VI — это DSP-аудиоплатформа класса серверов с12 аналоговыми входами и8 аналоговыми
выходами, которая имеет до 8 настраиваемых каналов для передачи звука по USB. Вмодель TesiraFORTÉ AVB
AI/CI/ TI/VI добавлена функция передачи цифрового звука по сети сиспользованием стандарта Audio Video
Bridging (AVB). Модель споддержкой AVB может использоваться как отдельное устройство или всочетании с
другими устройствами TesiraFORTÉ, атакже серверами, блоками расширения ипанелями управления Tesira.

TesiraFORTÉ FIXED I/O SERVER DEVICES FRONT PANEL
TesiraFORTÉ AVB AI model shown
1 – Ventilation fan cover
2 – Display navigation buttons
3 – LED status indicators
4 – OLED display
Ventilation fan cover
Each device has a perforated cover to allow cool air into the chassis. A variable speed temperature controlled fan allows
air into the front of the unit and out of the rear left side. Ensure that nothing obstructs the front or side of the unit.
Display Navigation Buttons
Capacitive-touch buttons allow navigation through the OLED display menu to view and configure device and networking
information, as well as see system-wide faults. Navigating the display is accomplished by touch-sensitive UP and DOWN
and SELECT buttons.
LED Status Indicators
Five multi-color LEDs on the front panel of the device provide information about the status of the device and the greater
Tesira system.
•Power – Reports power of the host device and Front Panel Display.
•Alarm – Reports abnormal conditions local to the host device.
•Activity – Reports the activity of host device within the greater system.
•Status – Reports the status of host device.
•AIS (Alarm in System) – Reports abnormal conditions within the greater system.
!
!
1
2
3
4

TesiraFORTÉ FIXED I/O SERVER DEVICES FRONT PANEL
LED
Off
Green
Yellow
Red
Power
Unit is not powered
Unit is powered
Not applicable
Not applicable
Alarm
No fault is active in the
device
Not applicable
Minor fault is active in
the device
Major fault is active
in the device
Activity
Not applicable
The host device is an
active part of an active
system
Not applicable
The host device is part
of an inactive system
(Audio is stopped) or
host device is not part
of a system
Status
Not applicable
Device has received its
configuration and is ready
to participate in the system
Device is ready and
waiting to receive a
configuration
Device is not ready to
receive its configuration
AIS
(Alarm In System)
No fault is active in any
device in the system
Not applicable
Minor fault is active in
a device in the system
Major fault is active in
a device in the system
OLED Display
The OLED display provides information about the server device as well as the Tesira system that is connected to the
server. The OLED display is read-only.
Home Screen
The home screen is the default screen that shows the overview of the device. If the text is too long to fit on the entire
display, it will scroll to the left. Menus at the bottom allow other selections. By default the main menu icon will be selected.
Some menu icons double as status indicators. They change depending on the status of the device. The fault status icon
only appears if there is an active fault in the system.
After a period of inactivity, the Front Panel Display will transition back to this home screen.
1. Device description
2. Host Name and IP address
3. Main Menu
4. Network Menu / Status
To open any of the menus, use the UP and DOWN buttons to highlight the menu icon desired, and press the SELECT
button.
Menu Screen
A menu screen containing a list of items that is used to navigate to other menus is accessible from the home screen. On
the right are icons that provide quick navigation to other screens. Pressing the select button on an item will transition to
the screen that displays that information. A scroll indicator at the left shows if there is more information to show by
scrolling down.
Device Information
The device information screen shows the following information:
•Device description
•Host name
•Serial number
•Firmware revision

TesiraFORTÉ FIXED I/O SERVER DEVICES FRONT PANEL
System Information
The system information screen shows the following information:
•Device audio state (on/off)
•System description
Network Parameters
The network parameters screen shows the following information
•Host name
•IP address
•Subnet mask
•Gateway
Display Settings
The display settings operations include the following:
•Change brightness and contrast
•Change timeouts
Faults
If a fault is present in the system an exclamation icon is shown on the lower right of the screen. Each unique fault in the
system will be listed.
Edit Timeouts
Dim Mode
The display has a screensaver mode where it will dim the display brightness. Pressing any button will bring the screen
back to the original brightness and respond to the control movement.
Sleep Mode
After the display timeout is reached the display will go blank. The device will still have power in this state even though the
display appears blank.
Localization
All menus and error messages are displayed in English by default. Descriptive icons are used to avoid the need for
messages in specific languages. Text entered (e.g. Device Description) will be displayed in the language as entered in the
software.
The following alphabets are supported:
•Latin-1 (ISO/IEC 8859-1) and Latin-2 (ISO/IEC 8859-2)
•Cyrillic (Russian alphabet only)
•Simplified Chinese
•Japanese – Hiragana, Katakana, Kanji
•Thai

TesiraFORTÉ FIXED I/O SERVER DEVICES REAR PANEL
!
TesiraFORTÉ AVB TI model shown
!
1. AC power inlet
6. GPIO connections
2. Gigabit Ethernet control port (RJ-45)
7. Mic/line level output balanced analog
connections
3. AVB port (RJ-45) – AVB models only
8. Mic/line level input balanced analog
connections.
AVB AI and AI – Mic/Line
AVB CI, TI, VI and CI, TI, VI – Mic/Line with
Sona AEC
4. RS-232 serial port
9. Telephony port
AVB AI, CI and AI, CI – Not available
AVB TI and TI – 1 analog telephone line
(RJ-11) AVB VI and VI – 2 VoIP telephone
lines (RJ-45)
5. USB-B port
!
AC Power Inlet
IEC connector which will accept AC mains voltage of 100-240VAC @50/60Hz.
Gigabit Ethernet Port
Used to configure the TesiraFORTÉ unit with Tesira and BiampCanvas™ software. Can also be used to receive third-
party commands over IP.
AVB Port (AVB models only)
Can send and receive up to 128x128 audio channels to other Tesira audio devices.
RS-232 port
Can be used to receive third party controls or output command strings.
USB- B port
Can be used to connect to a PC or a computer that is USB Audio Class 1 compliant. Three connection methods are
supported:
1. Connection to a software based codec where the Tesira device does make use of AEC such as the TesiraFORTÉ
CI, TI and VI.
2. Connection to a software based codec which does not use Tesira AEC functions – such as a TesiraFORTÉ AI.
3. Line In/Out mode – where the channels of Line In and Line Out are installed in Microsoft Windows® but do not
show up by default.
!

TesiraFORTÉ FIXED I/O SERVER DEVICES QUICK START
Before getting started please
1. Install Tesira software on a Windows PC.
•The software must be Tesira version 2.0 or later.
•The most up to date version can be downloaded from the Biamp website here:
http://www.biamp.com/products/tesira/downloads.aspx.
2. Minimum PC requirements:
•Windows®7 SP1 32-bit or 64-bit, Windows 8 32-bit or 64-bit
•1280 x 1024 screen resolution (recommended)
•1 GB RAM
•Intel®Pentium 4 Processor 2.4 GHz or faster
3. Cables required:
•Connection to the device should be made using either a direct connection or connection via an Ethernet
switch.
•Direct Connection - 1x Cat5E cable to connect from the PC to the TesiraFORTÉ Control Port
•Via a Switch - 2x Cat5E cables and 1 Ethernet switch
Connecting to the TesiraFORTÉ system
1. Connect the PC and TesiraFORTÉ to the network.
•Connect a Cat5E cable between your PC and the TesiraFORTÉ device.
•Direct connection: Attach an Ethernet cable from the PC’s network card to the TesiraFORTÉ Ethernet port.
The TesiraFORTÉ Ethernet port is autosensing so a straight or crossover cable can be used.
•Connecting via Ethernet switch: Attach an Ethernet cable from the network card to a 100/1000 Base-T
Ethernet switch.
•The TesiraFORTÉ Ethernet port is autosensing so a straight or crossover cable can be used.
2. Power up TesiraFORTÉ devices:
•Connect the supplied power cord to a grounded AC mains voltage of 100-240VAC @50/60Hz. Connect the
other end of the power cord to the power entrance located on the rear of the TesiraFORTÉ unit. Power,
Activity, and Status LEDs on the front panel should illuminate.
3. Assign an IP address to the PC.
•The PC must have a unique IP address in the same subnet as the TesiraFORTÉ device. A TesiraFORTÉ
device is configured from the factory with DHCP or Zero Conf (Link Local) address. If you wish to verify your
PC network interface is set correctly, please review the Setting an IP address section.
4. Configure the software to use the correct Network Interface.
•Tesira software should automatically discover the available network interfaces and enable them. If you wish to
verify the network interfaces you are using, open the Tesira software and select Tools > Options >
Application settings > Network > Device Discovery.
•Selecting Interfaces will list the available connections. These can be enabled or disabled individually. Confirm
the expected Network interface is selected and IP addressing is in the correct range.
5. Connect to the network with Tesira software.
•Open the Tesira software. Connect to the network by going to System > Network > Connect to System.
The System Connect dialog will appear. Select the required device listed in the System List and press
Connect to System (“Connect to System” will not be available for devices that do not have a configuration file
loaded to them). The software will connect and allow real time user control. When the required changes have
been made, disconnect the PC from the Tesira system by going to System > Network > Disconnect from
system.
Setting an IP address
It may be a requirement to configure your PC or TesiraFORTÉ IP address. Please review the following section.
TesiraFORTÉ FIXED I/O SERVER DEVICES QUICK START
Assigning your computer’s IP address
Go to Control Panel > Network and Sharing Center. Click on Local Area Connection.
The Local Area Connection Status Dialog will open. Select Properties.
The Local Area Connection Properties Dialog will open. Double-Click Internet Protocol Version 4 (TCP/IPv4).

TesiraFORTÉ FIXED I/O SERVER DEVICES QUICK START
The Internet Protocol Version 4 (TCP/IPv4) Properties will open.
Update the IP address and Subnet mask to ‘Obtain an IP address automatically’
Click OK when complete. Click OK on the Local Area Connection properties dialog to confirm the changes. The PC may
take up to one minute to resolve an IP address. If a DHCP server is available the PC will resolve to an address served to
it. If no DHCP server is available the PC will resolve to a link local address in the 169.254.xxx.xxx range with a subnet
mask of 255.255.0.0.
Auto assignment of IP Address using DHCP
All TesiraFORTÉ units ship from the factory configured for DHCP or Zero Conf (Link Local) address. If a DHCP server is
available the PC will resolve to an address served to it. If no DHCP server is available the PC will resolve to a link local
address in the 169.254.xxx.xxx range with a subnet of 255.255.0.0.
When using more than one device in a system, each device must have a unique IP address. Tesira device IP addresses
must be different from any IP address that will be used on the same network segment. Please note that adjusting a
TesiraFORTÉ IP address will stop the system audio.
Manually assigning an IP address
To make changes to the TesiraFORTÉ IP address you must first be disconnected from the system.
•In the Tesira software, go to System > Network > Perform Device Maintenance.
•Select the device in the Device List. Select Network Settings.
•Update the IP Address, Subnet mask and Gateway values to the new settings.
•Click OK when complete.
•Close Device Maintenance when complete.
•Move the PC IP address to reside on the same subnet as the Tesira Device.
•Re-start the system audio as needed.

TesiraFORTÉ FIXED I/O SERVER DEVICES SPECIFICATIONS
TesiraFORTÉ AVB AI and TesiraFORTÉ AI Specifications
Frequency Response:
20Hz to 20kHz ,+4dBu output
THD+N (22Hz to 22kHz):
0dB gain, +4dBu input
54dB gain, -50dBu input
EIN (no weighting, 22Hz to 22kHz):
Dynamic Range (in presence of signal):
22Hz to 22kHz, 0dB gain
Input Impedance (balanced):
Output Impedance (balanced):
Maximum Input:
Maximum Output (selectable):
Input Gain Range: (6dB steps):
Overall Dimensions/Weight:
+0.25dB/-0.5dB
< 0.006%
< 0.040%
< -125dBu
> 108dB
8kΩ
207Ω
+24dBu
+24dBu, +18dBu, +12dBu,
+6dBu , 0dBu, -31dBu
0dB to 66dB
Height: 1.75 inches (44 mm)
Width: 19.0 inches (483 mm)
Depth: 10.5 inches (267 mm)
Weight: 8 lbs (3.63 kg)
Phantom Power:
Crosstalk, channel to channel, 1kHz:
0dB gain, +4dBu input
54dB gain, -50dBu input
Sampling Rate:
A/D – D/A Converters:
Power Consumption
(100-240VAC 50/60Hz):
USB:
Bit Depth:
Number of Channels:
Sample Rate:
Compliance:
+48 VDC (7mA/input)
< -85dB
< -75dB
48kHz
24-bit
< 35W
16- or 24-bit
up to 8
48kHz
FCC Part 15B (USA)
Industry Canada CS-03 (Canada)
CE marked (Europe)
UL and C-UL listed (USA & Canada)
RCM (Australia)
EAC (Eurasian Customs Union)
RoHS Directive (Europe)
TesiraFORTÉ AVB CI and TesiraFORTÉ CI Specifications
Frequency Response:
20Hz to 20kHz ,+4dBu output
THD+N (22Hz to 22kHz):
0dB gain, +4dBu input
54dB gain, -50dBu
input
EIN (no weighting, 22Hz to 22kHz):
Dynamic Range (in presence of signal):
22Hz to 22kHz, 0dB gain
Input Impedance (balanced):
Output Impedance (balanced):
Maximum Input:
Maximum Output (selectable):
+0.25dB/-0.5dB
< 0.006%
< 0.040%
< -125dBu
> 108dB
8k
Ω
207
Ω
+24dBu
+24dBu, +18dBu, +12dBu,
+6dBu , 0dBu, -31dBu
Phantom Power:
Crosstalk, channel to channel, 1kHz:
0dB gain, +4dBu input
54dB gain, -50dBu
input
Sampling Rate:
A/D – D/A Converters:
Power Consumption
(100-240VAC 50/60Hz):
USB:
Bit Depth:
Number of
Channels: Sample
Rate:
Compliance:
+48 VDC (7mA/input)
< -85dB
< -75dB
48kH
z
24-
bit
< 35W
16- or 24-bit
up to
8
48kH
z
FCC Part 15B (USA)
Industry Canada CS-03 (Canada)
Input Gain Range: (6dB steps):
0dB to 66dB
CE marked (Europe)
UL and C-UL listed (USA & Canada)
Overall Dimensions/Weight:
Height: 1.75 inches (44 mm)
RCM (Australia)
Width: 19.0 inches (483 mm)
EAC (Eurasian Customs Union)
Depth: 10.5 inches (267 mm)
RoHS Directive (Europe)
Weight: 8 lbs (3.63 kg)

TesiraFORTÉ FIXED I/O SERVER DEVICES SPECIFICATIONS
TesiraFORTÉ AVB TI and TesiraFORTÉ TI Specifications
Frequency Response:
20Hz to 20kHz ,+4dBu output
THD+N (22Hz to 22kHz):
0dB gain, +4dBu input
54dB gain, -50dBu input
EIN (no weighting, 22Hz to 22kHz):
Dynamic Range (in presence of signal):
22Hz to 22kHz, 0dB gain
Input Impedance (balanced):
Output Impedance (balanced):
Maximum Input:
Maximum Output (selectable):
Input Gain Range: (6dB steps):
Overall Dimensions/Weight:
+0.25dB/-0.5dB
< 0.006%
< 0.040%
< -125dBu
> 108dB
8kΩ
207Ω
+24dBu
+24dBu, +18dBu, +12dBu,
+6dBu , 0dBu, -31dBu
0dB to 66dB
Height: 1.75 inches (44 mm)
Width: 19.0 inches (483 mm)
Depth: 10.5 inches (267 mm)
Weight: 8 lbs (3.63 kg)
Phantom Power:
Crosstalk, channel to channel, 1kHz:
0dB gain, +4dBu input
54dB gain, -50dBu input
Sampling Rate:
A/D – D/A Converters:
Power Consumption
(100-240VAC 50/60Hz):
USB:
Bit Depth:
Number of Channels:
Sample Rate:
Compliance:
+48 VDC (7mA/input)
< -85dB
< -75dB
48kHz
24-bit
< 35W
16- or 24-bit
up to 8
48kHz
FCC Part 15B (USA)
FCC Part 68 (USA)
Industry Canada CS-03 (Canada)
CE marked (Europe)
UL and C-UL listed (USA & Canada)
RCM (Australia)
EAC (Eurasian Customs Union)
RoHS Directive (Europe)
TesiraFORTÉ AVB VI and TesiraFORTÉ VI Specifications
Frequency Response:
20Hz to 20kHz ,+4dBu output
THD+N (22Hz to 22kHz):
0dB gain, +4dBu input
54dB gain, -50dBu input
EIN (no weighting, 22Hz to 22kHz):
Dynamic Range (in presence of signal):
22Hz to 22kHz, 0dB gain
Input Impedance (balanced):
Output Impedance (balanced):
Maximum Input:
Maximum Output (selectable):
Input Gain Range: (6dB steps):
Overall Dimensions/Weight:
+0.25dB/-0.5dB
< 0.006%
< 0.040%
< -125dBu
> 108dB
8kΩ
207Ω
+24dBu
+24dBu, +18dBu, +12dBu,
+6dBu , 0dBu, -31dBu
0dB to 66dB
Height: 1.75 inches (44 mm)
Width: 19.0 inches (483 mm)
Depth: 10.5 inches (267 mm)
Weight: 8 lbs (3.63 kg)
Phantom Power:
Crosstalk, channel to channel, 1kHz:
0dB gain, +4dBu input
54dB gain, -50dBu input
Sampling Rate:
A/D – D/A Converters:
Power Consumption
(100-240VAC 50/60Hz):
USB:
Bit Depth:
Number of Channels:
Sample Rate:
Compliance:
+48 VDC (7mA/input)
< -85dB
< -75dB
48kHz
24-bit
< 35W
16- or 24-bit
up to 8
48kHz
FCC Part 15B (USA)
Industry Canada CS-03 (Canada)
CE marked (Europe)
UL and C-UL listed (USA & Canada)
RCM (Australia)
EAC (Eurasian Customs Union)
RoHS Directive (Europe)

IMPORTANT SAFETY INSTRUCTIONS
Lightning Bolt: Hazardous Live voltages present when this unit is in operation. Do not touch terminals marked with
this symbol while the unit is connected to live power.
do so will compromise safe operation of this unit
WARNING
WARNING – 100 Volt Speaker terminals marked with the symbol are Hazardous Live. External wiring connected to these terminals
WARNING
provide a protective earthing connection.
Disconnect Device
CAUTION
Intended for Installation and Service by Skilled Personnel Only:
CAUTION
CAUTION
•
•
Wall Mounting Instructions – Wall mounted products must be securely fastened to drywall or similar surface using a minimum of 4 wood
sheet metal screws located in metal studs or wood screws extending a minimum of ½ inch into wood studs.
Explanation of Graphical Symbols:
1) Read these instructions.
5) Do not use this product near water.
produce heat.
9) Do not defeat the safety purpose of the grounding-type plug.
A grounding type plug has two blades and a third grounding
prong.
replacement of the obsolete outlet.
where they exit from the product.
manufacturer.
building structure.
the cart and product combination to avoid injury from tip-over.
unused for long periods of time.
has been dropped.

INSTRUCCIONES DE SEGURIDAD IMPORTANTES
símbolo mientras la unidad se encuentre conectada a una salida activa de energía.
Aspas de ventilador en movimiento peligrosas Desenchufe el producto antes de realizar reparaciones y aléjelo de las
aspas en movimiento de los ventiladores.
1) Lea estas instrucciones.
4) Siga todas las instrucciones.
según las instrucciones del fabricante.
tercera punta con conexión a tierra.
La tercera punta se provee para su seguridad. Si el enchufe
electricista para reemplazar la toma obsoleta.
convenientes y el punto donde salen del producto.
fabricante.
base o
la combinación del carro con el producto para evitar
lesiones en caso de una caída.
va a utilizarlo por largos períodos de tiempo.
14) Todas las reparaciones deben ser realizadas por personal
ha caído.
ADVERTENCIA
ADVERTENCIA están activas y son peligrosas.
ADVERTENCIA
funcionen correctamente para brindar una conexión a tierra de protección.
Desconexión del dispositivo – El enchufe de alimentación eléctrica se utiliza para desconectar esta alimentación y deberá poder accionarse
fácilmente.
PRECAUCIÓN
para las conexiones de los circuitos de telecomunicaciones.
PRECAUCIÓN
PRECAUCIÓN
códigos locales.
•
•
Instrucciones para el montaje sobre la pared

CONSIGNES DE SÉCURITÉ IMPORTANTES
en mouvement.
1) Lisez attentivement les présentes instructions.
4) Respectez toutes les consignes données.
la terre. Le connecteur est reconnaissable par ses deux broches
fabricant.
ou chariots capables de supporter le poids du produit et
avec précaution pour éviter de le renverser.
AVERTISSEMENT
AVERTISSEMENT – Les bornes des haut-parleurs 100 V comportent le pictogramme signalant une tension dangereuse. Toute connexion
AVERTISSEMENT
Débranchement de l’appareil
MISE EN GARDE
).
Installation et interventions réservées au personnel compétent:
MISE EN GARDE
MISE EN GARDE
•
•
Consignes pour le montage mural

WICHTIGE SICHERHEITSHINWEISE
Ausrufezeichen: Ersetzen Sie Bauteile (z. B. Sicherungen) nur entsprechend den vom Hersteller angegebenen
fernhalten.
1) Lesen Sie diese Hinweise.
4) Befolgen Sie die Hinweise.
9) Sicherheitsfunktion des geerdeten Steckers nicht umgehen.
Ein geerdeter Stecker hat zwei Stromkontakte und einen dritten
Erdungskontakt.
einem Elektriker austauschen.
ACHTUNG
ACHTUNG – 100-Volt-Lautsprecherklemmen mit dem Symbol
nur von geschulten oder beaufsichtigten Personen vorgenommen werden.
ACHTUNG
Trennen des Geräts
VORSICHT
Brandrisiko zu reduzieren.
Ausschließlich für Einbau und Wartung durch geschultes Personal vorgesehen:
VORSICHT
VORSICHT
•
•
Anweisungen zur Wandmontage

重要安全说明
闪电:此设备运行时会伴随有危险的实时电压。当设备与电源连接时,不要触碰带有此符号的端子。
惊叹号:只能按照厂商指定的技术参数更换组件(例如:保险丝)。 否则,将会降低本设备的运行安全性。
危险的移动风扇叶片:请在提供服务之前切断电源,并与移动风扇叶片保持距离。
图形符号解释:
1) 阅读这些说明。
妥善保管这些说明。
留意所有警告。
4) 遵守所有说明。
5) 不得在靠近水源处使用本产品。
只能用干布进行清洁。
不要堵塞通风口。按照厂商说明进行安装。
不要在靠近任何热源处,如散热器、热调节器、火炉或其他
释放热量的产品(包括扩音器)附近进行安装。
9) 不要损坏用于安全目的的接地插头。 接地插头有两个插片
和第三端接地管脚。
第三端管脚是为了确保您的安全而提供。如果附带的插头不适
用于您的插座,请让电工更换插座。
10) 防止电源线被踩踏或挤压,尤其是在插头、电源插座以及
产品周围进出的位置。
11) 只使用厂商指定的附属装置/附件。
只配合专为建筑结构提供足够的机械强度、
热消散性和稳固性的机柜、手推车、支架或设备
桌使用。
在用手推车时应小心移动,避免因翻倒而带来伤
害。
在室外出现闪电或长期未使用的情况下应拔掉本产品的电
源线。
14) 请与有资历的服务人员联系,获得所有维修服务。 当产品
以任何方式受到损害时有必要进行维修,如电源线或插头被损
坏、沾染上液体或有异物落入产品中、产品暴露在雨水或潮湿
的环境中、无法正常运行或已掉落在地上损坏了。
警告 –为减少火灾或雷电冲击带来的风险,不要将这些产品暴露在雨水或潮湿的环境中。这些产品不得暴露在有液体滴落或飞溅的环境
中,也不应在这些产品上放置装有液体的物品(如花瓶)。
警告 –标有符号 的100 伏特扬声器端子是危险的带电线路。与这些端子相连的外部布线需要由专业技术人员或经过培训的人员来安
装。
警告 – 由市电供电的产品采用了安全接地技术,必须与正确接地的市电插座连接,才能提供接地防护。
断开设备连接 – 市电插头可用于断开 市电电源且必须保持时刻可运行状态。
小心 – 在提供了 POTS 电话接口选项时,必须由训练有素的人员将电话接口与本设备的电信回路进行连接。为减少火灾风险,只能使用
号实心铜线连接电话端口。
只适用于专业技术人员来执行的安装和服务:
小心 – 为减少电击带来的风险,Biamp 产品的安装和服务应该只能由 Biamp 音频安装专业技术人员来执行。
除非您是专业技术人员,否则不能执行未包含在操作说明中的任何服务。
在打开产品之前,专业人员必须先断开交流市电电源。
小心 – “辅助电源”的安装步骤只适用于专业技术人员,而且必须遵循所有的本地法规。
• 对于美国,国家电气法规。
• 对于加拿大,加拿大电气法规第 1 部第、和节。
壁挂安装说明 – 壁挂安装产品必须至少使用 4 个木螺丝(只有两个安装孔的产品则用个螺丝)安全地固定在石膏板隔断墙或类似表面
上。可能会用到的其他紧固件包括胀管、用于金属支撑架中的自攻钢板金属螺丝或是用于木制支撑架上的 ½ 英寸木螺丝。

중요 안전성 지침
번개 표시: 본 장비가 작동 중일 때는 위험한 전압이 발생합니다. 본 장비가 전원에 연결되어 있는 동안에는 이
기호가 표시된 터미널에 손을 대지 마십시오.
느낌표: 구성 부품(예:퓨즈)은 제조업체에 의해 지정된 사양으로만 교환합니다. 그렇지 않으면 본 장비의 안전한
작동에 문제가 생길 수 있습니다.
위험한 이동식 송풍기 블레이드: 전원을 끄고 나서 서비스를 제공하고, 이동식 송풍기 블레이드를 가까이 두지
마십시오.
그래픽 기호 설명:
1) 이 지침서를 읽으십시오.
이 지침 내용을 지키십시오.
모든 경고에 주의를 기울이십시오.
4) 모든 지침을 따르십시오.
5) 이 제품을 물 가까이에서 사용하지 마십시오.
마른 헝겊으로만 닦으십시오.
환풍구를 막지 마십시오. 제조업체의 지침에 따라
설치하십시오.
라디에이터, 온풍기, 스토브 또는 열을 내는 다른 제품(
증폭기 포함)과 같은 열원 근처에 설치하지 마십시오.
9) 접지형 플러그의 안전 목적에 어긋나지 않도록 하십시오.
접지형 플러그에는 두 개의 날과 접지 단자가 있습니다.
세 번째 접지 단자는 안전을 위해 제공되는 것입니다. 제공된
플러그가 콘센트에 맞지 않는다면, 해당 콘센트의 교체를 위해
전기 기술자와 상의하십시오.
10) 전원 코드가 밟히거나 집히지 않도록 보호하십시오. 특히
플러그, 콘센트, 제품과 연결된 부분에 주의해 주십시오.
11) 제조업체가 명시한 부가 장비 및 부속품만 사용하십시오.
적합한 기계적 내구성, 열 방산, 건물 구조에 대한 적절한
보호를 제공할 수 있게 설계된 장비 랙, 카트, 스탠드 또는
테이블과만 함께 사용하십시오.
카트를 이용할 때에는 카트와 제품을 함께 옮길
때 넘어뜨림으로 인한 부상을 입지 않도록 주의해
주십시오.
천둥 번개가 치거나 오랜 기간 사용하지 않을
경우에는 제품의 플러그를 뽑아 주십시오.
14) 모든 서비스는 자격을 갖춘 서비스 기술자에게
문의하십시오. 제품이 어떤 방식으로든 파손되었을 경우, 예를
들어 전원 공급 코드나 플러그가 파손되었을 때, 제품에 액체
또는 물체가 쏟아졌거나 제품이 비나 습기 등에 노출되었을
때, 정상적으로 작동하지 않을 때, 제품을 떨어뜨렸을 때 등의
경우에는 서비스를 받아야 합니다.
경고 –화재 또는 전기 충격의 위험을 낮추려면, 이 제품을 비 또는 수분에 노출시키지 마십시오. 이 제품에 물이 떨어지거나 튀기면
안되며, 꽃병같이 액체로 가득 찬 물건이 있을 경우 이 제품 가까이에 놓지 마십시오.
경고 – 이 기호가 표시된 100 V 확성기 단자 는Hazardous Live 입니다. 이 단자에 연결된 외부 배선은 숙련되거나 전문 교육을 받은
인력이 설치해야 합니다.
경고로 구동되는 제품들은 접지 안정성이 있어야 하고소켓에 연결하여 보호 접지 연결을 제공하도록 정확하게
접지되어야 합니다.
장치 연결 해제플러그는전원을 차단하는 데 사용되며 즉시 작동할 수 있는 상태로 유지해야 합니다.
주의 – POTS 전화 인터페이스 옵션을 제공할 경우, 이 장비의 전화 회로망 연결은 전문 교육을 받은 인력이 담당해야 합니다. 화재의
위험을 줄이기 위해서는 전기 통신 회로 연결은번솔리드 동선만 이용하십시오.
공인 전문가의 설치 및 서비스:
주의 – 전기 충격의 위험을 줄이기 위해제품의 설치 및 서비스는 Biamp 공인 오디오 설치 전문가에게 의뢰해야 합니다.
전문 인력이 아닌 경우, 작업 지침에 담긴 내용 이외의 사항에 대해 서비스를 제공하면 안됩니다.
전문 인력은전원을 차단하고 나서 제품을 열어야 합니다.
주의 – ’보조 전원’의 설치 단계는 전문 인력에게만 해당되며, 현지의 코드를 모두 준수해야 합니다.
• 국제 전기 코드미국)
• 캐나다 전기 코드및캐나다)
벽면 설치 지침 – 벽걸이 제품은 최소 4개의 나무못을 사용하여 건식벽체 또는 이와 유사한 표면에 확실하게 조여야 합니다(설치 구멍은
개이며개 나사는 제품용임). 교대용 패스너로는 건식벽체 앵커, 메탈 스터드에 조이는 셀프 태핑 판금 나사 또는 나무 스터드 안에 ½
인치 이상 들어가는 나무못이 있습니다.

:
.
.
.
.
.
.
.
.
.
.
.
.
.
.
.
.
(1
(4
(5
(9
(10
(11
(14
.
100
.
.
.
.
:
.
.
.
.
.1
4
)
.
POTS
Biamp
.Biamp
Drywall
•
•

IMPORTANTES INSTRUÇÕES DE SEGURANÇA
movimento das pás do ventilador.
aterramento.
trocar a tomada obsoleta.
fabricante.
normalmente ou se tiver caído.
AVISO
AVISO – Os terminais de alto-falantes de 100 Volts marcados com o símbolo
AVISO
Dispositivo de desconexão
sempre acessível.
ATENÇÃO
ATENÇÃO
ATENÇÃO
locais.
•
•
Instruções de Montagem na Parede
Other manuals for TesiraFORTE
2
Table of contents
Languages:
Other Biamp Server manuals

Biamp
Biamp Tesira SERVER User manual

Biamp
Biamp Vocia TTS-1e User manual

Biamp
Biamp Vocia MS-1E User manual

Biamp
Biamp Tesira SERVER User manual

Biamp
Biamp VOCIA MS-1 User manual

Biamp
Biamp Tesira SERVER User manual

Biamp
Biamp VOCIA MS-1 User manual

Biamp
Biamp Tesira SERVER User manual

Biamp
Biamp VOCIA TTS-1 User manual
Popular Server manuals by other brands

Fujitsu
Fujitsu PRIMERGY CX2560 M4 Upgrade and maintenance manual

Supermicro
Supermicro SuperServer 5038MR-H8TRF user manual

IBM
IBM x3550 M4 Type 7914 Installation and service guide

HP
HP vc4820T - Thin Client specification

HP
HP ProLiant ML150 Gen9 Maintenance and service guide

HP
HP RDX REMOVABLE DL380 Quickspecs