BIGHA BIKE User manual

Owner’s Manual

1
Table of Contents
Section 1: Getting Started
Unpacking………………………………………………………………………….3
Your First Ride…………………………………………………………………….4
Customizing Your BiGHA………………………………………………………...6
Powering the Electronics…………………………………………………………..9
Section 2: Using Your Electronics
Electronics Operation…………………………………………………………….11
Pod Operation…………………………………………………………………….11
Console Operation………………………………………………………………..12
English/Metric Display…………………………………………………………...14
Trip Screen………………………………………………………………………..14
Altitude Adjustments……………………………………………………………..15
Clock……………………………………………………………………………...18
Compass…………………………………………………………………………..19
Batteries…………………………………………………………………………...20
Section 3: Maintenance, Repair and Adjustments
Adjusting the Shock………………………………………………………………21
Adjusting the Brakes……………………………………………………………...21
Shifting Adjustments……………………………………………………………...22
Seat Adjustments………………………………………………………………….23
Handlebar Adjustments…………………………………………………………...26
Turning the bike Upside Down…………………………………………………...26
Rear Wheel Removal/Installation………………………………………………...27
Front Wheel Removal/Installation………………………………………………..31
Changing the Batteries……………………………………………………………33
Folding/Unfolding for Storage……………………………………………………34
Removing/Installing Front Fender………………………………………………..35
BiGHA
4314 SW Research Way
Corvallis, OR 97333
888-258-8440

2
Getting Started

3
Unpacking your BiGHA
You’ve just received your new BiGHA. Wow, you must be thinking, What a gigantic
box! The box may be intimidating to look at, but it’s more than made up for by the ease
of assembly. You’ll be riding your new bike in 2 minutes.
You only need to unfold the handlebars and attach the seat. Here’s how to do it:
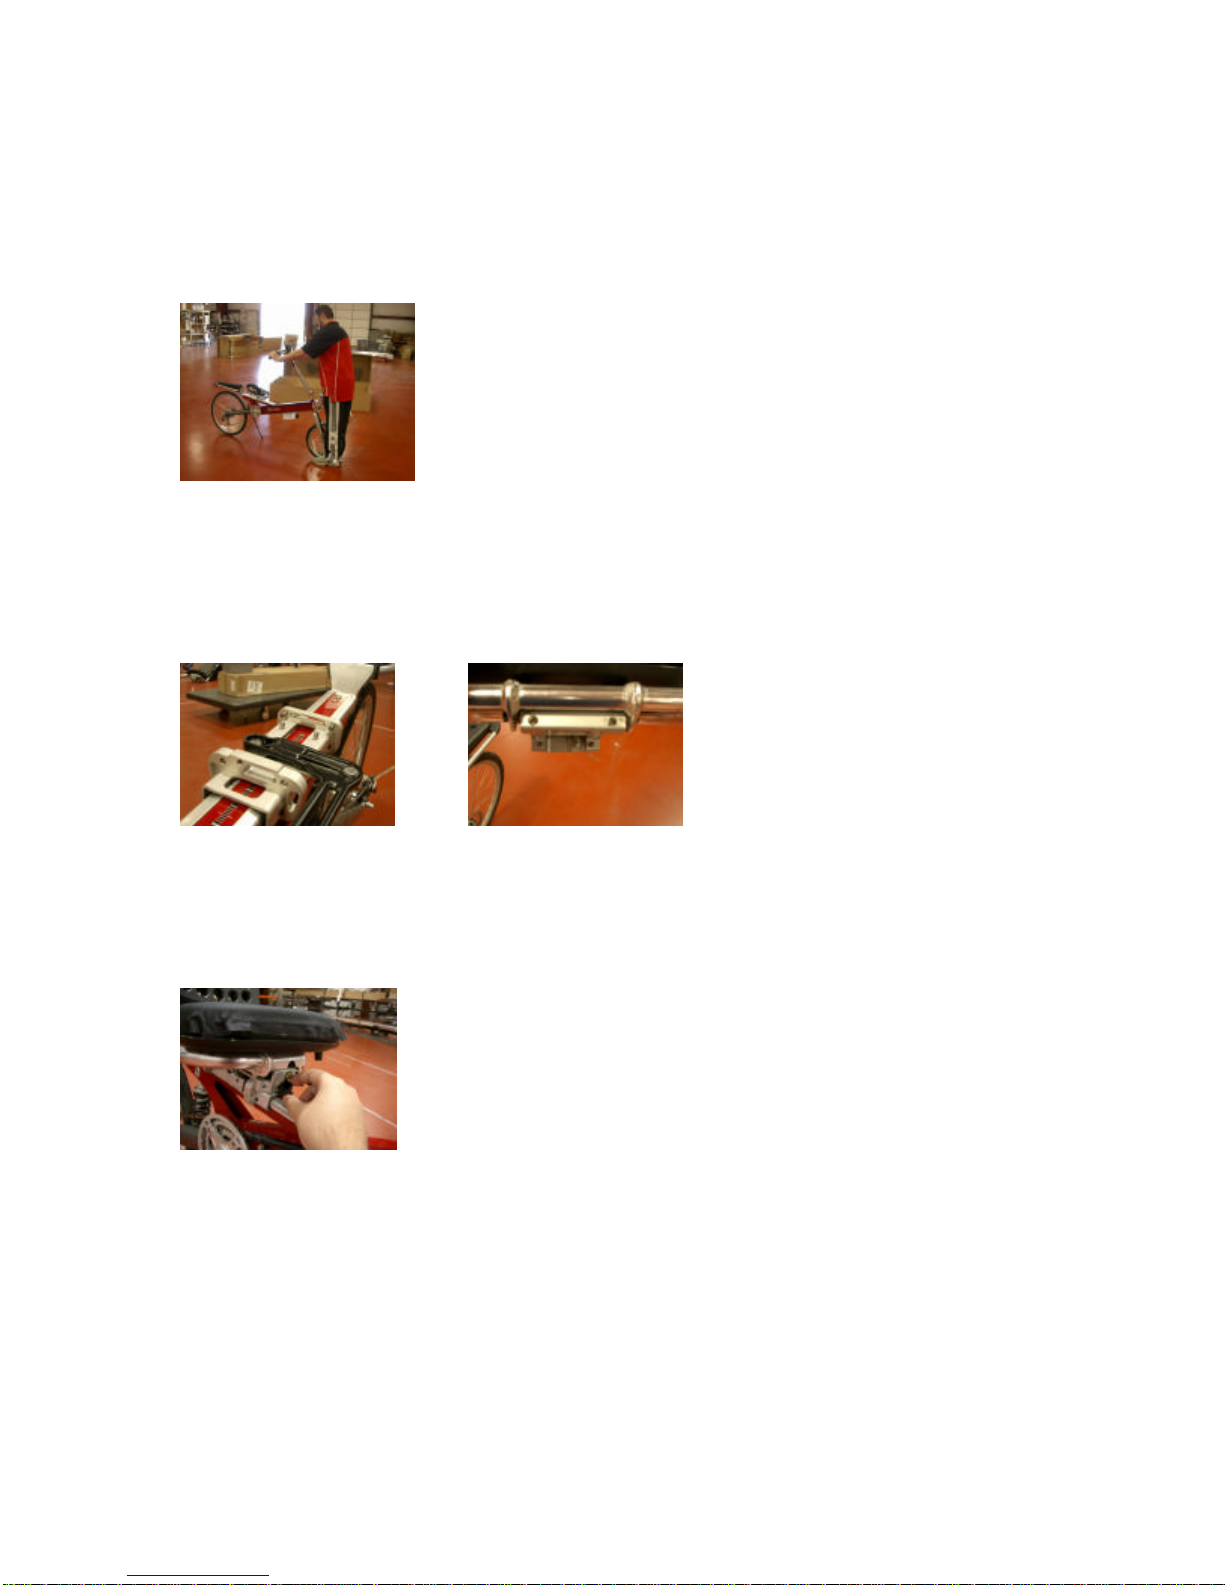
1. Start by opening the box. Place one foot inside the box and lift the bike so it’s
standing on both wheels. Now pick the bike up and set it outside the box. Make
sure you kick the kickstand down so it stands on its own.
2. Now you’re ready to unfold the steering mast. Swing the steering mast around
the non-drive side until the handlebars are facing away from the bike. Now place
one hand on the frame to balance the bike as you pull the steering mast in towards
the bike.
Tip: To avoid confusion, the two sides of your bike will be referred to as “drive” or
“non-drive” side, rather than right or left. What’s the difference? Well, the drive
side is the side with the chain, and the non-drive is the side without.
3. Before you move on, double check to make sure you didn’t twist the steering mast
backwards. If you did it correctly, the disc brake rotor and caliper should be on
4
the left side of the wheel –just like it is on the rear wheel. If your brake is on the
right side of the wheel, you need to twist the steering mast 180 degrees.
4. Align the handlebars with the front wheel. This is done by sandwiching the front
wheel with your legs and twisting the handlebars.
5. You’re ready to attach the seat. Start by closing the lever on the seat clamp to
prevent it from moving.
Now look at the two forward pointing pegs on the back of the seat clamp. These
two pegs align with two holes on the bottom of the seat. The bottom of the seat
also holds two rear pointing pegs that insert into the two holes at the front of the
seat clamp.
Your job is to align each set of pegs with the corresponding holes. Once aligned
correctly, push the seat backwards to insert the pegs into the holes. Then tighten
the thumbscrew to lock the seat into place.
6. Now it’s time to adjust the seat to your leg reach. Start by sitting on the bike with
the kickstand up. Open the seat lever by pulling it away from the bike.
Position the pedals so they are the same height –one close to you and one further
away. Place one leg on the distant pedal. Your leg should be about 85%-90%
fully extended.
Push the seat forward or back until you find the desired position.

5
You’re now ready to ride! Before you fine tune the other adjustments on your BiGHA,
you should give it a quick test spin to see how it feels.
The First Ride:
How to master your new BiGHA
You’re ready to take your first spin on a BiGHA. Riding the bike should be easy, but
don’t sweat it if you don’t pick it up immediately. It’s a new exercise, and like anything,
it takes some getting used to.
Before you ride, start by finding an open area on which you can ride straight to learn your
balance.
1. First, sit down on the seat and kick up the kickstand.
Squeeze the brakes to prevent rolling.
2. Position the pedals such that one is at its highest position
while the other is at its lowest.
3. When you feel comfortable, place your foot on the high
pedal. Leave the other foot on the ground for balance, and
keep squeezing on the brakes.
4. As you release the brakes, give a strong push on the pedal to
start movement, then lift your balance leg onto the other
pedal. Don’t forget to keep pedaling!
Hints:
Are you having a difficult time placing your balance foot on the pedal?

6
Try using your balance foot to “skate” and build up momentum. This will give you a
little more time to get your free foot on the pedal. Try this exercise a few times until you
get the hang of it.
Another exercise is to sit on the bike with the kickstand up and
balance against a wall or a bench. If you have a friend nearby, you
could also have them balance you.
In this position you can practice moving your foot from the ground
to the pedal. You can also pedal backwards to get a feel for the
motion of the bike. While you’re doing this, focus on sitting back
in the seat while relaxing your arms and shoulders onthe
handlebars.
Do you find the steering to be twitchy and difficult to balance?
If so, you’re over-steering the bike. Quite literally, you need to sit back in the seat and
relax your upper body, especially your arms and shoulders. Pretend you’re sitting in your
car seat and your arms are draped over the steering wheel. Riding a BiGHA is almost the
same.
Customizing your bike
Once you get the hang of things, you can start fine tuning your bike. Start by
determining whether or not the handlebars are aligned with the wheel. They may be a
couple of centimeters off balance. If so, get off the bike, sandwich the front wheel
between your legs and turn the handlebars until you find the desired position.
Here are some other adjustments to consider:
Steering Mast Pivot:
Your steering mast is mounted on a pivot. This makes the bike adjust to the length of
your arms, and also helps it fold for storage or shipping.
To adjust for arm reach, simply push or pull the handlebars away from your body. The
handlebars should be easy to move, but not so easy that they move just from the weight
of your arms.
If you need to change the tension required to make this adjustment, get your 5mm Allen
wrench out and follow the directions listed below:
1. Start by locating the pivot at the base of the steering mast.
There is a screw on either side.
The screw on the drive side of the bike (the side on which
the chain is located) comes pre-tightened. The screw on
the non-drive side is the one you’ll be adjusting.

7
2. Use your 5mm Allen wrench to tighten or loosen the screw.
If you want to make the steering mast feel looser, turn the
wrench counterclockwise. To make it more difficult to
move, tighten it by turning your wrench clockwise.
Handlebar height:
You can also adjust the handlebar height. If you feel you the handlebars are too tall for
you, or if they’re too short and your knees bump into them, you’ll want to make this
adjustment. Here’s how:
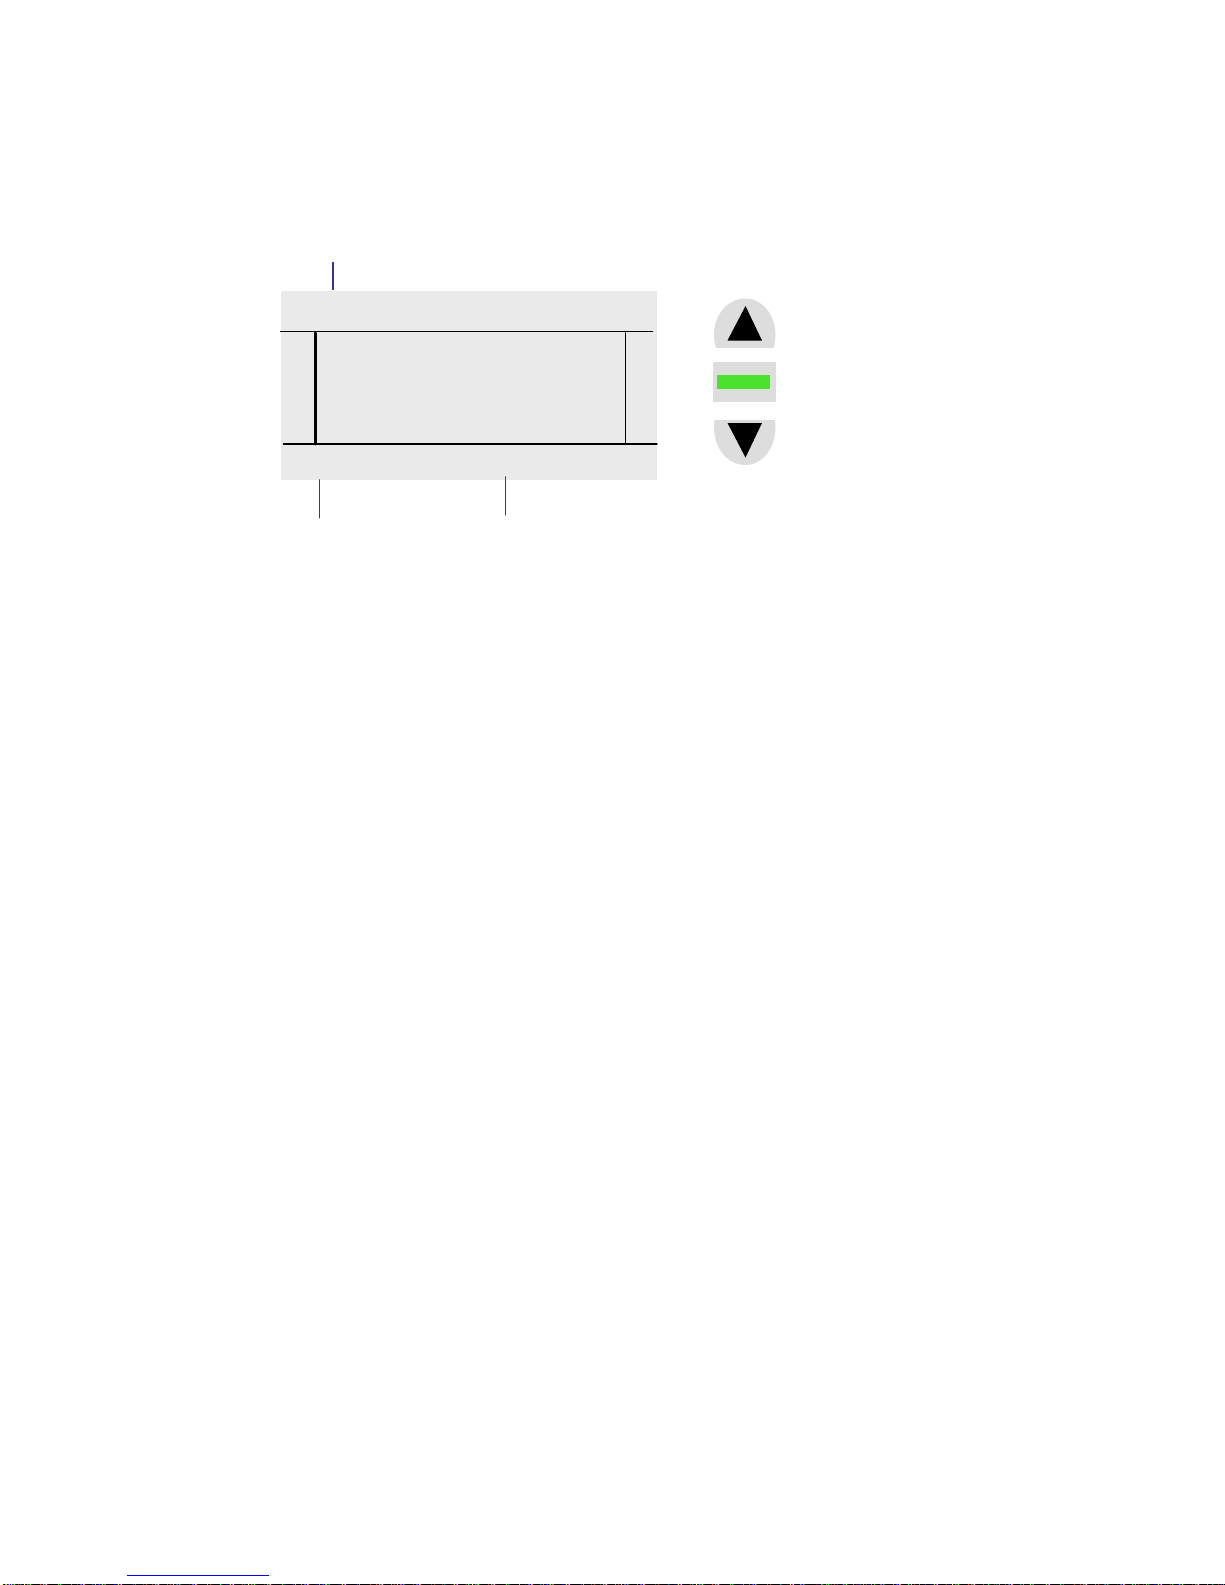
1. Find the Quick Release lever on the steering mast.
2. Open the QR lever by pulling it away from the bike
3. Now adjust accordingly by either pushing the handlebar stem down or pulling it
up. If you can’t push or pull the stem easily, try twisting while applying upward
or downward force. You have a range of 4” to make this adjustment.
4. It is likely your alignment will get tweaked when you twist the handlebar stem. If
this happens, you’ll need to align the handlebars with the wheel again.
In case you forgot how to do this, just stand in front of the bike with the wheel
sandwiched between your legs. Now twist the handlebar stem until it’s aligned
with the front wheel.
Air Cushion:
You’ll also want to change the amount of air in your seat cushion. To make the seat
firmer, add more air. Deflate the cushion if you want a softer seat. Here’s how it works:
1. Find the air stem located under the seat cushion on
the non-drive side of the bike.
Adjustthenon-driveside of the
pivot.

8
Derailleur
Shift using your right
hand
Twist knob
2. Get off of the seat and open the stem by twisting it
counter-clockwise. The cushion will fill up with air.
Now close the stem.
3. Sit down on the cushion and open the stem to force
air out of the seat. When you feel comfortable, close
the stem to hold the right amount of air in.
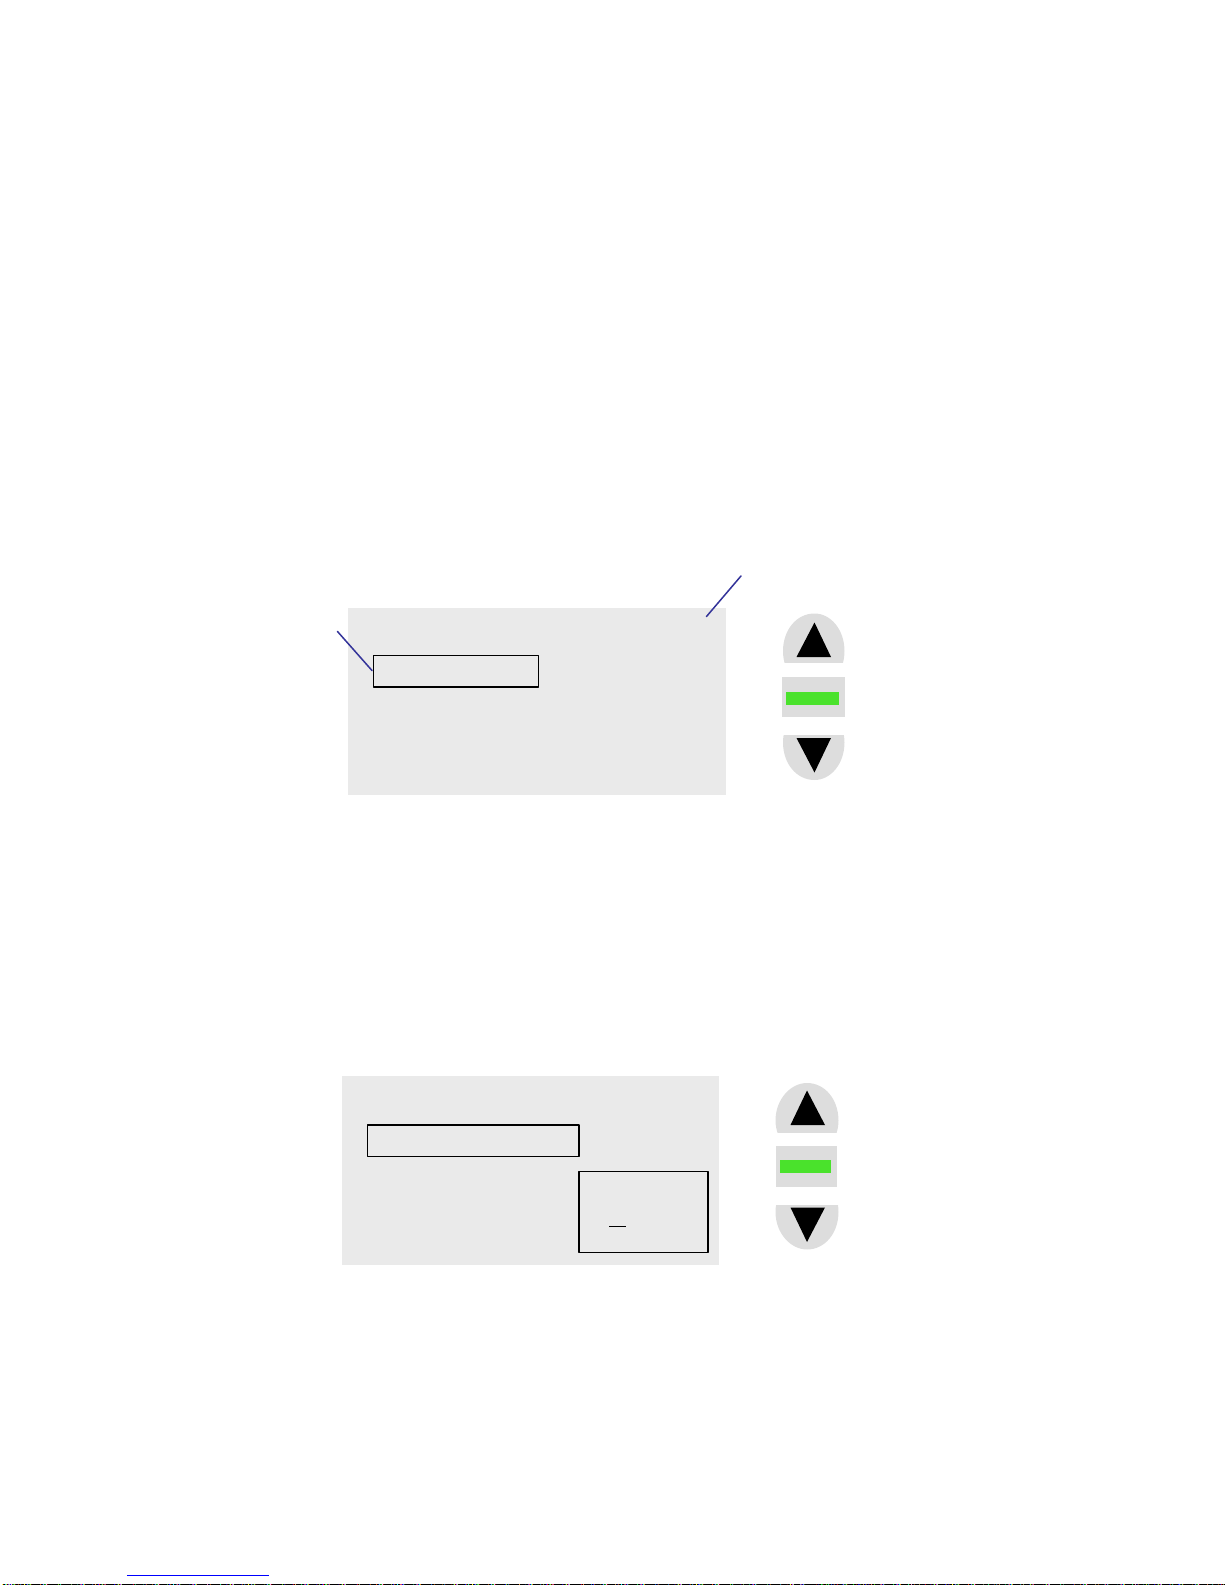
Seat Recline:
1. Find the long, skinny black knob under the seat.
2. Twist to increase the angle of recline. This adjustment
can be made even as you ride.
Shifting Gears:
Your BiGHA has 27 gears. Nine gears are on a standard chain ring –
otherwise known as a cassette –and three riding modes are available
via an internal hub.
All shifting is done using your right hand. Switch between 9 gears
on the cassette by twisting your wrist up or down. You can watch
through the gear window as the indicator points to gears 1 – 9. 1st
gear is the easiest to pedal in; 9th is the hardest.
You must be pedaling to switch between these gear.

9
Clickbox
Tip: Watch the chain jump cogs on the cassette as you shift gears. The
component that moves the chain is called the derailleur –you’ll need to
know what this part is for future maintenance.
Using the 3 riding modes is simple and fun. Directly below the grip on your right
handlebar is a thumb lever. Using the thumb lever you can toggle between the three
riding modes designed for uphill, flat and downhill terrain.
You don’t need to be pedaling to switch riding modes. If you find yourself stopped in a
high gear, just switch to the uphill riding mode and you’ll be able to start easily.
Tip: You can see the internal hub on your rear tire –it’s the silver piece of
metal in the center. Now look at the drive side of the bike, directly above the
derailleur. There’s another gray and black component called the Clickbox.
The Clickbox operates the internal hub. You’ll need to remember this part
for future maintenance.
Powering the Electronics:
During normal use your electronics will start up automatically whenever the bike is in
motion. To prevent wear on the batteries a feature called “Hard Off” is provided. Your
bike is shipped with Hard Off activated. To activate the electronics, simply press and
hold the right turn signal button.
For more information on electronics and electronics operation, please refer to the
electronics section of this manual.

10
Using Your
Electronics

11
Electronics Operation
Ride information is obtained from the console display located at the center of your
handlebars. The console includes three push buttons to choose display information. The
pod is located near your left handle grip and contains three additional push buttons to
control turn signals, lights and horn.
To operate any of the push buttons, briefly press down and release. This is called a short
press. Some buttons also accept long presses (press and hold down for more than ½
second).
To extend battery life the system shuts itself off after three minutes without rear wheel
motion. It starts again automatically whenever you move the bike or press any button.
You bike is shipped in hard off condition to preserve battery life. When you first get the
bike you’ll need to press the right turn signal button once. Normal operations should
immediately begin.
Pod Operation
Turn signals (front and rear) are activated by pressing
the left or right button. They automatically turn off when
you complete the turn or after thirty seconds pass;
whichever comes first. If you accidentally activate a turn
signal, just press the same button again to cancel it.
Head and tail lights automatically turn on at dusk and
off in daylight. You can adjust head light brightness or
override the automatic light controls by using long
presses (hold down for at least ½ second) on the turn
signal buttons. If lights are off, a long press on the right
button will turn them on. Make one or two more long

12
presses for mid or high brightness (remember though, batteries drain more quickly with
bright light settings).
Lights are dimmed or turned off with long left presses. Each long press will dim the
lights one level. If the lights are already set to low, another long press turns them off (you
can always turn them back on again with a long press to the right button.)
Headlight brightness is indicated on the console display by the words LO, MID or HI.
The brightness indicator flashes if the lights are activated in daylight.
Automatic startup of the electronics can be a problem when you are transporting the bike.
If you mount the bike on a car rack and start driving, the car’s motion will make the bike
think it is in use, wasting valuable battery energy. A feature called “hard off” is provided
to overcome that problem.
Hard Off
Just press and hold the left turn signal button and, then press the Select button on your
console (the middle button with the green line). The console will shut down and will not
turn on again from bike motion. Your bike is shipped from the factory in the hard off
condition.
To again activate the electronics, just press the right turn signal button and normal
operation—including automatic start-up—resumes.
Console Operation
The console provides a visual display of ride information, including:
•Speed •Odometer •Compass direction
•Temperature •Humidity •Altitude
•Cadence •Clock •Heart Rate*
•Calories* •Heat Index* •Exertion Index*
The console also displays trip information, including:
•24 hour trip timer •Ride distance
•Altitude Change •Average Speed*
•Total Altitude Gain*
*coming in future software releases. Additional functions will be added throughout the summer and will be
made available to you free of charge. Software upgrades are easily done in just a couple of minutes and
requires no disassembly.

13
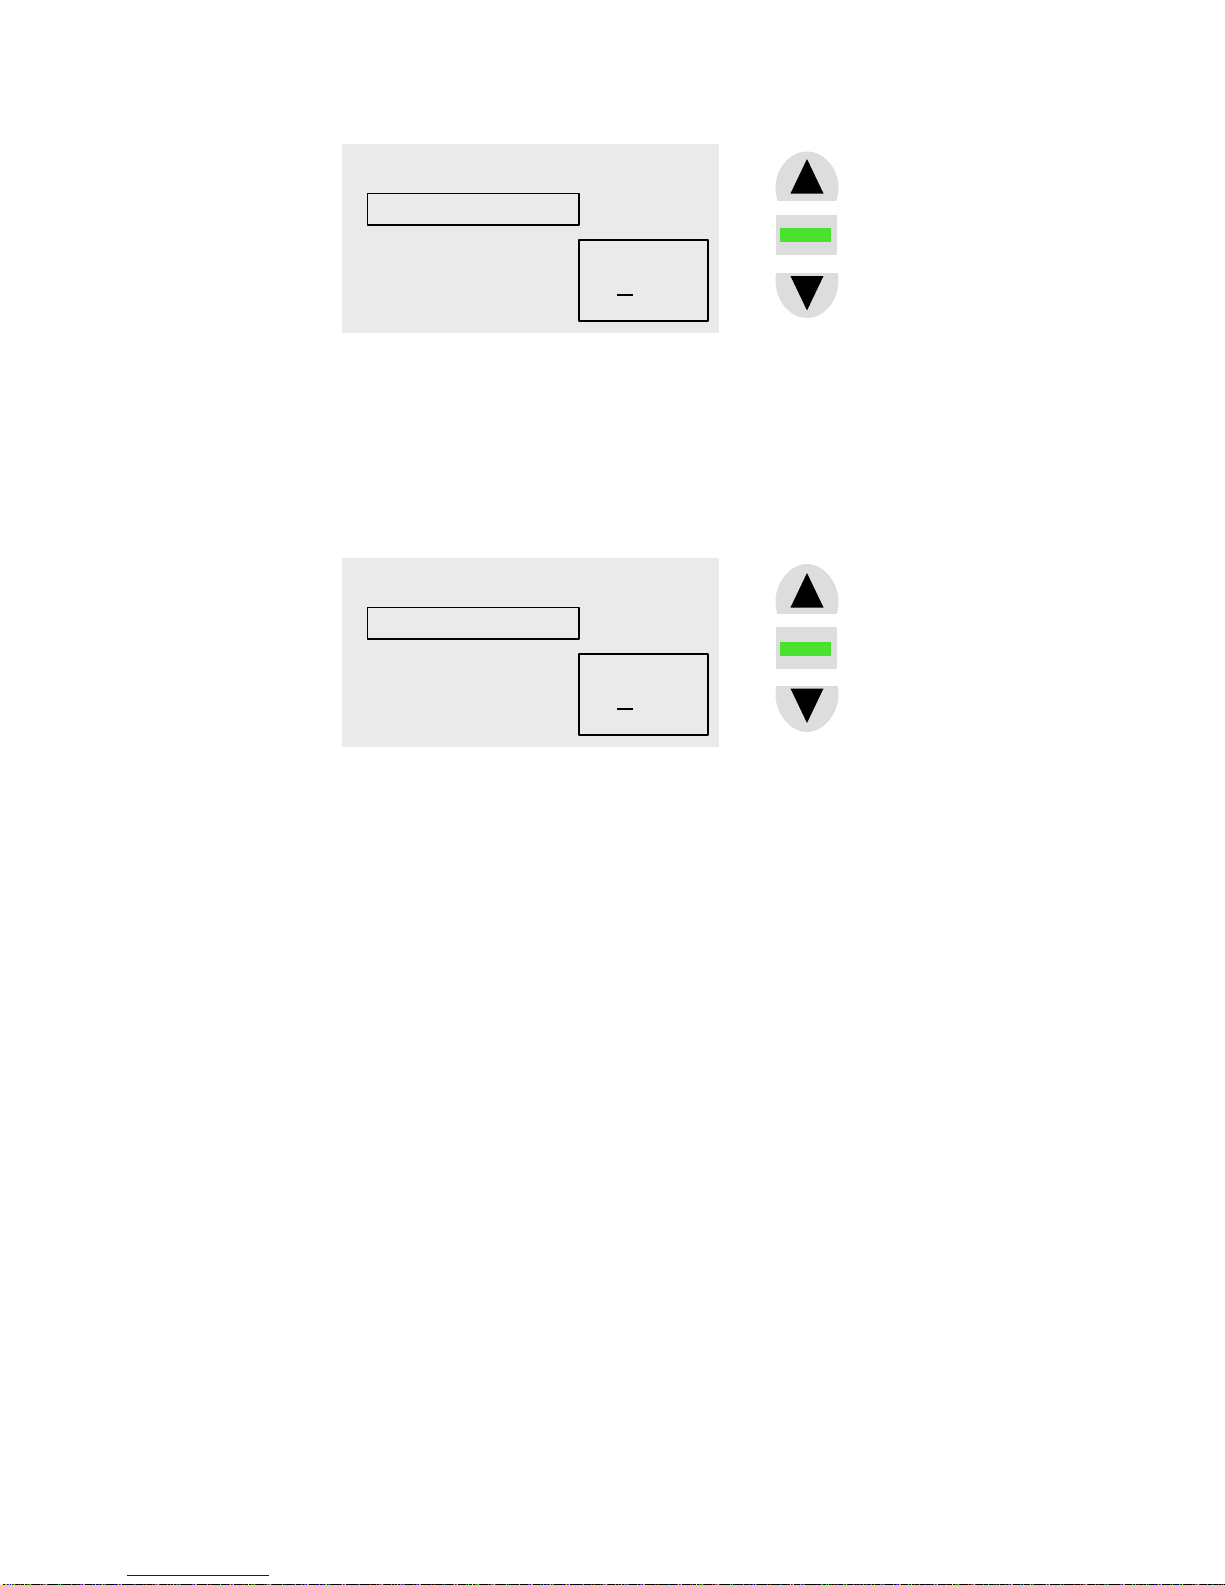
Console Display with Odometer Screen
Two information screens are available: odometer and trip. Select between them with
short presses of the up or down button. New screens will be introduced in software
updates throughout the summer but you’ll always choose between them using short
presses of the up or down buttons.
English/Metric Display
BiGHA can display measurements of speed, distance, elevationand temperature in either
English or metric. To alternate between the two formats simply do a long press on the
select button (the middle button with the green stripe).
You’ll notice that the various readings and they’re suffixes have changed. For instance,
what was 72F (72 degrees Fahrenheit) is now 22C (22 degrees Celsius). Similarly, speed
is now displayed in kilometers per hour, elevation is now displayed in meters and total
distance is displayed in kilometers.
To switch back to English units of measurement, just do another long press on the select
button.
Trip Screen
How far have you ridden today? How long have you been riding? Have you gained or
lost altitude? Find out through the Trip screen. Basic layout is like the odometer screen
but you can see altitude change, elapsed time and interval distance in addition to speed,
temperature, humidity, direction and cadence.
Easiest way to tell between the Odometer and Trip screens is to look at the lower left
corner. If the time shown ends with an “E”, you are looking at the Trip screen and its
elapsed time. While Odometer screen showed you current altitude, Trip shows the change
in altitude since your trip began: in this illustration, you’re 510 feet below where the trip
12,580ft 72F 63%
1
1
7
NW 15.7
12:24P
1,582.01
mph
Temperature
Humidity
Clock
Odometer
Altitude
Cadenc
e
Compass
Speed
Select Button
Up Button
Down Button
MID
Head light
brightness
14
started. You’ve covered 31.42 miles in 3 hours 14 minutes and 7 seconds. All other
information is identical to what is displayed on the Odometer Screen.
Start a New Trip
To start a new trip you must have the trip screen on display. Now make a long press on
the Up button. A warning screen appears. Do a short Up button press to start the new trip.
Elapsed time, Altitude change and trip mileage reset to zero and immediately begin
calculating your new ride information. If you don’t really want to start a new trip, but
accidentally made a long Up button press, just press the Down button to cancel.
Altitude Adjustments
Altimeters measure the weight of surrounding air to determine height above sea level.
Our atmosphere is a huge pile of air and the pile is deeper at sea level than in the
mountains. Air is thinner (under less pressure) in Denver,Colorado than in San Diego.
Your BiGHA altimeter uses an extremely sensitive sensor to monitor barometric pressure
(barometric pressure is just another way of saying air pressure). Problem is, barometric
pressure also changes with weather.
Example: Jim lives on the coast in a house at 120 feet above sea level. His altimeter read
exactly 120 feet when Jim parked it after a long ride. That night a weather system moved
in and changed the barometric pressure. But when Jim gets on his bike the next day his
altimeter still displayed 120 feet. Why? BiGHA’s altimeter is self regulated by a motion
detector. If the bike is not in motion, the altimeter stays locked on the previous reading.
Despite this self regulation, your altimeter still needs recalibration from time to time. For
instance, when you transport your BiGHA via automobile, the bike itself is not in motion
and the altitude reading will pick up where it left off rather than self adjusting for the new
elevation. Or, if you go on a long ride and the weather changes the barometric pressure
while the bike is in motion, the accuracy of your altimeter can be affected.
-
510ft
85F
29%
1
1
7
NW22.3
03:14:07E 31.42
mph
Elapsed Time
Trip Mileage
Altitude Change
Select Button
Up Button
Down
15
Such changes are normal for altimeters. They work by reading air pressure and the
weather can change that pressure. (That’s why airplane pilots reset their altimeters at the
start of every flight).
Even if your altimeter’s absolute readings are distorted by changes in the weather,
BiGHA’s altimeter will still accurately register changes during your ride. So if you climb
a 300 foot hill, you’ll still see a net elevation gain of 300 feet on your altimeter regardless
of whether or not the base reading is correct.
If you are a stickler for details, you can do exactly what the airline pilots do and calibrate
your altimeter every day. To change your altimeter calibration, make a long press (more
than ½ second) on the console Down button while the Odometer screen is showing (the
one with an A or P after the clock time.) A calibration screen appears with Altimeter
highlighted by a selector box:
WARNING:Please don’t select any options under the factory category. These were used
to configure your bike and can cause unexpected outcomes. Selection of the
odometer setting under factory will cause your mileage to be zeroed out.
Press Select. A box appears with your current altitude reading within it. The thousands
number has an underline indicating it is the value being adjusted. Every press of the Up
button increases the value and every Down press causes it to decrease.
When the desired value is displayed, press Select to register it. Our desired altitude is 120
so we’ll leave the thousands digit at 0. Now the underline is beneath the hundreds digit
(the zero has been converted to a blank to minimize confusion.).
altitude
clock
compass
factory
Calibrate 1.00
Software
Version
Selector Box
altitude
clock
compass
factory
Calibrate 1.00
0,260
16
(Use the Up and Down arrow exactly as before to choose the correct hundreds value.
Choices ranges from -2 (Death Valley, one of the lowest places on earth, is about 250 feet
below sea level and requires a negative number) to 9. For 120 feet, we want the number
1. Press Select when the right number is chosen. Now follow the same process for the
tens digit.
In this example, we want a 2. Press Select. You’ll return to the Odometer screen and see
the new altitude displayed. The last digit is always recalibrated to zero so there was no
need to enter it.)
It only takes a few seconds to recalibrate. All you need know is the approximate altitude
of the location..
Note: over the next several weeks we’ll introduce new software that combines air
pressure readings with other sensor readings to minimize the need for any recalibration
at all. For example, if the air pressure sensor experiences a change in pressure when the
bike is parked (no wheel motion) it will retain its current altitude reading and presume
the changes are due to weather.
Your bike’s altimeter is extremely sensitive and highly accurate. Properly calibrated for
weather, you can expect to experience accuracy within ten feet of actual altitude. We’ve
expand resolution to the 1 foot level but air pressure and sensor noise makes such
readings difficult. You may notice a little bouncing around of your altimeter’s last diigt.
Your bike can be sitting still and have altimeter readings of 260 then 259, 258 and back
to 260. We’re working to filter out such noise and still provide you moment by moment
altitude updates as you descend steep hills, etc. We promise rapid improvement in the
performance of this already accurate sensor.
altitude
clock
compass
factory
Calibrate 1.00
160
altitude
clock
compass
factory
Calibrate 1.00
160
17
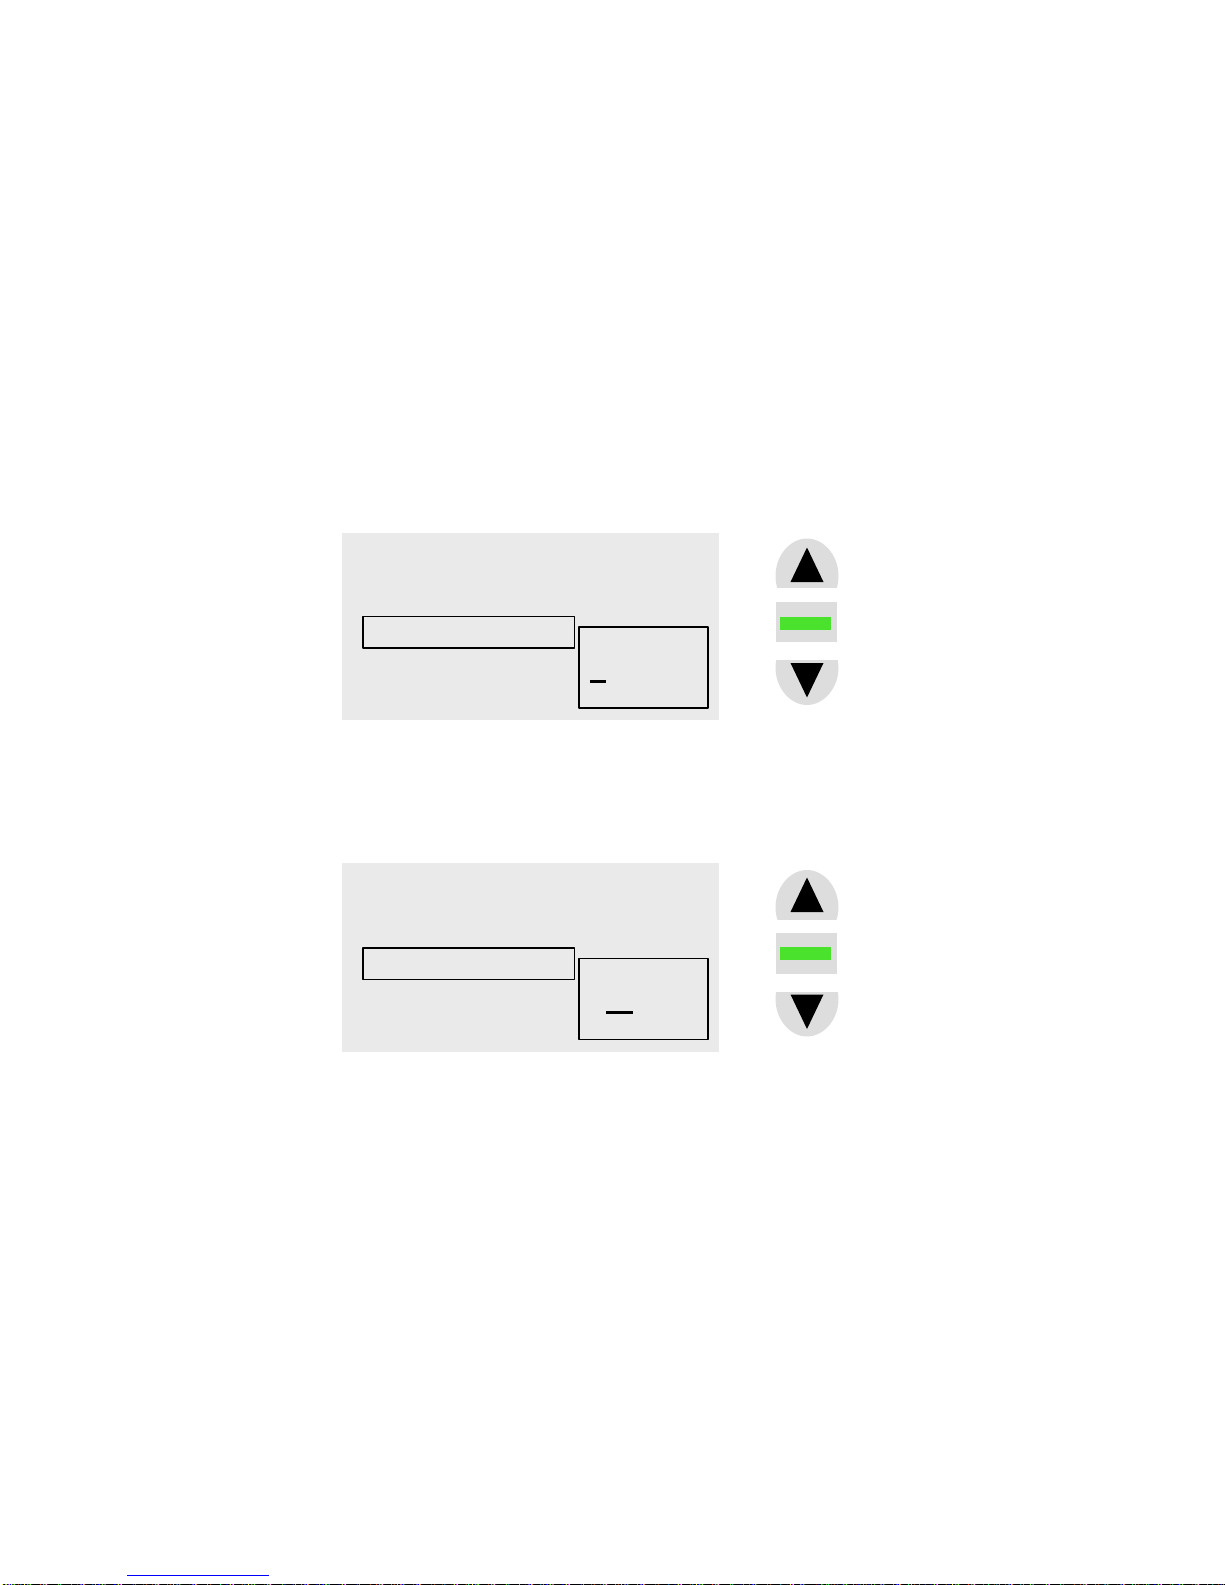
Clock
BiGHA’s bike clock is quite accurate: to within about four minutes a year. But daylight
savings time or moves to other time zones brings the need to change even the most
accurate clock. Doing so is easy.
Just make a long Down press from the Odometer screen to enter the Calibration screen.
Now use the down arrow key to highlight Clock. Press Select. A box appears with the
current time within it. The first character is underlined and is either the letter “A” or “P”,
representing AM or PM.
Press the Up or Down button to change from A to P or vice versa. Once your desired
value is displayed, press Select. The underline moves to hours.
Adjust to the correct hour setting using Up and Down buttons. Press Select again and do
the same for minutes.
altitude
clock
compass
factory
Calibrate 1.00
A11:32:02
altitude
clock
compass
factory
Calibrate 1.00
A11:32:02

18
Repeat once more for seconds. For really accurate time, set the clock a few seconds
ahead of the actual time and watch your reference clock until it exactly matches the
seconds count you entered. Press Select at that exact moment and your clock is
synchronized.
That’s it. Your clock is all set to the new time.
Compass
Your bike includes a sensor that reads earth’s magnetic field. Sometimes it can get out of
adjustment, especially if you park the bike near anything magnetic: including large stereo
speakers. You can restore compass accuracyby recalibrating. All you need is an open
area that is at least 50 feet away from any large metal objects (metal buildings, cars, etc.).
Make a long press on the Down button from the odometer screen to enter calibration.
Press down arrow twice to highlight Compass and press Select. Calibration mode erases
all prior magnetic readings so don’t actually choose this unless you are ready to actually
recalibrate. Once calibration is selected, your compass will not function until you
complete the calibration function.
To calibrate, slowly walk your bike in a circle while keeping the handle bars as level as
possible. You’ll need to complete at least one full circle to expose the bike to every
magnetic field angle.. Turning more than one full circle does no harm, but turning less
can spoil the process and you’ll have to do it again. A good goal is one complete turn in
15-20 seconds.
When you’ve finished the circle, make a long press on the Up key. The Odometer screen
returns. Turn your bike in a circle again to check that the compass is working. It will stay
altitude
clock
compass
factory
Calibrate 1.00
A11:32:02
altitude
clock
compass
factory
Calibrate 1.00
A11:32:02

19
blank if it didn’t get good calibration readings. If that happens, just recalibrate again and
make sure to keep the bike level and turn slowly.
You shouldn’t have to recalibrate your compass very often, if ever, unless it is exposed to
strong magnetic devices.
Batteries
From time to time you will need to change the batteries in your BiGHA. Just how often
your batteries need depends on a number of variables –how often you ride, use of turn
signals, horn and alarm, use of light, even the climate –that makes it impossible to tell
when you’ll have to change them. But one thing is always certain with batteries: they
will die.
BiGHA uses lithium AA batteries. BiGHA’s electronics require periodic surges of power
that can only be reliably supplied by lithium batteries. Normal alkaline batteries will
work, but they won’t last as long. As far as we know, lithium AA batteries are only
available from Energizer. Keep this in mind as you search for new batteries.
Other manuals for BIKE
1
Table of contents
Other BIGHA Bicycle manuals


