Binding Union 8404 User manual

Technical Manual (MTU8404-06.doc - 11)
BINDING UNION srl - via Cuorgnè, 21 - 10156 Torino - Italy - Tel. +39 - 011 - 2625414 - Fax +39 - 011 - 2625428 - E-mail binding@binding.it
www.binding.it
1
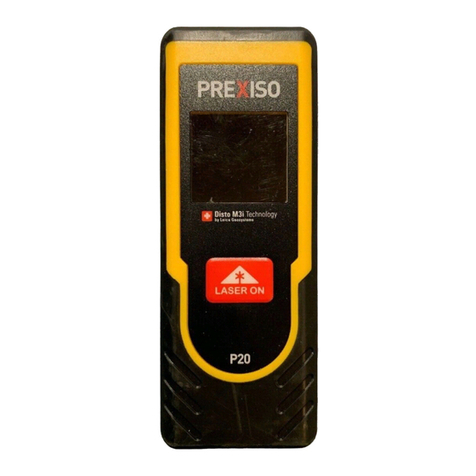
8404 / 8406 - OPTICAL TACHOMETER
CARATTERISTICHE SPECIFICATIONS
Distanza di riflessione : 20...300mm
Alimentazione : 4 pile AA 1,5V
Temperatura di lavoro : 0...+45° C
Dimensioni : 180x60mm
Peso : 400 grammi circa
Caratteristiche specifiche modello 8404:
Visualizzazione : 4 digit LED rossi da 10 mm
Campo di misura : 2...20000 giri/min
Aggiornamento misura :
ogni rotazione da 2 a 60 giri/min
ogni secondo da 60 a 20000 giri/min
Precisione : ±0,1 giri/min fino a 999,9 giri/min
±0,005% da 1000 a 20000 giri/min
Il superamento del valore 9999 è segnalato dal LED a
sinistra (sostituisce la cifra 1 nella lettura)
Caratteristiche specifiche modello 8406:
Visualizzazione : 5 digit LED rossi da 10 mm
Campo di misura : 2...100000 giri/min
Aggiornamento misura :
ogni rotazione da 2 a 60 giri/min
ogni secondo da 60 a 100000 giri/min
Precisione : ±0,1 giri/min fino a 999,9 giri/min
±0,005% da 1000 a 100000 giri/min
Reflection range : 20...300mm
Power supply : 4 AA 1.5V batteries
Operating temperature : 0...+45° C
Dimensions : 180x60mm
Weight : 400 grams
Model 8404 specifications:
Display : 4 digit, 10 mm red LED
Measuring range : 2...20000 rpm
Reading update : each rotation from 2 to 60 rpm
1 second from 60 to 20000 rpm
Accuracy :
±
0,1 rpm up to 999,9 rpm
±
0,005% from 1000 to 20000 rpm
When value of 9999 have been exceeded left LED is
light.
Model 8406 specifications:
Display : 5 digit, 10 mm red LED
Measuring range : 2...100000 rpm
Reading update : each rotation from 2 to 60 rpm
1 second from 60 to 100000 rpm
Accuracy :
±
0,1 rpm up to 999,9 rpm
±
0,005% from 1000 to 100000 rpm
ISTRUZIONI OPERATIVE OPERATIVE INSTRUCTIONS
•Premere il pulsante ON per l’accensione.
•Tenendo premuto il pulsante ON viene effettuata la
misura, al suo rilascio la misurazione viene
interrotta ed il valore resta memorizzato.
•Premere SEL per cambiare la funzione o l’unità di
misura.
•Premere OFF per lo spegnimento.
•ad ogni impulso il LED sopra al display si accende
Dopo due minuti di inoperatività il tachimetro si
spegnerà automaticamente.
All’accensione il display indicherà “SPE.” (o “SPEED”
sul modello 8406) per un secondo e si accenderà il
primo LED a destra per indicare che il tachimetro è
pronto per la misura di VELOCITA’ ANGOLARE o per
la programmazione delle altre funzioni
•Push the central ON push-button to lighting.
•To enable measurement holding ON push-button.
When ON push-button is released the measured
value is held in memory.
•Push SEL to select function or measuring unit.
•To switch-off press the OFF push-button.
•Each input pulse the LED on display is lighted
After two inoperative minutes tachometer will shutoff
automatically, in order to save battery power.
At power-on display will show “SPE.” (or “SPEED” on
8406 model) with the right LED on, and after one
second the speed measurement will be enabled
MISURA DI VELOCITA’ ANGOLARE ANGULAR SPEED MEASUREMENT
Dopo il ciclo iniziale il tachimetro è pronto per la misura
della VELOCITA’ ANGOLARE.
•Applicare sull’organo rotante una tacca
catarifrangente adesiva.
After the initial cycle the speed measurement will be
enabled.
•Apply a reflective tip on the rotating part.

Technical Manual (MTU8404-06.doc - 11)
BINDING UNION srl - via Cuorgnè, 21 - 10156 Torino - Italy - Tel. +39 - 011 - 2625414 - Fax +39 - 011 - 2625428 - E-mail binding@binding.it
www.binding.it
2
8404 / 8406 - OPTICAL TACHOMETER
•Rivolgere il tachimetro verso la tacca in modo
leggermente obliquo (45° circa) per evitare
riflessioni spurie.
•Premere e mantenere il pulsante ON. Al rilascio del
pulsante la misura rimarrà memorizzata
•Determinare la posizione ottimale di misura per
mezzo della spia luminosa al centro del display;
questa deve lampeggiare alla frequenza di
rotazione del motore. In caso di segnale anomalo il
display lampeggerà segnalando all’operatore il non
corretto allineamento.
•Point optical head towards the mark, holding an
oblique position (about 45°) in order to avoid
unwanted reflections.
•Holding MEASURE push-button on. Releasing the
push-button, the measured value is held in memory
•Lighting of the LED of the center of the display at
the same rate of rotating part assures that tat has
been properly oriented. With anomalous input
signals display starts blinking, warning for a
defective alignment.
MISURA DI VELOCITA’ LINEARE (solo per 8406) LINEAR SPEED MEASUREMENT (8406 model only)
Dopo il ciclo iniziale agire come indicato:
•Inserire nell’ingresso posteriore la sonda a contatto
(opzionale) AV0162.
•Premere il pulsante SEL per selezionare l’unità di
misura voluta: “METER” =metri minuto (accensione
del 2° LED da destra)
“FEET” =piedi minuto (accensione del 3° LED da
destra)
•Applicare sul puntale della sonda la rotella.
•Appoggiare la rotella sulla parte in movimento.
•Premere e mantenere il pulsante ON. Al rilascio del
pulsante la misura rimarrà memorizzata
After the initial cycle following the procedure:
•Insert AV0162 contact sensor (optional)into the
external connector input of the tachometer.
•Select through the SEL push-button the desired
measuring unit: meter/min = “MET” (“METER”)
(lighting of 2° right LED)
feet/min = “FEET” (lighting of 3° right LED)
•Apply the rubber wheel on sensor outlet spindle.
•Rest the wheel on the moving part.
•Holding MEASURE push-button on. Releasing the
push-button, the measured value is held in
memory.
TOTALIZZATORE TOTALIZER
Dopo il ciclo iniziale agire come indicato:
•Premere il pulsante SEL per selezionare la
funzione totalizzatore “tot” (“totAl” sul mod. 8406)
(accensione del 4° LED da destra).
•Premere e mantenere il pulsante ON per totalizzare
i giri. Al rilascio del pulsante la misura rimarrà
memorizzata
•Per tornare alla funzione tachimetro premere il
tasto SEL due volte
•N.B. Per il modello 8406 con sonde esterne: con il
proximity il comportamento non cambia, con la
sonda a contatto si avranno 10 impulsi ogni giro
per cui si visualizzerà un valore totalizzato 10 volte
superiore e nel caso di misura lineare si otterranno
10 impulsi ogni 100mm (1 impulso ogni cm).
After the initial cycle following the procedure:
•Select through the SEL push-button the totalizer
function “tot” (“totAl”) (lighting of 4° right LED)
•Holding MEASURE push-button on in order to
totalize. Releasing the push-button, the measured
value is held in memory.
•To set again the tachometer mode press the “SEL”
push-button two times.
•N.B. Model 8406 with external sensors: with
proximity detector the totalizer works in the same
way. With the contact detector you will get 10
pulses every revolution, so the totalized revolutions
number will be multipled by 10. If linear measured
is performed then you will get 10 counts for 100mm
of linear movement (a pulse each cm).
RESET RESET
Per resettare il valore memorizzato premere il tasto
SEL una sola volta
For resetting the counting press the “SEL” push-button
a single time.
SONDE ESTERNE EXTERNAL SENSORS
Il modello 8406 dispone, alla sua base, di un
connettore a vaschetta che permette il collegamento di
sensori esterni. I sensori vanno disconnessi appena
terminate le misurazioni in quanto sono sempre
alimentati, anche a tachimetro spento.
8406 model is arranged to receive the input signal also
by external sensors, having in the lower side a female
connector. Disconnect the external probe when the
measuring operations are finished, as it is always
powered, also if the tachometer is switched off.
SOSTITUZIONE DELLE BATTERIE BATTERY REPLACEMENT
Se con il pulsante ON rilasciato il display lampeggia, le
batterie sono da sostituire: togliere il coperchio sul
retro del tachimetro svitando le due viti di fissaggio,
sostituire le batterie rispettando la polarità indicata.
Blinking of display with the ON push-button released
indicates need of battery replacement: remove the
cover on the back of the tachometer loosening the two
fixing screws, replace the 4 AA batteries, observing the
correct polarity.
ACCESSORI E RICAMBI ACCESSORIES AND REPLACEMENTS
AV0158 : set catarifrangenti
Solo per il modello 8406:
AV0157 : proximity - AV0162 : sensore a contatto
AV0158 : reflector set
For 8406 model only:
AV0157 : proximity - AV0162 : contact sensor
This manual suits for next models
1
Other Binding Union Measuring Instrument manuals
