U.K. AND IRELAND
PLEASE READ AND SAVE THESE
IMPORTANT SAFETY INSTRUCTIONS.
Carefully read and retain all instructions
before using your 2-in-1 dual desk/stand fan.
This appliance is not intended for use
by persons (including children) with
reduced physical, sensory or mental
capabilities, or lack of experience and
knowledge, unless they have been given
supervision or instruction concerning
use of the appliance by a person
responsible for their safety. Children
should be supervised to ensure that they
do not play with the appliance.
Unplug from the electrical outlet when
not in use, when moving the fan from
one location to another, before putting
on or taking off any parts and before
cleaning.
If the supply cord or plug is damaged, it
must be replaced by the manufacturer or
its service agent or a similarly qualied
person in order to avoid hazard.
• To protect against electrical shock, do not
immerse the fan, plug or cord in water or
spray with liquids.
• Avoid contact with any moving parts.
• Do not operate in the presence of
explosive and/or ammable fumes.
• Do not operate fan until fully assembled
with all parts properly in place.
• To avoid re hazard, NEVER place the
cord under rugs or any parts near an
open ame, cooking or other heating
appliance.
• Do not use outdoors.
• Do not let the cord hang over the edge of
a table or counter, or come into contact
with hot surfaces.
• To disconnect from the electrical supply,
grip the plug and pull from the wall outlet.
DO NOT pull on the cord.
• Always use on a dry, level surface.
• Do not operate your fan unless the fan
grilles are properly tted.
• This product is intended for household
use ONLY and not for commercial or
industrial applications.
• Should the fan stop working, rst check
the fuse in the plug (UK only) or fuse/
circuit breaker at the distribution board
is operating, before contacting the
manufacturer or service agent.
MISSING A PART FOR YOUR FAN?
Please call 0800 052 3615 for assistance.
ASSEMBLY INSTRUCTIONS
Base/pole assembly (FIG 1)
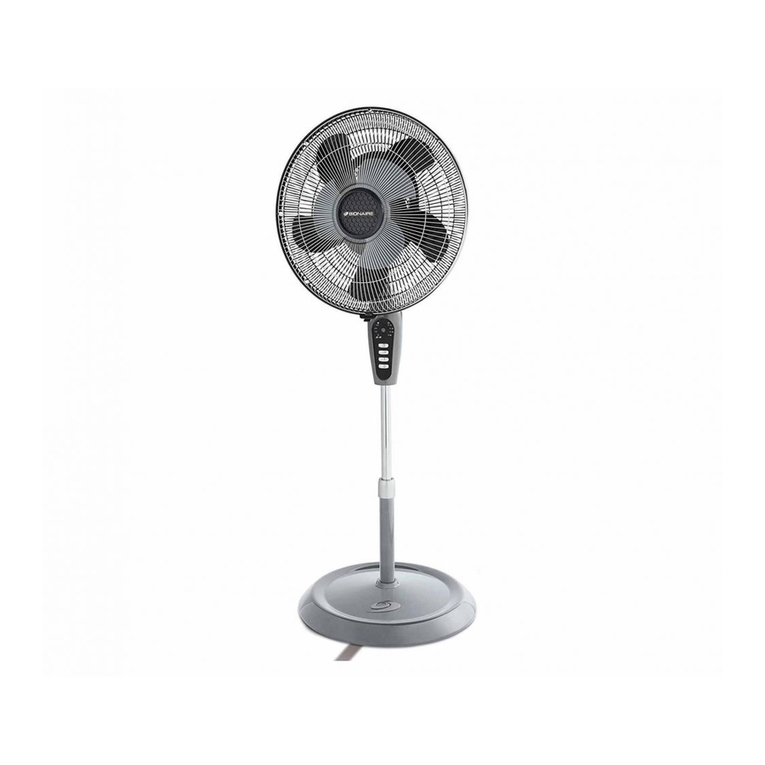
Your fan can be used as a desk fan or a
oor fan. It is supplied with two poles; an
adjustable pole for oor use and a short, xed
pole for desktop use.
1. Select either the adjustable pole or short
pole A.
2. Turn the pole upside down and insert the
end of the pole through the decorative
base cover B.
3. Fit the weight Cand conical washer D
over the end of the pole as shown.
4. Screw the T-shaped locking bolt Einto
the end of the pole as shown and tighten
rmly.
5. Set the base on the oor, weight side
down.
Fan head assembly (FIG 2)
1. Place the fan head assembly Fonto
the pole.
2. Align the hole in the fan head with the
hole in the pole and secure the fan head
using the locking knob Itightening
rmly.
NOTE: The fan head locking knob Imay be
tted to the short pole when shipped.
Rear grillee assembly (FIG 3)
1. Unscrew the grille mounting nut Lfrom
the fan head. Position the rear grille over
the motor shaft making sure that the
vertical slots in the top and bottom of the
rear grille t over the two prongs on the
front of the fan head. Make sure that the
carry handle on the rear grille is at the top.
2. Secure the rear grille using the grille
mounting nut L and tighten rmly.
Fan blade assembly (FIG 4)
CAUTION: The fan blades might have sharp
edges. Handle with care.
1. Loosen the securing screw Nand slide
the fan blade Monto the motor shaft.
The motor shaft may be covered with a
protective plastic sleeve. Remove and
discard the sleeve before tting the fan
blade.
A
B
C
D
E
H
K
G
I
J
FIG 1 FIG 2
FIG 3 FIG 4
FIG 5 FIG 6
LM
Q
S
R
F
N
O
T
T
T
T
T
P
2. Make sure securing screw Naligns
with the notch Oon the motor shaft and
tighten it rmly.
Front grille assembly (FIG 5)
NOTE: Parts Q, Rand S are tted to the
front grille for shipping purposes. Remove
and discard the clear plastic tube.
1. Position the front grille with the
BIONAIRE™ logo the right side up and
hook the bracket Pover the rim of the
rear grille as shown. When correctly
tted, the bracket will straddle the central
wire of the rear grille.
2. Align the slot in the bottom rim of of the
front grille with the corresponding slot in
the rear grille.
3. Fit the screw Qthrough the slots.
4. Fit the washer Rover the screw and
then t the nut S and tighten rmly.
Final assembly (FIG 6)
1. Rotate the ve grille clips Tas shown
making sure that they go over both front
and rear grille rims.
OPERATING INSTRUCTIONS
1. Set your fan on a dry, level surface
2. Make sure the speed control (HFIG 2)
is in the off (0) position.
3. Plug your fan into a suitable mains outlet
socket.
4. Select the desired speed using the
speed control (1, 2 or 3).
5. If desired, you can set your fan to swing
slowly backwards and fowards using
the oscillation knob (GFIG 2). To start
oscillation, push the knob downwards. To
stop, pull the knob upwards.
ADJUSTMENTS
Tilt adjustment
To adjust the tilt of your fan, loosen the tilt
head adjustment knob (KFIG 2), adjust your
fan to the desired tilt angle then tighten the
knob.
Height adjustment (adjustable pole only)
1. Loosen the adjustable pole locking knob.
2. Adjust the pole to the desired height then
rmly tighten the locking knob.
CLEANING AND MAINTENANCE
Follow these instructions to correctly and
safely care for your Bionaire™ fan. Please
remember:
• Always unplug the fan before cleaning or
assembly.
• Do not allow water to drip onto or into the
fan head.
• Be sure to use a soft cloth, moistened
with a mild soap solution.
• Do not use any of the following as a
cleaner: petrol, thinners or benzene.
Fan blade cleaning
1. To access the fan blade, remove the
front grille by opening the ve clips T
and removing the securing screw Q, nut
Sand washer R.
2. Loosen the fan blade securing screw N
and remove the fan blade from the motor
shaft.
3. Clean the fan blade, and front and rear
grilles with a soft moist cloth.
4. Replace the fan blade as described
under Fan blade assembly.
5. Ret the front grille as described under
Front grille assembly and Final assembly.
Fan head, base and pole cleaning
Carefully clean the fan base, pole and fan
head using a soft, moist cloth, with or without
a mild soap solution. Please use caution
around the motor housing area. Do not allow
the motor or other electrical components to
become exposed to water.
FAN STORAGE
Your fan can be stored either partially
disassembled or assembled.
It is important to keep it in a safe, dry location.
• If stored disassembled, we recommend
using the original or an appropriately
sized box.
• If stored assembled or partially
assembled, remember to protect the fan
head from dust.

