manuals.online logo
Brands
  1. Home
  2. •
  3. Brands
  4. •
  5. Bionaire
  6. •
  7. Fan
  8. •
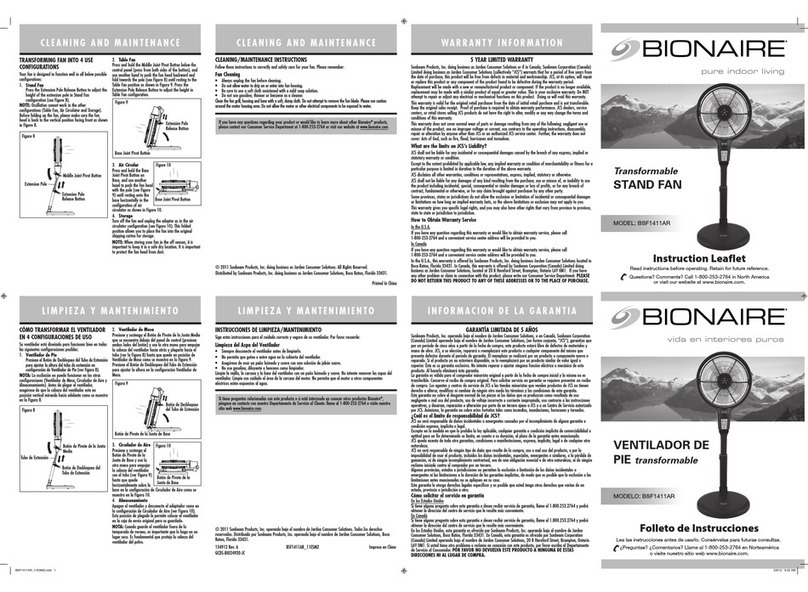
  9. Bionaire BDWLF1609-IN User manual

Bionaire BDWLF1609-IN User manual

DUAL BLADE
WALL FAN
pure indoor living
MODEL# BDWLF1609-IN
INSTRUCTION MANUAL
Read instructions before operating. Retain for future reference.
LEARNING MORE
For a wealth of information about your fan and other Bionaire®products, visit our
website at www.bionaire.com.
THIS PR DUCT IS MANUFACTURED T C MPLY WITH
THE E.E.C. DIRECTIVES 2006/95/EC AND 2004/108/EC.
Waste electrical products should not be disposed of with house-
hold waste. Please recycle where facilities exist. Check on the
following website for further recycling and WEEE information:
www.bionaire.com.
Please see warranty card for warranty information.
© 2009 Sunbeam Products, Inc. doing business as Jarden Consumer Solutions. All rights
reserved. Manufactured by Sunbeam Products, Inc. doing business as Jarden Consumer
Solutions, 2381 Executive Center Drive, Boca Raton, Florida 33431 U.S.A. Distributed
by Jarden Consumer Solutions of India Private Limited, Unit Number B-204, Universal
Business Park ff Saki Vihar Road, Chandivli Farm Road Andheri (E), Mumbai 400-072,
India. Telephone : 1-800-102-6300
Printed in PRC
138037
SPR-110409
3. The installation plate must be installed
using the appropriate anchoring
hardware and/or fastener for the wall
surface application.
4. Drill holes and mount the fan onto the
bracket by fitting and tightening the
thumbscrew to the corresponding hole
of the plate.
5. CAREFULLY check fan for proper
mounting.
OPERATING INSTRUCTIONS
(See Fig. 2 & 3)
1. Pull the RIGHT Control C RD down for
the required fan speed: “0” for “ FF”, “1”
for Low Speed, “2” for Intermediate
Speed, “3” for High Speed.
2. To start or stop the fan head oscillation,
pull the LEFT C NTR L C RD down.
NOTE: CAREFULLY PULL ON FAN
CORD CONTROLS. EXCESSIVE
FORCE MAY DAMAGE FAN AND MAY
CREATE AN ELECTRICAL HAZARD.
3. To adjust the fan head, loosen the
thumbscrew and move to the desired
angle. Then firmly tighten the
thumbscrew. The fan may be moved up
and down, but not left to right.
NOTE: THE FAN SHOULD BE FULLY
ASSEMBLED ON THE WALL BEFORE
MAKING THIS ADJUSTMENT.
OTHERWISE THE FAN HEAD WILL
NOT HOLD INTO POSITION.
CAUTION: The fan should e
switched off when making this
adjustment
CLEANING
1. Switch off and unplug the power cord
before assembling or disassembling
and cleaning.
2. Plastic parts should be cleaned using
mild detergent and a damp cloth or
sponge.
CAUTION: Do not use harsh
detergents, chemical cleaners or
solvents as they may damage the
surface finish of the plastic
components. Also, do not immerse
in liquids.
NOTE: Unit must e unplugged for
it to e fully off.
BDWLF1609-IN
Fig. 1
Fig. 2 Fig. 3
1. Front Guard
2. Guard loop
3. Guard Locking Screw/Nut
4. Blade Retaining Nut
5. Small Blade
6. Large Blade
7. Guard Retaining Nut
8. Rear Guard
9. Handle
10. Motor Sha t
11. Motor Case
12. Installation Plate
13. Thumbscrew
14. Control Panel
15. Cords
BDWLF1609-IN
PLEASE READ AND SAVE THESE
IMPORTANT INSTRUCTIONS
1. Read all instructions before using this
appliance.
2. To avoid fire or shock hazard, plug the
appliance directly into an appropriate
electrical outlet.
3. Keep the power cord out of heavy
traffic areas. To avoid fire hazard,
NEVER put the power cord under
rugs, near heat registers, radiators,
stoves, or heaters.
4. To protect against electrical hazards,
DO NOT immerse the appliance in
water or other liquids. Do not use
near water.
5. NEVER drop or insert any objects into
the openings of the unit.
6.
Do not operate any appliance with a
damaged power cord or plug. If the motor
fails to operate or the unit has been
dropped or damaged in any manner,
return appliance to manufacturer for
examination and/or repair.
7.DO NOT use outdoors.
8.NEVER place on a soft surface such
as a bed or sofa as this could cause
the unit to tip over and block the air
inlet or outlet grills.
9. DO NOT place anything on top of unit.
10.WARNING: To reduce the risk of fire
or electric shock, DO NOT use this
appliance with any solid-state speed
control device.
11. CAUTION: In order to avoid a hazard
due to inadvertent resetting of the
thermal cutout, this appliance must not
be supplied through an external
switching device, such as a timer, or
connected to a circuit that is regularly
switched on and off by the utility.
12.This appliance is not intended for use by
persons (including children) with reduced
physical, sensory or mental capabilities,
lack of experience and knowledge,
unless they have been given supervision
or instruction concerning use of the
appliance by a person responsible for
their safety. Children should be
supervised to ensure that they do not
play with the appliance.
13.This product is not desgned or intended
to be used with an extension cord.
ASSEMBL INSTRUCTIONS
1. Remove the blade retaining nut
(turning clockwise) while holding motor
shaft. Then remove the guard retaining
nut (turning counter-clockwise). Take
off the motor shaft sleeve protector
and discard.
2. Set the rear guard in the proper
position (carry handle topmost) on the
motor assembly. Make sure that the
pins on the rear guard align with the
pins on the motor assembly. Then
screw on the guard retaining nut
(turning clockwise) until tight.
3. Install the large blade onto the shaft of
the motor assembly. Then install the
small blade. The flat area of the “D”
on the blade should align with the flat
area of the “D” on the motor shaft.
Screw on the blade retaining nut
(turning counter-clockwise) until tight.
4. pen the guard locking screw/nut.
Place the guard loop on the rear guard
with the guard locking screw/nut at the
bottom. Assemble the front guard on
guard loop until all sides snap. Rotate
the front guard until the Bionaire logo
is horizontal.
5. Secure both guards firmly by fitting
and tightening the guard locking
screw/nut.
INSTALLING INSTRUCTIONS
1. Select a suitable spot on the wall
(away from curtains, draperies, or heat
sources) where you want to mount the
fan and in close proximity to the power
supply.
2. Remove the installation plate and use
it as a template to mark holes in the
wall. Note that the fan must be
mounted vertically.
ENGLISH
11
10875421
3
13
12
14
15
9
6
11
10875421
3
13
12
14
15
9
6
HINDI

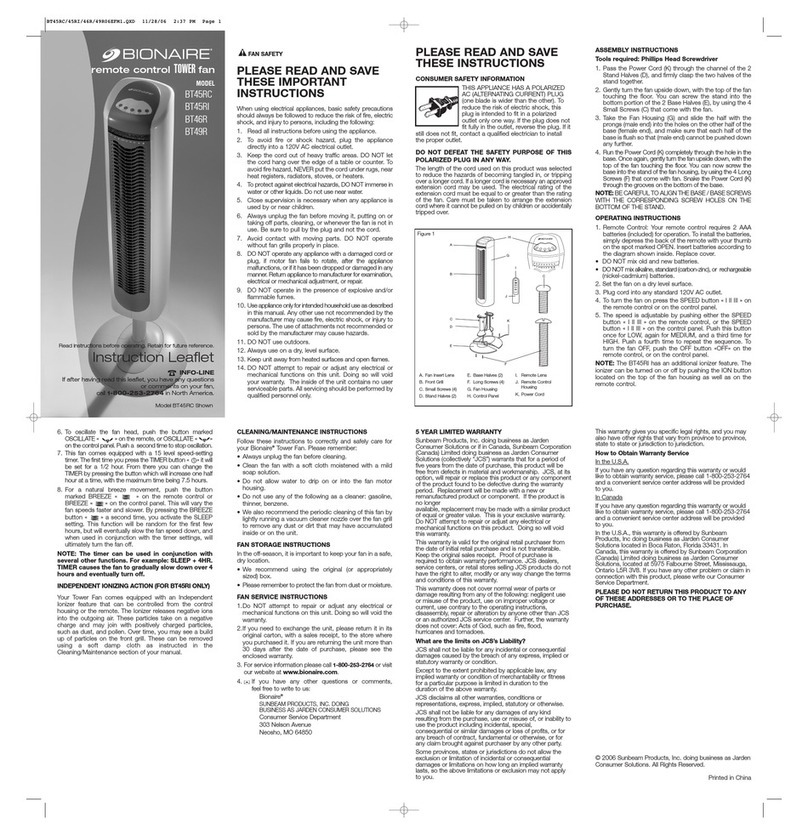
Other Bionaire Fan manuals

Bionaire BPF1130 Manual

Bionaire

Bionaire BPF1130 Manual

Bionaire BT3813M User manual

Bionaire

Bionaire BT3813M User manual

Bionaire BT18 User manual

Bionaire

Bionaire BT18 User manual

Bionaire BMT01 -  2 User manual

Bionaire

Bionaire BMT01 - 2 User manual

Bionaire BW2100 Manual

Bionaire

Bionaire BW2100 Manual

Bionaire BASF 1714 User manual

Bionaire

Bionaire BASF 1714 User manual

Bionaire BT014 Series Manual

Bionaire

Bionaire BT014 Series Manual

Bionaire BSF1411AR User manual

Bionaire

Bionaire BSF1411AR User manual

Bionaire BT18 User manual

Bionaire

Bionaire BT18 User manual

Bionaire BDF1011A User manual

Bionaire

Bionaire BDF1011A User manual

Bionaire BFF1222AR User manual

Bionaire

Bionaire BFF1222AR User manual

Bionaire BMT01 -  2 User manual

Bionaire

Bionaire BMT01 - 2 User manual

Bionaire BAC015X User manual

Bionaire

Bionaire BAC015X User manual

Bionaire BT100R User manual

Bionaire

Bionaire BT100R User manual

Bionaire BT440RCU User manual

Bionaire

Bionaire BT440RCU User manual

Bionaire BTF1616 Manual

Bionaire

Bionaire BTF1616 Manual

Bionaire BMT014D-I User manual

Bionaire

Bionaire BMT014D-I User manual

Bionaire BAOF25M Manual

Bionaire

Bionaire BAOF25M Manual

Bionaire BW2300 Manual

Bionaire

Bionaire BW2300 Manual

Bionaire BASF1314 -  2 User manual

Bionaire

Bionaire BASF1314 - 2 User manual

Bionaire BTF4010 series User manual

Bionaire

Bionaire BTF4010 series User manual

Bionaire BDSF1609-IN User manual

Bionaire

Bionaire BDSF1609-IN User manual

Bionaire BTF38138 Series User manual

Bionaire

Bionaire BTF38138 Series User manual

Bionaire BSF1609RC User manual

Bionaire

Bionaire BSF1609RC User manual

Popular Fan manuals by other brands

Sealey SFF12 instructions

Sealey

Sealey SFF12 instructions

Hinkley SAWYER instruction manual

Hinkley

Hinkley SAWYER instruction manual

Penlon AV-S introduction

Penlon

Penlon AV-S introduction

ANEMOI AIRPRO L installation manual

ANEMOI

ANEMOI AIRPRO L installation manual

Ridder Drive Systems PolyDrive RPD 506 Series product manual

Ridder Drive Systems

Ridder Drive Systems PolyDrive RPD 506 Series product manual

Ebmpapst D3G180-AB62-01 operating instructions

Ebmpapst

Ebmpapst D3G180-AB62-01 operating instructions

Ebmpapst G2E160-BY47-02 operating instructions

Ebmpapst

Ebmpapst G2E160-BY47-02 operating instructions

Delta breez REC80LED Installation and operating instructions

Delta

Delta breez REC80LED Installation and operating instructions

Ebmpapst K3G500-PB24-03 operating instructions

Ebmpapst

Ebmpapst K3G500-PB24-03 operating instructions

Ebmpapst VBH0500CTTRS operating instructions

Ebmpapst

Ebmpapst VBH0500CTTRS operating instructions

Ebmpapst S1G300-CA23-02 operating instructions

Ebmpapst

Ebmpapst S1G300-CA23-02 operating instructions

Ventry POSITIVE PRESSURE VENTILATION FANS owner's manual

Ventry

Ventry POSITIVE PRESSURE VENTILATION FANS owner's manual

Makita DCF203 instruction manual

Makita

Makita DCF203 instruction manual

Ebmpapst R2E146-AW07-05 operating instructions

Ebmpapst

Ebmpapst R2E146-AW07-05 operating instructions

Hitachi RPI-1.5FSRE Installation & operation manual

Hitachi

Hitachi RPI-1.5FSRE Installation & operation manual

COLORATO CLMFW-20 instruction manual

COLORATO

COLORATO CLMFW-20 instruction manual

Ebmpapst D2E146-CD51-09 operating instructions

Ebmpapst

Ebmpapst D2E146-CD51-09 operating instructions

Kichler Lighting BISC 300710MWH instruction manual

Kichler Lighting

Kichler Lighting BISC 300710MWH instruction manual

manuals.online logo
manuals.online logoBrands
  • About & Mission
  • Contact us
  • Privacy Policy
  • Terms and Conditions

Copyright 2025 Manuals.Online. All Rights Reserved.