Performing a Test
4
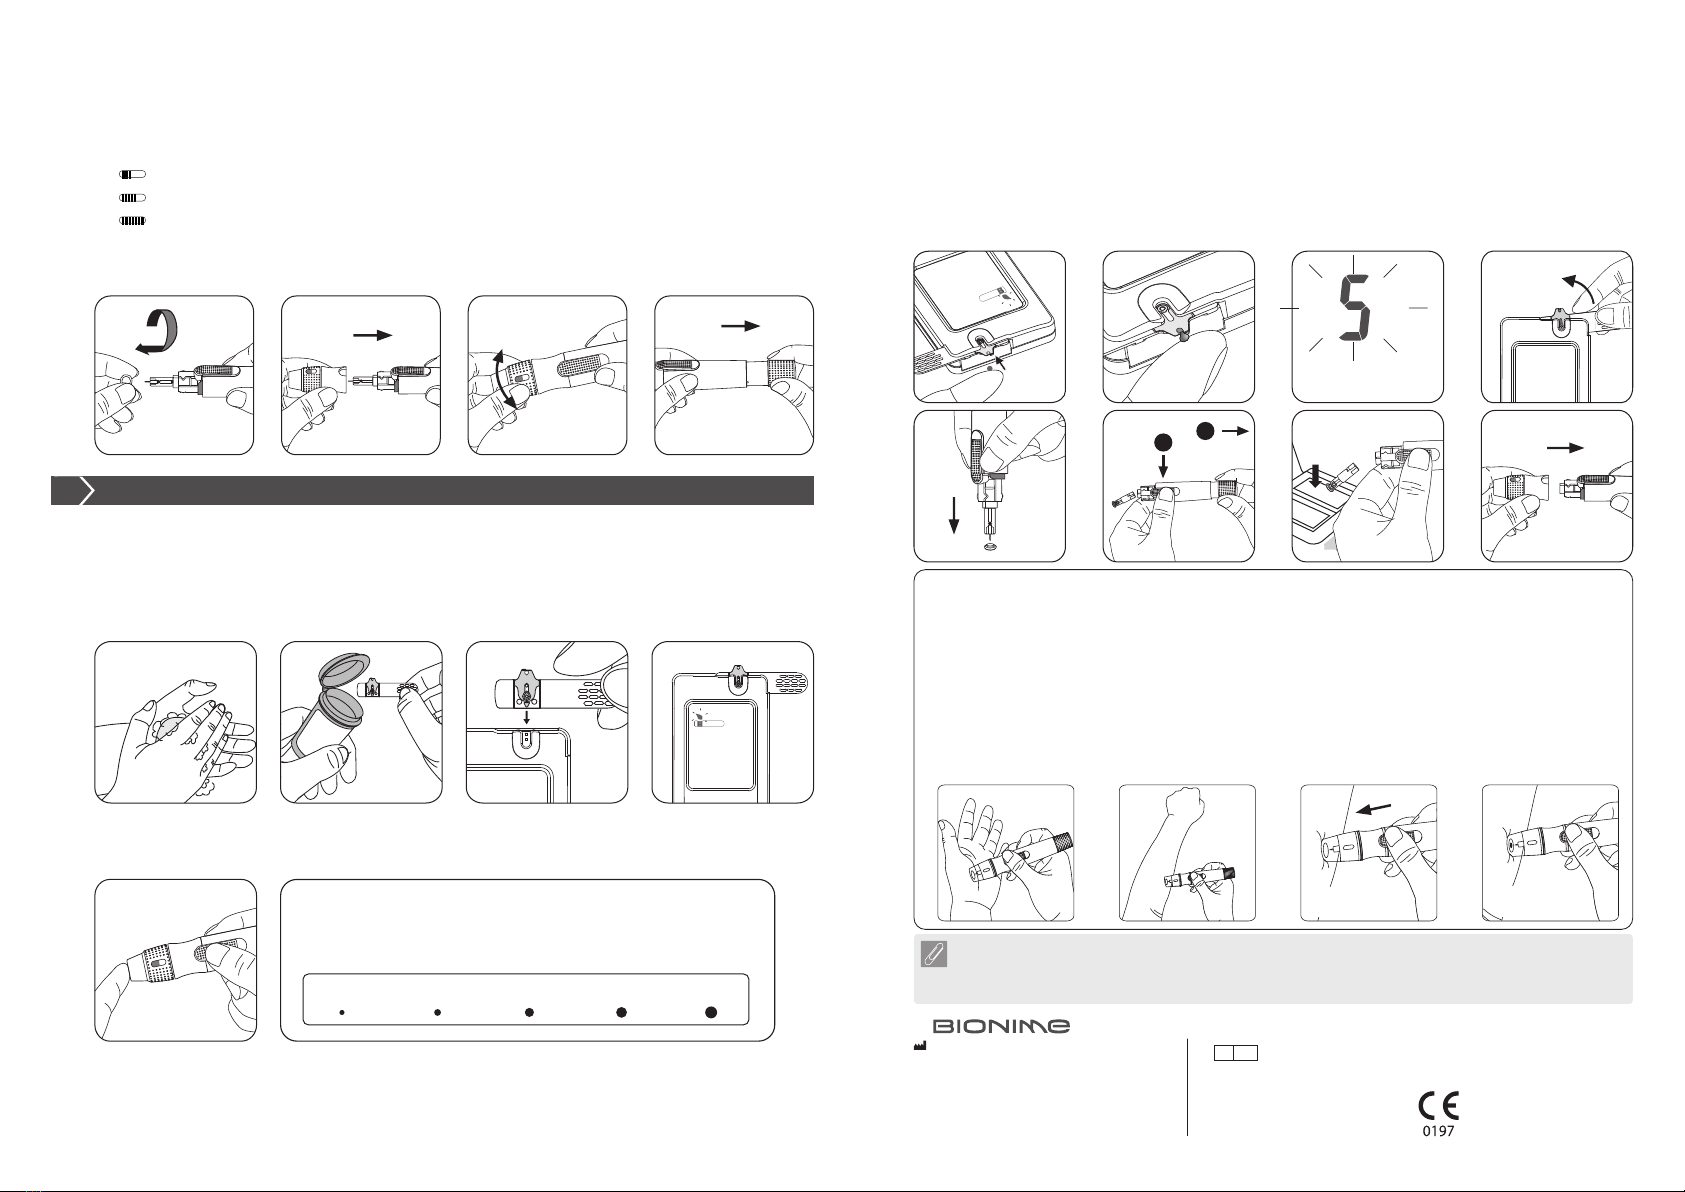
1) Wash and dry your hands. Take one test strip from the vial. Close the vial cap immediately.
2) Insert the test strip into the test strip port on the meter with the Viewing Window facing up. Push the
test strip in until you hear a click. The meter will automatically calibrate with the strip.
3) When you see the flashing blood drop icon on the display window, hold the lancing device to your
fingertip and press the release button.
4 6 75
Sample Size Example
3b
5) Touch and hold the blood droplet to the test strip sample entry port until you hear a " beep " and the
Viewing Window is filled with blood. If the Viewing Window is not completely filled with blood or the
test does not start, please discard the test strip and repeat the test with a new test strip.
6) You will see a countdown on the screen. After 5 seconds, the test result will appear.
7) Remove the test strip from meter. Please follow local regulations and discard the used strip
properly.
8) Remove the cap from the lancing device. Do not touched the used lancet. Press the lancet tip into
the protective cover.
9) Hold down the release button and pull back the plunger to eject the lancet.
10) Discard the lancet into a suitable sharps biohazard container.
11) Reattach the depth adjustable cap after finishing the test.
4) Use a minimum blood sample volume of 0.75 µL for blood glucose testing. Samples larger than
3.0 µL may contaminate the meter.
0.75 μL 1.0 μL 1.5 μL 2.0 μL 3.0 μL
1a 1b 2 3a
812
9 10 11
6
5a
3a 3b 3c 4
5b 7
4) Twist off and set aside the protective cover of the disposable lancet.
5) Reattach the depth adjustable cap.
6) Rotate the clear top part of the cap to adjust the depth. Check the number of lines visible in the
viewing window. More lines corresponds to a greater depth. Try
" " for soft or thin skin,
" " for average skin, or
" " for thick or calloused skin.
7) Pull back the plunger until you hear a click. The device is now primed. Let go of the plunger. It will
return to its original position.
Alternative site testing: palm or forearm blood sampling
1. Install the clear cap on the lancing device and follow Steps 1 and 2 of Performing a Test . " "
2. Massage the target area on the palm or forearm for a few seconds to increase blood flow.
3. Immediately after massaging, press and hold the lancing device against the target area.
4. Press the release button.
5. After pressing the release button, continue holding the lancing device against the skin. Gradually
push the device against your skin with increasing pressure until the blood droplet is of sufficient
size.
6. Discard the lancet into a suitable sharps biohazard container.
NOTE: DO NOT test from the palm or forearm if you are testing for hypoglycemia (low blood glucose).
Palm
Forearm
Press for a few
seconds
NOTE
- The RIGHTEST Lancing Device is intended for single person use only.
- For more information, please see the User’s Manual.
BIONIME CORPORATION
No. 100, Sec. 2, Daqing St., South Dist.,
Taichung City 40242, Taiwan
Tel: +886 4 2369 2388
Fax: +886 4 2261 7586
Email: info@bionime.com
http://www.bionime.com
Emergo Europe
Prinsessegracht 20
2514 AP The Hague
The Netherlands
Email: EmergoVigilance@ul.com
EC REP
101-3GM111-0C0
EN
Rev. Date: 2021-06
Rotate
Push the
release button
4


