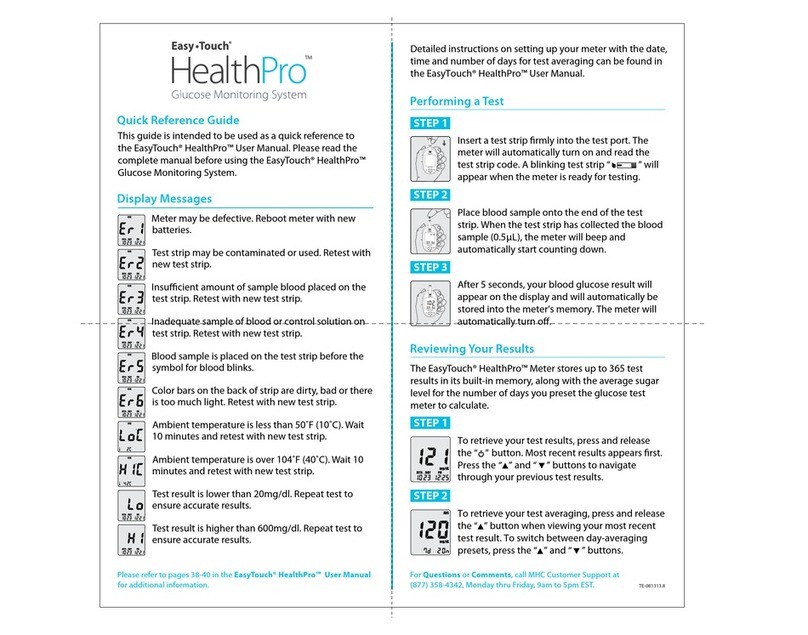
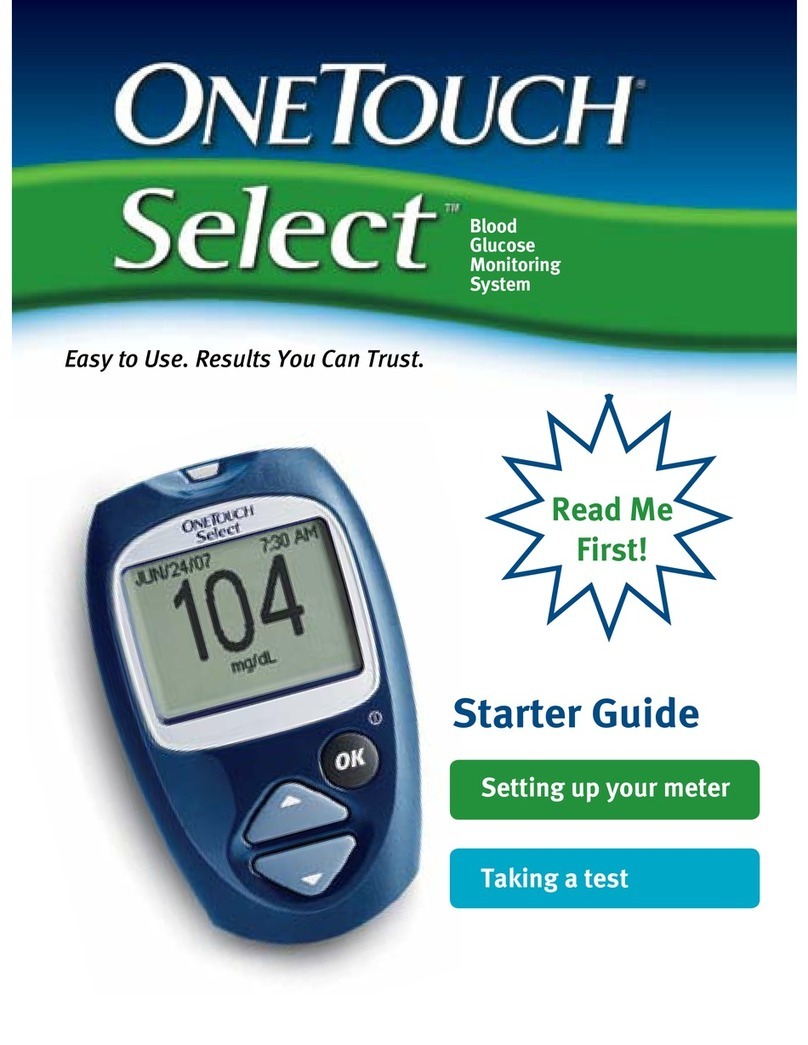
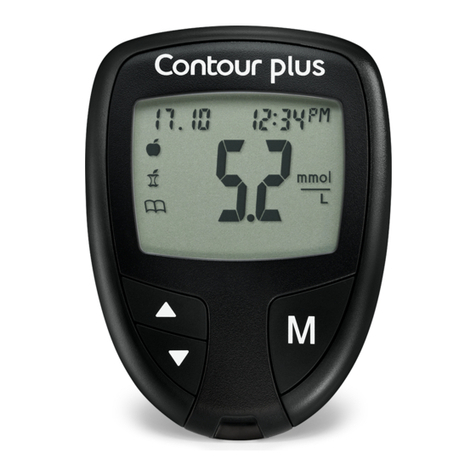
Prodigy Autocode User manual

1
Diagnostic Devices, Inc. 1.800.243.2636
Prodigy Talking Meter Owner’s Manual
Dear Prodigy®Owner:
Thank you for choosing the Prodigy AutoCode®Talking
blood glucose monitoring system. Please read this manual
carefully as it contains important information about your new
Prodigy®system. A warranty registration card is included with
your system. Please return the completed card to us.
Prodigy®meters are designed to help you and your
healthcare professionals monitor your blood glucose levels.
This owner’s manual will help you learn how to use the
Prodigy AutoCode®Talking Meter effectively. Technical
support is available 24 hours/7 days a week by calling
1-800-243-2636. All questions about interpreting the
results should be directed to your healthcare professionals.
The Prodigy AutoCode®is the latest technology for blood
glucose monitoring. It is easy to use and will give you fast
and accurate results with a minimal sample of blood. It has
a large screen display for easy reading and is small and
lightweight for portable convenience.
The Prodigy AutoCode®Meter:
•Requiresno-coding,allowingyoutosavetimeandavoid
human error due to improper coding.
•AllowsYoutoPerformAlternativeSiteTesting(AST).
• Hasmemoryanddatamanagementcapabilities.
Prodigy®’s free software, available at
www.prodigymeter.com, gives you and your
healthcare professionals powerful graphic tools to
manage your diabetes.

Diagnostic Devices, Inc. www.prodigymeter.com
Prodigy Talking Meter Owner’s Manual
2
3
Diagnostic Devices, Inc. 1.800.243.2636
Prodigy Talking Meter Owner’s Manual
Blood Glucose Testing ................................................... 24
Preparing the Lancing Device ........................................ 24
GettingaBloodSample................................................ 26
Performing a Blood Glucose Test .................................. 28
Using the Meter Memory ............................................... 30
Viewing Results on a Personal Computer ....................... 32
Caring for your Prodigy AutoCode® Meter........................ 34
Maintenance................................................................ 34
Battery ....................................................................... 34
BatteryReplacement.................................................... 35
System Troubleshooting ................................................ 36
SpecialMessages........................................................ 36
Error Messages ........................................................... 37
Troubleshooting Guide.................................................. 38
Information about your Prodigy AutoCode® Meter ........... 40
ComparingMeterandLaboratoryResults ...................... 40
Specifications ............................................................... 42
Performance Characteristics......................................... 43
ExpectedTestResults .................................................. 44
Important Safety Instructions .......................................... 4
Important Health-Related Information .............................. 5
About Alternative Site Testing (AST)................................ 6
Introduction to the Prodigy AutoCode®Meter................... 8
Intended Use ................................................................. 8
Test Principle ................................................................. 8
Contents of the Prodigy AutoCode®Meter......................... 9
Key Functions of the Meter ........................................... 10
Setting up the Prodigy AutoCode®Meter........................ 11
Meter Display ............................................................. 11
SpeakingFunction........................................................ 12
KeyFunctionsoftheTestStrips .................................... 13
ImportantTestStripInformation.................................... 14
Set-UpSteps ............................................................... 15
Control Solution Testing ................................................ 19
About Prodigy®ControlSolution..................................... 19
ImportantControlSolutionTestInformation................... 20
PerformingaControlSolutionTest ............................... 21
Table of Contents Table of Contents

Diagnostic Devices, Inc. www.prodigymeter.com
Prodigy Talking Meter Owner’s Manual
4
5
Diagnostic Devices, Inc. 1.800.243.2636
Prodigy Talking Meter Owner’s Manual
ReadthisbeforeusingyourProdigyAutoCode®Meter.
The following basic safety precautions should always be
taken.
•Closesupervisionisnecessarywhenthedeviceisused
by, on, or near children, handicapped persons or invalids.
•Usethedeviceonlyfortheintendedusedescribedin
this manual.
•Donotuseteststripsandcontrolsolutionsthatarenot
supplied by the manufacturer.
•Donotusethedeviceifitisnotworkingproperly,orifit
has suffered any damage.
•Beforeusinganyproducttotestyourbloodglucose,
read all instructions thoroughly and practice the test.
Do all quality control checks as directed and consult with
a diabetes healthcare professional.
Warning: Keep the test strip vial away from children;
the vial cap and the test strips can be a potential choking
hazard. Never chew or swallow a test strip. If this occurs,
please seek medical assistance immediately.
Important Safety Instructions
Severedehydrationandexcessivewaterlossmaycause
false low results. If you believe you are suffering from
severe dehydration; consult a healthcare professional
immediately.
Elevated blood triglycerides, reducing substances such
as uric acid and ascorbic acid at normal blood
concentration, or acetaminophen, dopa, methyldopa,
L-dopa, and tolbutamide at normal blood concentrations
should not significantly affect the results.
Testresultsbelow60mg/dL(3.3mmol/L)indicatelow
bloodglucose(hypoglycemia).Testresultsgreaterthan
240mg/dL(13.3mmol/L)indicatehighbloodglucose
(hyperglycemia).Ifyourresultsarebelow60mg/dLor
above 240 mg/dL, repeat the test, and if the test
resultsarestillbelow60mg/dL(3.3mmol/L)orabove
240mg/dL(13.3mmol/L),consultyourhealthcare
professional immediately.
Inaccurate results may occur in severely hypotensive
individuals or patients in shock. Inaccurate low
results may occur for individuals experiencing a
hyperglycemic-hyperosmolar state, with or without ketosis.
Critically ill patients should not be tested with blood glucose
meters.
Please refer to your test strip package insert for additional
important information.
Important Health-Related Information

Diagnostic Devices, Inc. www.prodigymeter.com
Prodigy Talking Meter Owner’s Manual
6
7
Diagnostic Devices, Inc. 1.800.243.2636
Prodigy Talking Meter Owner’s Manual
ThereareimportantlimitationstoAST.Pleaseconsultyour
healthcareprofessionalbeforeyouperformAST.
What is AST?
AlternativeSiteTesting(AST)meansyoucanusepartsof
the body other than your fingertips to check your blood
glucose levels. The Prodigy AutoCode®Meter allows you to
test on your palm, forearm, upper arm, calf or thigh.
See Figure 1.
What is the advantage?
Fingertips feel pain more readily
because they are full of nerve
endings(receptors).Atotherbody
sites, nerve endings are not so
numerous and you will not feel as
much pain as you will experience at
the fingertip.
When to use AST?
Food, medication, illness, stress,
and exercise can affect blood
glucose levels. Capillary blood at
the fingertip reflects these changes
faster than capillary blood at other sites.
Therefore, if you are testing your blood glucose level
during or immediately after a meal, physical exercise
or stressful event, take the blood sample from your
fingertip only.
About Alternative Site Testing (AST)
Figure 1
Use AST only:
vTwo hours or more after your last meal.
vTwo hours or more after taking insulin.
vTwo hours or more after exercise.
vDuring steady state blood glucose conditions.
Do not use AST if:
vYouhavereasontobelieveyouhavehypoglycemiaor
hyperglycemia.
vYourroutineglucoseresultsareoftenuctuating.
vYouarepregnant.
*To increase the accuracy when using AST, rub the puncture
site before extracting blood.
About Alternative Site Testing (AST)

Diagnostic Devices, Inc. www.prodigymeter.com
Prodigy Talking Meter Owner’s Manual
8
9
Diagnostic Devices, Inc. 1.800.243.2636
Prodigy Talking Meter Owner’s Manual
Intended Use
Thesystemisintendedforuseoutsidethebody(invitro
diagnosticuseonly).Itshouldbeusedonlyfortestingblood
glucose(bloodsugar)andonlywithfreshcapillarywhole
blood samples. The system is intended for use in the home
and in clinical settings. It should not be used for the
diagnosis of diabetes or for the testing of newborns.
Test Principle
Blood glucose is measured by an electric current that is
produced when a blood sample mixes with the reagent
(specialchemicals)oftheteststrip.Theelectricalcurrent
changes with the amount of glucose in the blood sample.
The Prodigy AutoCode®Meter measures the strength of the
electrical current, calculates your blood glucose level and
then displays your result in either “mg/dL” or “mmol/L.”
The Prodigy AutoCode®Meter,TestStripsandControl
Solutionshavebeendesigned,testedandproventowork
together as a system to produce accurate blood glucose
test results.
Important: Use only Prodigy®ControlSolutionsandTest
StripswithyourProdigyAutoCode®Meter. Using other test
strips and control solutions with this meter can produce
inaccurate results.
REF #51850 or
REF #51885
Your “Meter” includes:
•ProdigyAutoCode®
Talking Meter
•Two(2)AAABatteries
•CarryingCase
•CompleteInstructions:
- Manual
- Log Book
-QuickReference
- Warranty Card
*You can purchase
additional supplies
from your provider
REF #51880 or
REF #51890
Your “Meter Kit” includes:
•ProdigyAutoCode®
Talking Meter
•Two(2)AAABatteries
•Prodigy®Control
Solution(4ml)
•Prodigy®TestStrips(10ct)
•SterileLancets(10ct)
•LancingDevice
•CompleteInstructions:
- Manual
- Log Book
-QuickReference
- Warranty Card
Introduction to the Prodigy AutoCode®Meter
The Prodigy AutoCode®Meter is available as a meter only
orasameterkit.Pleasecheckthe“REF”numbermarked
on the outside of the box to see if you have purchased a
“Meter” or a “Meter Kit.” Please review the contents of your
purchase to confirm that all the components are included as
listed below:
Important: Please review the contents of your purchase.
If any items are missing, please return your meter to the
place of purchase.
Contents of the Prodigy AutoCode® Meter

Diagnostic Devices, Inc. www.prodigymeter.com
Prodigy Talking Meter Owner’s Manual
10
11
Diagnostic Devices, Inc. 1.800.243.2636
Prodigy Talking Meter Owner’s Manual
Control Solution
Test Symbol
Showsthatyouarein
ControlSolutionMode.
Test
Result Area
Displays test
results.
Blood Drop Symbol
Flashes when sample
should be applied.
Test Strip
Symbol
Appears
when the
meter is
turned on.
Unit of Measure
Indicates what unit of measure
the test result is displayed in.
Low Battery
Symbol
Appears
when the
battery
power is low.
Voice Symbol
Showsifaudio
function is on.
Temperature
Symbol
Appears
when
ambient
temperature
is outside of
operating
range.
Memory
Symbol
Appears when
you review the
memory.
Day Average
Indicates that the
displayed test result
is an average.
Time Date
Meter Display
Figure 5
Test Slot
Insert the test strip here.
The meter will turn on automatically.
LCD Display
Guides you through the test using
symbols and simple messages.
Talking Symbol
Confirms audio function.
Set Button
Located in the battery compartment;
used to set up the meter.
Data Port
PortforUSBCable
connection to your computer.
Main Button
Turns the meter on or performs other
functions described in this manual.
Figure 2
Front
Figure 3 - Back
Figure 4 - Back
Key Functions of the Meter
Setting Up the Prodigy AutoCode®Meter

Diagnostic Devices, Inc. www.prodigymeter.com
Prodigy Talking Meter Owner’s Manual
12
13
Diagnostic Devices, Inc. 1.800.243.2636
Prodigy Talking Meter Owner’s Manual
The Prodigy AutoCode®Meter measures the amount of blood
glucose(bloodsugar)inwholeblood.Bloodisappliedto
the opening of the absorbent channel of the test strip and is
automatically drawn.
The test strip consists of the following parts:
Absorbent Channel
Apply a drop of blood and it will be drawn
in automatically.
Confirmation Window
Showswhetherenoughbloodhas
been drawn into the test strip’s
absorbent channel.
Test Strip Handle
Holdthisparttoinser ttheteststripinto
the test strip port on the meter.
Contact Bars
Insert this end of the test strip into the
meter. Push it in firmly until it will not go
any further.
Please refer to the “Performing a Blood Glucose Test”
Sectionforcompleteinstructions.
Key Functions of the Test Strip
The Prodigy AutoCode®Meter talks you through each step of
your testing procedure.
When does the
meter speak?
When the meter is turned
on.
When room temperature is
outside operating range;
which is 50°F ~ 104°F
(10°C-40°C).
When the meter is ready to
test.
(appearsondisplay)
When the test is completed.
(Theresultappearson
display)
When there is not enough
blood in the test strip.
When you turn off the meter.
When a used test strip is
inserted.
What does the
meter say?
YourProdigy®Meter is on.
Roomtemperatureisoutof
range.
Please apply blood to the
strip.
Yourbloodglucoseis
(number)milligramsper
deciliter/millimoles per liter.
Yourbloodsampleisnot
enough.
Goodbye.
Test strip has been used.
Speaking Function

Diagnostic Devices, Inc. www.prodigymeter.com
Prodigy Talking Meter Owner’s Manual
14
15
Diagnostic Devices, Inc. 1.800.243.2636
Prodigy Talking Meter Owner’s Manual
The Prodigy AutoCode®Meter has the language, volume,
time,dateandunitofmeasurepresets.However,ifyou
change the time or replace the batteries, you should check
and update the time and date.
STEP 1: Enter Set-Up Mode
Startwiththemeteroff.Thenpressthe
“SET” button located in the battery
compartment. The meter is now in
the set-up mode.
STEP 2: Select Language
The language option appears first;
press the “SET” button; then
“L-1” or “L-2” will appear on the LCD.
By default, “L1” indicates default language
and “L2” indicates second language.
Press the “M” button to select
language. With the correct language on
the display, press the “SET” button and
a number will appear. See Figure 6.
Set-Up Steps
Figure 6
• Storeteststrippackagesinacool,dr yplacebetween
39.2°F~104°F(4°C~40°C).Keepawayfromdirect
sunlight and heat. Do not refrigerate.
•Storeyourteststripsintheiroriginalvialonly.Donot
transfer them to a new vial or any other container.
•Withclean,dryhands,youmaytouchtheteststrip
anywhere on its surface when removing it from the
vial or inserting it into the meter.
•Afterremovingateststripfromthevial,useit
immediately then replace the vial cap and close it tightly.
•Useeachteststripimmediatelyafterremovingitfrom
the vial.
•Onlyapplyabloodsampleoracontrolsolutionsample
to the test strip’s absorbent channel. Applying other
substances to the test strip’s absorbent channel
will cause inaccurate results.
•Recordthediscarddateontheviallabelwhenyourst
open it. Discard remaining test strips 90 days after
the first opening date.
•Donotuseteststripsbeyondtheexpirationdate
printed on the package.
•Donotbend,cutoralterateststripinanyway.
Warning: Keep the test strip vial away from children; the
vial cap and the test strips can be a potential chocking
hazard. Never chew or swallow a test strip. If this occurs,
please seek medical assistance immediately.
Important Test Strip Information

Diagnostic Devices, Inc. www.prodigymeter.com
Prodigy Talking Meter Owner’s Manual
16
17
Diagnostic Devices, Inc. 1.800.243.2636
Prodigy Talking Meter Owner’s Manual
STEP 6: Set the Day
Press and release the “M” button to advance
the day. With the correct day on the display,
press the “SET” button and the time will
appear on the display with the hour segment
flashing. See Figure 11.
STEP 7: Set the Hour
Press and release the “M” button to
advance the hour. With the correct hour on
the display, press the “SET” button and the
minutes segment will start flashing.
See Figure 12.
STEP 8: Set the Minutes
Press and release the “M” button to
advance the minutes. With the correct
minutes on the display, press the “SET”
button and the current unit of
measurement will start flashing.
See Figure 13.
Important: Day averages are calculated from results
obtained during the 7, 14 and 28 days preceding
the current date and time settings.
Figure 13
STEP 3: Setting Volume Level
The meter displays “VOL” and a flashing
number. Press the “M” button to select
the speaking volume. Then press the
“SET” button and the year segment
will appear and start flashing.
•Number0indicatesthatthespeaking
function is turned off.
•Numbers1to3indicatespeakingvolume
from low to high, where “” is displayed
on the LCD during testing.
See Figures 7 and 8.
STEP 4: Set the Year
Press and release the “M” button to
advance the year. With the correct year
on the display, press the “SET” button
and the date will appear on the display
with the month segment flashing.
See Figure 9.
STEP 5: Set the Month
Press and release the “M” button to advance
the month. With the correct month on the
display, press the “SET” button and the day
segment will start flashing.
See Figure 10.
Figure 9
Figure 10
Figure 11
Figure 12
Figure 7
Figure 8

Diagnostic Devices, Inc. www.prodigymeter.com
Prodigy Talking Meter Owner’s Manual
18
19
Diagnostic Devices, Inc. 1.800.243.2636
Prodigy Talking Meter Owner’s Manual
About Prodigy®Control Solution
Prodigy®ControlSolutionisaredliquidthatcontainsglucose
that will react with test strips and produce a test result.
Prodigy®systems use a high or low control solution.
vFirst, check your contents to see if you have a high
or low control solution in your meter kit.
vThen, after completing a control solution test, compare
resultswiththecorrectrange(highorlow)located
on the back of the test strip vial.
Why perform a control solution test?
•Toensurethatyourmeterandteststripsareworking
properly together.
•Topracticetestingwithoutusingyourownblood.
It is recommended to do a control solution test:
•Onceaweek(tomakesurethatyoucontinuetoget
accurateresults).
•Whenyoubeginusinganewvialofteststrips.
•Whenteststripsareexposedtoextremeenvironmental
conditions.
•Ifyoudropthemeter.
•Ifyouchangethebatteries.
Control Solution Testing
STEP 9: Select Unit of Measure
Press and release the “M” button until
the unit of measurement you are choosing
appears on the display. Press the “SET”
button and the memory segment will start
flashing. See Figures 14 and 15.
Yourmetercandisplaytestresultsin
milligramsperdeciliter(mg/dL)or
millimolesperliter(mmoL/L.)
•Themg/dLunitisstandardinthe
UnitedStates.
•Themmol/LunitisstandardinCanada.
STEP 10: Delete Memory
When the “dEL” symbol and the flashing
“M” symbol appear on the display, you can
choose to clear the memory. If you do not
want to clear the memory, press the “SET”
button again to skip this step. If you want
to clear ALL memory, press the “M”
buttonfor(4)foursecondsandboth“dEL”
and “M” will flash. Press the “M” button
again to delete ALL memory. The “- - -” will
appear to indicate all memory has been
deleted. See Figure 16.
Set-upisnowcompleted.Pressthe“SET”
button to turn off the meter. “OFF” is
displayed before shut down. See Figure 17.
Figure 16
Figure 17
Figure 14
Figure 15

Diagnostic Devices, Inc. www.prodigymeter.com
Prodigy Talking Meter Owner’s Manual
20
21
Diagnostic Devices, Inc. 1.800.243.2636
Prodigy Talking Meter Owner’s Manual
Performing a Control Solution Test
Startwiththemeteroff.
STEP 1: Insert Test Strip
Insert a test strip with the contact bar end
entering into the test slot first. Push the test
strip as far as it will go without bending it. The
meter turns on automatically.
See Figure 18.
STEP 2: Mark as a Control Solution Test
After the “ ” symbol appears on display,
press the “M” button and a control solution
bottle symbol appears on display. With the
control solution bottle symbol on the the
display, the meter will not store your test
result in the memory. If you decide not to
perform a control solution test, press
the “M” button again and the control
solution bottle symbol will disappear.
See Figure 19.
Important: Be sure that you are in
ControlSolutionModesothatthetest
result will not be stored in the meter
memory.
Figure 19
Figure 18
Important Control Solution Test Information
•UseonlyProdigy®ControlSolutions.
•Checktheexpirationdateonthecontrolsolutionbottle.
Do not use if expired.
•ControlSolution,meterandteststripsshouldcometo
roomtemperature(68-77°F/20-25°C)beforetesting.
•Usewithinaperiodof90daysfromthedatethatyourst
openit.Recordthediscarddateonthecontrolsolution
bottle and discard after 90 days.
•Storethecontrolsolutiontightlyclosedattemperatures
below86°F(30°C).Donotrefrigerate.
Important: Prodigy®’sControlSolutionrangesare
located on the back of the test strip vial. They are not
recommended target ranges for your blood glucose level.

Diagnostic Devices, Inc. www.prodigymeter.com
Prodigy Talking Meter Owner’s Manual
22
23
Diagnostic Devices, Inc. 1.800.243.2636
Prodigy Talking Meter Owner’s Manual
STEP 4: Check if the Test Result is in Range.
Inlessthan(7)seconds,thecontrol
solution test result appears on the display.
Compare the test result with the range
printed on the test strip vial. The test
result should fall within the printed range.
See Figure 23.
Youwillhearavoicemessage,
“Blood glucose is
(number) (unit)”.
Out of Range Results
If test results fall outside the range printed
on the test strip vial, check “Trouble-Shooting
Guide” located in the “System Troubleshooting”
Sectionandrepeatthetest.
If you continue to get out-of-range results, it means that the
system or the control solution may not be working properly.
DO NOT use the system to test your blood glucose level. If
you are unable to resolve the problem, contact Technical
Supportat1-800-243-2636.
NORMAL
109-165
Figure 23
STEP 3: Apply Control Solution
Shakethecontrolsolutionbottle
well.Removecap.Squeezethe
bottle, discard the first drop, and
wipe off the dispenser tip with a
clean tissue paper or cotton.
Squeezethebottleagaintogeta
second drop onto a clean
non-absorbent surface or on your
fingertip first. Then apply the drop to
the opening of the absorbent channel
oftheteststrip(whereitmeetsthe
narrowchannel)untiltheconrmation
window is filled. The meter begins
to count down. See Figures 20, 21 and 22.
Caution: To avoid contaminating the control solution with
the content of the test strip, DO NOT DIRECTLY APPLY
CONTROL SOLUTION ONTO THE TEST STRIP.
Figure 20
Figure 21 Figure 22

Diagnostic Devices, Inc. www.prodigymeter.com
Prodigy Talking Meter Owner’s Manual
24
25
Diagnostic Devices, Inc. 1.800.243.2636
Prodigy Talking Meter Owner’s Manual
STEP 5:SettheLancingLevel.The
adjustable tip offers 5 levels of skin
penetration. To select the desired
depth, twist the adjustable tip in
either direction until the number lines
up with the arrow. To select the best
depth: 1-2 for soft or thin skin, 3 for
average skin, 4-5 for thick or
callused skin. See Figure 26.
Warning: To reduce the chance of infection:
•Neversharealancetorthelancingdevice.
•Alwaysuseanew,sterilelancet.
•Lancetsareforsingleuseonly.
•Avoidgettinghandlotion,oils,dirt,ordebrisin
or on the lancets and the lancing device.
Preparing the Lancing Device
STEP 1:Removethecapbytwistingitoff.
STEP 2:InsertaSterileLancetinto
the Lancing Device. Insert the lancet
into the lancet holder and push down
firmly until it is fully seated. Do not
twist the lancet. See Figure 24.
STEP 3:Removetheprotectivecap
from the lancet by twisting it and then
save it for later use. See Figure 25.
STEP 4:Replacethecapontothe
LancingDevice.Screwthecap
until it is snug but not too tight.
Blood Glucose Testing
Figure 25
Figure 26
Figure 24

Diagnostic Devices, Inc. www.prodigymeter.com
Prodigy Talking Meter Owner’s Manual
26
27
Diagnostic Devices, Inc. 1.800.243.2636
Prodigy Talking Meter Owner’s Manual
•Sites other Than Your Fingertip
Please refer to the “About Alternative Site Testing (AST)”
Section.Pleaseconsultyourhealthcareprofessional
before obtaining blood from sites other than your fingertip.
Caution: The Prodigy AutoCode®Meter only requires a tiny
blood sample to perform a test. Choose a different spot
eachtimeyoutest.Repeatedpuncturesinthesamespot
may cause soreness and calluses.
STEP 3: Gently Massage the Area
Do not smear the blood sample.
To obtain the most accurate test
results, wipe off the first drop of blood
and gently squeeze another drop of blood.
See Figures 29 and 30.
STEP 4: Remove the Lancet
Take the lancet out carefully. Place the
protective cap back on the exposed
tip of the lancet.
*Always use caution when removing the lancet.
Discard the lancet according to your local regulations.
Warning: The first drop of blood usually contains tissue
fluid and serum, which may affect the test result. It should
be discarded.
Alternative Site Testing (AST)
When you want to obtain blood from sites other than the
ngertip,usetheclearcap.Screwtheclearcapontothe
Lancing Device until it is snug but not too tight, and then
gotoStep6.
STEP 6: Cock the Lancing Device.
Slidetheejection/cockingcontrolback
until it clicks. If it does not click, the
lancing device may have been cocked
when the lancet was inserted. See
Figure 27.
*The Lancing Device is prepared and
ready to lance your finger for a blood sample.
Getting a Blood Sample
STEP 1: Wash Your Hands and the Puncture Site
Use warm, soapy water.
Rinseanddrythoroughly.
STEP 2: Lance the Selected Puncture Site
• Fingertip
Holdthelancingdevicermlyagainstthe
sideofyournger.PresstheReleasebutton.
Youwillhearaclick,indicatingthatthe
puncture is complete. See Figure 28.
Figures 29 and 30
Figure 27
Figure 28

Diagnostic Devices, Inc. www.prodigymeter.com
Prodigy Talking Meter Owner’s Manual
28
29
Diagnostic Devices, Inc. 1.800.243.2636
Prodigy Talking Meter Owner’s Manual
If not, do not try to add more blood to the test strip.
Discard the test strip and retest with a new one.
If you have trouble filling the test strip,
pleasecontactTechnicalSupportforassistance.
Caution: DO NOT:
•Smearorscrapethebloodonto
the test strip.
•Applybloodtotheteststrip
when the test strip is out of
the meter
•Putbloodorforeignobjectsintothe
test strip slot.
STEP 3: Read Your Result
Youwillhearavoicemessage,
“Blood glucose is (number) (unit).”
After the meter counts down from 6 to 0, your
blood glucose test result appears along with the
unit of measure, date and time. The speaker
will announce the test result. This blood
glucose result is automatically stored in the
meter memory. Turn the meter off by removing
the test strip. Discard the used test strip
carefully to avoid contamination. See Figure 34.
Important: If you do not apply a blood sample within
(5)veminutes,themeterwillautomaticallyturnoff.
Youmustremovetheteststripandre-inser titagain
to turn on the meter and restart the test procedure.
Performing a Blood Glucose Test
STEP 1: Insert the Test Strip
Insert a test strip with the contacts bar end
entering into the test slot first. Push the test
strip as far as it will go without bending it.
The meter turns on automatically. See Figure
31.
STEP 2: Apply Blood Sample
Youwillhearavoicemessage,
“Please apply blood onto the strip.”
When the meter shows the “ ” apply blood
to the opening of the absorbent channel of
the test strip where it meets the narrow
channel. Blood will be drawn into the test
strip. See Figure 32.
The test strip confirmation window should be
completely filled before the meter begins to
count down. The meter will keep inidicating
the confirmation window is full.
See Figure 33. Figure 34
Figure 31
Figure 32
Figure 33

Diagnostic Devices, Inc. www.prodigymeter.com
Prodigy Talking Meter Owner’s Manual
30
31
Diagnostic Devices, Inc. 1.800.243.2636
Prodigy Talking Meter Owner’s Manual
The 14-day average is calculated from the
blood glucose test results obtained during
the last 14 days. See Figure 37.
It, too, indicates how many blood glucose
tests have been performed, e.g., 41
(41testsinthelast14days).The28-day
averages show the same information.
STEP 3: Recalling Individual Test Results
After the 28-day average, the most recent
test result with date and time will be shown.
Press the “M” button once and the next
most recent test result will appear. Each
time you press and release the “M” button,
the meter will recall up to your last 120 test
results in order. When the memory is full, the
oldest test result is dropped as the newest is
added.After reaching the last set of results,
the meter will turned automatically.
See Figure 38.
STEP 4: Exit the Memory Mode
Press and hold the “M”buttonforthree(3)secondstoturn
off the meter.
Important: If you do not press any button for three
(3)minutes,themeterwilldisplay“OFF” and turn
off automatically.
The Prodigy AutoCode®Meter stores a maximum of the 120
most recent blood glucose test results with date and time in
its memory. It also provides you with 7, 14, 21 and 28 day
averagesofyourbloodglucosetestresults.Youcanreview
the individual or average test results by entering the memory
mode.
STEP 1: Enter the Memory Mode
While the meter is turned off, press the
“M” button twice. The 7-day average will
appear, indicating that you are in the
memory mode. If you continue to press the
“M” button, the 14 and 28-day averages
willappearinorder.Youcanthenreview
the last 120 individual test results in
memory. When using the meter for the first
time, “- - -” appears, indicating no test results
are in the memory. See Figure 35.
STEP 2: Recalling Average Test Results
The 7-day average is calculated from the
blood glucose results obtained during the
last 7 days. It also indicates how many
blood glucose tests have been performed
withinthisperiod,e.g.,21(21testsinthe
last7days).See Figure 36.
Figure 38
Using the Meter Memory
Figure 35
Figure 36
Figure 37

Diagnostic Devices, Inc. www.prodigymeter.com
Prodigy Talking Meter Owner’s Manual
32
33
Diagnostic Devices, Inc. 1.800.243.2636
Prodigy Talking Meter Owner’s Manual
STEP 3: Transmit Data
Follow the instructions provided in the software to transmit
data. Test results transmitted will include data and time.
RemovetheUSBCableandthemeterwillautomaticallyturn
off.
Important: While the meter is connected to the PC,
it is unable to perform a blood glucose test.
Test results in the memory can be transmitted to your
personal computer. Prodigy®DiabetesManagementSystem
SoftwareandstandardUSBcableareneededbefore
installation. The free software can be downloaded from
www.prodigymeter.com. To learn more about Prodigy®
DiabetesManagementSystemSoftware,pleasecontact
your local diabetes supplier.
STEP 1: Install Software
Install Prodigy®DiabetesManagementSystem
Softwareonyourcomputerbyfollowing
the instructions provided on our website:
Go to http://www.prodigymeter.com and
clickon“SoftwareDownloads”.
STEP 2: Connect to a Personal Computer
ConnecttheUSBCabletoyourcomputer.
ConnecttheUSBCabletotheDataPort
of the meter. “Lnk” will appear if the
USBcableisconnectedtothemeter.
“USb” will appear on the display indicat-
ing that the meter is successfully commu-
nicatingtoyourcomputer.Youcanbegin
to download the data from the meter.
See Figures 39 and 40.
Caring for Your Prodigy®AutoCode Meter
Viewing Results on a Personal Computer
Figure 39
Figure 40

Diagnostic Devices, Inc. www.prodigymeter.com
Prodigy Talking Meter Owner’s Manual
34
35
Diagnostic Devices, Inc. 1.800.243.2636
Prodigy Talking Meter Owner’s Manual
Battery Replacement
To replace the batteries, make sure
the meter is turned off.
STEP 1: Press the buckle on the
battery cover and lift up to remove
the cover. See Figure 43.
STEP 2:Removeoldbatteriesand
replacewithtwo(2)1.5VAAAalkaline
batteries. See Figure 44.
STEP 3: Close the battery cover.
See Figure 45.
STEP 4: Check the time and date.
Replacingthebatteriesdoesnot
affect the previous test results stored
inmemory.However,thetime,date
and units settings may need to be
updated.
Caution: As with all small objects,
the batteries should be kept
away from small children as they
may be a potential choking hazard.
If a battery is swallowed, seek
medical assistance immediately.
Maintenance
The Prodigy AutoCode®Meter does not require special
maintenance.
•Avoidgettingdirt,dust,blood,controlsolutionorwater
inside the meter through the test port or data port.
•Storethemeter,teststripsandcontrolsolutioninthe
carrying case after each use in a cool, dry place.
•Donotrefrigerate.
•Useaclothdampenedwithwaterandmilddetergentto
wipe the outside of the meter.
*Your meter is a precision instrument.
Please handle it with care.
Battery
Yourmetercomeswithtwo(2)1.5VAAA
alkaline batteries. The meter will alert you
when the power is getting low by displaying
two(2)differentmessages:
1. When the “ ” symbol appears alone
on the display, the meter is functional
and the result remains accurate, but
you should change the batteries as
soon as possible. See Figure 41.
2. When the “ ” symbol appears
together with the “E-b” symbol on the
display, the batteries do not have enough
powerforatest.Youmustchangethe
batteries before using the meter.
See Figure 42.
Caring for your Prodigy AutoCode®Meter
Figure 41
Figure 42
Figure 43
Figure 44
Figure 45

Diagnostic Devices, Inc. www.prodigymeter.com
Prodigy Talking Meter Owner’s Manual
36
37
Diagnostic Devices, Inc. 1.800.243.2636
Prodigy Talking Meter Owner’s Manual
SpecialmessagesandErrormessageshelptoidentify
certain problems but do not appear in all cases when a
problem has occurred. Improper use may cause an
inaccurate result without producing an error message.
If the problem is not resolved, please call Technical
Supportat1-800-243-2636forassistance.
Special Messages
Message What it means
“Lo” appears when your result
is below the measurement limit,
which is less than 20 mg/dL
(1.1mmol/L).“Lo”indicates
hypoglycemia(lowblood
glucose.)Youshould
immediately consult your
healthcare professional.
“HI”appearswhenyourresult
is above the measurement limit,
which is higher than 600 mg/
dL(33.3mmol/L).Youshould
immediately consult your
healthcare professional.
Blood
Glucose
level
LOW
Blood
Glucose
level
HI
Message What it means Action
Appears when the
batteries cannot
provide enough
power for a test.
Appears when
a used test strip
is inserted.
Error Messages
Appears when the
environmental
temperature is
below the system
operation range
50°F ~ 104°
(10°C~40°C).
Replacethe
batteries
immediately.
Test with a new
test strip. If the
problem persist,
please contact
Technical
Supportat
1.800.243.2636.
Contact
Technical
Supportat
1.800.243.2636.
Repeatthe
test after the
meter and test
strip is within
the operation
temperature
range.
SystemError
System Troubleshooting

Diagnostic Devices, Inc. www.prodigymeter.com
Prodigy Talking Meter Owner’s Manual
38
39
Diagnostic Devices, Inc. 1.800.243.2636
Prodigy Talking Meter Owner’s Manual
The test does not start after applying the sample.
Probable Cause What to Do
Error in peforming the test.
ControlSolutionbottle
not shaken well.
Expired or contaminiated
ControlSolution.
ControlSolutionthatistoo
warm or too cold.
Test strip deterioration.
Meter malfunction.
Readtheinstructions
thoroughly and repeat
the test again.
ShaketheControlSolution
bottle vigorously and repeat
the test again.
Check the expiration date
or the discard date of the
ControlSolution.
ControlSolution,meter,
and test strips should
come to room temperature
(68-77°F/20-25°C)
before testing.
Please repeat the test with
a new test strip.
Please contact Technical
Supportat1-800-243-2636
for assistance.
v
Batteriesexhausted. Replacethebatteries.
Batteries incorrectly Check that the batteries are
installed or absent. correctly installed.
Test strip inserted Insert the test strip correctly with
upside or the contact bars end entering
incompletely. first and facing up.
Metermalfunction. PleasecontactTechnicalSupport
at 1-800-243-2636
for assistance.
The meter does not display a message after
inserting a test strip.
Probable Cause What to Do
Troubleshooting Guide
The test does not start after applying the sample.
Probable Cause What to Do
Insufcientblood Repeatthetestusinga
sample. new test strip with a larger
blood sample.
Defectiveteststrip. Repeatthetestwithanew
test strip.
Sampleappliedafter Repeatthetestwitha
automatic shut-off new test strip. Apply sample
(5minutesafterlast onlywhenthe“ ” symbol
useraction). appearsonthedisplay.
Metermalfunction. PleasecontactTechnicalSupport
at 1-800-243-2636 for
assistance.
v
v
Other manuals for Autocode
8
Table of contents
Other Prodigy Blood Glucose Meter manuals
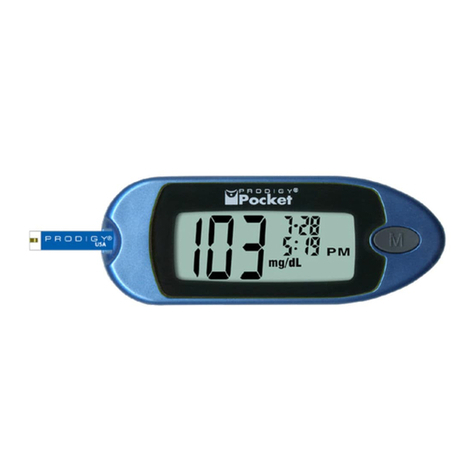
Prodigy
Prodigy Pocket User manual
Prodigy
Prodigy Preferred User manual

Prodigy
Prodigy Pocket User manual
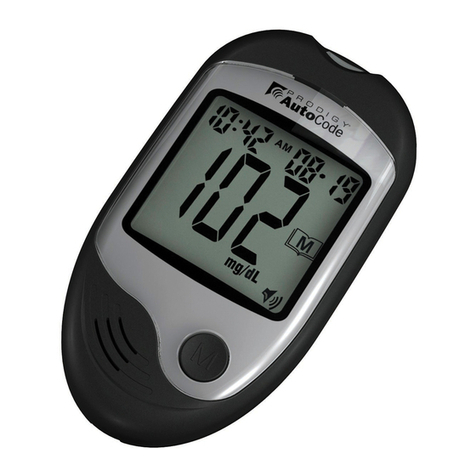
Prodigy
Prodigy Autocode User manual
Prodigy
Prodigy VOICE User manual

Prodigy
Prodigy Autocode User manual
Prodigy
Prodigy Autocode User manual

Prodigy
Prodigy Autocode User manual

Prodigy
Prodigy Autocode User manual

Prodigy
Prodigy Autocode User manual
