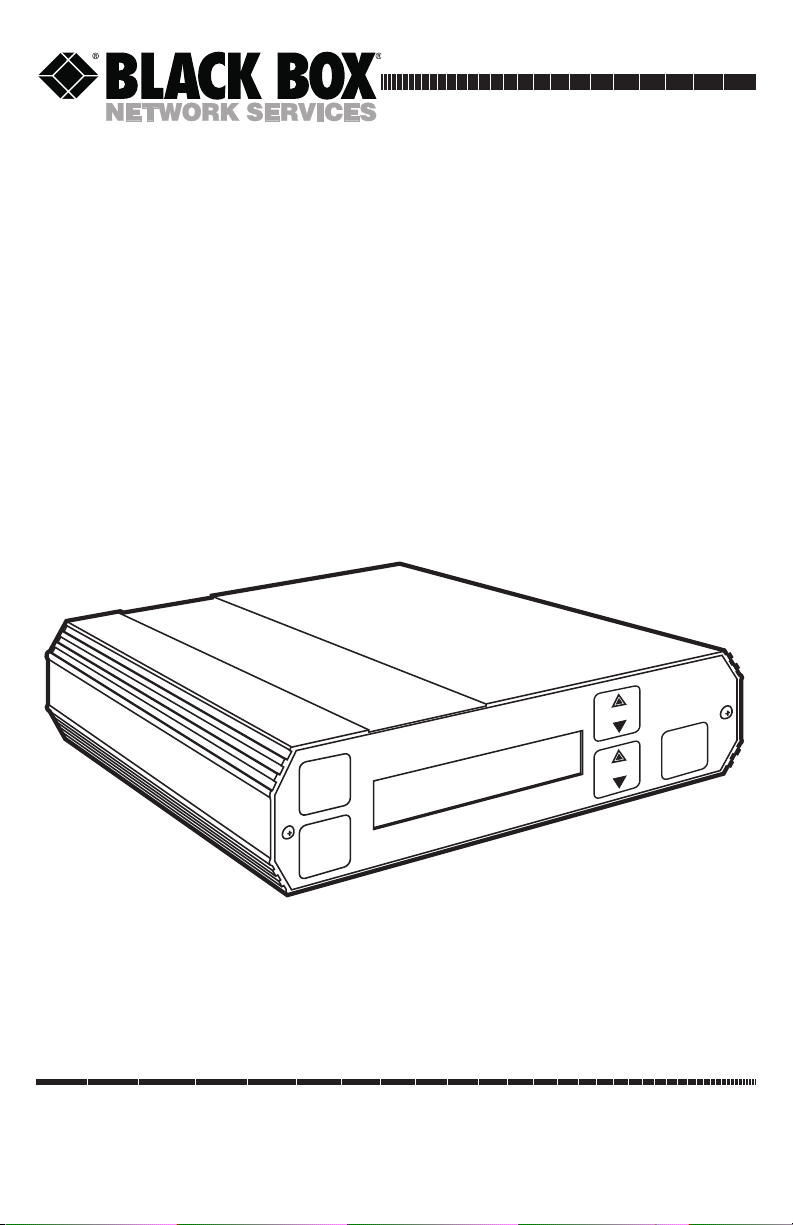
Black Box TX/CX 4000 User manual

1000 Park Drive • Lawrence, PA 15055-1018 • 724-746-5500 • Fax 724-746-0746
© Copyright 1995. Black Box Corporation. All rights reserved.

CUSTOMER
SUPPORT
INFORMATION
Order toll-free in the U.S. 24 hours, 7 A.M. Monday to midnight Friday: 877-877-BBOX
FREE technical support, 24 hours a day, 7 days a week: Call 724-746-5500 or fax 724-746-0746
Mail order: Black Box Corporation, 1000 Park Drive, Lawrence, PA 15055-1018
OCTOBER 1995
PCA40A
PCA40AE
TX/CX 4000
Select
Alt
Menu
List I/O
TX/CX 4000

3
FCC STATEMENT
FEDERAL COMMUNICATIONS COMMISSION
AND
INDUSTRY CANADA
RADIO FREQUENCY INTERFERENCE STATEMENTS
This equipment generates, uses, and can radiate radio frequency energy
and if not installed and used properly, that is, in strict accordance with the
manufacturer’s instructions, may cause interference to radio communication.
It has been tested and found to comply with the limits for a Class A
computing device in accordance with the specifications in Subpart J of
Part 15 of FCC rules, which are designed to provide reasonable protection
against such interference when the equipment is operated in a commercial
environment. Operation of this equipment in a residential area is likely to
cause interference, in which case the user at his own expense will be required
to take whatever measures may be necessary to correct the interference.
Changes or modifications not expressly approved by the party responsible
for compliance could void the user’s authority to operate the equipment.
This digital apparatus does not exceed the Class A limits for radio noise emission from
digital apparatus set out in the Radio Interference Regulation of Industry Canada.
Le présent appareil numérique n’émet pas de bruits radioélectriques dépassant les limites
applicables aux appareils numériques de classe A prescrites dans le Règlement sur le
brouillage radioélectrique publié par Industrie Canada.
TRADEMARKS
Epson®is a registered trademark of Seiko Epson Corporation.
Hewlett-Packard®, HP®, LaserJet®, and PCL®are registered trademarks
of Hewlett-Packard.
IBM®, Proprinter®, and IPDS™are trademarks or registered trademarks
of IBM Corporation.
Mannesmann Tally®is a registered trademark of Mannesmann Tally
Corporation.
OKIDATA®is a registered trademark of OkiAmerica Incorporate.
PostScript®ia a registered trademark of Adobe Systems Incorporated.
All applied-for and registered trademarks are the property of their respective
owners.

4
5210E ETHERNET CARD
NORMAS OFICIALES MEXICANAS (NOM)
ELECTRICAL SAFETY STATEMENT
INSTRUCCIONES DE SEGURIDAD
1. Todas las instrucciones de seguridad y operación deberán ser leídas antes
de que el aparato eléctrico sea operado.
2. Las instrucciones de seguridad y operación deberán ser guardadas para
referencia futura.
3. Todas las advertencias en el aparato eléctrico y en sus instrucciones de
operación deben ser respetadas.
4. Todas las instrucciones de operación y uso deben ser seguidas.
5. El aparato eléctrico no deberá ser usado cerca del agua—por ejemplo,
cerca de la tina de baño, lavabo, sótano mojado o cerca de una alberca,
etc..
6. El aparato eléctrico debe ser usado únicamente con carritos o pedestales
que sean recomendados por el fabricante.
7. El aparato eléctrico debe ser montado a la pared o al techo sólo como
sea recomendado por el fabricante.
8. Servicio—El usuario no debe intentar dar servicio al equipo eléctrico más
allá a lo descrito en las instrucciones de operación. Todo otro servicio
deberá ser referido a personal de servicio calificado.
9. El aparato eléctrico debe ser situado de tal manera que su posición no
interfiera su uso. La colocación del aparato eléctrico sobre una cama,
sofá, alfombra o superficie similar puede bloquea la ventilación, no se
debe colocar en libreros o gabinetes que impidan el flujo de aire por los
orificios de ventilación.
10. El equipo eléctrico deber ser situado fuera del alcance de fuentes de
calor como radiadores, registros de calor, estufas u otros aparatos
(incluyendo amplificadores) que producen calor.

5
INSTRUCCIONES DE SEGURIDAD
11. El aparato eléctrico deberá ser connectado a una fuente de poder sólo
del tipo descrito en el instructivo de operación, o como se indique en el
aparato.
12. Precaución debe ser tomada de tal manera que la tierra fisica y la
polarización del equipo no sea eliminada.
13. Los cables de la fuente de poder deben ser guiados de tal manera que no
sean pisados ni pellizcados por objetos colocados sobre o contra ellos,
poniendo particular atención a los contactos y receptáculos donde salen
del aparato.
14. El equipo eléctrico debe ser limpiado únicamente de acuerdo a las
recomendaciones del fabricante.
15. En caso de existir, una antena externa deberá ser localizada lejos de las
lineas de energia.
16. El cable de corriente deberá ser desconectado del cuando el equipo no
sea usado por un largo periodo de tiempo.
17. Cuidado debe ser tomado de tal manera que objectos liquidos no sean
derramados sobre la cubierta u orificios de ventilación.
18. Servicio por personal calificado deberá ser provisto cuando:
A: El cable de poder o el contacto ha sido dañado; u
B: Objectos han caído o líquido ha sido derramado dentro del
aparato; o
C: El aparato ha sido expuesto a la lluvia; o
D: El aparato parece no operar normalmente o muestra un cambio en su
desempeño; o
E: El aparato ha sido tirado o su cubierta ha sido dañada.

6
TX/CX 4000
Contents
Chapter Page
1. Specifications....................................................................................................8
2. Introduction .....................................................................................................9
3. Installation......................................................................................................10
4. Configuration—Twinax.................................................................................13
4.1 Host Configuration................................................................................13
4.2 Host/PC Download Commands ...........................................................18
4.3 Twinax Host/PC Download Commands..............................................20
4.4 Configuration Options ..........................................................................25
5. Operation—Twinax .......................................................................................45
5.1 Printer Sharing ......................................................................................45
5.2 PCLAN Printing.....................................................................................46
5.3 Parallel and/or Serial Initialization......................................................46
5.4 Host Printing..........................................................................................46
5.5 Host Port Initialization ..........................................................................47
5.6 Connecting Two Printers ......................................................................47
5.7 Twinax Drive ..........................................................................................48
5.8 Serial Printing ........................................................................................48
5.9 Laser Printer Operation ........................................................................48
5.9.1 Changing Typestyles ...................................................................50
5.9.2 Font Change Commands............................................................50
5.9.3 Page Length.................................................................................51
5.9.4 Paper Size.....................................................................................51
5.9.5 Paper Drawer Selection ..............................................................52
5.10 APO and COR......................................................................................54
5.10.1 Envelope Printing .....................................................................57
5.10.2 Document/Envelope Printing .................................................58
5.10.3 Duplex Printing.........................................................................59
5.11 Other Printer Commands ....................................................................60
5.12 Matrix/Specialty Printer Operation ...................................................61
5.13 ASCII Codes (Character Set) ..............................................................62
5.14 Print Quality.........................................................................................62
5.14.1 Pitch Control .............................................................................62
5.14.2 Graphics Printing ......................................................................62
5.14.3 Line Length ...............................................................................63

7
TX/CX 4000
Chapter Page
5.14.4 True 15 CPI ...............................................................................63
5.15 Generic Mode ......................................................................................63
5.16 Command Pass-Thru ...........................................................................64
5.17 User-Defined Command Strings.........................................................66
5.17.1 User-Defined Strings .................................................................66
5.17.2 User-Defined Fonts (HP PCL only) .........................................67
6. Configuration—Coax.....................................................................................68
7. Operation—Coax.........................................................................................112
7.1 Printer Sharing ....................................................................................112
7.2 PCLAN Printing...................................................................................113
7.3 Parallel and/or Serial Initialization....................................................113
7.4 Host Printing........................................................................................114
7.5 Host Port Initialization ........................................................................114
7.6 Connecting Two Printers ....................................................................114
7.7 Serial Printing ......................................................................................114
7.8 Print Position and Page Length..........................................................115
7.9 Laser Printing (HP PCL protocol selected).......................................116
7.10 Computer Output Reduction (COR)...............................................116
7.11 Automatic Print Orientation (APO) ................................................117
7.12 Generic Mode ....................................................................................120
7.13 Advanced Features.............................................................................120
7.13.1 Command Pass-Thru™...........................................................121
7.13.2 Custom User Strings................................................................122
7.13.3 SCS Mode Transparent Data ..................................................122
8. Troubleshooting...........................................................................................123
8.1 Interface Self-Test ................................................................................123
8.2 Buffer Print ..........................................................................................134
8.3 Hard Loopback....................................................................................134
8.4 Self Diagnostics ....................................................................................135
8.5 Solving Problems .................................................................................139
Appendix: Pinouts...........................................................................................145

8
TX/CX 4000
1. Specifications
Temperature —Operating: 40° to
110° F (4° to 43° C),
Storage: 32°to 158° F (0° to 70° C)
Maximum Relative Humidity —
85%, noncondensing
Power — PCA40A: 120 V, 60 Hz,
9 V output voltage, 1 A output
current; PCA40AE: 230 V,
50 Hz, 9 V output voltage, 1 A
output current
Size — 2"H x 6.4"W x 5.5"D
(5.1 x 16.3 x 13.9 cm)
Weight — 3 lb. (1.4 kg)
Hardware Requirements —
ASCII parallel or serial printer
Software Requirements — No
special host drivers needed
Emulation — AS/400 or System/3X
twinax, or 3270-type coax printer
Systems Supported — AS/400,
System/3X, 3270
Indicators — Front-panel LCD
display
Connectors — (1) DB25 male serial
out, (1) DB25 female parallel out,
(1) DB9 twinax/coax, (1) DB25
female serial in, (1) 36-pin
Centronics®female parallel in,
(1) 12 V power connector

9
TX/CX 4000
2. Introduction
Standard connectors for both
parallel and serial cables allow the
TX/CX 4000 to change with your
printing needs. The TX/CX 4000
allows printer sharing of up to two
PCs (parallel and serial), an IBM
coax or twinax host connection, and
a choice of using a parallel or serial
printer.
Unpacking
Check the packaging for water or
physical damage, and notify the
carrier immediately if any damage is
evident. Keep the original packaging
in case you need to move or ship the
TX/CX 4000. The package should
include the following:
• TX/CX 4000
• Wall-mount transformer
(9-VAC output). The PCA40A
comes with a 120-VAC input
transformer and the PCA40AE
comes with a 230-VAC input
transformer.
• This user manual
• Auto-terminating twinax V-cable
and 9-pin-to-coax adapter cable
• DB25 male-to-Centronics male
cable
• DB25 male-to-female cross cable
The TX/CX 4000 is a powerful yet
easy-to-operate printer interface. It
has a multitude of features that you
can access through its front panel or
by sending download commands
from the host or PC. Since it senses
which host adapter cable has been
attached, the TX/CX 4000
automatically adjusts to the host
environment.
The TX/CX 4000 is a twinax/coax
interface that enables most ASCII
parallel and serial printers to attach
directly to an AS/400®or System/3X
twinax host system, or 3270-type
coax host system.
When connected to an HP®PCL®
or compatible laser printer, the
TX/CX 4000 can be configured to
emulate the IBM 3812-1 (without
IPDS) system laser printer.
For IBM Proprinter®II, III, PPDS,
and Epson DFX+, DFX
(9-pin), LQ (24-pin), and ESC/P2
type printers, IBM 4214-2, 5224-1,
5225-1, and 5256-3 (twinax) printer
emulations are available. For coax
printing 3287, 3268, 3262, 4214-1
and 4224 printer emulations are
available. In addition, the TX/CX
4000 printer interface offers a
generic (carriage return and line
feeds) output protocol.

10
TX/CX 4000
3. Installation
Printer OK.”
6. During initial installation, review
and set the configuration
settings as necessary. Follow the
configuration instructions in
Chapter 4 for twinax
applications and Chapter 6 for
coax applications. To enter the
configuration mode, press the
blue MENU key.
7. After the desired parameters
have been selected, power on
the printer and print a self-test
from the “Test Menu” or return
to normal operation mode by
pressing Select.
8. Attach the host system cable(s)
and send a test print job to the
TX/CX 4000 to verify proper
installation.
Before connecting the TX/CX 4000
to the printer, verify that the printer
functions properly by performing a
printer self-test. Consult the printer’s
user’s guide for instructions on how
to start and evaluate the self-test. If
the printer functions properly,
follow these steps to install the
TX/CX 4000.
1. Power off the printer.
2. Attach the parallel or serial
cable from the interface to the
printer.
3. Attach the 9-pin host cable
adapter (twinax or coax) to the
interface’s connector. Do not
attach the host cable(s) at this
time.
4. Plug the 9V transformer into a
standard 120-VAC outlet (for the
PCA40A) or a 230-VAC outlet
(for the PCA40AE).
5. Power on the interface by
pressing the black I/O button.
The TX/CX 4000’s LCD screen
should identify itself as a “5250
or 3270 Interface,” indicating
proper power. It will then display
the message “Waiting for

11
TX/CX 4000
Using the Front Panel
The LCD front panel is easy to
configure and use. The functions
of the front panel are as follows:
• LCD Display—This displays the
current status of the TX/CX
4000 and is used to perform tests
and configure the settings.
During operational mode, the
top line displays S3X/AS-400
(Twinax), 3270 Coax, and Host
Communications Status (Sync or
No Sync) mode. The lower line
displays “Active Input” (left);
“Output Printer” (center); and
“Printer Status” (right).
• Select—While the operator is
viewing different options,
pressing “Select” will select the
displayed option as the active
option.
• Alt—Pressing “Alt” modifies the
displayed option.
• Menu—Pressing “Menu” moves
to the next menu group, if
possible. When the TX/CX 4000
is in operating mode, pressing
“Menu” places the TX/CX 4000
into configuration mode.
• List—Pressing “List” displays the
next setup item.
• I/O—Powers the TX/CX 4000
ON and OFF.
A flow chart of the twinax front
panel is shown in Chapter 4. A flow
chart of the coax front panel is
shown in Chapter 6.
The following is a tutorial for
the TX/CX 4000 front panel. By
completing this tutorial, you will
have a better understanding of
how the front panel operates in
both twinax and coax mode.
1. Power on the TX/CX 4000 by
pressing the I/O switch. A
twinax or coax adapter cable
must be attached, or an error
message will be displayed. The
TX/CX 4000 then proceeds to
the normal operational mode,
as noted in the LCD display.
2. Place the TX/CX 4000 in the
front panel mode by pressing
Menu.
3. The display now gives you the
choice of returning to normal
operation by pressing Select or
proceeding to the configuration
menus by pressing Menu. Press
Menu to continue.
4. Enter the “Test Menu” by
pressing List to list items in that
menu, or proceed to the Setup
menu by pressing Menu.
5. List the Setup Menu items by
pressing List.

12
TX/CX 4000
6. The first setup menu item in the
twinax menu is “Twinax
Address,” which is displayed on
the top line. The first setup
menu item in the coax menu is
“Lines Per Inch.” Item options
are shown on the second line.
An asterisk in the first position
indicates that the option is the
current active selection.
Press Alt repeatedly to display
the available options.
Press Select to select a displayed
option as the active selection. An
asterisk will appear in front of
the chosen selection.
Press List to list the next item in
the Setup Menu.
Press Menu to exit the Setup
Menu and go to the next menu.
7. Follow the instructions in Step 6
above to review and change the
menu item settings desired.
When all changes have been
made, press Menu until you
reach the display allowing you
to exit the configuration mode.
Pressing Select will then return
the TX/CX 4000 to normal
operation.
The menu selections for the
TX/CX 4000 and the option settings
offered are shown in the
Configuration chapters of this User’s
Guide. The twinax menu appears in
Chapter 4, and the coax menu
appears in Chapter 6.

13
TX/CX 4000
4. Configuration—Twinax
Table 4-1 shows the recommended
emulation and device ID on the
different host systems.
4.1 Host Configuration
Before operating the TX/CX 4000
in twinax mode, you must configure
the IBM host with a cable address
and device ID for the printer. See
your system operator or system
manuals for details. You must also
set the twinax address on the
TX/CX 4000.
Table 4-1. Emulation and Device IDs for Various Host Systems.
Host System Printer Used Emulation Device ID
AS/400, S/38, S/36 Laser printer (using 3812 3812-1
HP PCL commands)
AS/400, S/38, S/36 Matrix printer 4214 4214-2
(printing NLQ)
AS/400, S/38, S/36 Matrix printer 5224 5224 (2P)
(S/34)
AS/400, S/38, S/36 Specialty printer 5256 5256
S/34 (e.g., label printer)

14
TX/CX 4000
You can configure the TX/CX
4000 through its front panel or by
sending download commands from
the host or from a PC/LAN. To
ensure proper functioning of the
TX/CX 4000, configure the BASIC
SETUP parameters.
The following pages outline the
main menu options with their
accompanying host download
command numbers shown to the
left. To change any of the default
options (shown with an asterisk (*)
to the left of the option), press Alt,
then Select to save the change. To
make additional changes to other
parameters within the current menu,
press List.

15
TX/CX 4000
Figure 4-1. Twinax Setup Menu.
RESTORE
FACTORY
DEFAULTS
On-Line
Normal Operation
Off-Line
Press MENU to Continue or
SELECT to Exit
Self Test Printout
Twinax Diagnostics
Hard Loopback
00 Address
05 Host Language
42 Buffer Print
60 Output Printer
66 Output Port
(72) Out Baud
(73) Out Word
(74) Out Stop
(75) Out Parity
76 Input Baud
77 Input Word
78 Input Stop
20 Twinax Drive
03 Host Timeout
50 P/S Timeout
(Matrix)
16 Override Host
17 ASCII Codes
22 Print Quality
23 Draft Print
24 IBM Emulation
25 Carriage Cmds
26 Line Length
(3812 Laser Printing)
06 Portrait
07 Landscape
08 C.O.R.
09 Paper Size
10 True LPI
13 Bin 1
14 Bin 2
15 Bin 3
16 11 x 17 (A3)
33 Duplexing
18 Vertical Margin
19 Horz Margin
TEST MENU BASIC SETUP ADVANCED
SETUP
EMULATION
SETUP
Menu Menu
Menu Menu Menu
Menu
Menu
List List List List

16
TX/CX 4000
Test Menu Self Test Active
Self Test Printout Cycle power to end
Twinax Diagnostics
Hard Loopback Test
Basic Setup Menu [00] Twinax Address
0 to 6 *0
[05] Host Language
*00-Multinational 08-France
01-U.S./Canada 09-Italy
02-Austria/German 10-Japan (English)
03-Belgian 11-Katakana (US)
04-Brazil 12-Portugal
05-Canada (French) 13-Spain
06-Denmark/Norway 14-Spanish Speaking
07-Finland/Sweden 15-United Kingdom
[42] Buffer Print
*0-No 1-Yes
[60] Output Printer
0-IBM PPDS 6-EPSON LQ (24 pin)
1-EPSON ESC/P2 7-EPSON DFX+
2-HP-PCL 3812 8-EPSON FX (9 pin)
5-IBM Proprinter 1 *9-Generic Strings
[66] Output Port
*0-Parallel 1-Serial
[76] Input Baud
0-38.4K 5-1200
1-19.2K 6-600
*2-9600 7-300
3-4800 9-Disabled
4-2400
[77] Input Word
7-7 bits *8-8 bits
[78] Input Stop
*1-1 bit 2-2 bits
[79] Input Parity
*0-None 3-Even
1-Odd
Note: *Indicates factory defaults
Figure 4-2. Test Menu and Basic Setup Menu.

17
TX/CX 4000
Advanced Setup Menu [20]-Twinax Drive
*0-Normal 1-Star Panel Overdrive
[03] Host Timeout
1 to 99 *8
[50] P/S Timeout
1 to 99 *8
Emulation Setup Menu [16] Override Host
*0-No Overrides 1-Override CPI &NLQ
2-Override NLQ 3-Override CPI
[17] ASCII Codes
0-HP Roman 8 *1-Code Page 850
2-Code Page 437
[22] Print Quality
*0-Default Draft 1-Default NLQ
[23] Draft Print
*0-Normal Draft 1-Fast Draft
[24] IBM Emulation
*0-5256 1-5224
2-5225 3-4214
[25] Carriage Cmds
*0-Use Form Feeds 1-FF by LFs
2-Ignore FFs 3-No CR/LF/FF
[26] Line Length
*0-Wrap beyond 8" 1-Truncate at 8"
Set Factory Defaults Select-Restoring Factory Defaults
Are you sure? Press SELECT to continue
Restoring Factory
Menu-Press MENU to enter or SELECT to exit
Menu-Recycles to Test Menu
Select-Returns to on-line condition
Note: *Indicates factory defaults
Figure 4-3. Advanced Setup Menu, Emulation Setup Menu,
and Set Factory Defaults.

18
TX/CX 4000
4.2 Host/PC Download Commands
By sending download commands
from the Host/PC to the TX/CX
4000, you can change all available
configuration parameters.
NOTE
This section includes all
configuration parameters
accessible through the front
panel, as well as additional
parameters.
Host/PC download commands are
placed in a Host/PC document or
on the screen. The commands take
effect when the print job or screen
print is sent to the TX/CX 4000.
The TX/CX 4000 checks data
streams on all three in-ports (host,
serial, parallel) for download
commands. Whether the incoming
print job is a screen print, a
spreadsheet, or a word-processing
document created on either host or
PC, the interface will recognize the
Host/PC download command. The
command itself will not be printed if
it was entered correctly. If any part
of the command is printed, the
TX/CX 4000 did not recognize the
command because of a problem in
the format. Check the syntax of the
command and send it again.
You can send Host/PC downloads
commands to the TX/CX 4000 that
are not required for the active
emulation. For example, if an output
printer other than the HP LaserJet®
PCL-4 (Command 60) is selected
and a request for duplexing
(Command 33) is sent, the
duplexing command would be
ignored, since it only functions
with the HP LaserJet PCL-4 output
printer.
Host/PC download commands
sent to the 4000DX take effect
immediately (unless otherwise
noted) and stay only in the TX/CX
4000’s active memory. To save the
changed configuration as an active
default configuration, you must send
the Host/PC download command
Z99,1.
NOTE
Save the Host/PC download
commands in a separate file.
If the TX/CX 4000 needs to
be reconfigured at a later
time or if you need to
configure more than one
TX/CX 4000, just “print” the
file containing the selected
Host/PC download
commands.

19
TX/CX 4000
Follow these steps to enter a host
download command.
1. Type the Command Pass-Thru
delimiter &% (or alternate CPT
start delimiter as described in
the table) in the document at
the point where the command
is to take effect.
2. Type an upper-case “Z.”
3. Type the command number for
the command to be used, as
shown in Table 4-2.
4. Type a comma.
5. Type the command. No spaces
are allowed. A space or invalid
character in a command causes
the TX/CX 4000 to ignore the
command and resume printing
from the point where the error
occurred.
For example, to change the
Twinax Address from the default
of 0 to 4, enter:
&%Z00,4
6. Multiple commands can be
chained together by using a slash
(/) or backslash (\) to separate
the commands (no spaces
allowed). For example, to set the
Output Printer (Command 60)
to HP LaserJet PCL-4 (Option
2), the Output Port (Command
66) to Parallel (Option 0), and
the Duplex Printing (Command
33) option to long-edge
duplexing (Option 1), type:
&%Z60,2\Z66,0\Z33,1
To ensure that the configuration
is correct, review and, if necessary,
modify at least the following
configuration options.

4.3 Twinax Host/PC Download
Commands
Table 4-2 shows the Twinax Host
/PC Download command and its
command number in alphabetical
order. This table includes all
configuration parameters accessible
through the front panel, as well as
additional parameters.
20
TX/CX 4000
Table of contents
Other Black Box Print Server manuals

Black Box
Black Box LEP0005A User manual

Black Box
Black Box PCA35A-R3 User manual

Black Box
Black Box PC435A User manual

Black Box
Black Box LE3840A User manual

Black Box
Black Box LEP0000A User manual

Black Box
Black Box LE3700A-R2 User manual

Black Box
Black Box LEP0002A User manual

Black Box
Black Box LEP0005A User manual

Black Box
Black Box Pure Networking 802.11b User manual