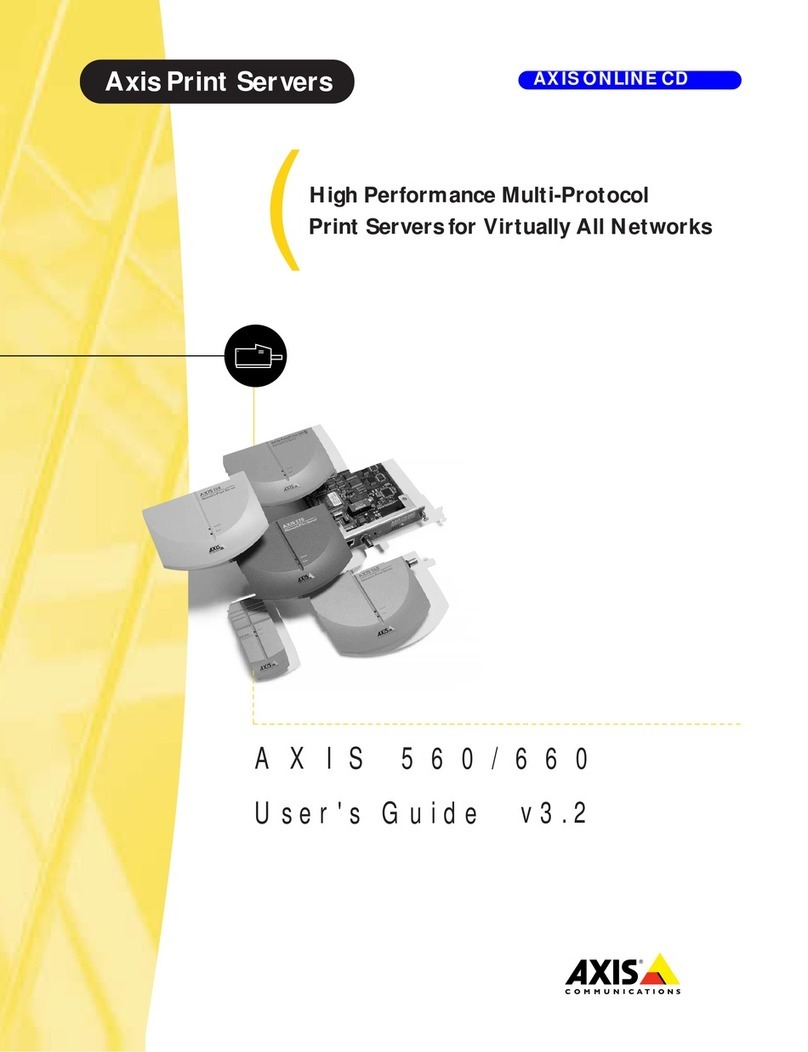
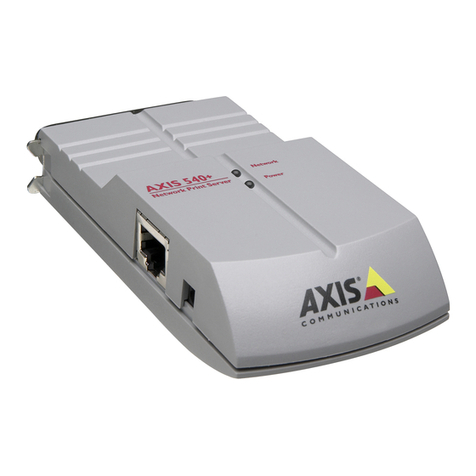
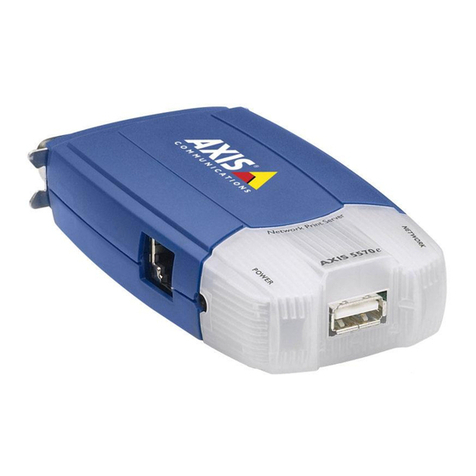
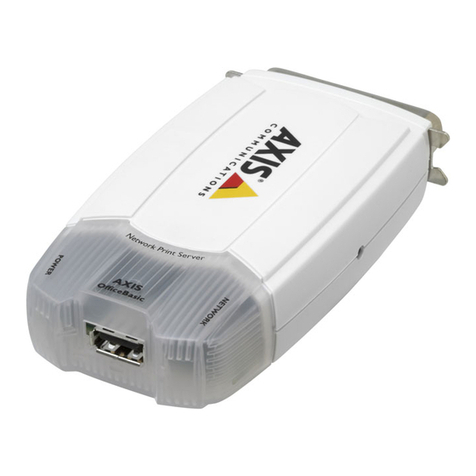
Axis OfficeBasic USB Wireless User manual

AXIS OfficeBasic USB Wireless 1
AXIS OfficeBasic USB Wireless
User’s Manual

2 AXIS OfficeBasic USB Wireless
Regulatory Information
Safety Notices - Take some time to read through the safety notices before installing the AXIS OfficeBasic USB
Wireless. Please observe all safety markings and instructions when using this product.
Important!: - must be observed to avoid operational impairment. Do not proceed any of the above notices,
until you have fully understood the implications.
Radio Transmission Regulatory information - Tested to comply with FCC Standards FOR HOME OR OFFICE
USE.
This product must be installed and used in strict accordance with the instructions given in the user
documentation. The AXIS OfficeBasic USB Wireless complies with the following radio frequency and safety
standards:
Europe - This digital equipment fulfils the requirements for radiated emission according to limit B of
EN55022, and the requirements for immunity according to EN55024 residential, commercial, and light
industry.
Technical requirements for radio equipment according to EN 300 328-1 (2001-12) and 300 328-2 (2001-12)
USA - Federal Communications Commission FCC. This device complies with Part 15 of FCC Rules. Operation of
the device is subject to the following two conditions:
(1) This device may not cause harmful interference
(2) This device must accept any interference that may cause undesired operation.
Important! - The channel must be set according to the radio frequency requirements in your country:
Japan - This is a class B product based on the standard of the Voluntary Control Council for Interference from
Information Technology Equipment (VCCI). If this is used near a radio or television receiver in a domestic
environment, it may cause radio interference. Install and use the equipment according to the instruction
manual.
Liability - Every care has been taken in the preparation of this manual; if you detect any inaccuracies or
omissions, please inform your local Axis office, which can be found on the cover of this document. Axis
Communications AB cannot be held responsible for any technical or typographical errors and reserves the
right to make changes to the product and manuals without prior notice. Axis Communications AB makes no
warranty of any kind with regard to the material contained within this document, including, but not limited
to, the implied warranties of merchantability and fitness for a particular purpose. Axis Communications AB
shall not be liable nor responsible for incidental or consequential damages in connection with the furnishing,
performance or use of this material.
Safety: EN60950
Trademark Acknowledgments - Apple, Ethernet, Hewlett Packard, Mac OS, Microsoft Windows, are
registered trademarks of the respective holders.
Support Services - Should you require technical assistance, please contact your Axis dealer. If your
questions cannot be answered immediately, your Axis dealer will forward your queries through the
appropriate channels to ensure you a rapid response. If you are connected to the Internet, you can find on-
line manuals, technical support, software updates, application software, corporate information, etc. at
http://www.axis.com/techsup
USERS MANUAL AXIS OBW
Part No: 20426 r1
Date: May 2004Copyright © Axis Communications AB, 2004
AXIS OfficeBasic USB Wireless 3
Table of Contents
Product Overview . . . . . . . . . . . . . . . . . . . . . . . . . . . . . . . . . . . . . . . . . . . . . . . . . . . . . . . . . . . . . 5
Print Server Management . . . . . . . . . . . . . . . . . . . . . . . . . . . . . . . . . . . . . . . . 5
Wireless Operating Modes. . . . . . . . . . . . . . . . . . . . . . . . . . . . . . . . . . . . . . . . 5
Infrastructure (Access Point) . . . . . . . . . . . . . . . . . . . . . . . . . . . . . . . . . . 6
Ad Hoc (Peer to Peer) . . . . . . . . . . . . . . . . . . . . . . . . . . . . . . . . . . . . . . . 6
Wireless Frequency Bands and Channels. . . . . . . . . . . . . . . . . . . . . . . . . . . . . 7
Print Server Setup . . . . . . . . . . . . . . . . . . . . . . . . . . . . . . . . . . . . . . . . . . . . . . . . . . . . . . . . . . . . . 8
Hardware Inventory. . . . . . . . . . . . . . . . . . . . . . . . . . . . . . . . . . . . . . . . . . . . . 8
Quick Installation Overview for Windows and Mac OS . . . . . . . . . . . . . . . . . . 8
Hardware Installation . . . . . . . . . . . . . . . . . . . . . . . . . . . . . . . . . . . . . . . . . . . 9
Print Server’s Serial Number . . . . . . . . . . . . . . . . . . . . . . . . . . . . . . . . . . 9
IP Addressing . . . . . . . . . . . . . . . . . . . . . . . . . . . . . . . . . . . . . . . . . . . . . . . . . . . . . . . . . . . . . . . 10
Obtaining an IP Address Using DHCP . . . . . . . . . . . . . . . . . . . . . . . . . . . . . . 10
Set a Temporary IP Address with Arp/Ping: . . . . . . . . . . . . . . . . . . . . . . . . . . 11
Windows Setup . . . . . . . . . . . . . . . . . . . . . . . . . . . . . . . . . . . . . . . . . . . . . . . . . . . . . . . . . . . . . . 13
Setup in Windows 2003/2000/XP . . . . . . . . . . . . . . . . . . . . . . . . . . . . . . . . . 13
Setup in Windows NT . . . . . . . . . . . . . . . . . . . . . . . . . . . . . . . . . . . . . . . . . . 17
Setup in Windows 98/Me . . . . . . . . . . . . . . . . . . . . . . . . . . . . . . . . . . . . . . . 18
Alternative Windows Printing Methods. . . . . . . . . . . . . . . . . . . . . . . . . . . . . 19
Standard TCP/IP - Raw TCP Method in Windows 2000/XP/2003 . . . . . . 19
Adding Printers in Windows NT4 Using the Microsoft LPR Monitor . . . 23
Adding Printers in W2K/XP Using the Microsoft LPR Monitor . . . . . . . . 23
IPP (Internet Printing Protocol) Configuration . . . . . . . . . . . . . . . . . . . . 25
Mac OS Setup . . . . . . . . . . . . . . . . . . . . . . . . . . . . . . . . . . . . . . . . . . . . . . . . . . . . . . . . . . . . . . . 27

4 AXIS OfficeBasic USB Wireless
AppleTalk Printing (Mac OS X). . . . . . . . . . . . . . . . . . . . . . . . . . . . . . . . . . . . 27
IP Printing (Mac OS X). . . . . . . . . . . . . . . . . . . . . . . . . . . . . . . . . . . . . . . . . . 28
Installation on MacOS 9.1 or older, using AppleTalk . . . . . . . . . . . . . . . . . . . 28
Choosing a Printer . . . . . . . . . . . . . . . . . . . . . . . . . . . . . . . . . . . . . . . . 28
Print Server Management . . . . . . . . . . . . . . . . . . . . . . . . . . . . . . . . . . . . . . . . . . . . . . . . . . . . . . 30
Print Server Management from a Web Browser .. . . . . . . . . . . . . . . . . . . . .30
Status Menu . . . . . . . . . . . . . . . . . . . . . . . . . . . . . . . . . . . . . . . . . . . . . 31
Setup Menu . . . . . . . . . . . . . . . . . . . . . . . . . . . . . . . . . . . . . . . . . . . . . 33
Maintenance . . . . . . . . . . . . . . . . . . . . . . . . . . . . . . . . . . . . . . . . . . . . . 38
Restart . . . . . . . . . . . . . . . . . . . . . . . . . . . . . . . . . . . . . . . . . . . . . . . . . 38
Print server management using the Reset button . . . . . . . . . . . . . . . . . . . . . 39
Reset the Print Server: . . . . . . . . . . . . . . . . . . . . . . . . . . . . . . . . . . . . . 39
Print a Test Page: . . . . . . . . . . . . . . . . . . . . . . . . . . . . . . . . . . . . . . . . . 39
Perform a Factory Default: . . . . . . . . . . . . . . . . . . . . . . . . . . . . . . . . . . 40
Upgrading the Print Server’s Firmware . . . . . . . . . . . . . . . . . . . . . . . . . . . . . . . . . . . . . . . . . . . . . 41
Upgrading the Firmware . . . . . . . . . . . . . . . . . . . . . . . . . . . . . . . . . . . . 41
Appendix 1: Print Server Setup in Ad Hoc Mode. . . . . . . . . . . . . . . . . . . . . . . . . . . . . . . . . . . . . 43
Appendix 2: Enabling WEP in the AXIS OfficeBasic USB Wireless . . . . . . . . . . . . . . . . . . . . . . . 45
Appendix 3: Troubleshooting . . . . . . . . . . . . . . . . . . . . . . . . . . . . . . . . . . . . . . . . . . . . . . . . .. . . 46
Frequently Asked Questions . . . . . . . . . . . . . . . . . . . . . . . . . . . . . . . . . 48
Technical Specifications . . . . . . . . . . . . . . . . . . . . . . . . . . . . . . . . . . . . . . . . . . . . . . . . . . . . . . . . 49
Index . . . . . . . . . . . . . . . . . . . . . . . . . . . . . . . . . . . . . . . . . . . . . . . . . . . . . . . . . . . . . . . . . . . . . . 51

Product Overview
AXIS OfficeBasic USB Wireless 5
Product Overview
This User’s Manual includes installation instructions for the AXIS OfficeBasic
USB Wireless print server in Microsoft Windows (95, 98, NT, Me, 2000, XP,
Server 2003) and Mac OS (TCP/IP and AppleTalk) environments.
The instructions in this manual are based on the settings found in a new and
non-configured AXIS OfficeBasic USB Wireless. To establish this status in a
previously configured AXIS OfficeBasic USB Wireless, you can reset it to factory
default settings. See for Perform a Factory Default:, on page 40 for instructions.
Print Server Management
The embedded web server provides access to configuration and management
pages for the print server and the connected printer, see Print Server
Management from a Web Browser, on page 30,
Alternatively, the print server can be configured from the provided Windows-
based software OBW Setup Wizard, see Windows Setup, on page 13.
Wireless Operating Modes
The AXIS OfficeBasic USB Wireless print server communicates either in
Infrastructure mode, where there is an 802.11b Access point acting as a bridge
between the workstation/laptop and the print server, or Ad-hoc mode, where
the workstation/laptop communicates directly with the print server.

Product Overview
6 AXIS OfficeBasic USB Wireless
Infrastructure (Access Point)
Workstations and laptops communicate over the WLAN and the LAN through
an Access Point with the print server.
Infrastructure mode is most commonly used, both for printing and
configuration purposes. See Windows Setup, on page 13 or Mac OS Setup, on
page 27 for installation instructions.
Ad Hoc (Peer to Peer)
Workstations and laptop computers communicate directly over the WLAN with
the print server.
Ad Hoc is used for configuration and for printing purposes. If you lose
contact with the print server, you can try reaching it from the Ad Hoc mode,
see Appendix 1: Print Server Setup in Ad Hoc Mode, on page 43.

Product Overview
AXIS OfficeBasic USB Wireless 7
Wireless Frequency Bands and Channels
When setting up a wireless network, it is important that the radio frequency
channel setting is the same on all communicating clients and that the channel
is set according to the requirements in your country.
Frequency bands and channels:
* (France) outdoor use permitted on private property with prior authorization
Country Frequency Available Channels Default Channel
Europe 2.412-2.472 GHz 1-13 11
France 2.457-2.472 GHz 10-13 (indoor use*) 11
Japan 2.484 GHz 14 14
US/Canada 2.412-2.462 GHz 1-11 11

Print Server Setup
8 AXIS OfficeBasic USB Wireless
Print Server Setup
Hardware Inventory
Unpack and check all the items using the following check list. Contact your
dealer if anything is missing or damaged. All packing materials are recyclable.
Quick Installation Overview for Windows and Mac OS
Follow these steps to install and configure theAXIS OfficeBasic USB Wireless in
Windows or Mac OS.
Print Server Model Part Number
AXIS OfficeBasic USB Wireless PROD UNIT AXIS OB USB W <EUR> ch 1-13
PROD UNIT AXIS OB USB W <US> ch 1-11
0208-001-01
0208-004-01
Media Title Part Number
CD AXIS OfficeBasic USB Wireless CD 21965
Printed Material AXIS OfficeBasic USB Wireless User’s Guide 21962
Accessories Description Part Number
Cable USB 20208
Power Adapter Model Part Number
PS-M Australia
Europe
UK
USA/Japan
21822
21819
21820
21821
Step Windows Mac OS X
1Hardware Installation, on page 9 Hardware Installation, on page 9
2IP Addressing, on page 10 IP Addressing, on page 10
3Windows Setup, on page 13 Mac OS Setup, on page 27

Print Server Setup
AXIS OfficeBasic USB Wireless 9
Hardware Installation
Before you start, you should prepare the following items:
1. Turn off the printer’s power.
2. Connect the print server to your printer with the supplied USB cable.
3. Turn the printer’s power on.
4. Plug the AC power adapter into the power connector on the backside of
the wireless print server.
5. Wait 1 minute.
6. Press the print server’s external Reset button for 5 seconds. A test page will
be printed on the connected printer, displaying information about the print
server’s IP address, firmware number, etc.
Note:
Print Server’s Serial Number
All Axis print server’s have a unique serial number (S/N), which is displayed on
the backside label. The Ethernet address is based on the serial number:
• One Win98/Me/2000/XP/2003 PC with AXIS OfficeBasic USB Wireless CD
• One 802.11b Access Point*
• One Printer with a USB Port
* Alternatively, a laptop with wireless adapter card for Ad Hoc configuration.
• The Status LED will flicker whenever data is being transmitted and printed.
• When the print server is powered on, the Status LED will flash 5 times as part of
the unit’s Power On Self Test (POST). If the LED doesn’t flash 5 times when you
power on the unit, disconnect all cables and repeat the installation procedure
described here.
Reset button:
Status LED (orange) WLAN LED (green)
DIP switch:
Power connector USB Connector
Nor. = Normal mode
Diag. = Diagnostic Mode
- Press once to restart print server.
- Press 5 seconds to print test page. (USB Low/Full Speed compliant)
Serial number example: MAC/Ethernet address:
00408c181cf0 00-40-8c-18-1c-f0 (Windows)
00:40:8c:18:1c:f0 (Mac OS)

IP Addressing
10 AXIS OfficeBasic USB Wireless
IP Addressing
To enable network communication with the print server, it must have a proper
IP address. Use one of these methods to assign an IP address to the print server:
Obtaining an IP Address Using DHCP
If you are working in a network with dynamic IP address assignment, your print
server will obtain an IP address automatically when you connect it to the
network. Follow these instructions on this page to verify the IP address:
1. Print a test page by pressing the reset button for 5 seconds. Locate the
print server’s IP address on the test page.
2. Open a web browser (e.g. Internet Explorer).
3. In the Web browser’s Location/Address field, enter the print server’s IP
address and press Enter.
4. If the Wireless Print Server web page appears in your Web browser, the IP
address is fully functional. Continue with Windows Setup, on page 13 or
Mac OS Setup, on page 27.
Method: Server
Required: Operating System Comment:
DHCP DHCP server
Windows
Mac OS
DHCP provides the print
server with an IP address
automatically from a DHCP
server.
The print server’s DHCP
support is enabled by
default.
Most broadband routers
have a built-in DHCP
server.
Arp/Ping Mac OS
Windows
Manual assignment of a
temporary IP address.

IP Addressing
AXIS OfficeBasic USB Wireless 11
5. If the Wireless Print Server web page does not appear, you need to set the
print server’s IP address manually, described in Set a Temporary IP Address
with Arp/Ping:, on page 11.
Set a Temporary IP Address with Arp/Ping:
You can assign a temporary IP address to the print server using arp/ping and
then access the print server’s internal web pages to assign a fixed IP address:
1. Locate the print server’s serial number (S/N) found on the print server’s
underside label. The Ethernet address is based on the serial number:
2. Open a Command Prompt or Terminal and enter the following syntax:
3. The host will return psname is alive (Mac OS Terminal) or Reply from
192.168.3.191... (Windows Command prompt) or a similar message. This
indicates that a temporary IP address has been set and that
communication is established.
4. Next, open a web browser (e.g. Internet Explorer).
5. In the Web browser’s Location/Address field, enter the print server’s IP
address and press Enter.
6. The print server’s web page will appear:
Serial number: MAC/Ethernet address:
00408c181cf0 00-40-8c-18-1c-f0 (Windows)
00:40:8c:18:1c:f0 (Mac OS X)
Syntax Example Windows (Command prompt)
1
2
arp -s <IP address> <Ethernet address>
ping <IP address>
arp -s 192.168.3.191 00-40-8c-18-1c-f0
ping 192.168.3.191
Syntax Example Mac OS (Terminal)
1
2
arp -s <IP address> <Ethernet address>
ping <IP address>
arp -s 192.168.3.191 00:40:8c:18:1c:f0
ping 192.168.3.191

IP Addressing
12 AXIS OfficeBasic USB Wireless
7. Go to Setup | TCP/IP:
8. Select the Use the following TCP/IP settings radio-button and enter a
valid IP address, Subnet Mask and Default Router.
9. Click Save and Restart. The new IP address will be loaded.
10. Check the communication by entering the new IP address in the browser
and that the print server’s web pages appear again.
Continue with Mac OS Setup, on page 27 or Windows Setup, on page 13.
• When you execute the ping command for the first time, you may experience a
significantly longer response time than usual.
• The IP address and serial number used here are sample values. You should acquire a
new and unused IP address from your network administrator.

Windows Setup
AXIS OfficeBasic USB Wireless 13
Windows Setup
This chapter describes how to locate and configure the networked printer in
Windows over Infrastructure mode.
See also Alternative Windows Printing Methods, on page 19
For Ad Hoc installation and configuration, see Appendix 1: Print Server Setup in
Ad Hoc Mode, on page 43.
Setup in Windows 2003/2000/XP
Before You Start:
1. Insert the AXIS OfficeBasic USB Wireless CD into your CD-drive.
2. Choose Setup Wizard to install the wireless print server and configure the
connected printer.
3. From the Select A Print Server screen, select the print server that you want
to configure and click Next.
• Make sure you have an Access Point in your network and that it has a valid IP
address. Example: 192.168.1.100
• Check that the TCP/IP protocol is installed on your computer.
• Make sure the print server’s DIP switch is in Normal mode (Nor.)
The Wizard will automatically install these components in
C:\Program Files\Axis Communications\AXIS OBW Wizard:
• AXIS OBW Wizard.exe
• AXIS OBW Network Printer Port. DLL (Wireless Print Monitor)
After installation, AXIS OBW Wizard will be available from Start | Programs |
Axis Communications.
AXIS OBW Wizard will start in the same language as your operating system,
see Technical Specifications, on page 49 for supported languages.

Windows Setup
14 AXIS OfficeBasic USB Wireless
4. On the Change Settings screen, select No or Yes:
Click No if you want the print server to keep using the assigned DHCP address
and keep the default Infrastructure settings:
• Infrastructure mode
• SSID = <ANY>
• Data transmit rate = Auto
• No WEP encryption
• Authentication Type = Open System
•DHCPenabled
Click Next in the program until you reach Figure: Select an already configured
printer or click Add New Printer, on page 15. Follow the instructions from
there on.
Click Yes if you want change wireless settings or assign a static IP address to
the print server:
•OntheBasic Wireless Settings screen, select Communications Type
according to your network:
- Infrastructure
- 802.11b Ad-hoc
• Enter the proper SSID of your wireless network. The default value <ANY>
will connect with the Access Point that has the best signal in your
wireless network.
- Channel: optional.
- Data Transmit Rates: select Auto, 1,2Mbps, 5.5Mbps or 11Mbps.
•OntheSecurity and WEP Encryption Settings page, enable or disable
WEP Encryption, configure according to your wireless network and click
Next.
•Onthe802.1X Settings page, select None or MD5 as your
authentication type. If you choose MD5 you must enter the Login Name
and Password used when logging on to the Radius server.
•Specify a fixed or dynamic IP address for the print server, a fixed IP address
is highly recommended. Click Next.
Click Next in the program until you reach Figure: Select an already configured
printer or click Add New Printer, on page 15. Follow the instructions from
there on.

Windows Setup
AXIS OfficeBasic USB Wireless 15
Notes:
5. In the Wizard, select an already configured printer from the list, click Next
and then Finish to complete the installation.
or
Select Add New Printer if the print server is connected to a printer that hasn’t
been installed before and does not appear in the list.
Figure: Select an already configured printer or click Add New Printer
•If you use WEP encryption on your WLAN and by mistake change the WEP
format or keys in the print server, you will lose contact with the print
server. Follow the steps in Reinstating contact with the wireless network,
on page 46 to recover the connection.
• The IP address of the wireless print server must be within the same subnet as
your wireless adapter
• A quick way of finding the print server’s IP address is to press the reset button for
5 seconds to print a test page. The print server’s DHCP address or static IP
address is normally displayed on the test page. See page 9 for details.

Windows Setup
16 AXIS OfficeBasic USB Wireless
6. For Windows NT/98/Me, go to page 17.
For Windows 2000/XP/2003:
Click Add New Printer to launch Windows Add Printer Wizard. Click Next
and select Local Printer, make sure the Automatically detect and install my
Plug and Play printer check box is NOT checked:
7. Make sure the Use the following port radio-button is clicked and select LPT1:
(Recommended Printer Port) from the drop-down list. Click Next.
8. Select Manufacturer and Printer from the driver lists. Click Next.

Windows Setup
AXIS OfficeBasic USB Wireless 17
9. If you already have the printer’s driver installed, you will be asked whether
to keep it or to replace it. Click Next. Supply a name for the printer and choose
whether you want to make it your default printer. Click Next.
10. Choose whether you want to share the printer with other network users, print
a test page, etc. Select the appropriate radio button and click Next and Finish.
11. In AXIS OBW Wizard, finish the installation by highlighting the installed
printer in the Select a Printer list and click Next => Finish.
12. From Windows, go to Start | Printers (and Faxes) and highlight your newly
installed printer.
13. Right-click, select Properties and verify that the AXIS OfficeBasic USB
Wireless port appears as OBWXXXXXX-1 (the Xs represent the last six digits
of the print server’s serial number).
14. Print a test page to verify the configuration.
Setup in Windows NT
1. Configure according to the description in Windows Setup, on page 13 until
you reach Figure: Select an already configured printer or click Add New
Printer, on page 15. Click Add New Printer to launch Windows Add Printer
Wizard.
2. Select My Computer and click Next.
3. Select LPT1 as Local Port and click Next.
4. Select Printer Manufacturer and Printer model, click Next and Finish.
5. In the AXIS OBW Wizard, select the newly added printer from the list, click
Next and Finish to complete the installation.
6. From Windows, go to Start | Settings | Printers and highlight your newly
installed printer.
If you wish to install more print servers, start AXIS OBW Wizard from your
Windows Start menu: Start | Programs | Axis Communications | AXIS OBW
Wizard and repeat the installation procedure.

Windows Setup
18 AXIS OfficeBasic USB Wireless
7. Right-click, select Properties and verify that the AXIS OfficeBasic USB
Wireless port appears as OBWXXXXXX-1 (the Xs represent the last six digits
of the print server’s serial number).
8. Print a test page to verify the configuration.
Setup in Windows 98/Me
1. Configure according to the description in Windows Setup, on page 13 until
you reach Figure: Select an already configured printer or click Add New
Printer, on page 15. Click Add New Printer to launch Windows Add Printer
Wizard.
2. Select Local Printer and click Next.
3. Select Printer Manufacturer and Printer model. Do not print a test page.
4. Select LPT1 (ECP Printer Port) and click Next and Finish to complete the
installation.
5. From Windows, go to Start | Settings | Printers and highlight your newly
installed printer.
6. Right-click, select Properties and verify that the AXIS OfficeBasic USB
Wireless port appears as OBWXXXXXX-1 (the Xs represent the last six digits
of the print server’s serial number).
7. Print a test page to verify the configuration.

Windows Setup
AXIS OfficeBasic USB Wireless 19
Alternative Windows Printing Methods
Standard TCP/IP - Raw TCP Method in Windows 2000/XP/2003, on page 19
Adding Printers in Windows NT4 Using the Microsoft LPR Monitor, on page 23
IPP (Internet Printing Protocol) Configuration, on page 25
Standard TCP/IP - Raw TCP Method in Windows 2000/XP/2003
To add a network printer to your printer list in Windows 2000/ Windows
XP/2003 using Standard TCP/IP - Raw TCP:
1. Make sure your print server has a valid IP address, see IP Addressing, on
page 10.
2. Windows XP/ Server 2003:
Go to Start | (Settings) | Printers and Faxes and click the Add a Printer icon
to start the Add Printer Wizard. Click Next.
Windows 2000:
Go to Start | Settings | Printers and click the Add Printer icon to start the
Add Printer Wizard. Click Next.
3. Select Local Printer attached to this computer and make sure the
Automatically detect and install my Plug and Play printer check box is
not checked. Click Next.
4. Click the Create a new port radio button and select Standard TCP/IP Port
from the list. Click Next and the Add Standard TCP/IP Printer Port Wizard
starts. Click Next.

Windows Setup
20 AXIS OfficeBasic USB Wireless
5. In the Printer Name or IP Address field, enter the IP address of the AXIS
OfficeBasic USB Wireless (Example: 192.168.3.191)
The Port Name field will be filled in automatically. Click Next.
6. Select Device Port: LPT1 (if you want the USB port to appear as an option
you must install Axis software*). Click Next
7. Select Manufacturer and Printer from the lists. Click Next and Finish.
8. If you already have the printer’s driver installed, you will be asked whether
to keep it or to replace it. Click Next. Supply a name for the printer and
choose whether you want to make it your default printer. Click Next.
Other manuals for OfficeBasic USB Wireless
4
Table of contents
Other Axis Print Server manuals

Axis
Axis AXIS 560 User manual

Axis
Axis 5570e User manual

Axis
Axis 140 BJC User manual

Axis
Axis AXIS 5900 User manual

Axis
Axis USB Wireless G User manual

Axis
Axis AXIS 5900 User manual

Axis
Axis 5570e User manual

Axis
Axis C1440AXIS - Axis 1440 Print Server User manual

Axis
Axis NPS 550 User manual

Axis
Axis 140 BJC User manual
Popular Print Server manuals by other brands

Brother
Brother MFC-8460N Network manual

Linksys
Linksys WPSM54G - Wireless-G PrintServer With Multifunction Printer Support Print... user guide

TP-Link
TP-Link TL-WPS510U user guide

D-Link
D-Link DPR-1061 Quick installation guide

Atlantis Land
Atlantis Land NetServer Pro A02-PSU-W54 manual

Brother
Brother HL-4040CN Network user's guide